
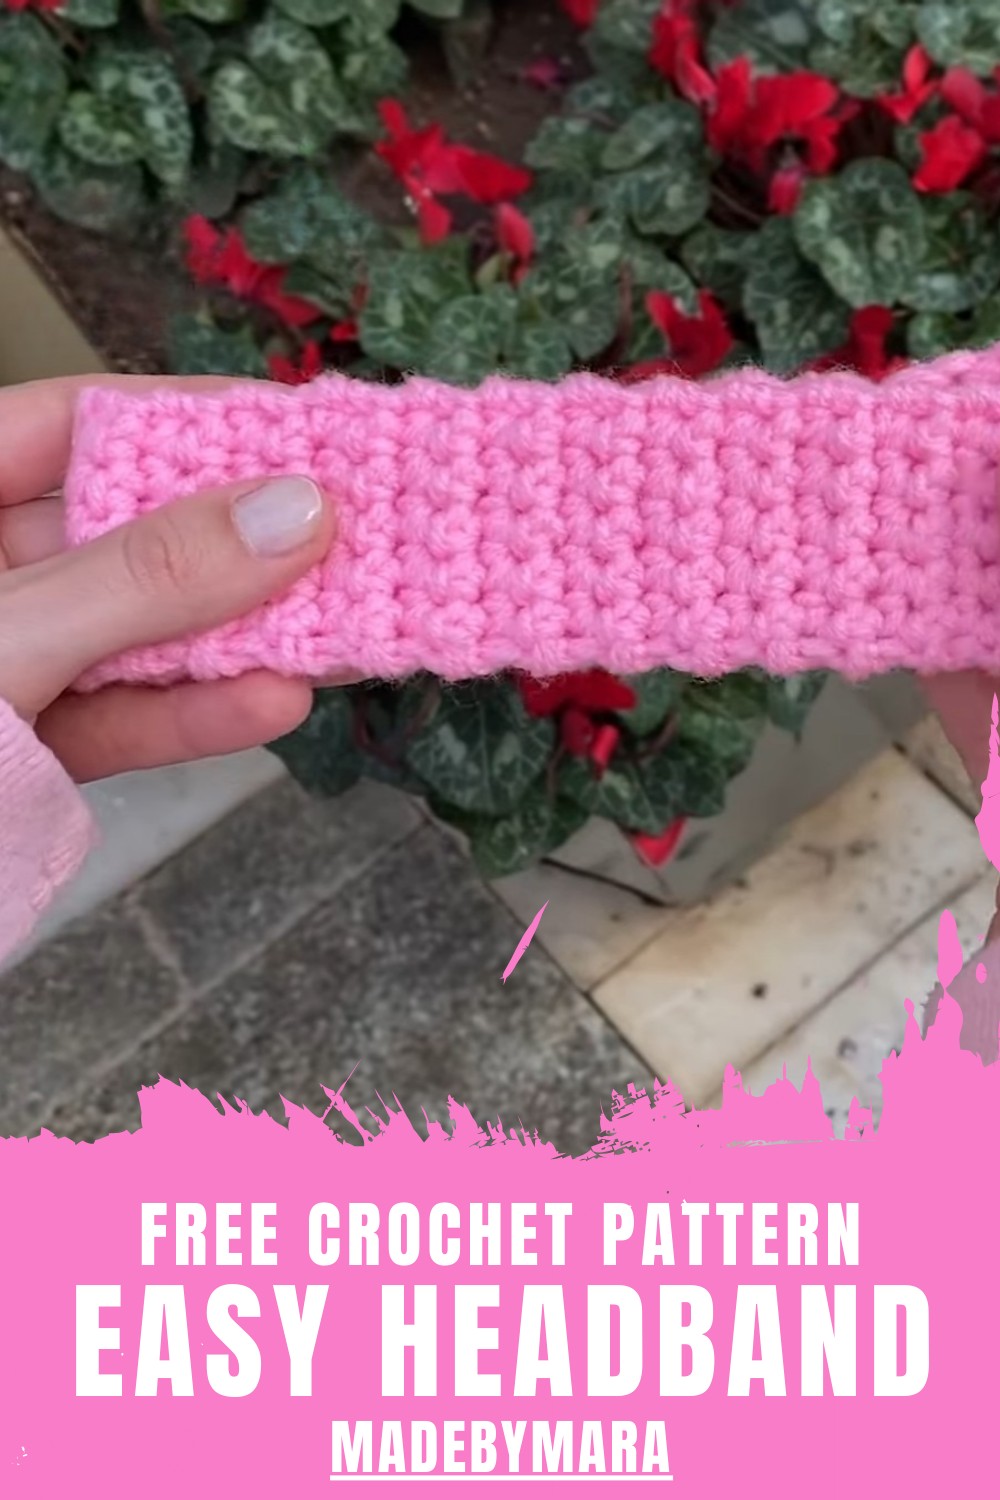
Accessorize any look effortlessly with this free crochet headband pattern, that promises comfort and simplicity for every age and occasion.
A bright thread moves gently through careful hands shaping a band that brings style and warmth to any outfit. With a crochet headband pattern it becomes simple to create a beautiful and comfortable accessory perfect for anyone. This lovely band softly keeps hair in place and can help keep ears warm on chilly days always feeling gentle against the skin. You can make it in any color you like and add special touches like a flower or a bow to show your personality.
Free Crochet Headband Pattern for a Chic Look
Whether used during daily tasks or worn to make special moments extra pretty its usefulness shines. Easy to wash and made to last this headband quickly becomes a favorite you reach for again and again. A crochet headband pattern is a wonderful way to make an accessory that adds both practicality and beauty to your life.
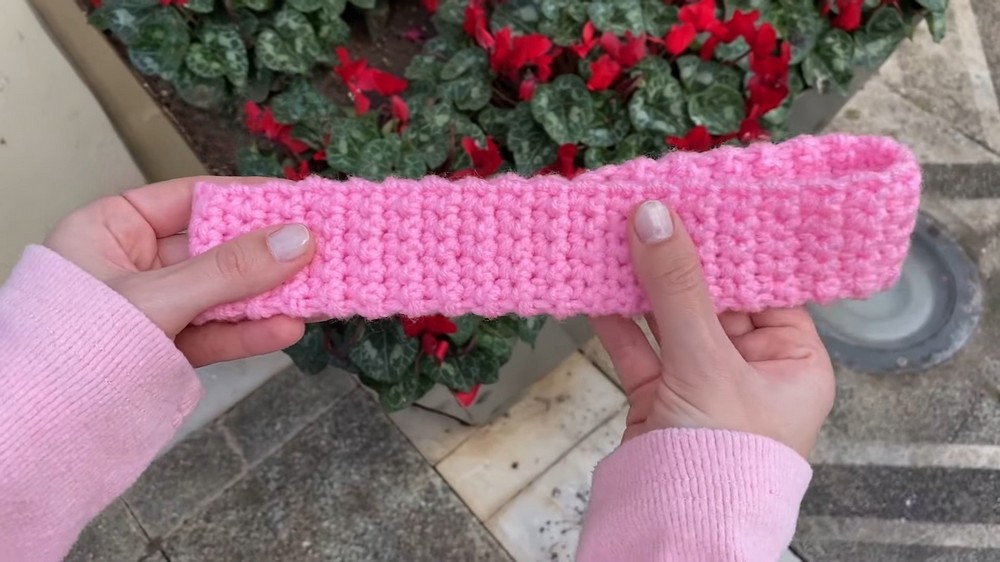
Simple Single Free Crochet Headband
Materials List
- Yarn: Any type (sample uses size 2 acrylic, held double for a size 4 thickness)
- Hook: 6 mm crochet hook
- Yarn Needle: For weaving in ends
- Scissors
Key Abbreviations
- ch – chain
- sc – single crochet
- sl st – slip stitch
- st(s) – stitch(es)
- BLO – back loop only (optional for texture)
Pattern uses US crochet terminology.
Special Notes
- You may adjust starting chain for desired headband width.
- For a ribbed look, use sc in back loop only (BLO); for a flat look, work sc through both loops.
- The headband will stretch slightly; fit snugly but not too tight.
- You can hold two strands together if working with thinner yarn for added thickness.
Pattern Instructions
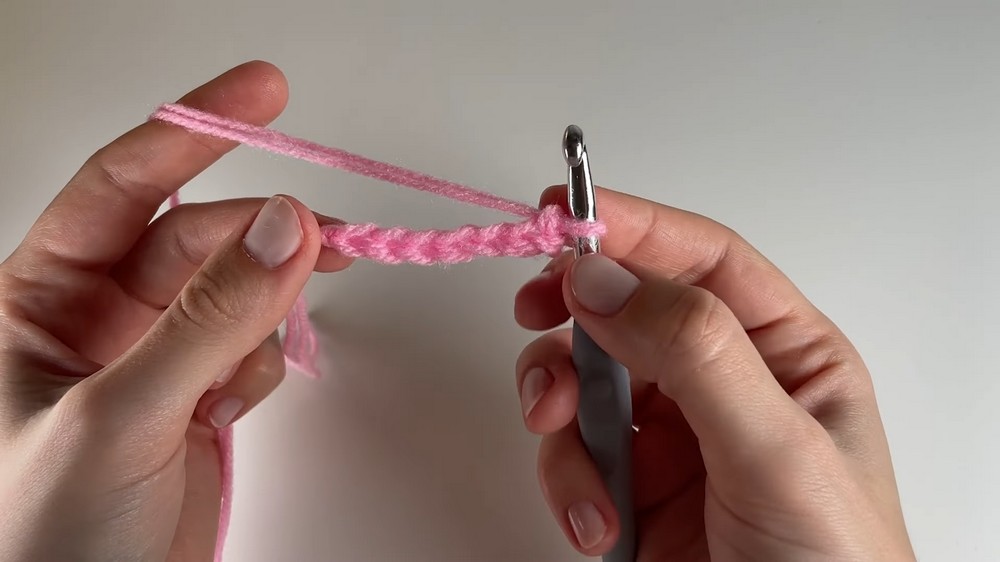
1. Foundation Chain
- Make a slip knot and place on hook.
- Chain 7 (or desired number for headband width).
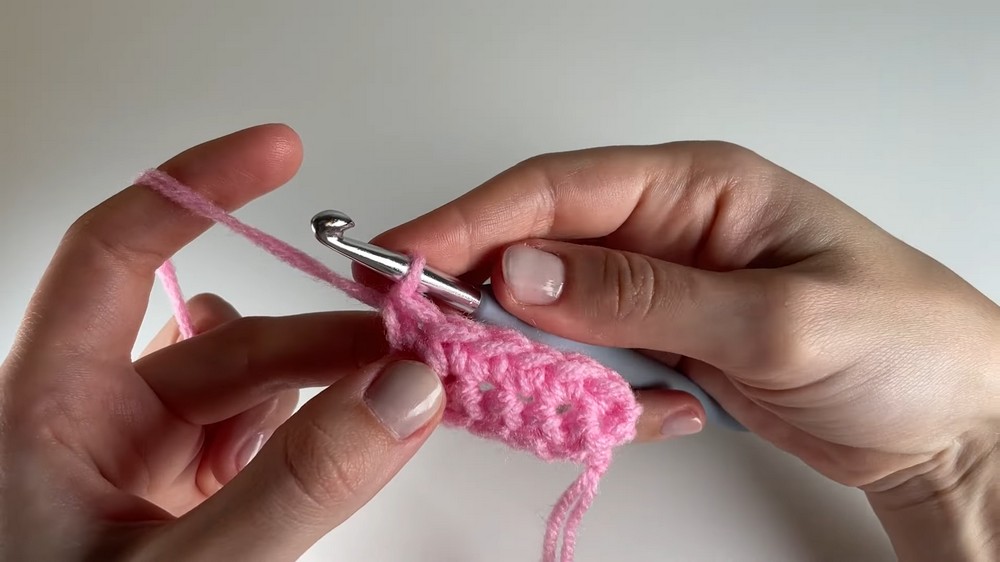
2. Row 1
- Skip the first chain from the hook.
- Work 1 sc in each of the remaining 6 chains.
- Insert hook, yarn over, pull up a loop (2 loops on hook), yarn over, pull through both loops.
- Row count: 6 sc.
- Count stitches to ensure accuracy.
3. Rows 2 and Beyond
- Do NOT chain 1 to turn (for a flatter edge).
- Turn your work.
- Work 1 sc in each stitch across. (6 sc per row)
- For ribbed effect, sc in the back loop only (BLO).
- For flat effect, sc through both loops as normal.
- Repeat this row until the band fits comfortably around your head.
- Try on your headband as you crochet. Do not make it too loose; it will stretch slightly with wear, especially with acrylic yarn.
4. Adding New Yarn (if needed)
- If you run out or want to change color:
- Begin your next sc as usual (insert hook, yarn over, pull up loop).
- Before final yarn over, place new yarn on hook and pull through both loops.
- Continue crocheting with new yarn, crocheting over the yarn tails for a few stitches, or leave the tails to weave in later.
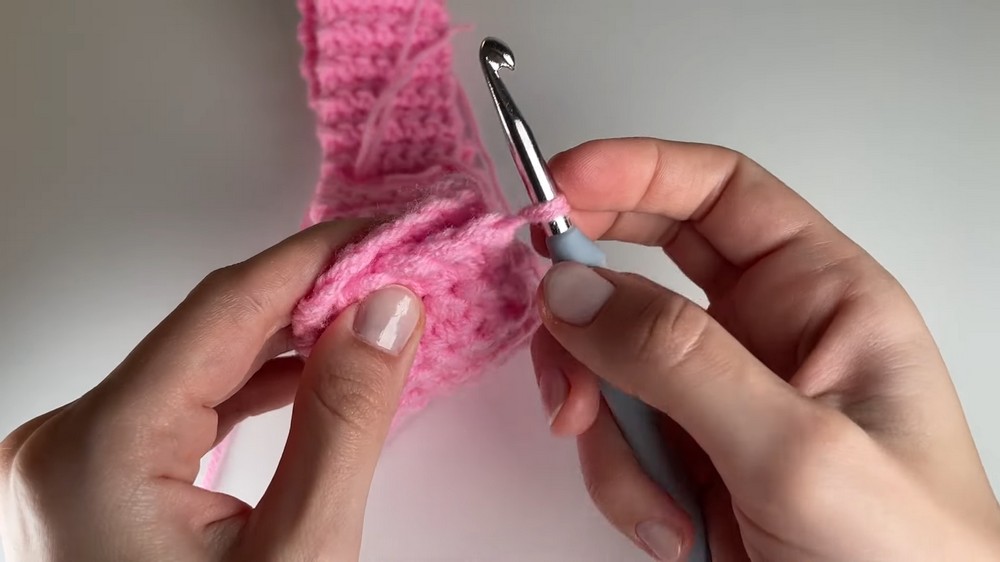
5. Seaming the Headband
- When your headband is long enough, fold the ends together.
- Insert hook into first st on both ends.
- Yarn over, pull through both stitches and loop on hook (sl st).
- Repeat slip stitches across all stitches to seam the headband.
- Chain 1 to fasten off at the end. Cut yarn and pull through to secure.
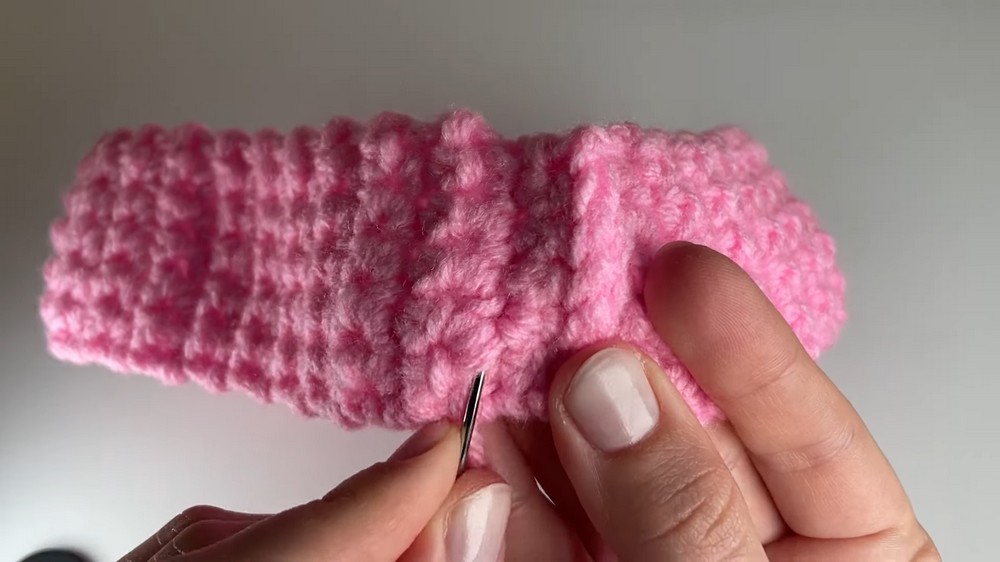
6. Finishing
- Use yarn needle to weave yarn tails into the headband, moving back and forth for extra security.
- For color change tails, weave them into the inside of the headband and trim excess.
Conclusion
This basic headband is crocheted in rows of single crochet and easily customizable for width and length. The sides stay flat without turning chains, and you may choose between a ribbed (BLO) or classic look. This project is ideal for beginners and can be made quickly in any yarn.
Pattern Correction
- Maintain consistent row count (6 sc in sample; adjust as needed).
- Be careful to work into each stitch, especially at row ends, for straight sides.
- Make sure slip stitches for seaming line up stitch-for-stitch for a smooth join.
Tips
- Try the headband on as you work; acrylic yarn will stretch with wear.
- Add a decorative edging or appliqué for a personalized look.
- Block finished piece gently if needed for shape.
- To make wider or narrower, adjust foundation chain as desired.
Leave a Reply