
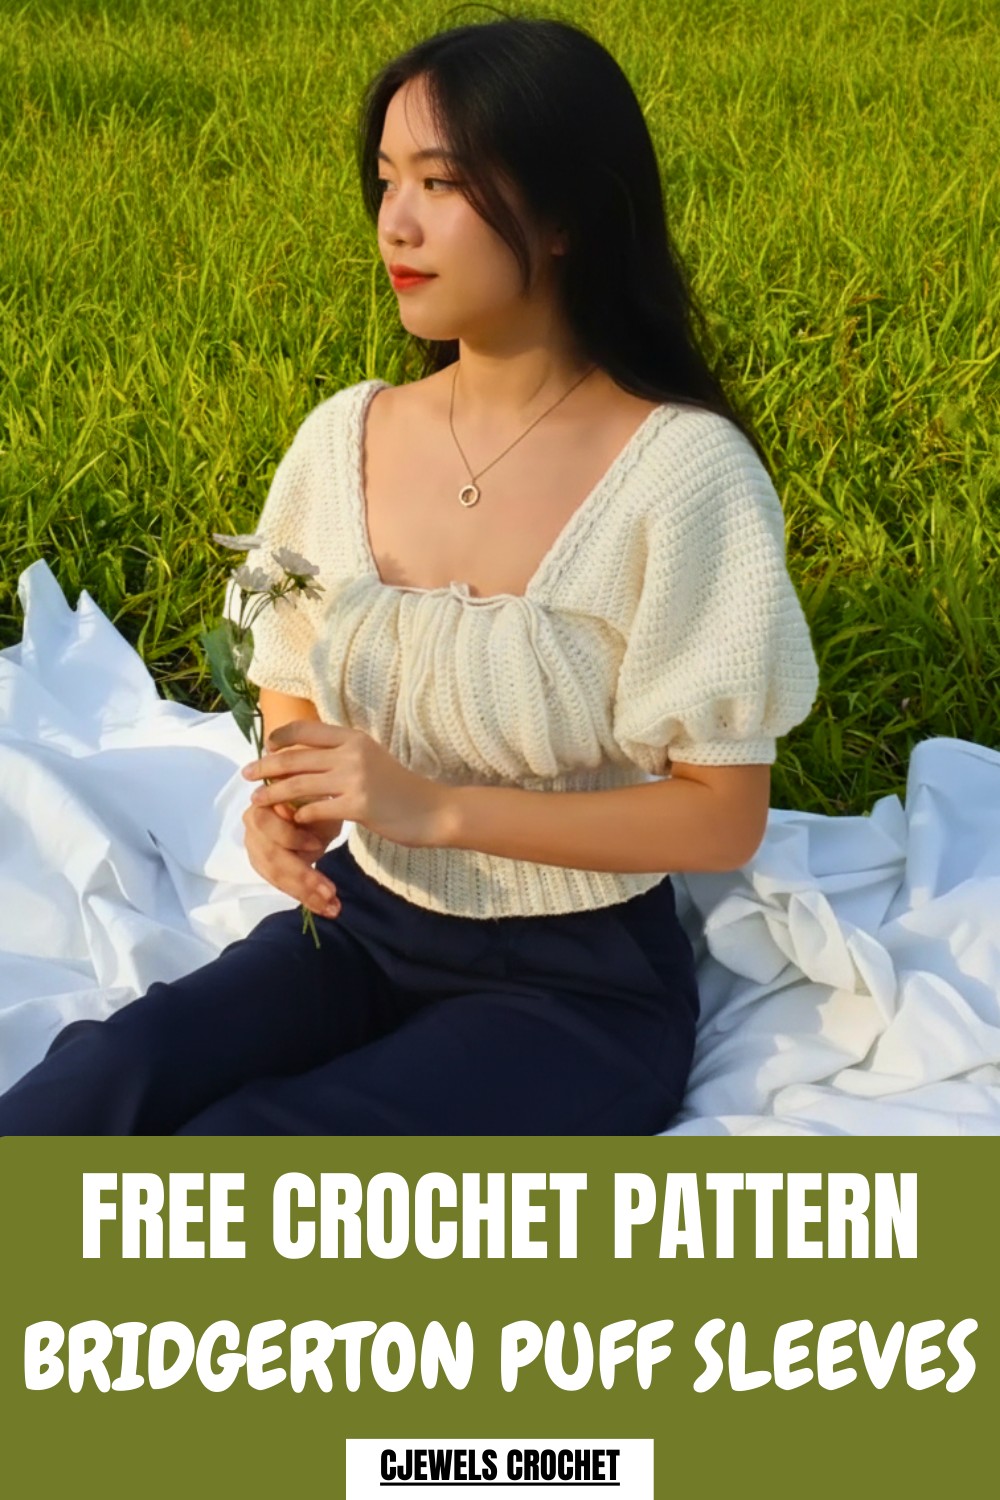
Step out in style with this free crochet Bridgerton puff sleeves pattern for an instantly charming that brings vintage flair to any outfit.
Soft and dreamy sleeve that gently puffs out adds a magical twist to any outfit and makes you feel like a character in a fairy tale. With a Crochet Bridgerton Puff Sleeves pattern you can easily turn a plain top or dress into something filled with delicate charm and vintage style. The beauty lies in the elegant design—each stitch creates a fluffy cloud on your shoulder and frames your arm with a gentle flow. This sleeve is comfortable to wear and perfect for special occasions or everyday fashion.
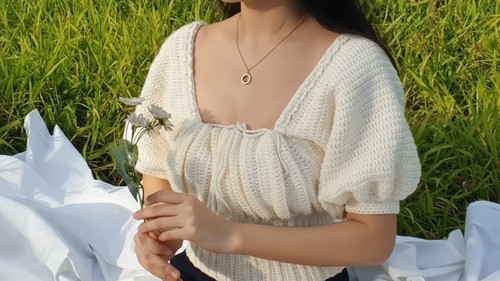
How to Crochet Bridgerton Puff Sleeves – Free Pattern
Wear it to a party or while relaxing at home and let every movement feel special. The pattern is simple to follow and needs only basic yarn and a hook so everyone can enjoy making this unique piece. Your finished sleeve brings a touch of royal elegance and shows your creativity wherever you go making your clothes stand out with warmth and grace.
Free Crochet Corset Top with Ruffled Bust and Sleeves
Materials List
- Yarn: Any yarn of your choice (sample not named; DK or light worsted acrylic recommended)
- Hook: Size suitable for your yarn (sample uses approx. 3.5mm–4mm)
- Yarn Needle: For seaming and weaving in ends
- Scissors: For cutting yarn
- Stitch Markers: Helpful for keeping track of sides and placement
Key Abbreviations
- ch – chain
- sc – single crochet
- hdc – half double crochet
- dc – double crochet
- sl st – slip stitch
- fpdc – front post double crochet
- st(s) – stitch(es)
- RS – right side
- WS – wrong side
Pattern is written in US crochet terminology.
Special Notes
- Customization: All measurements (chains, row counts) are adjustable for your preferred fit and size.
- Seams: Work seams with slip stitch for a sturdy but flexible edge.
- Back Loops: For ribbing, work hdc rows in the back loop only unless otherwise noted.
- Post Stitch: For texture, use front post double crochet (fpdc) as indicated.
Pattern Instructions
1. Corset/Base Panel
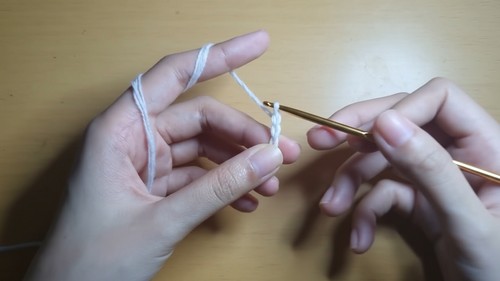
- Foundation Row
- Make a slip knot.
- Ch enough for your desired length (e.g., 28 ch ≈ 6 inches).
- Adjust as needed for longer or shorter top.
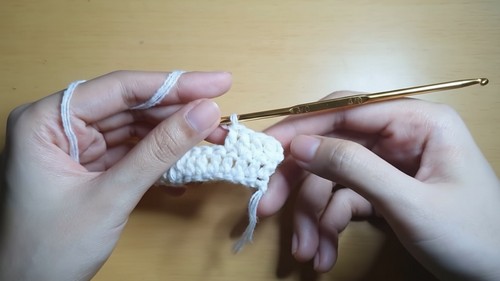
- Row 1: Double Crochet (dc)
- Ch 3 (counts as first dc).
- Dc in the 3rd ch from the hook and in each remaining chain.
- (One dc in each ch; total should equal your base chain less 2.)
- Row 2: Dc Row
- Ch 2, turn.
- Dc in the first st and across the row.
- Rows 3–5: Half Double Crochet (hdc) Back Loop Only
- Ch 2, turn.
- Hdc in the back loop only (BLO) of each st across.
- On last st: hdc in both loops.
- Repeat Pattern
- Repeat: 1 row dc (through both loops), then 3 rows hdc (BLO), ending each hdc row with hdc through both loops on the last st.
- Continue until you’ve reached your desired width. Mark the RS/outward side for assembly.
- Seaming Corset
- Fold panel with RS out.
- Join ends with sl st seam, matching st to st.
- Turn panel RS out.
- Edging
- Work 2 sc per row around the edge; continue all around.
- Join with sl st, fasten off.
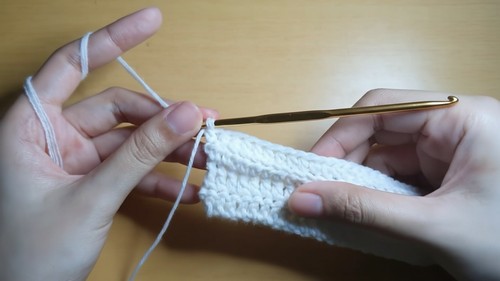
2. Bust/Ruffle Part
- Foundation Row
- Attach yarn at the top edge.
- Ch to desired ruffle length (e.g., 25 ch ≈ 5 inches).
- Row 1
- Ch 3, dc in 3rd ch from hook and across.
- Last st: hdc in last ch.
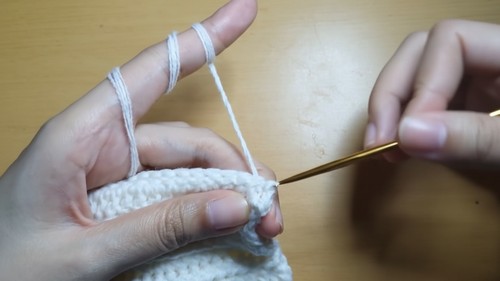
- Row 2
- Turn, sl st in next 2 sts, turn.
- Begin with hdc, then dc in each st to end.
- Row 3
- Ch 2, turn, dc in first st and across.
- Last st: hdc.
- Row 4
- Sl st in next st, turn, hdc in first st, dc in each st to end.
- Repeat Pattern
- For bust ruffle, repeat as follows:
- 1st row after foundation: 2 sl st at start, hdc then dc.
- Next 2 rows: 1 sl st at start, hdc then dc.
- This creates a ruffled edge.
- Continue until desired width (usually to half-panel for each bust side).
- Mark where next piece/side will join.
- For bust ruffle, repeat as follows:
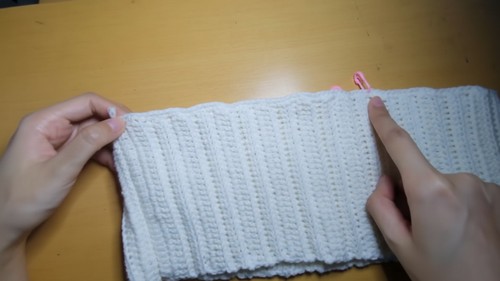
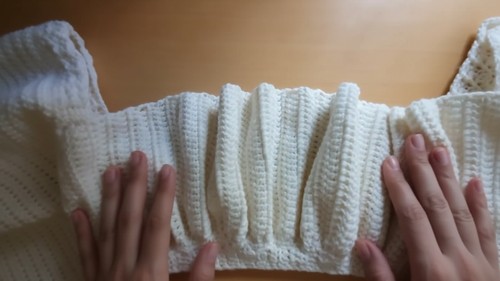
- Gathering the Ruffle
- Make a tie of approx. 55 inches (ch to length).
- To gather the ruffle, weave the tie in and out through every few rows (insert at first row, then at every 4th row, etc.).
- Pull gently to gather ruffle, then tie to secure.
3. Back Part
- Mark segment, attach yarn at edge.
- Row 1: Ch 2, hdc in each st across.
- Row 2 & Onward: Sl st in next 2 sts, turn, hdc in first 4 sts, 2 fpdc, hdc in next 4 sts. Repeat as needed.
- Repeat Rows:
- Alternate plain hdc row with fpdc row for subtle ribbing/textured effect.
- Continue to stitch marker/desired width.
- Lacing Eyelets
- At end of back, turn, hdc in next 2, ch 2, skip 2, hdc in next st, repeat to end.
- Next row: ch 1, turn, sc in every st and ch space.
- Work slip stitches as edging to starting corner; fasten off.
- Repeat Back for Opposite Side
- Attach yarn at other side of bust, repeat process as on first back section.
4. Straps
- Mark third row of dc at front, and seventh row at the back.
- Attach yarn at front mark.
- Ch 2, work 2 dc in first row of dc, 3 dc in next (6 dc).
- Ch 2, turn, dc in every st across.
- Front Post Row: ch 2, turn, fpdc in second st, dc in next, repeat sequence as established, ending with dc in last st.
- Alternate 1 row dc, 1 row fpdc/dc mix.
- Work until desired strap length (e.g., 35 rows ≈ 12 inches).
- Attach to back with sc.
- Repeat for second strap.
5. Sleeves
- Around the armhole edge, work 2 sc per row.
- Join with sl st.
- Ch 2; dc in every st around.
- Repeat for 2 rows.
- Shaping/Sleeve Increases
- Next: [Dc in 5, inc (2 dc in next st)] repeat all around.
- Follow with plain dc round.
- Repeat Increase Round and Plain Round for as many rounds as needed for desired volume.
- Sleeve Decreases
- [Dc2tog (decrease over 2 sts), dc in next] repeat around.
- Switch to half double crochet: [hdc2tog, hdc in next] repeat around for 2 rounds.
- Then 5 rounds of plain hdc.
- Finish
- Sl st, fasten off, weave in end.
- Repeat for Second Sleeve
6. Lacing Ties
- Bust/Front Tie: Make a 55” tie (chain to length); weave along bust ruffle as shown.
- Back Tie: Make a 35” tie (chain to length); lace up through back eyelets for closure.
Conclusion
This lacy crochet top features a ribbed corset body, adjustable gathered ruffle bust, fitted back with lace-up closure, textured straps, and dramatic bell sleeves. It is fully customizable for size and style by changing your chain and row counts as needed. The tie-up features and post stitches add both style and fit. This project is best suited for intermediate makers familiar with basic stitches and construction.
Pattern Correction
- Ensure all edges align perfectly before seaming/joining.
- Always keep count of stitches on each side for symmetry.
- On ruffled and eyelet rows, count carefully for even spacing.
- Keep tension even, especially on post stitches and gathered elements.
Tips
- Fit: Try on your top as you work, adjusting for best personal fit.
- Finishing: Weave in ends securely and block your finished piece for best drape.
- Customization: Add or omit increases/decreases on sleeves and bust ruffle for your preferred silhouette.
- Secure Ties: Knot and weave in tie ends securely to prevent fraying.
Leave a Reply