
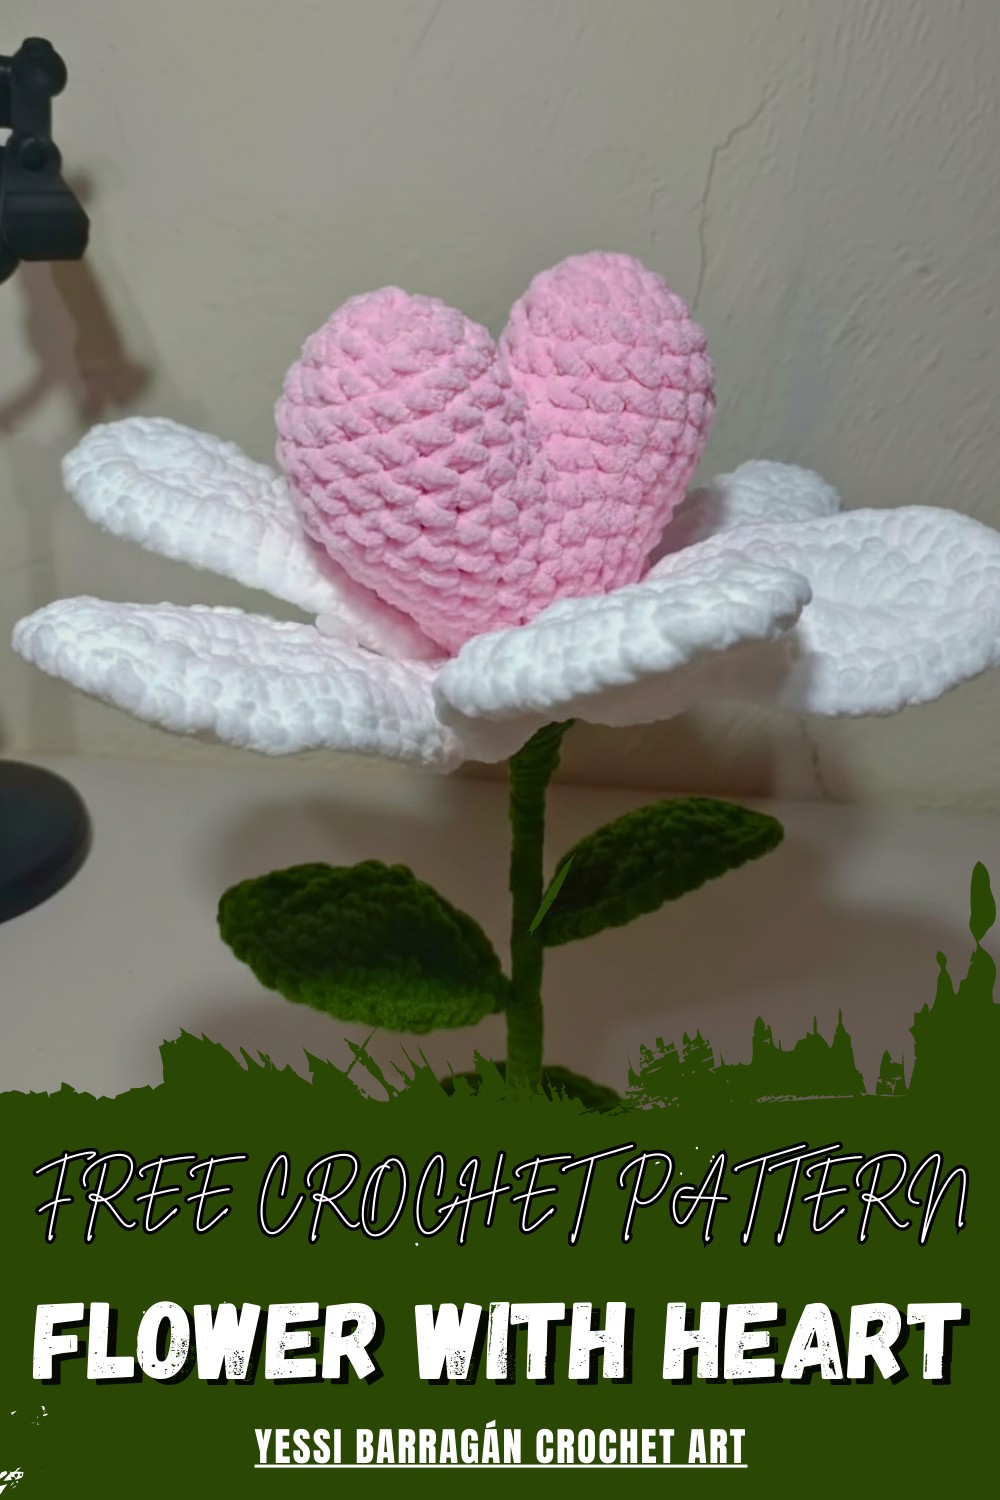
Warmly welcome the beauty of blooms with our free crochet flower with heart pattern and enjoy easy steps for a charming decorative touch.
Imagine holding a soft, pretty flower that is shaped like a blooming heart. It is bright and lovely, and feels nice in your hand. With a crochet flower with heart pattern, you can make this beautiful thing for yourself or your loved ones. This flower stands out because of its charming heart center and gentle petals, making it look cheerful and sweet wherever you place it. You can use it as a gift to show someone you care, as a decoration for your table or room, or even to cheer up anyone who sees it.
Crochet Flower With Heart – FREE Pattern
Making one is simple and fun, and you do not need to know any hard skills. The pattern helps you create something full of love and joy. Every time you touch or see your crochet flower with heart pattern, you feel happy. It is soft, strong, and always brings a smile. Use it to make special days happier, or just to brighten up an ordinary day.
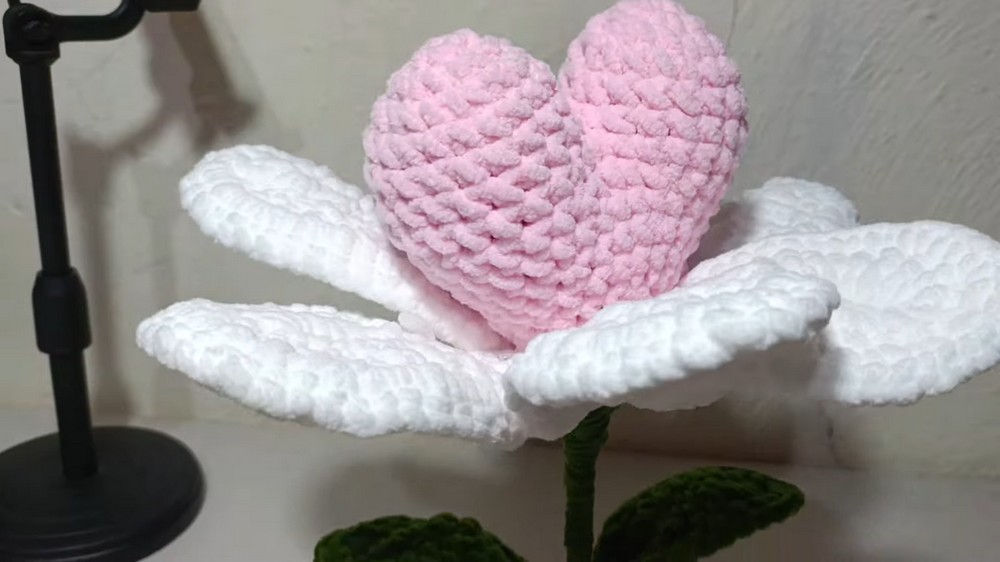
Free Crochet 3D Heart Flower Pattern
Materials List
- Chenille Yarn:
- White (petals)
- Pink or Red (heart center)
- Green (leaf and floral tape effect)
- Hook: 4–5 mm (sample uses 4.5 mm)
- Wire:
- 40 cm for each petal
- 30–35 cm for each leaf
- Stuffing: Polyester fiberfill or similar (for the heart)
- Floral Sticks: For stem (2–3 joined for stability)
- Silicone Glue or Hot Glue Gun: For securing parts
- Yarn Needle: To sew/weave ends
- Scissors
Key Abbreviations
- ch – chain
- sc – single crochet
- hdc – half double crochet
- dc – double crochet
- inc – increase (2 sc/hdc/dc in one st)
- dec – decrease (sc/hdc two together)
- sl st – slip stitch
- st(s) – stitch(es)
- MR – magic ring
- rep – repeat
Pattern uses US crochet terminology.
Special Notes
- For a smaller/larger flower, use thinner/thicker yarn and corresponding hook.
- Wire is essential for shaping and giving structure to leaves and petals.
- Adjust number of petals or leaves for your preferred fullness.
- Join pieces with glue for enhanced stability.
Pattern Instructions
1. Petals (Make 6)
Foundation:
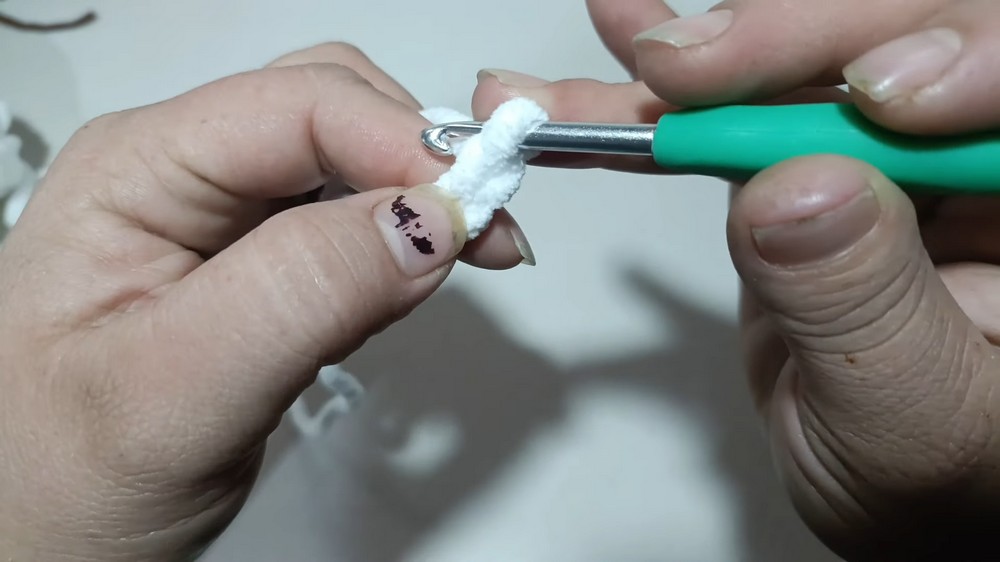
- With white yarn and 4.5 mm hook, ch 11.
Row 1:
2. Starting in 2nd ch from hook:
- 2 sc
- 2 hdc
- 2 dc
- 3 dc in next stitch (inc)
- 5 dc in last ch (tip of petal)
Mirror Side:
3. Working along the opposite side of foundation chain:
- 3 dc in next st (inc)
- 2 dc
- 2 hdc
- 2 sc
- Sl st to first sc to join.
Wire Row:
- Place a 40 cm piece of wire along the edge of the petal.
- With yarn, holding the wire alongside, sc over wire all around the petal (about 10 sc per side, then 10 sc inc, then 10 sc back).
- When complete, sl st to starting sc, ch 1, cut yarn, leaving a tail.
- Twist wire ends securely and tuck yarn ends.

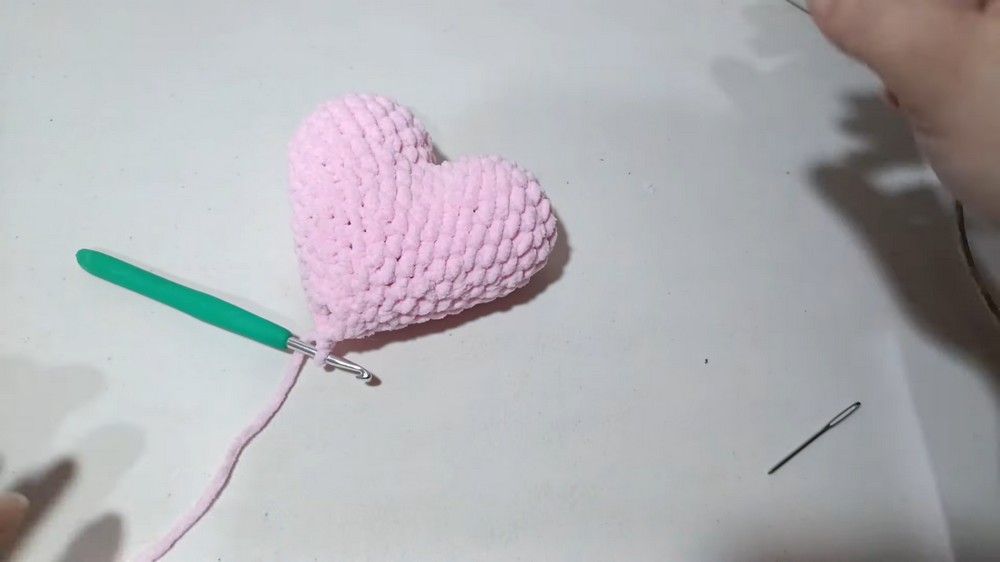
2. Heart Center
Make 2 identical pieces with pink or red:
First Heart Lobe:
- MR, ch 1.
- 6 sc in ring.
- Pull tight, sl st to first sc.
- Round 2: In each st, 2 sc (inc) (12 sts).
- Round 3: (sc, inc) around (18 sts).
- Rounds 4–5: sc in each st. (Repeats 2 rounds, 18 sts per round).
- Fasten off first lobe.
Second Heart Lobe:
- Repeat steps 1–7 above but do not cut yarn.
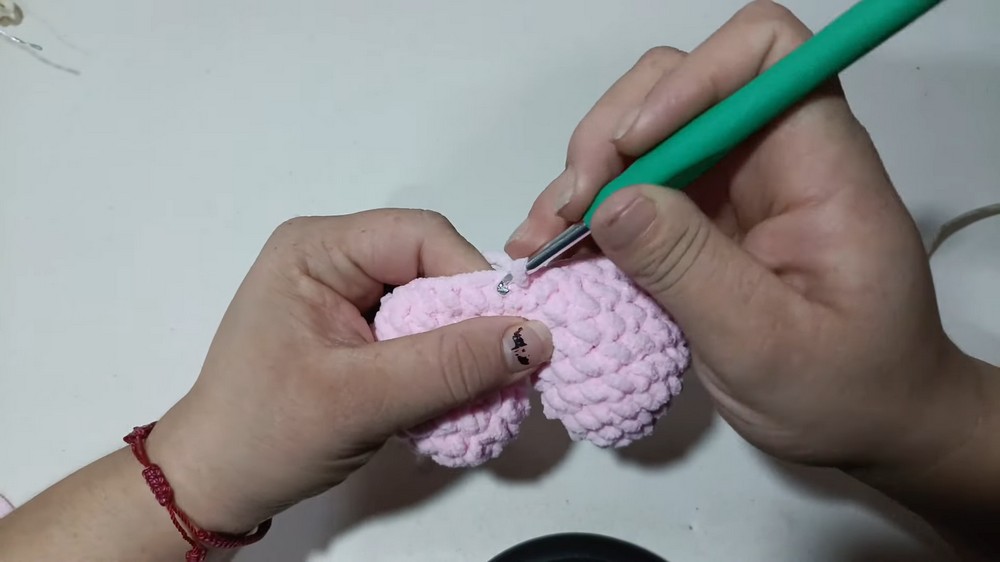
Joining and Shaping:
- Position second lobe next to first, sl st to adjacent st of first lobe to join, forming one round.
- Next round: sc in each st all around (both lobes) – 36 sc.
- Next round: (3 sc, dec) around (30 sts).
- 1 round sc in each st (30 sts).
- Next round: (3 sc, dec) around (24 sts).
- 1 round sc in each st (24 sts).
- Next round: (2 sc, dec) around (18 sts).
- Stuff heart center as you go with fiberfill.
- 1 round sc in each st (18 sts).
- Next round: (sc, dec) around (12 sts).
- 1 round sc in each st (12 sts).
- Next round: (dec) around (6 sts).
- Fasten off, close hole.
- Weave tail through final round and pull tight to close.
3. Leaves (Make 2)
- With green, ch 11.
- In 2nd ch from hook:
- sc, sc
- hdc, hdc
- dc, dc, dc
- hdc, hdc
- 3 sc all into last ch (turn)
- Continue along other side of foundation chain:
- hdc, hdc
- dc, dc, dc
- hdc, hdc
- sc, sc
- Sl st to starting sc to join.
Wire Edge:
- Use 30 cm wire, place along edge.
- sc around entire edge of leaf over the wire (1 sc per st, 3 sc in very tip).
- Sl st, ch 1, cut yarn, twist wire to secure. Tuck in the yarn end.

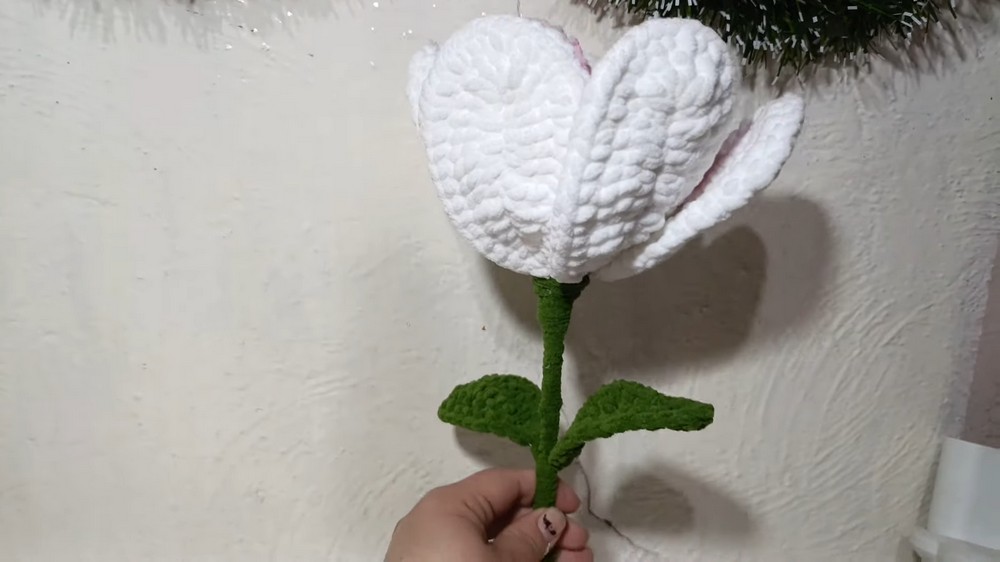
4. Assembling the Flower
- For the stem, join 2–3 floral sticks if necessary, for support.
- Insert sticks nearly 2/3 into heart center, securing with silicone glue.
- Run glue at base of heart and press firmly.
- Arrange petals evenly around heart (with right side of petal facing outward).
- Attach petals around base of heart, securing with glue and wrapping with green yarn to fix in place.
- Wrap green yarn tightly down the stem to cover sticks and wire, securing with glue as needed.
- Add leaves: Position on stem and secure snugly by wrapping remaining green yarn and glue.
- Finish: Trim off extra wire or stem at bottom. Shape petals and leaves gently.
Conclusion
This beautiful 3D heart flower is sturdy, dimensional, and perfect as a bouquet addition, centerpiece, or handmade gift. Using chenille and wire allows flexible shaping for a lifelike, luxurious effect.
Pattern Correction
- Ensure all sc/hdc/dc counts align to keep petals uniform.
- Secure wire firmly but do not cut through the soft chenille when twisting.
- Stuff heart firmly but without overfilling, which can warp stitch shape.
Tips
- Use thin floral tape or more green yarn for a professional stem finish.
- If petals are loose, add extra glue at base after assembly.
- Experiment with different yarn weights for tiny or giant flowers.
- Arrange petals symmetrically before final securing for best effect.
Leave a Reply