
Stay cozy and stylish with a free crochet fingerless gloves pattern that’s perfect for chilly weather while keeping your fingers free for everyday tasks.
Keep your hands warm while enjoying full finger mobility with this unique accessory. A free crochet fingerless glove pattern is both functional and stylish, combining warmth with practicality. It offers a cozy touch without restricting movement, making it perfect for chilly mornings, working on a keyboard, or holding your favorite hot beverage.
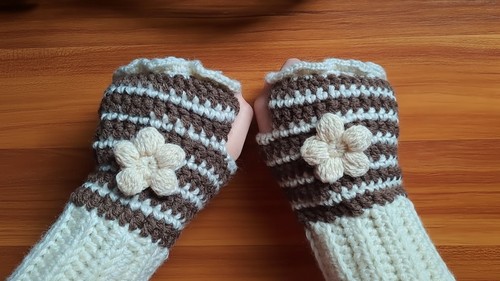
Cute & Cozy Fingerless Gloves Free Pattern for Winter
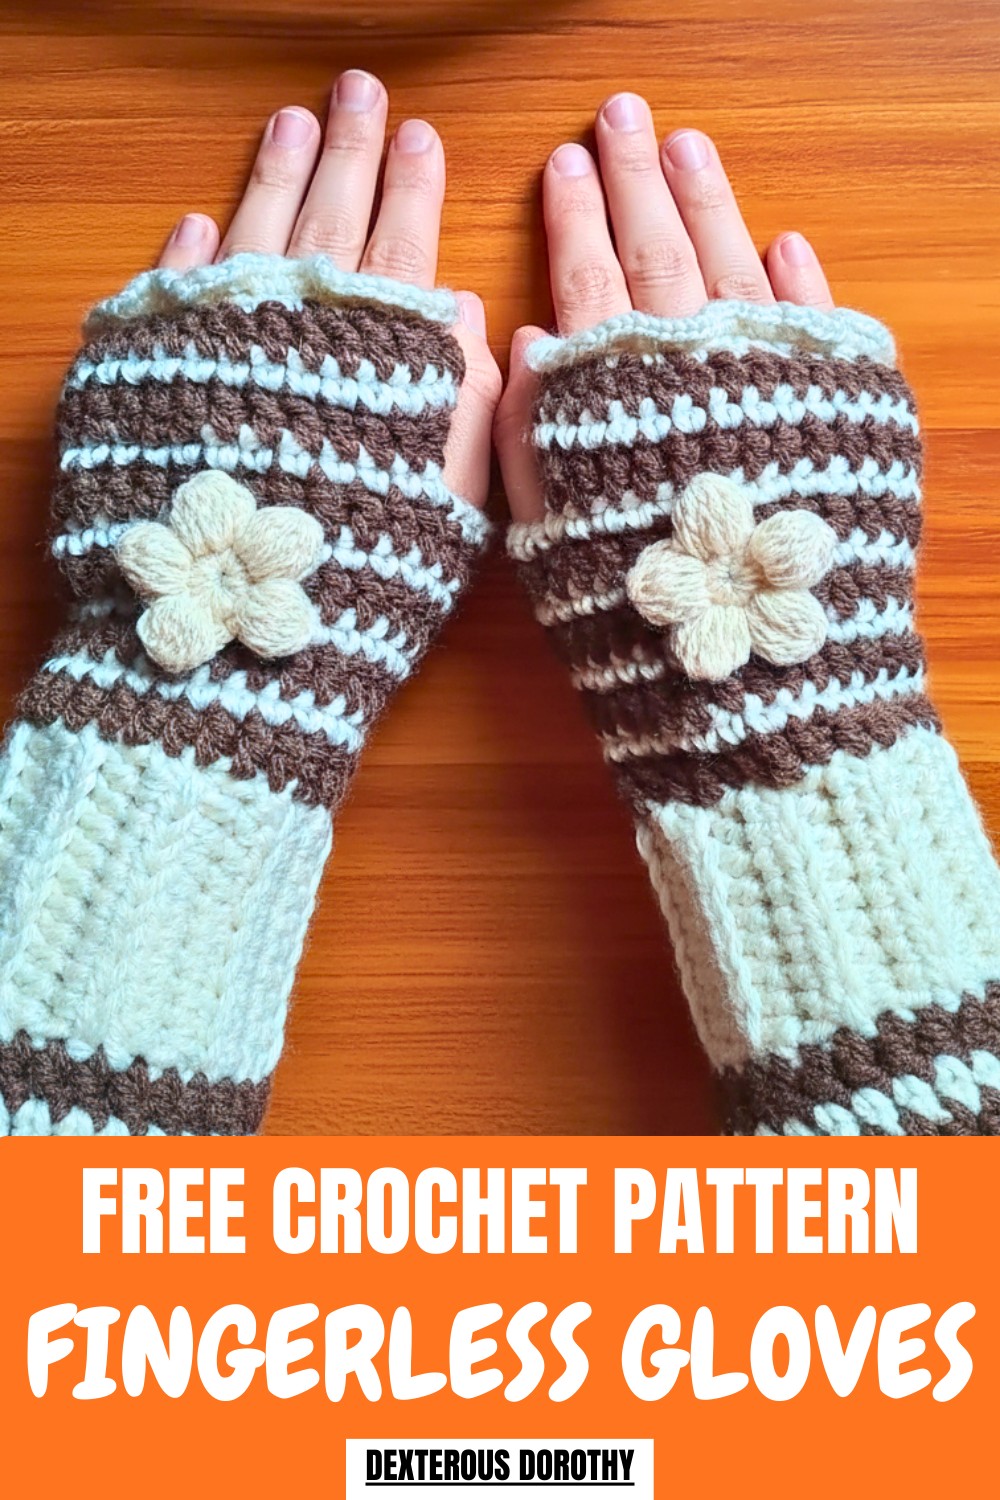
The gloves feature eye-catching textures and a handmade charm that pairs beautifully with casual or dressy outfits. With an elegant stitch design and customizable colors, you can crochet a one-of-a-kind piece that complements your style. The snug fit ensures comfort, while the open fingers make them highly versatile for daily tasks or outdoor activities.
Easy to follow and beginner-friendly, the pattern makes for a quick and fun project with a rewarding result. This crochet accessory not only adds beauty to your style but also provides comfort and convenience wherever you go.
Crochet fingerless gloves Pattern
Materials Needed
- Yarn:
- Two contrasting yarn colors (e.g., Color A for the main body and Color B for accents). Medium-weight yarn (#4 worsted) is recommended.
- Crochet Hook: 3.5 mm (E) or size suitable for your yarn.
- Darning Needle: For sewing and weaving in ends.
- Stitch Markers: Optional, but helpful for marking the thumb opening.
- Scissors: For cutting yarn.
Gauge
- 1 inch = Approximately 4 half double crochet (HDC) stitches.
Finished Size
- Fits an average adult hand.
- Wristband length: Adjustable to your wrist size.
- Glove length (from wrist to knuckles): Typically 7–8 inches.
Tips for Success
- Customize Fit: Adjust the wristband length to fit your wrist snugly. Add or reduce row repeats to suit different wrist sizes.
- Work Carefully on Color Changes: Secure color transitions tightly for a neat finish.
- Tweak Thumb Opening: Adjust the number of thumb stitches skipped and chains created to accommodate varying thumb sizes.
- Embellishments: Add a crochet flower (optional), or skip this step for a simpler look.
Abbreviations (US Terminology)
- CH: Chain
- SC: Single Crochet
- HDC: Half Double Crochet
- DC: Double Crochet
- DEC: Decrease (SC2tog)
- INC: Increase (work 2 SC in 1 stitch)
- SL ST: Slip Stitch
- ST(s): Stitch(es)
Pattern Instructions
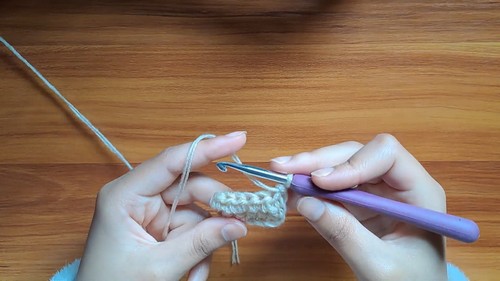
Step 1: The Wristband
- Foundation Chain: Start with CH 7.
- Row 1: Skip the first chain from the hook, work 1 HDC in each remaining chain. [6 HDC]
- Rows 2–X (Row Number Varies as Needed):
- CH 1, turn, work 1 HDC in each stitch across, working into back loops only (BLO).
- Repeat this row until the wristband fits snugly around your wrist (measure as you go).
Tip: BLO stitches create ribbing for a stretchy and textured wristband.
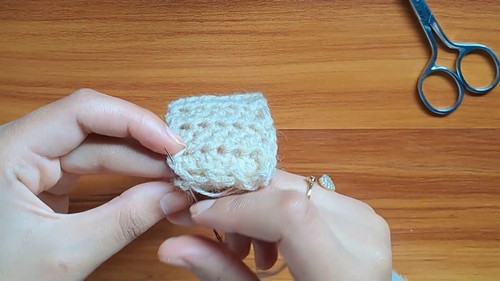
- Join the Wristband:
- When the desired length is reached, chain 1 and fold the wristband in half lengthwise.
- Align both edges together and sew them closed using a slip stitch (or whip stitch with a darning needle).
- Weave in the ends.

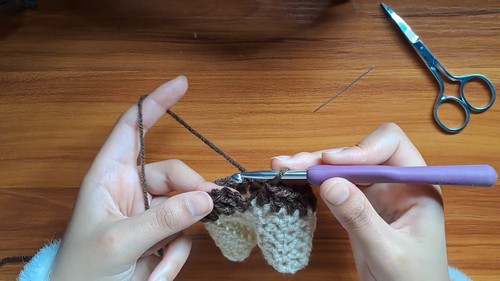
Step 2: Building the Glove Body
Round 1: Foundation Row Around the Wristband
- Change to Color A (or continue with the same color if preferred).
- Join Yarn: Start with a CH 3, which counts as the first DC.
- Work DC evenly around the edge of the wristband, inserting your hook into gaps rather than precise stitches. Space your DCs evenly but leave small gaps between them. This ensures a comfortable fit and prevents over-stretching.
- Join the round by working a SL ST into the top of the CH 3.
Rounds 2–5: Alternating Pattern Rows
- Round 2 (Color B):
- CH 2 (does not count as a stitch).
- Work 1 SC in each DC around.
- Join with a SL ST.
- Round 3 (Color A):
- CH 3 (counts as DC).
- Work 1 DC in each SC around.
- Join with a SL ST.
- Rounds 4–5: Continue alternating rows of SC (Color B) and DC (Color A). Stop when the glove extends to the knuckle of the thumb.
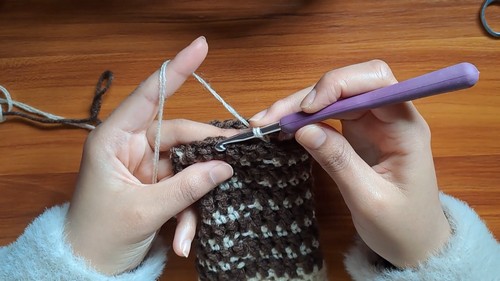
Step 3: Creating the Thumb Opening
- In the next SC row (Color B):
- Work 4 SC, then CH 5, and skip 3 SC.
- Resume SC into the 4th SC after the skipped stitches. Continue SC around.
- In the following DC row (Color A):
- Work DC across all SC, and work 1 DC into each chain of the thumb opening to complete the round.
- Repeat the alternating rows of SC and DC until the glove reaches your finger knuckles.
Step 4: Completing the Wavy Band
- Change to Color B for the final trim.
- Round 1:
- Work 1 SC in the first stitch, then decrease (SC2tog) over the next 2 stitches. Repeat (1 SC, DEC) around.
- Join with a SL ST.
- Round 2:
- 1 SC in the first stitch, INC (2 SC in next stitch). Repeat (1 SC, INC) around.
- Join with a SL ST.
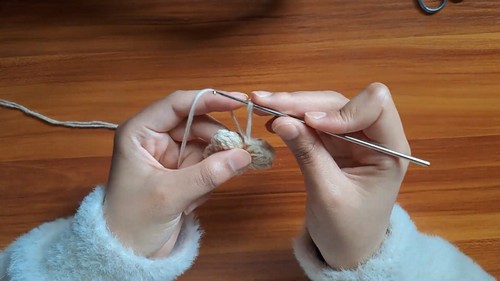
Step 5: Thumb Trim
- Using Color B, join yarn to any stitch in the thumb opening.
- Work SC evenly around the thumb, ensuring the stitches aren’t too tight or too loose.
- Join with a SL ST, chain 1, and fasten off. Weave in all remaining ends.
Optional: Crochet Flower Embellishment
- Foundation:
- Start with CH 4, join with a SL ST to form a ring.
- CH 1, work 12 SC into the ring. Join with SL ST to the first SC.
- Petals:
- CH 3, work (Yarn Over, pull up a loop, YO, pull through 2 loops) x 3 times in the next stitch, leaving all loops on the hook.
- YO, pull through all the loops on the hook. CH 3, SL ST into the same stitch. Repeat for all petals (5 petals total).
- Attach Flower: Sew or attach the flower to the glove as a decorative flourish.
Conclusion
Congratulations! You’ve completed your crochet fingerless gloves. These gloves offer warmth, flexibility, and a stylish finish. Adjust the colors and embellishments to your preference for a truly customized pair. Their comfortable fit and unique design make them excellent for personal use, gifts, or craft fairs.
Final Look
The finished gloves should feature a ribbed wristband, a structured main body with a two-toned wavy pattern, and a neatly defined thumb opening. Optional embellishments like flowers or buttons can add personality.
Leave a Reply