
Find out the beauty of Crochet Blouse Pattern and create stylish, handmade tops that combine creativity, charm, and personal flair effortlessly.
A stylish handmade top can feel like wearable art, and a crochet blouse pattern turns that idea into reality. This crochet blouse pattern is a set of clear, repeatable instructions that guides one through shaping sleeves, necklines, and body panels using nothing more than yarn and a hook. It’s a fun project because it balances rhythm and challenge—simple stitches can build eye-catching lace, textured panels, or delicate trims without needing complicated techniques.
Crochet Blouse Pattern Pattern for Timeless Beauty

It’s also practical: one can adjust length, fit, and sleeve style to suit any season or wardrobe, from a breezy summer blouse to a cozy layering piece. A clever idea is to use cotton yarn for a crisp, lightweight office-ready blouse, or soft bamboo for a drapey, evening-friendly look. Another interesting twist is combining solid and openwork sections to create visual contrast while keeping the top breathable. With a single pattern, one gains confidence, a new wardrobe favorite, and a deeper appreciation for how versatile crochet garments can be.
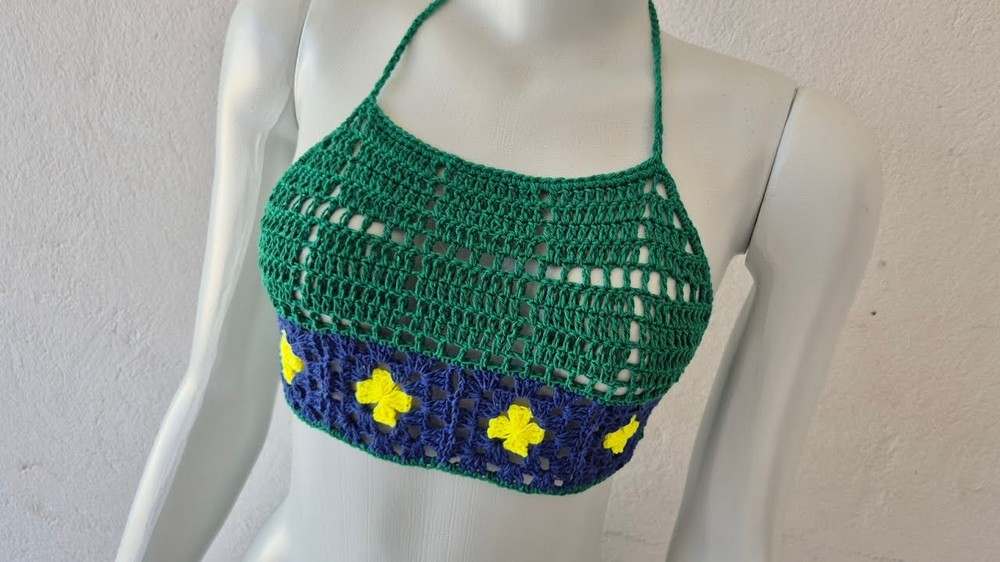
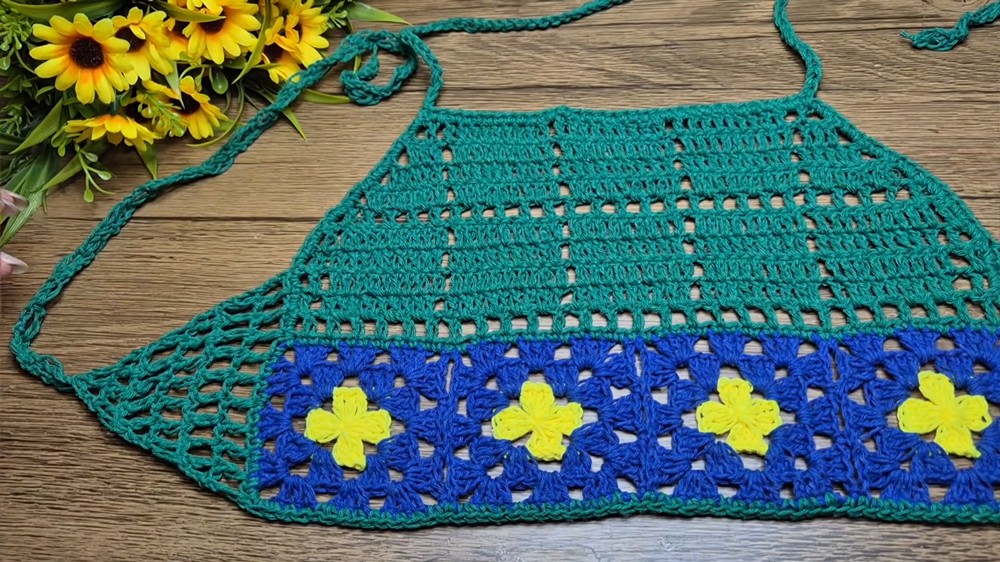
Brazilian Square Motif Halter Top
Materials
- Yarn: Fio Moda (lightweight cotton blend; Tex 295, 85% cotton, 15% other fibers)
- Colors: Royal Blue, Flag Green, Neon Yellow (or your choice)
- Each ball ~500 meters; only a small amount is needed for each color.
- Hook: 2.0 mm (or size preferred for yarn and tension)
- Scissors
- Tapestry needle (for weaving in ends)
Gauge & Sizing
- Sample square size: 7 x 7 cm (not stretched)
- Sample finished band width: 4 squares joined, ~27.5–28 cm (not stretched), stretches easily.
- Fits: XS–M (P–M); add more squares for larger sizes.
- Adjust: Add more squares for width, add extra rounds for more coverage and/or length.
Special Techniques
- Magic Ring: Begin motif with a ring for seamless center.
- Seamless Join-as-you-go: Motifs joined during final round for a clean finish.
- Lattice Mesh: Easy mesh for back ties and reinforcement.
- Double-strand for halter neck: Ensures strength.

Pattern
1. Square Motifs (Make 4 or as needed for band width)
A. With Neon Yellow: (Magic Ring, Ch3 counts as dc)
- Make a magic ring, ch 3 (counts as dc).
- Dc 2, ch 3, dc 3, ch 3, repeat until 4 groups of 3 dc separated by ch 3.
After last ch 3, join with sl st to 3rd ch of start. - Sl st in next 2 dc, sl st into corner ch 3 space.
- Cut yarn, secure and weave tail.
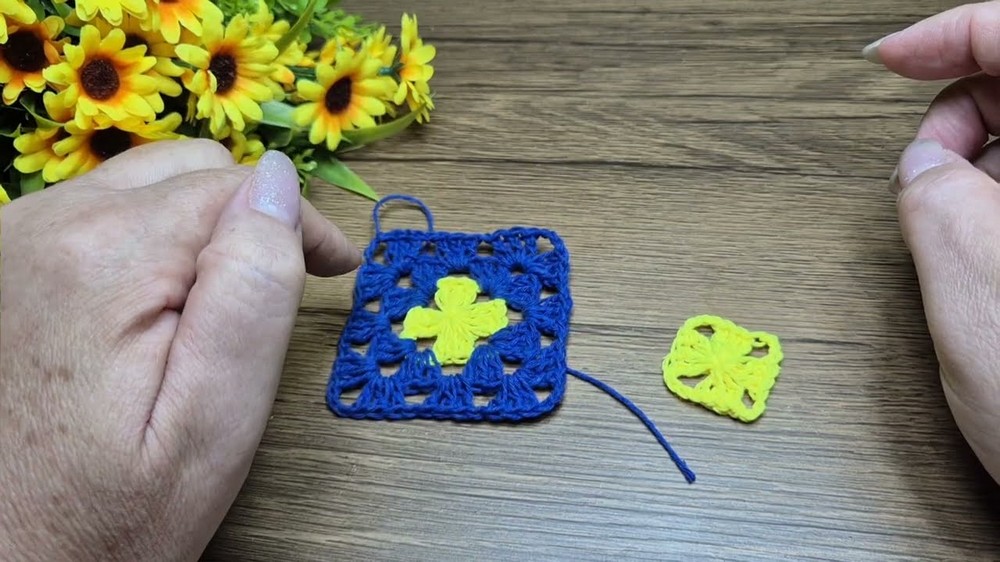
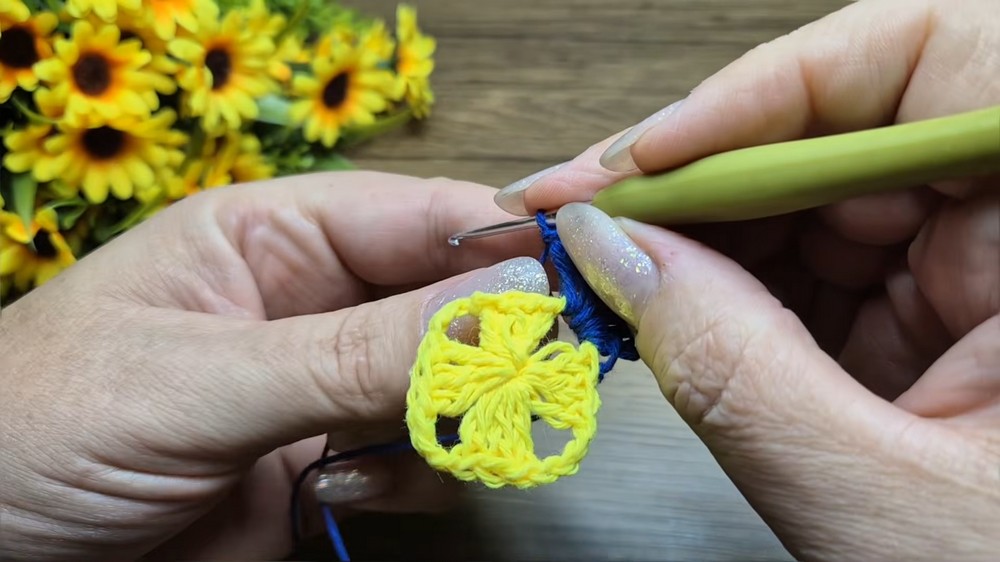
B. With Royal Blue:
Start in any corner ch-3 space.
- Join yarn, ch 2, sc into corner (acts as first dc), dc 2 (in same space — forms corner fan).
- Ch 3, dc 3 (same space), ch 1.
- In each next corner, repeat: [dc 3, ch 3, dc 3].
Between corners, ch 1. - Join last ch 1 with sl st to 2nd ch at start (if started with sc + ch 2).
- Sl st twice into next two dc, then sl st into corner space.
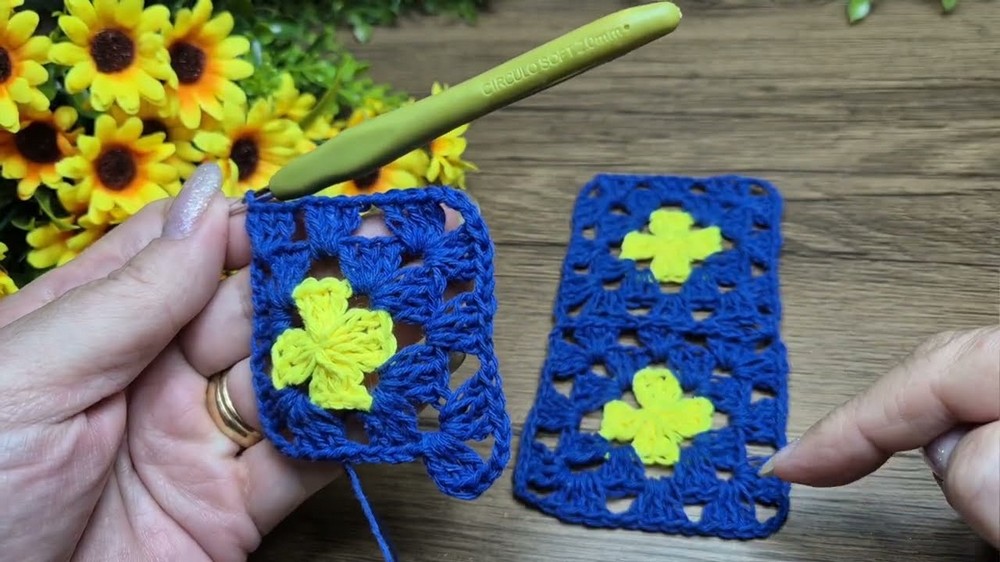
- Repeat Round above for 2 rounds total (add rounds for a larger square).
- Cut yarn, weave ends.
Customization (Square Modulation)
- More squares = wider band
- More rounds per square = larger/more coverage (width & length)
2. Joining Motifs Seamlessly (Join-as-you-go on Last Round)
- On final round of each square, after making 3 dc in corner, ch 1, sl st into corner of already made square, ch 1, finish 3 dc.
- For sides, replace ch 1 with sl st in adjacent square’s ch 1 spaces.
- Carry right sides together during join.
- Alternatively, finish all motifs and sew with tapestry needle for ease.
3. Band Construction
- Join all squares into a horizontal strip, right sides facing.
- With sample tension, band measures ~27.5–28 cm unstretched.
4. Body Expansion — Green Yarn
A. Foundation for body
- With joined motifs laid flat, attach Flag Green yarn to center of top edge (motifs lying horizontally).
- In each dc and ch space: sc to create a uniform edge, especially where squares are joined (sc in joins, corners).
- In corners/junctions, place 3 sc to maintain shape.
- Work across entire top edge.

B. Mesh Section (Back, Side Ties)
- Ch 3, turn. Dc in next sc.
- Ch 1, skip sc, dc in next sc.
- Repeat for entire row: ch 1, skip 1, dc in next.
- End: last 2 dc together.
- Next row: Ch 3, turn, dc in dc, ch 1, dc in dc, across; always 2 dc at start and end.
- Repeat for 4 rows (forms mesh for the back; adjust for preferred coverage).

5. Body Shaping (Block Group Rows, Tapering to Neck)
A. Block Groups
- Ch 3, turn. 2 dc in next dc.
- For mesh section: work block groups ([dc in ch-1 space, dc in dc]) for 4 mesh spaces.
- After 4 block groups, mesh section: ch 1, dc in dc, ch 1, then repeat block groups.
- Work for 4 rows, maintaining mesh in between blocks.
B. Tapering (Decreases)
- On next mesh row (ch 2, turn), skip first dc, dc in next dc (start decreasing at both ends).
- Continue mesh (ch 1, skip next dc, dc in dc), tapering at ends.
- On block group rows, reduce number of blocks at start/end.
- Repeat alternating mesh and blocks, decreasing at start/end each row, until only 1 block remains.
6. Side Lattice & Ties
A. Lattice Expansion
- From mesh edge (side underarm), attach yarn.
- Ch 1, sc into first ch-3 space, ch 1, dc in next sc, in mesh style.
- Form 10 mesh spaces along the edge.
- Repeat for 6 rows, decreasing at row ends for taper.
B. Reinforced Ties
- To form tie, after taper, ch 3, dc in same space, turn, dc 2 across.
- Continue 26 times for tie length (sample: 26 rows for tie).
- Repeat for both sides.

7. Halter Neck
- With double-stranded yarn (for reinforcement), ch 80 (or as needed for tie comfort).
- Sc across top edge, carrying tie tail.
- Repeat for other side.
- Adjust number of chains and sc for neck comfort or embellishment (add beads, tassels).
8. Edging & Finishing
- Sc or desired border along all edges (including bottom, sides, and top).
- At corners, place 3 sc for smooth turns.
- Weave all ends with tapestry needle.
- Add lining, foam cups, or continue mesh for desired coverage.
Finished Size
- To fit XS-M (P–M):
- Band: 4 squares, ~28 cm wide, stretches to fit.
- Top length: adjustable by square size and number of rows.
- Back ties: 26 rows, adjust for fit.
- Neck ties: 80 chains and sc border (double-stranded).
Tips & Customizations
- Increase size: Add more squares for width; add more rounds per square and more block rows for length/coverage.
- Decrease: Use fewer squares or rounds as needed.
- Color play: Use your flag/colors or any palette.
- Mesh adjust: Make mesh sections wider for extra coverage.
- Edging: Finish with picot or shell edge for added flair.
- Back support: Add extra mesh for comfort.
Conclusion & Final Remarks
This halter top combines classic granny square methods with trendy mesh shaping for a flattering, versatile garment. Seamless joins and reinforced ties ensure durability and comfort, and the top is easily customized for any body type or style preference. Finish with well-woven ends and blocking for best fit.
Leave a Reply