
Create a charming and easy blouse with this Free Crochet Blouse Pattern that feels soft, stylish, and fun to wear for any casual day out.
Have you ever wanted a blouse that feels soft, light, and just right for warm days? The Free Crochet Blouse pattern teaches how to make a beautiful blouse that is gentle on the skin and easy to wear. It has a simple open design that lets air flow, so it stays comfortable even when it is sunny outside. The neat crochet stitches create a smooth and tidy look, making the blouse appear stylish without being too fancy.
Crochet Comfortable Blouse Pattern for Hot Days
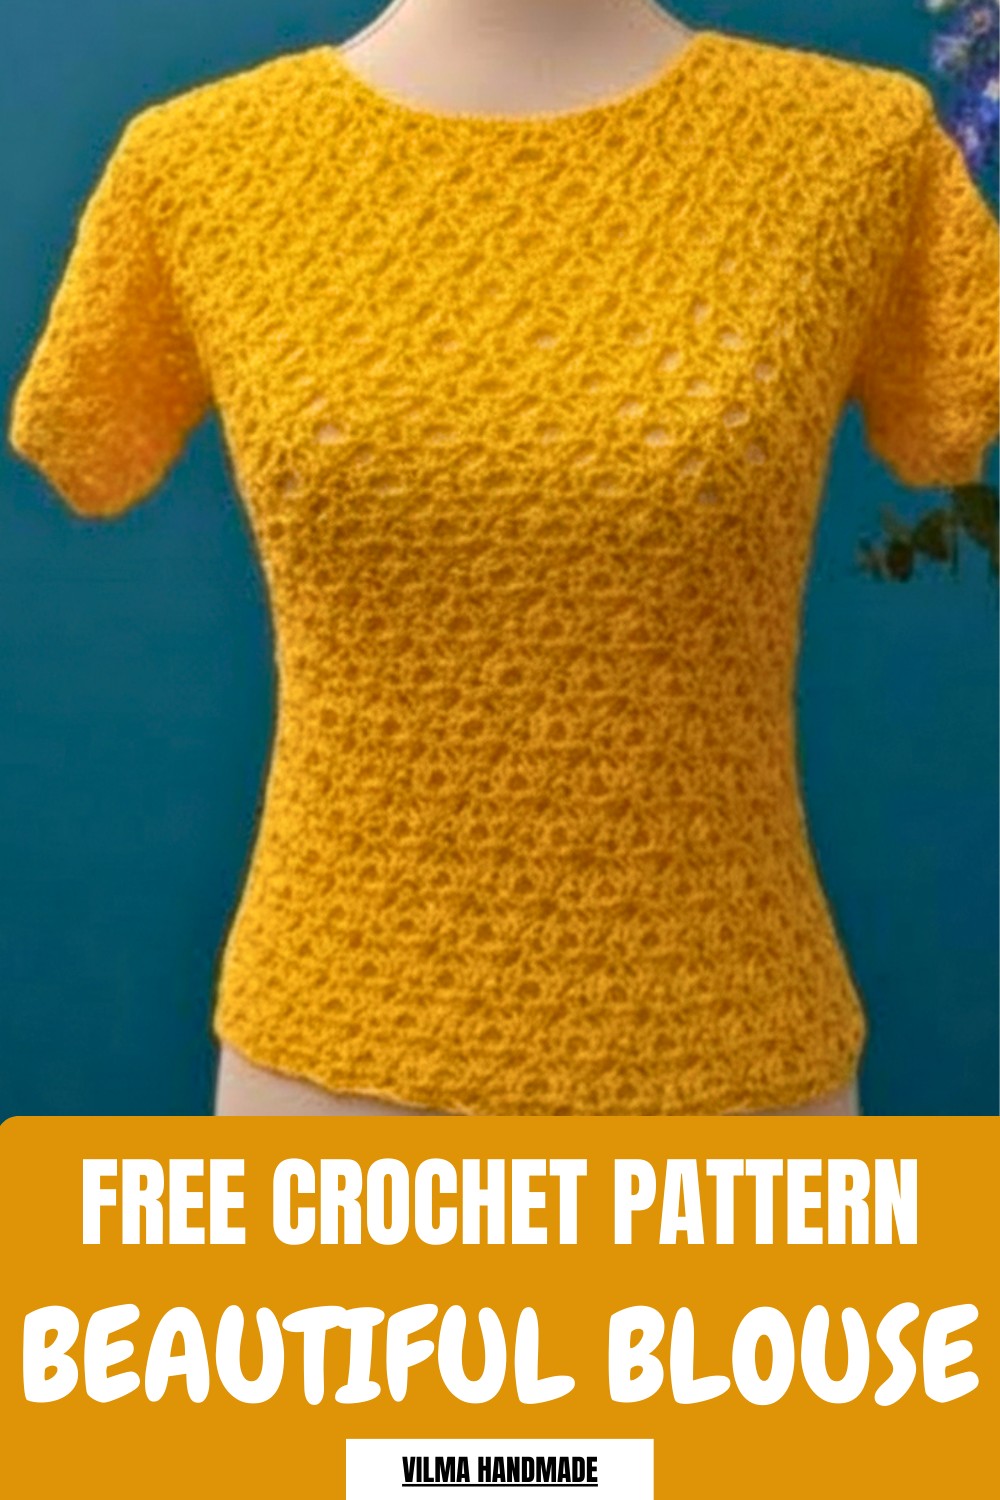
Its shape fits easily over other clothes, so it can be worn at home, school, or any casual outing. You can choose your favorite colors, making each blouse feel unique and special. This pattern is easy to follow, turning plain yarn into something useful and pretty. It gives a handmade touch that makes wearing it feel cozy, personal, and full of charm.
Beautiful Crochet Blouse Pattern Wtih Fan Stitch
Skill Level
Intermediate to Advanced
This blouse requires familiarity with fan stitches, picot stitches, shaping techniques, and sewing garment pieces.
Materials
Yarn
- Type: Lightweight cotton yarn (approx. 1 mm thickness)
- Quantity:
- 200g for Size S (small) with short sleeves
- Add ~50–100g more for larger sizes or longer sleeves
- Suggested Yardage: Approx. 700–800 yards for size S.
Crochet Hook
- Primary Hook: 3.5 mm crochet hook (main body and fan stitch).
- Optional Hook: 3 mm crochet hook for tighter edging.
Additional Tools
- Tapestry needle for weaving in ends and sewing seams.
- Stitch markers for separating sections (e.g., neckline, shoulders).
- Scissors.
Key Abbreviations & Terminology
- ch = chain
- sl st = slip stitch
- sc = single crochet
- dc = double crochet
- hdc = half-double crochet
- picot = 4 chains, joined to the base of stitch to create a pointed knot
- st(s) = stitch(es)
- rep = repeat
- RS = right side
- WS = wrong side
Special Notes
- Stitch Pattern Multiple: The fan stitch pattern is a multiple of 7 + 1 stitches.
- Gauge: Not critical, but ensure the foundation chain matches the finished width specified.
- Always measure your torso or desired fit for neckline width and adjust chains accordingly.
- Neckline Shaping: Delicate shaping is achieved by eliminating picots and reducing stitches gradually; follow row-by-row instructions closely.
Pattern Instructions
1. Foundation Chain and Measurements
Foundation Chain (Sizes)
- S (Small): 78 chains
- M (Medium): 85 chains
- L (Large): 92 chains
- XL (Extra Large): 99 chains
Each chain count achieves approximately:
- S: 40 cm width
- M: 42 cm width
- L: 46 cm width
- XL: 48 cm width
For exact sizing, measure your bust circumference and adjust chain length accordingly, following the multiple of 7 + 1 stitches.
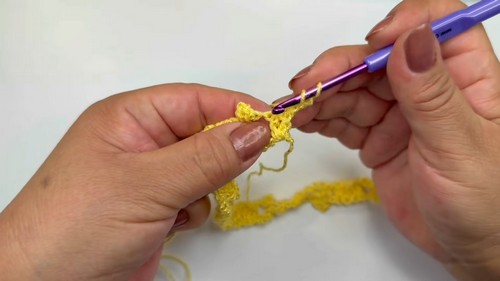
Foundation Chain Instructions
- Create a slipknot and crochet the required number of chains for your size.
- Ensure chains are loose but even in tension.
- For beginners: Measure your chain to ensure it corresponds to the desired width. Adjust length if needed while maintaining the stitch multiple (7 + 1).
- Start the first row.
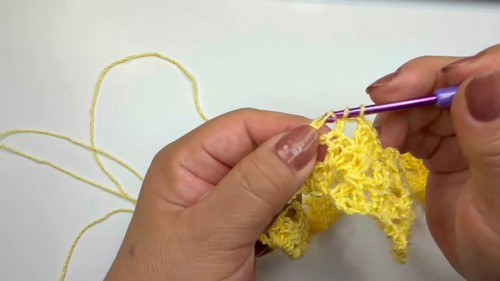
2. Fan Stitch Pattern
The fan stitch combines clusters of double crochets (dc) and picot accents for texture.
Row 1 – Fan Base
- Set up row:
- Ch 3 (counts as first dc), skip to the 4th ch.
- Work 3 unfinished dc into the space:
- Yarn over, insert hook in next st, pull up a loop, yarn over, draw through 2 loops (leave 2 loops on hook).
- Repeat twice more, then close all loops.
- Picot Accent:
- Ch 4, sl st into the loop formed by the 3 dc.
- Fan Formation:
- Skip 2 chains, and in the next chain, work 4 dc closely together to form the fan.
- Finish with 1 chain, skip 1 chain, and repeat the pattern.
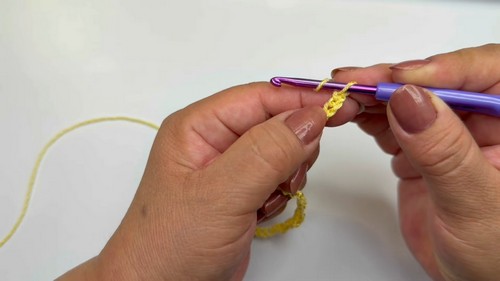
Continue throughout the row:
- Triangle and Picot → Fan → Triangle and Picot → Fan.
At the last chain, crochet 2 dc.
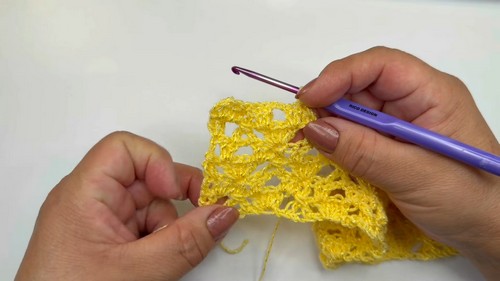
Row 2 – Expanding Fans
- Set up:
- Ch 3 (counts as dc), turn.
- Into first dc, work 2 dc.
- Work into Picot Accents:
- Insert hook in middle of picot, and work sc.
- Fans (expanded):
- For each fan: First dc → 2 dc, ch 2 → Last dc → 2 dc.
Repeat across the row, maintaining single crochet into picots and expanded fans.
At the last stitch, crochet 2 dc.
Row 3 – Reintroducing Picots
This row repeats Row 1, but now incorporates picot details:
- Begin with Ch 3, turn.
- Work unstressed triangles with picots to mimic Row 1.
At the last stitch, finish with 2 dc.
Row 4 – Base Expansion
Row 4 is identical to Row 2. Ensure spacing and expansions remain consistent.
At the last stitch, finish with 2 dc.
3. Repeating Pattern
Rows 1–4 form the stitch repeat. Repeat these rows throughout the body panel until you achieve the desired length:
- Front Panel: Work approximately 40 rows for size S (modify for larger sizes).
4. Neckline Shaping (Front Panel)
Separating for Neckline
At the end of your desired body repeats (e.g., after 40 rows):
- Place Markers:
- Find the center by dividing fans evenly. Mark the middle fan and attachment points at both shoulders.
- Start Row 41:
- Work up to the marker and adjust how you work picots:
- No picots in the neckline section.
- Continue fans and triangles without picot detail.
- Work up to the marker and adjust how you work picots:
- Form Shoulders:
- Narrow each shoulder by reducing fans gradually over Rows 42–47.
- Leave space for the neckline (center area).

At the end of Row 47, the neckline and front panel are complete.
5. Back Panel
- Work the Back Panel as the Front, but without a deep neckline.
- Create a small back neckline by narrowing fans only over Rows 45–47.
- Ensure the finished back panel matches the width and length of the front panel.
6. Sleeves
- Foundation Chain: Crochet 71 chains for short sleeves (modify for wider sleeves as needed).
- Work Rows 1–10 in the fan stitch pattern.
- Finish with 3 rows of single crochet (sc).
7. Assembly
Sewing Panels
- Shoulder Seams: Sew front and back shoulder edges together using matched stitches. Use a tapestry needle or slip stitches.
- Attach Sleeves:
- Position the sleeves centered at the armhole gap.
- Sew from the center outwards, ensuring alignment.
- Side Seams:
- Fold the blouse, RS facing inward.
- Sew the side seams from underarm to hem.
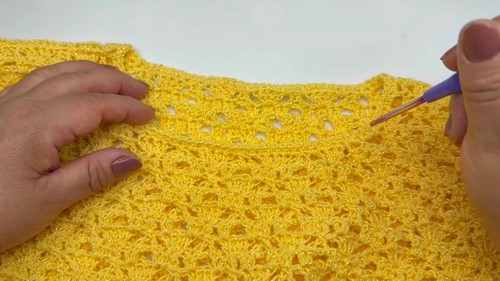
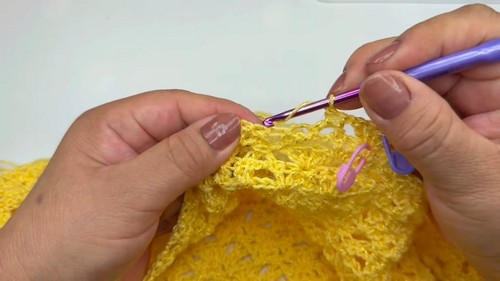
8. Neckline Finish
- Work two rows of single crochet (sc) around the neckline.
- Optionally use back loop only (blo) for a subtle ribbed effect.
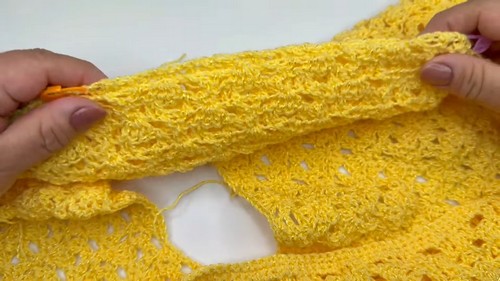
Conclusion
Your blouse is now complete! This fan-stitch design offers a sophisticated yet casual look perfect for any occasion. It can be further customized by lengthening the sleeves or adding decorative edging to the hem.
Pattern Tips and Corrections
- Customization:
- Alter neckline depth by adjusting Rows 41–47.
- Increase sleeve width via extra foundation chains (multiple of 7 + 1).
- Pattern Corrections:
- Ensure your gauge aligns for proper width. Adjust hook size if needed.
- Measure sections to verify symmetry before sewing.
- Blocking:
- Lightly block the blouse to smooth out any inconsistencies in stitches and improve drape.
Leave a Reply