
Cozy up your mug with this free crochet Mug Pattern, perfect for adding a handmade touch and charm to your everyday cup with ease.
Have you ever wanted to add a unique, cute touch to your coffee corner or surprise a friend with a heartfelt, handmade gift? This delightful crochet mug cozy is just the thing! Crocheted with simple yet beautiful stitches, this pattern brings a cozy warmth to any cup. It is perfect for decorating your home or brightening someone’s day. The magic of this project lies in its use of basic double crochet stitches and fan stitch patterns, which create lovely textures and shapes that almost look like delicate lace. These stitches are not just pretty; they are versatile and form the foundation for many other cozy crochet projects.
Charming Creation Crochet Mug Pattern for Stylish Homes

What makes this mug cozy special is how easy and quick it is to make, even if you are new to crocheting. The pattern teaches you how to start with a magic ring, work rows featuring combinations of double crochet and chain stitches, and create textured fans that give the cozy an elegant look. It is a wonderful way to get comfortable with crocheting in rounds and mastering increases and finishing techniques. Plus, you will learn how to add a practical handle using simple yet effective stitches, making the cozy not just pretty but also functional.
By following this pattern, you will gain valuable crochet skills that open the door to making other accessories too. Once you are confident with these stitches, you can create matching coasters, cute little pouch bags, or even use similar fan stitch motifs to decorate scarves and blankets. The stitches you learn here also set you up for crafting delightful flowers and lace-like trims that add charm to any project. This pattern is a perfect starting point for beginners who want quick, satisfying results and a practical, handmade piece to enjoy or gift. So get your yarn and hook ready, it is time to crochet something cozy and beautiful!

Crochet Cup and Saucer Pattern
Skill Level & Terminology
- Skill Level: Beginner
- Crochet Terminology: US Terms
Materials & Tools
- Yarn: Polypropylene thread (or silk thread) in two colors, e.g., blue and White
- Crochet Hook: 1.75mm
- Other Tools: Scissors, lighter, and yarn needle
Gauge
Gauge is not crucial for this project. However, to ensure the proper shape and size, make sure your tension is consistent.
Abbreviations
- ch: Chain
- st(s): Stitch(es)
- sl st: Slip Stitch
- sc: Single Crochet
- dc: Double Crochet
- hdc: Half Double Crochet
- yo: Yarn Over
Special Stitch Instructions
- Magic Ring: Wrap the yarn around your fingers, pull up a loop, and chain to secure.
- Half Double Crochet (hdc): Yarn over, insert the hook, yarn over again, pull through, then yarn over and pull through all 3 loops on the hook.
Finished Size
- Cup diameter: Approximately 3 inches
- Saucer diameter: Approximately 5 inches
Pattern Overview
This pattern involves working the cup and saucer separately. The stitches used include double crochets, chains, and single crochets, forming sturdy and beautiful designs. The details and edge finish bring charm to the piece.
The Pattern: Crochet Cup
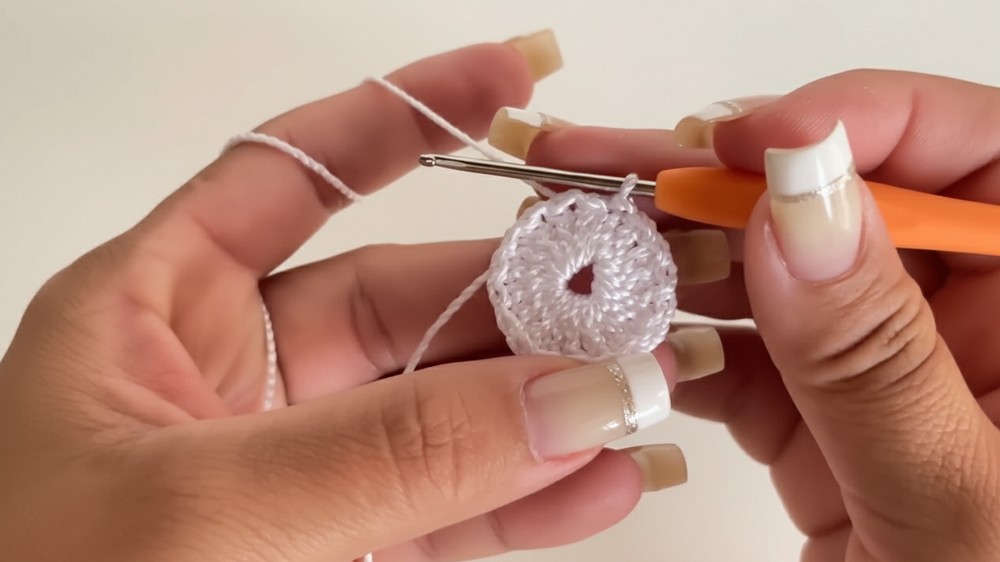
Base of Cup
- Start with a magic ring or chain 5 and join with a sl st to form a ring.
- Round 1: Chain 3 (counts as first dc), work 17 dc into the ring. Join with a sl st to the third chain of the beginning ch-3. (18 sts in total).
- Gently pull the magic ring closed, leaving a small hole.
For absolute beginners: Start by making double crochets into the ring and joining the ends with a slip stitch. You’ll form a flat base that works into a circle.
Increasing for the Cup Base
- Round 2: Chain 3, work 2 dc in every stitch around, join with sl st to the third chain of the beginning ch-3. (36 sts)
- Round 3: Work through the back loops only. Chain 3, dc in each stitch around, join with sl st to the third chain.
This step gives the base a cup-like shape. The idea is to create a circular foundation that is slightly elevated.
Working the Cup Walls
- Round 4: Chain 3, in the same stitch, work 2 dc, chain 2, 2 dc into the same stitch (creates a fan).
- Skip 2 stitches, work (dc, ch 2, dc) into the next stitch (creates “V” stitch).
- Repeat the pattern: Fan in one stitch, then a V in the next. Skip 2 stitches between each. Join with sl st.
- Round 5–7: Continue working fans in fans and V inside V for three additional rows.
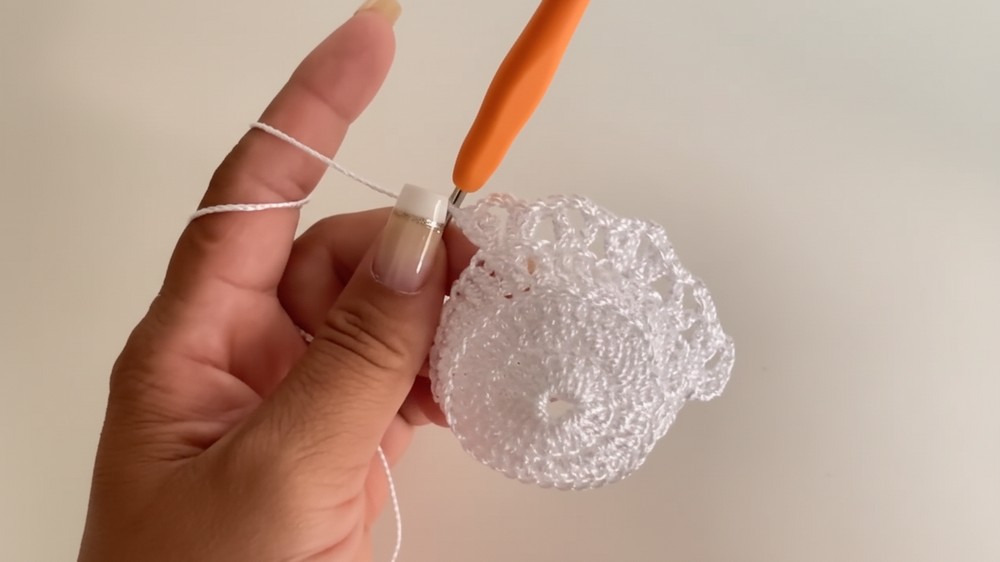
By repeating the rows as described above, the cup walls will gradually grow outward and upward, giving it the desired shape.
Top Edging of Cup
- Round 8: Chain 1, work 1 sc in each stitch around. In chain spaces of V stitches, work 2 sc.
- Join with a sl st to the first sc, chain 1, and finish off. Use your lighter to secure the yarn if using polypropylene thread.
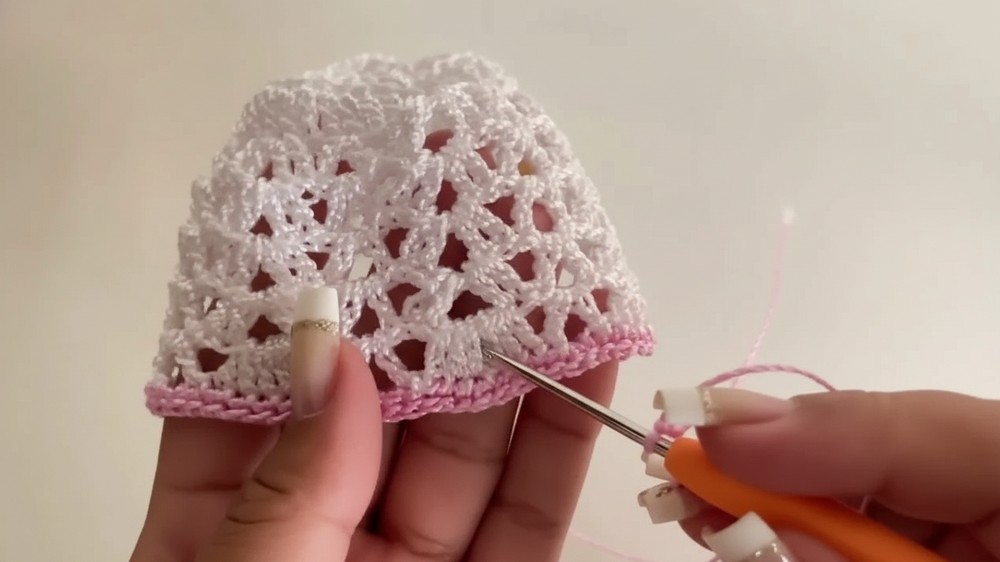
Congratulations, you’ve formed the body of your cup! Be sure to gently stretch and shape it with your hands.
The Cup Handle
- Use the secondary color yarn (e.g., blue).
- Create a slip knot and attach the yarn to the middle stitch of a fan row (near the cup’s side).
- Chain 12–14 stitches (depending on the desired handle size). Join to the middle stitch of the fan row directly opposite, forming a loop for the handle.
- Row 1: Chain 1, work hdc into each chain of the loop until you return to the base of the handle.
- Secure with a sl st into the fan stitch, make a chain stitch, and finish off the yarn. Tidy up the ends.
The Saucer
Base of Saucer
- Create a magic ring or chain 5 and close it with a sl st to form a ring.
- Round 1: Chain 3 (counts as first dc). Work 17 dc into the ring. Join with a sl st to the top of the ch-3. (18 sts)
- Pull the magic ring closed.
Increasing for Saucer Shape
- Round 2: Chain 3, work 2 dc in every stitch. (36 sts)
- Round 3: Chain 3, work (2 dc in the next stitch, 1 dc in the following stitch). Repeat around. (54 sts)
- Round 4: Chain 3, work (2 dc in one stitch, 1 dc in the next 2 stitches). Repeat around. (72 sts)
This gradual increase will form the saucer into a flat, circular shape.
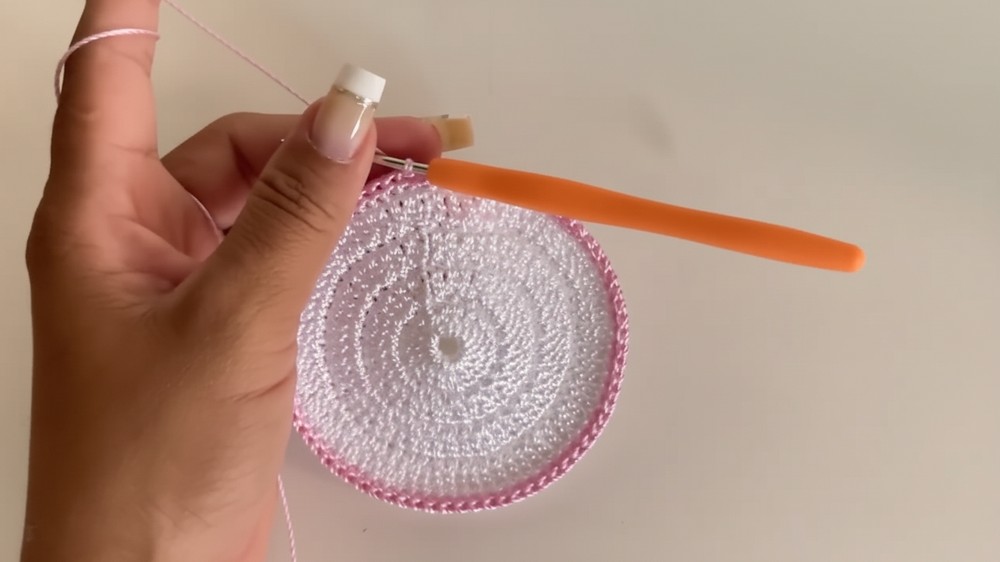
Finishing the Saucer
- Attach the secondary color yarn with a sl st.
- Round 5: Work 1 sc into each stitch around.
- Join with sl st, finish off the yarn, and secure the ends.
Assembly
- Shape your cup: Use your hands to adjust the stitches until the cup holds its shape.
- Place the saucer under the cup for display. If desired, you can glue or sew them together.
- For additional decoration, crochet a small flower or embellishment in the secondary color and attach it to the cup.
Conclusion
This Crochet Cup and Saucer Pattern uses basic stitches like double crochet, single crochet, and slip stitch to create a stunning, functional decoration. With its thoughtful construction, it’s a beginner-friendly project that allows for creative flair. Adjust colors or add embellishments to make it uniquely yours!
Leave a Reply