
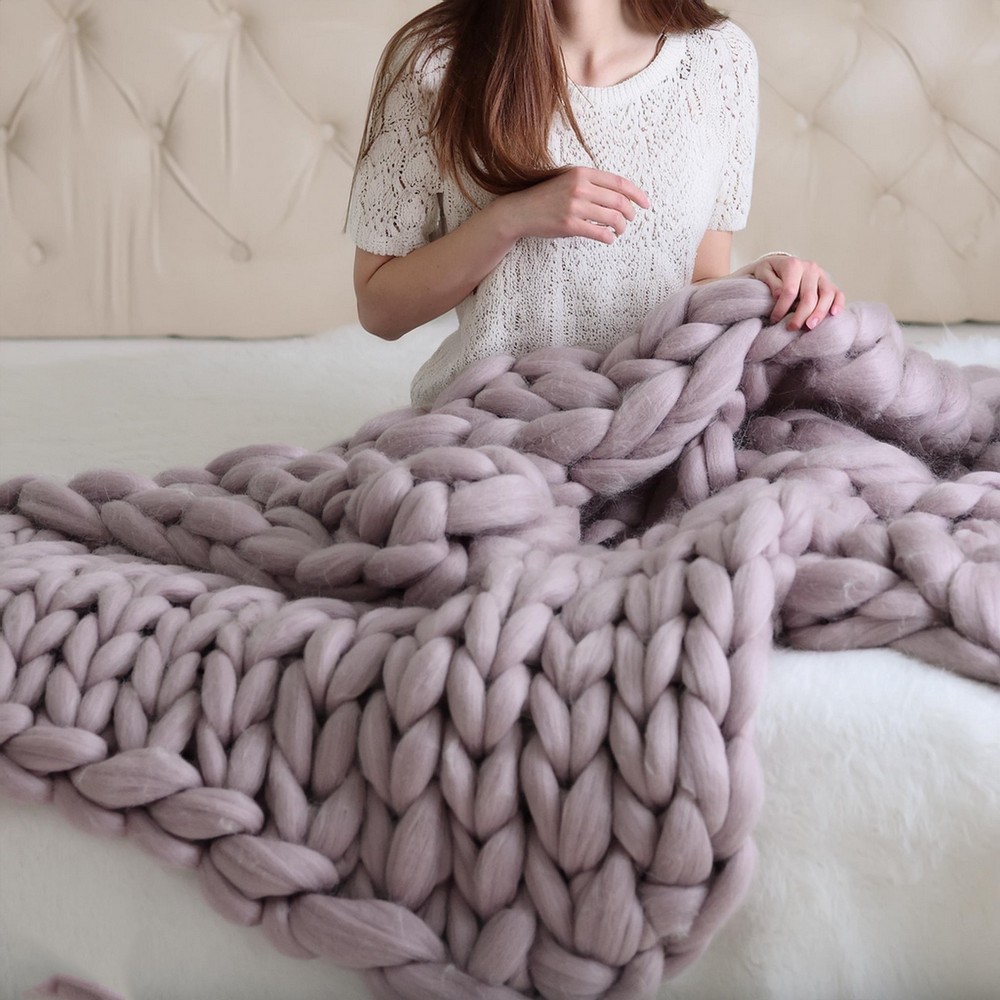
Try this fun project that mixes your creative touch with the snug comfort of a handmade blanket. How great it will feel to curl up under a blanket you made yourself in just one hour. That’s right, one hour! You don’t need a lot of fancy stuff or complicated steps to start making a super soft, thick blanket that’s all your own work. Whether you’re new to crafting or you’ve been doing it for years, this project is for everyone. Let’s grab some yarn and jump right in—together, we’ll make a hand–knitted blanket that’s as fun to create as it is to use.

Chunky Hand-knitted Blanket
Materials Needed
To begin this comforting journey, you’ll need:
- Yarn: 3-4 skeins of Chenille Chunky Yarn, 8 oz each. The project example used Mainstays brand from Walmart, chosen for its softness and thickness. However, feel free to explore other colors or brands like those available on Amazon to suit your preferences.
- Measuring Tape: Essential for ensuring your blanket dimensions align with your vision.
- Scissors: For cutting yarn when transitioning between skeins or finishing up your project.
- Needle & Thread (Optional): Handy for reinforcing the areas where new yarn pieces are tied, adding durability to your creation.
The Beginning – Slip Knot
Start by creating a sturdy base for your knitting:
- Tie a secure knot at the yarn’s end, ensuring it’s tight but not at the risk of breaking the yarn.
- Form a slip knot by making a loose loop with the yarn, then pulling the working yarn through this loop with your hand.
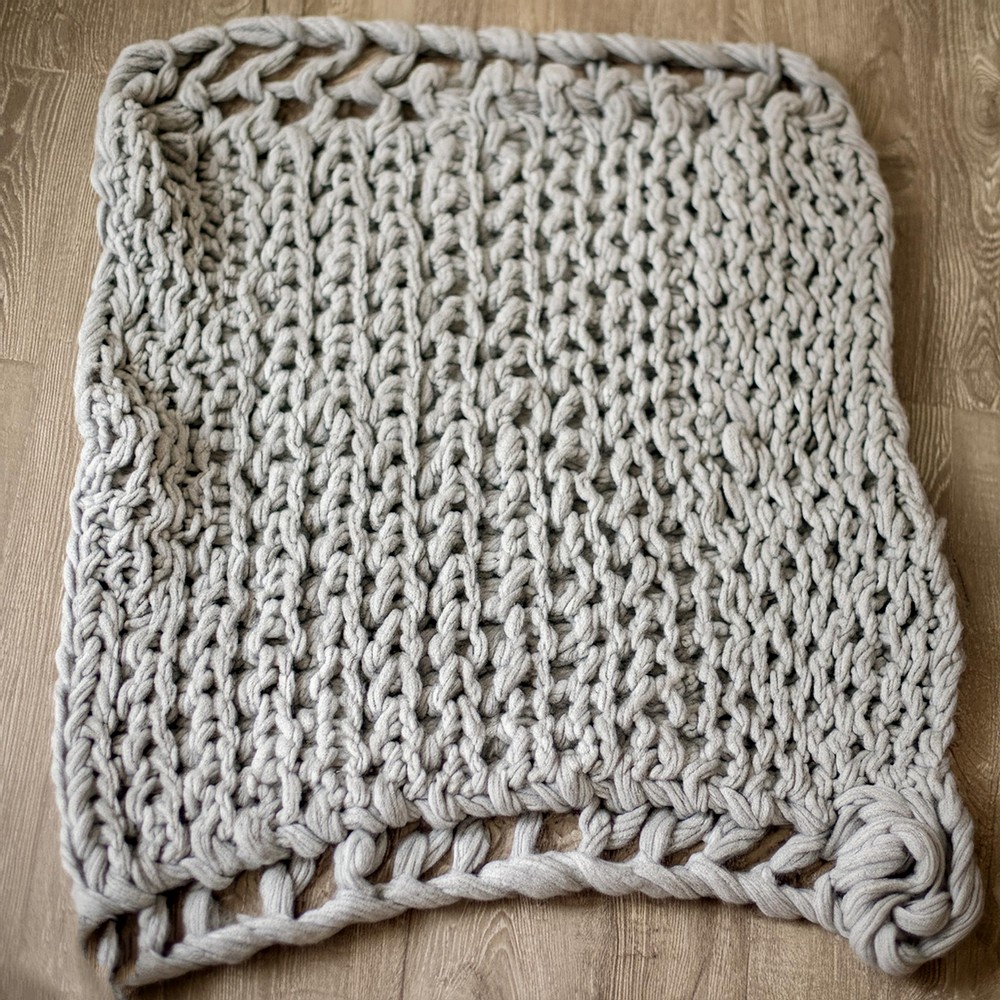
Laying the Foundation – First Row
Your blanket begins to take shape here:
- Create 16 stitches using the slip knot, careful not to tighten them excessively.
- Flip the chain vertically so the backside faces up, preparing for the next step.
Establishing the Pattern – The First Full Row
Creating a braided look at the bottom:
- With the chain flipped, find the loop on the far right and angle it upwards.
- Identify a small bump in the middle of this loop, pull the working yarn through to create a new loop. Repeat across the row for a braided effect.
Building the Blanket – Subsequent Rows
Expanding your creation:
- Remember to skip the first stitch in each new row to maintain a uniform braided edge.
- Continue creating loops by pulling working yarn through each existing loop. Decide on your desired tension; tighter loops for a denser blanket, looser for a larger one.
Joining New Yarn
When one skein ends, seamlessly transition to the next:
- Tie the end of the new yarn to the end of the current yarn in a basic, tight knot, then trim the excess.
- For added security, stitch through the knot with a needle and thread that matches your yarn color.
Finishing Touches
Concluding your knitting journey:
- Work the final loops towards the end of the blanket, then secure the last loop with a small, tight knot.
- Trim the final piece of yarn, tie a knot at its end, and weave it through the back of the blanket to hide it.
Final Thoughts From The Creator
And there you have it, your very own chunky, hand-knitted blanket, ready to provide warmth and comfort. This project isn’t just about creating a blanket; it’s about weaving a story, your story, into something tangible and cozy.
Whether for yourself or as a heartfelt gift, the blanket stands as a reflection of care, effort, and creativity. As you nestle under its weight, remember the journey of its making and smile, for you’ve just woven warmth not only into the fabric but into the heart.
Leave a Reply