
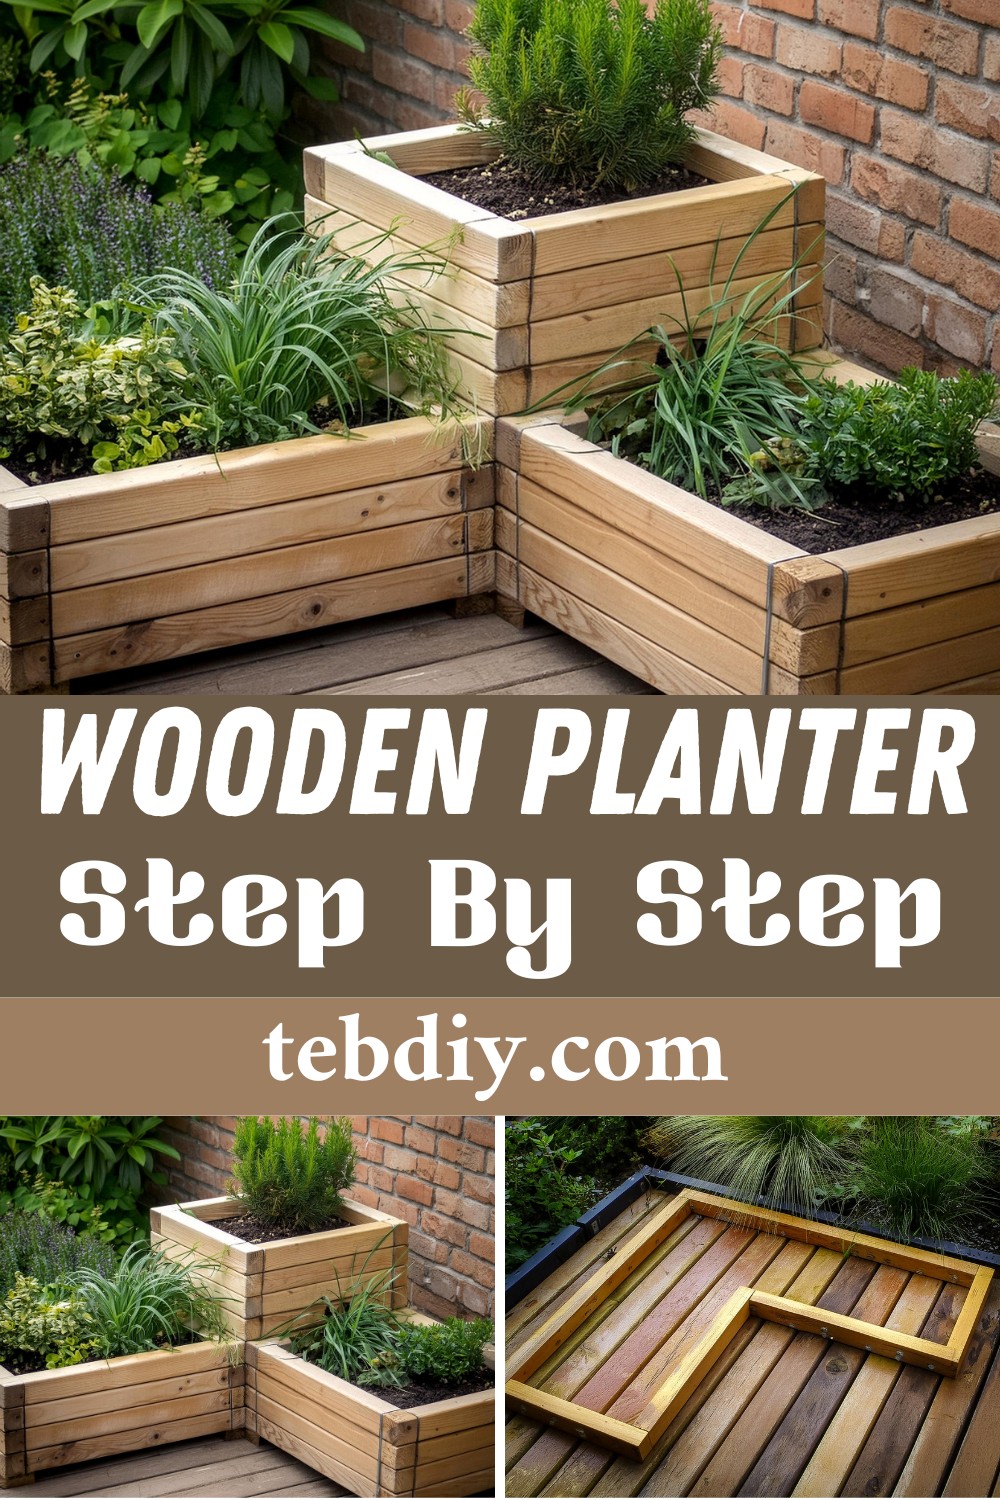
Follow the step-by-step guide to build a durable, stylish DIY wooden planter perfect for outdoor space. Its versatility allows it to fit any garden corner, and you can stain it in any color to match outdoor decor. Easy to make in a day, it also features drainage holes to prevent waterlogged plants, while a lining can be added for moisture retention in sunny spots. Perfect for customizing gardens, it combines practicality with aesthetic appeal, making gardening accessible and enjoyable.
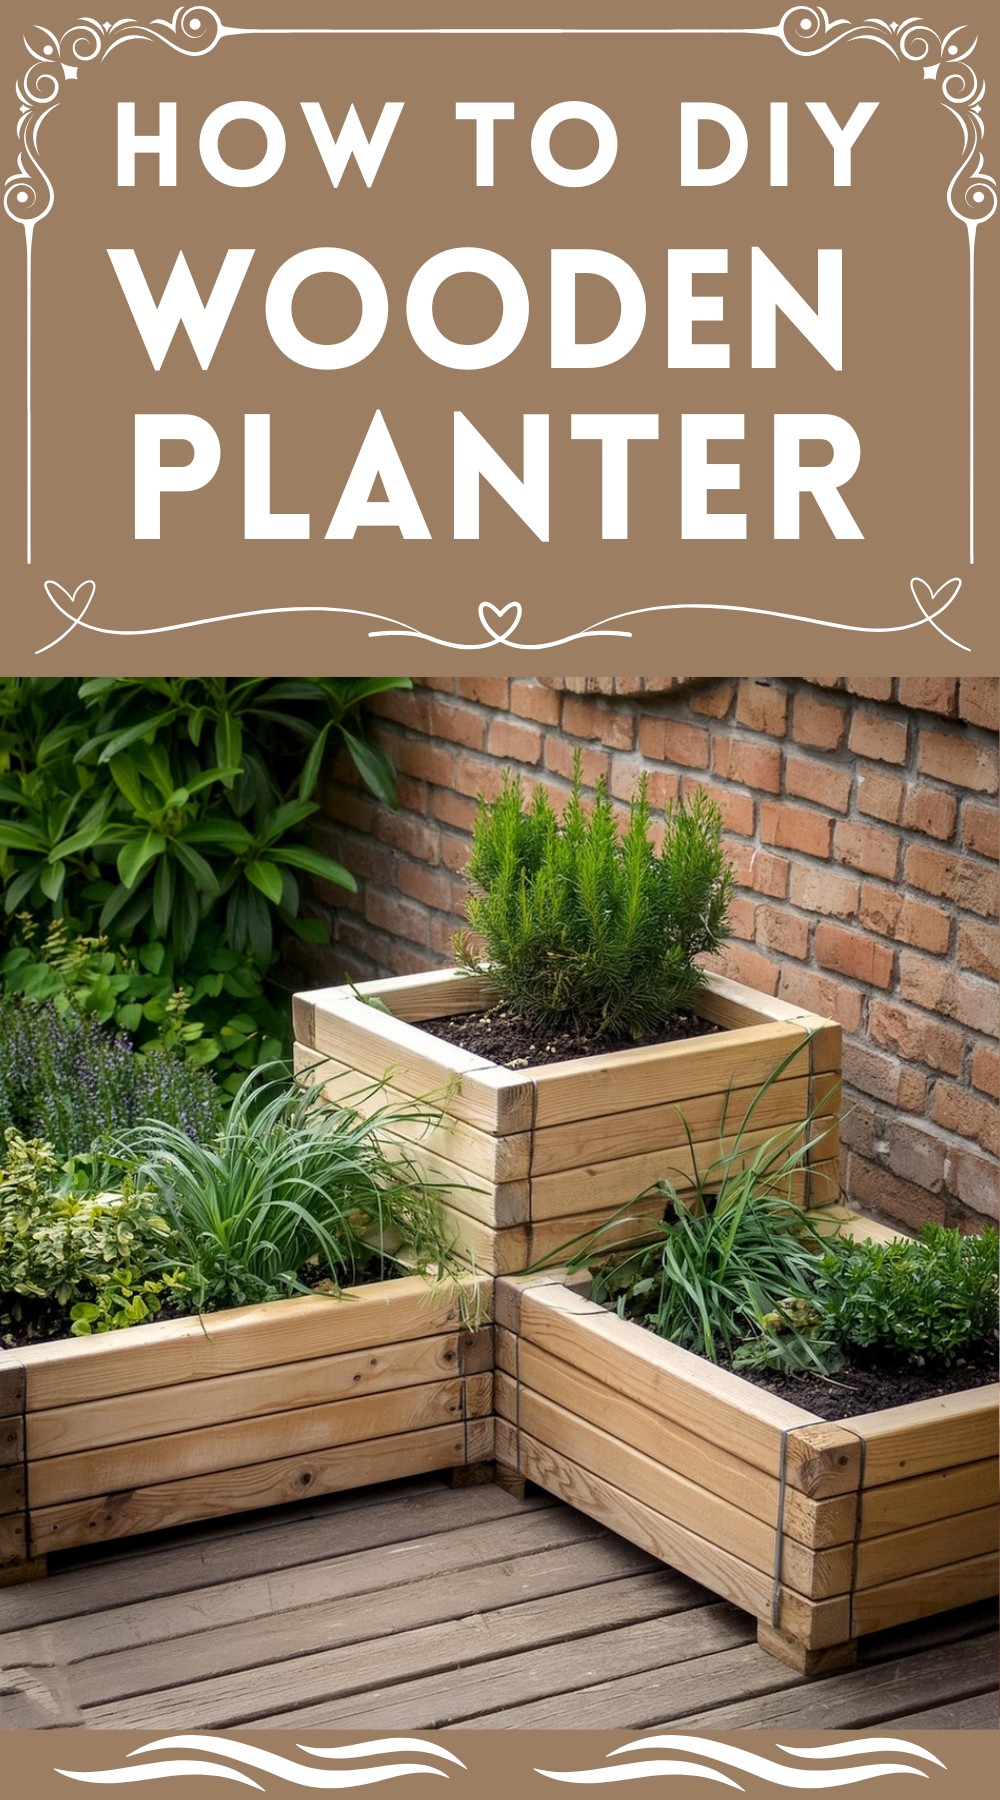
DIY Wooden Planter
Materials Needed:
- Pressure-treated timber (5cm x 5cm)
- Gravel board (15cm x 1cm, 3.45m length)
- Zinc-plated screws (75 x 7.5cm and 20 x 5cm)
Tools Required:
- Saw
- Drill with a 3mm wood drill bit
- Screwdriver
- Try square
- Pencil
- Tape measure
Building Your Planter: Step-by-Step Guide
Preparing the Timber
Begin by measuring and marking all timber pieces to the required lengths, ensuring cuts are as square as possible for a clean finish. Use a 3mm drill bit to pre-drill holes about 2.5cm from the end of each piece to prevent splitting when inserting screws.
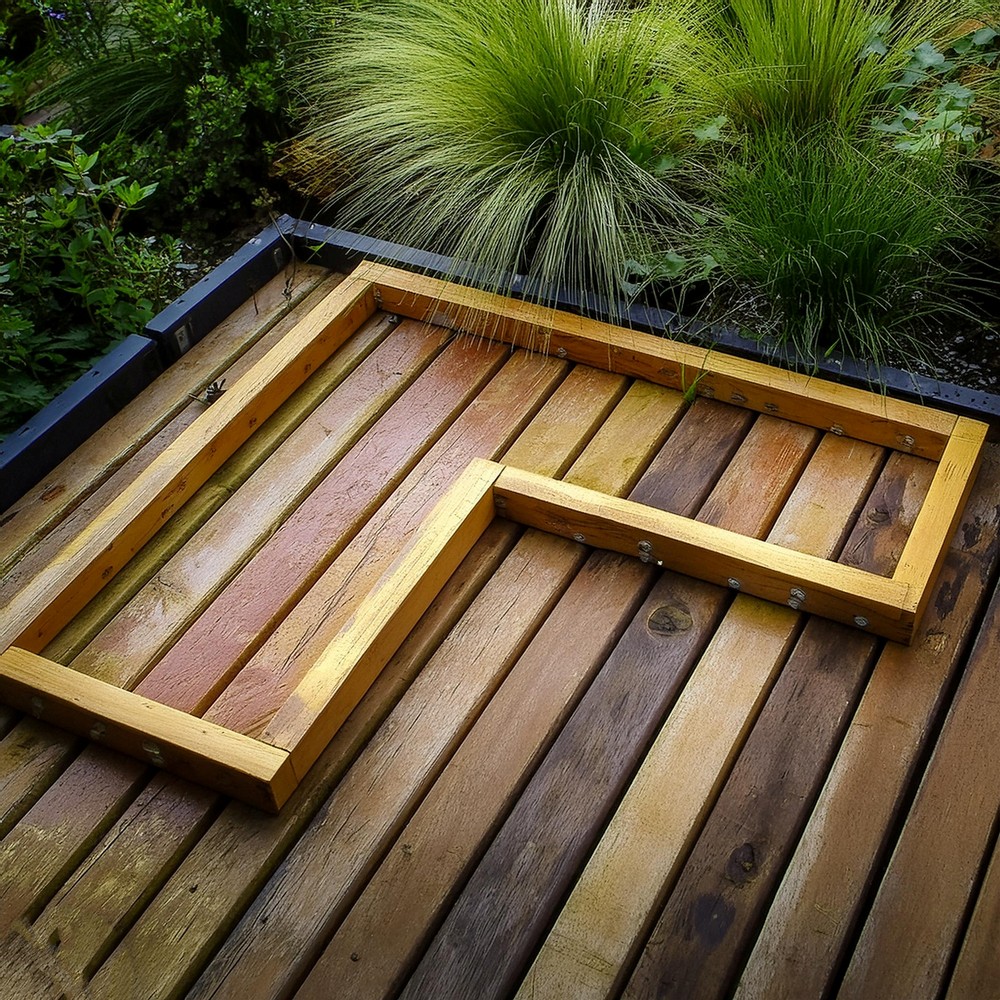
Assembling the Frame
Start by laying out two lengths each of 100cm, 60cm, and 40cm timbers to form your planter’s frame. Butt the ends of each timber against one another, with pre-drilled holes facing outwards. Use a try square to guarantee right angles, then secure the joints with 7.5cm screws.
Attaching the Bottom Boards
Cut the treated gravel board to fit the bottom of your frame. It’s fine if there are gaps up to 5cm wide between the boards since the interior will be lined. After pre-drilling the bottom boards and double-checking the frame’s squareness, secure them to the frame with 5cm screws.
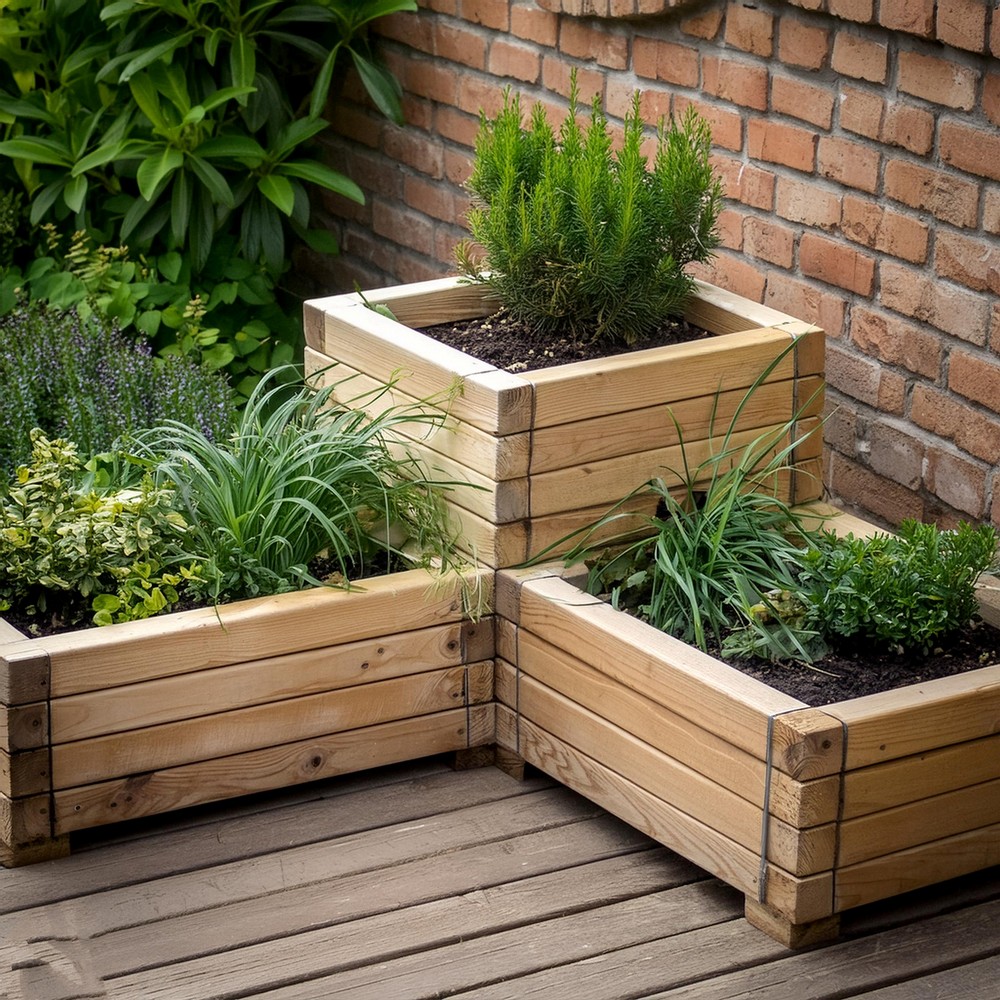
Layering the Sides
Flip the frame so the bottom touches the ground, and lay out the next row of timber, alternating the corner joints. Ensure the ends are flush before fixing everything together with 7.5cm screws.
Building Up
Continue adding alternating layers up to four rows high. Instead of a 60cm piece for the final row, affix a 100cm length across one gap to support a raised square section.
Fitting the Cross-Bar
Measure and cut the cross-bar (45cm length) directly on the frame for a perfect fit. Secure it at both ends, ensuring stability.
Forming the Rectangle
Place 45cm of timber across the opposite gap to form a rectangle, checking for right angles, then screw tightly into place.
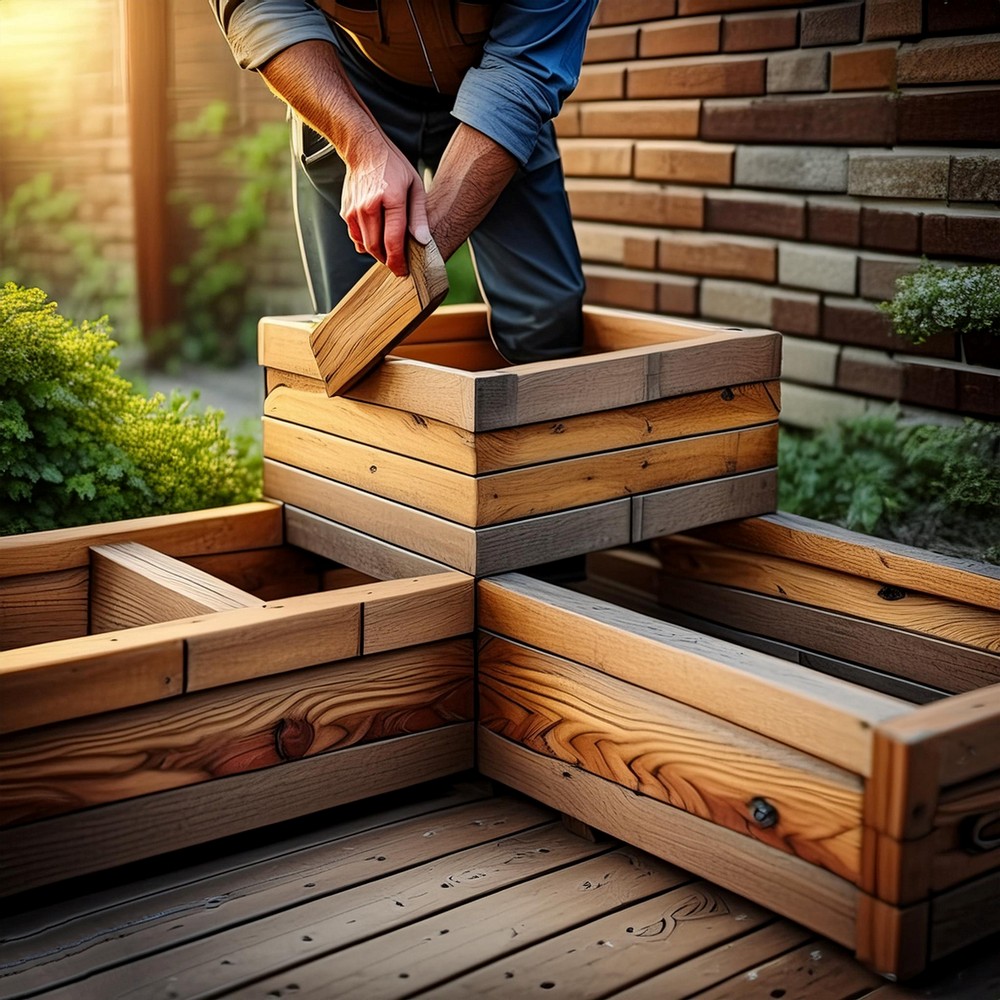
Completing the Planter
To complete this layer, add two 40cm lengths perpendicular to the 45cm piece, cutting timber to fit any remaining gap. Continue this pattern until your planter reaches the desired depth.
Enjoy the fruits of your weekend project by adding your choice of plants to this bespoke wooden planter, knowing you built it from the ground up.
Leave a Reply