
Create your own DIY Polymer Clay Mortelle Adèle with this detailed tutorial, perfect for fans of the iconic character and crafting enthusiasts alike.
Fans of the quirky and mischievous comic series Mortelle Adèle will love bringing their favorite character to life through the DIY polymer clay Mortelle Adèle project. This fun and creative craft captures Adèle’s unmistakable personality, from her fiery red hair to her playful smirk. The finished figure can include details that make her unique, such as her bold outfit, determined expression, and the little touches inspired by her mischievous adventures. You can even add accessories like a notebook or items tied to specific scenes from the comics to make your creation truly one of a kind.
CREDIT BY: Cedric PF
Adorable DIY Polymer Clay Mortelle Adèle in Simple Steps

This project is perfect for fans of Mortelle Adèle or anyone who enjoys crafting their favorite characters. Once completed, your Adèle sculpture can be displayed on a shelf, gifted to a fellow fan, or used as part of themed decorations. It also offers a great opportunity to sharpen your polymer clay skills, whether it’s sculpting detailed features or blending colors to match Adèle’s bold style.
Crafting her lets you add a personal, handmade touch to your love of the series. Dive into this fun and imaginative project—Mortelle Adèle is sure to bring her signature dose of boldness and charm into your space.

Mortelle Adèle (Deadly Adele) Polymer Clay Tutorial
Craft your own Mortelle Adèle figurine with expressive hair, detailed facial features, and her iconic outfit. This guide covers everything—from sculpting the head to finishing touches.
Materials & Tools
Materials
- Polystyrene ball (as head core)
- Fimo polymer clay:
- Sahara (beige/tan)
- Clair (light/flesh tone)
- White
- Black
- Pumpkin orange (mix of red and yellow; for hair)
- Plum/purple, raspberry, blue (for dress and shoes)
- Emerald green (for vest/tie)
- Chocolate brown (to darken purple shade)
- Aluminum wire (for armature/limbs)
- Liquid polymer clay (for attaching pieces)
- Varnish (for final shine)
Tools
- Acrylic roller or similar tool for flattening
- Silicone sculpting brushes
- Dotting tool, spoon tool (for texture and shaping)
- Sharp blade or craft knife
- Scalpel (for texture, cutting)
- Pliers (for bending wire)
- Wipes (for smoothing)
- Oven (for baking clay)
Step-by-Step Instructions
1. Head & Face
a. Sculpt the Face Base
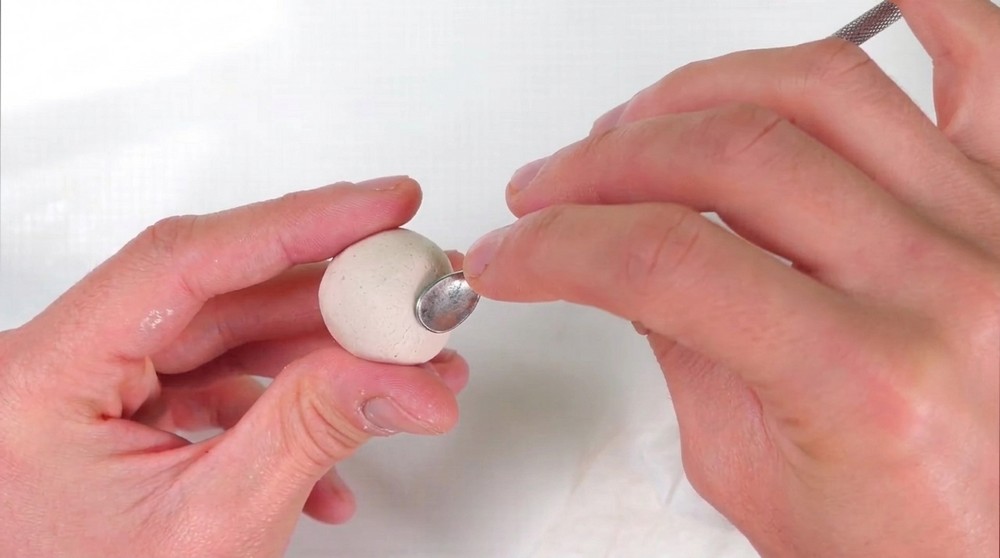
- Mix equal parts Sahara and Clair clay for Adèle’s skin. Knead until fully blended.
- Cover a polystyrene ball with this mixture, smoothing it with your fingers.
b. Shape Features
- Press gently with thumbs to form eye sockets and a protruding nose.
- Shape the cheeks and jaw line.
- Use a sharp tool to incise a line for the mouth. Smooth/soften as needed.
c. Sculpt the Smile & Teeth
- Use a spoon tool to lightly dig the smile curve.
- Roll a thin sausage of white clay. Flatten and place inside the mouth to create visible teeth/smile.
- Use a silicone brush to smooth the teeth into the mouth and fill the opening.
- Add texture between teeth with a specialized accessory or knife.
d. Eyes & Details
- Form two tiny balls of white clay, flatten and place as eyes—well spaced and symmetrical.
- Add small flattened black balls for the pupils (place as desired for expression).
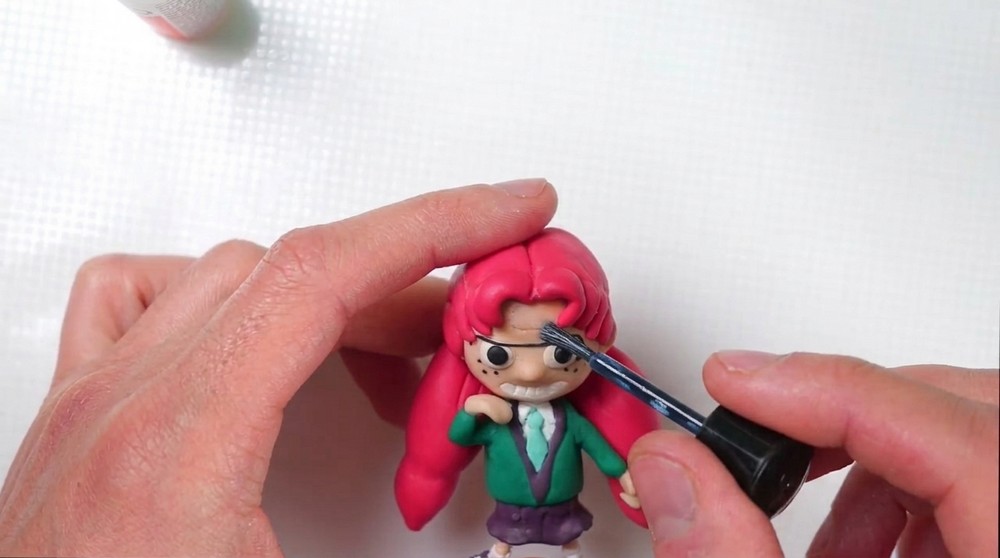
- Roll a thin sausage of black clay, position above each eye for eyebrows/arches; smooth with a silicone brush.
- Use a spoon tool to lightly draw a forehead wrinkle (optional, for comic effect).
- Place three tiny balls of black clay for beauty marks (“beauty seeds”) as seen in the book illustrations.
e. Add Ears
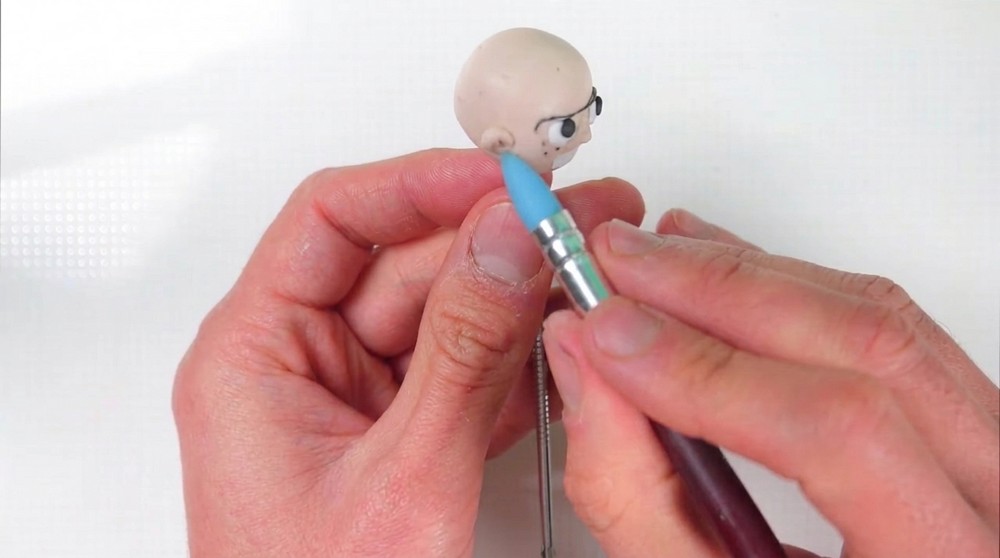
- Form two small balls of skin-tone clay. Shape and flatten; attach to sides of face.
- Sculpt with a dotting tool for detail.
f. Bake Head
- Bake at 110°C (230°F) for 10 minutes.
- Tip: Cover the polystyrene ball with a good layer of clay to prevent cracking during baking!
- Let cool.
2. Hair
a. Create Pumpkin Orange Color
- Mix 1 part red clay to 2 parts yellow for a vibrant pumpkin orange.
b. Base & Fringe
- Roll out a large sheet of orange clay to cover the head as hair base.
- Add a little liquid clay for adherence.
- Smooth with wipes or silicone tools.

c. Front Fringes/Bangs
- Roll six small balls of orange mixture.
- Shape each into a cone, flatten slightly.
- Position them one by one as fringe bangs at the front, referencing book images.
d. Volume/Texture
- Roll a bigger piece, cut in two for more volume at the sides/top.
- Smooth and sculpt with silicone brush.
- Draw texture lines with a sculpting tool or knife, then soften with a wipe if needed.
3. Body & Limbs
a. Sculpt Body
- Use white clay to shape Adèle’s body—proportional to the head.
- Cut a triangle at bottom for positioning legs.
b. Armature (Wire Frame)
- Cut two equal pieces of aluminum wire for arms and legs.
- Insert the first wire through the body for arms; bend for legs, feet, and hands.
- Sculpt white clay over wire for body—all should adhere well.

c. Bake Body
- Bake at 110°C (230°F) for 10 minutes.
- Let cool.
d. Legs, Socks, Shoes
- Using your skin-tone mixture, build up legs, but not all the way to feet.
- Add white clay for socks at base of legs.
- Roll thin white sausage to make sock cuffs; smooth with silicone brush.
e. Shoes
- For purple/pink shoes: Mix plum, raspberry, bit of blue and chocolate brown clay for desired shade.
- Sculpt shoe shapes, plant feet into shoes, add thin sausage for tongue/hook.
4. Dress & Outfit
a. Dress
- Roll out a flat sheet of your purple mix; cut into a straight-edged band.
- Wrap around body as dress, trim excess.
- Smooth joins with silicone brush.
b. Texture Dress
- Use sharp tool for texture lines at dress top.
- Make wavy shapes with silicone brush for folds and movement.

c. Vest
- Flatten emerald green clay, cut to size for vest.
- Cut bottom and position on body, fold edges down for vest lapels.
- Cut off excess, smooth with brush.
d. Re-position Arms
- If removed for vest, replace aluminum wire for arms. Cut thin purple strip, attach as inner edge band on vest.
e. Tie & Collar
- Make tie with emerald clay, form small ball and band for knot.
- For collar: Flatten small white ball, cut into downward V-shape, attach to creation, smooth edges.
5. Arms & Hands
a. Cover Arms
- Shape and cover aluminum wire arms with emerald green clay for sleeves.
b. Hands & Thumbs
- Use skin-tone mix to form hands; sculpt basic shape.
- Add small clay sausage for thumbs (easier for simplified cartoon hands).
- Position hands at ends of arms with liquid clay.
6. Hair Duvets (Pigtails) & Assembly
a. Duvets/Pigtails
- Make two large balls of orange hair mix.
- Shape into thick, textured pigtails with attached ends.
- Sculpt texture and form using images as reference.
b. Attach Hair Duvets
- Weld duvets to head using silicone brush and liquid clay for secure hold.
- Add texture with sculpting tools.
c. Join Head & Body
- Apply liquid polymer clay to neck, attach head to body.
- Bake at **110°C (230°F) for 15 minutes.
7. Finish & Varnish
- Cool fully.
- Apply varnish to seal and add shine.
- Let dry; your Mortelle Adèle figure is ready!

Tips & Explanations
- Refer to illustrations for correct facial expression and hair shape.
- Liquid clay ensures strong joins for limbs/hair/head.
- Texture and clothing details make the character pop!
- Beauty marks and eyebrows should imitate book style for accuracy.
- Use wipes and silicone brushes for perfect smoothing and finishing.
Finished!
Share your creation, display proudly, and enjoy your own Mortelle Adèle from clay!
Perfect for fans of the books or as a unique handmade gift.
Leave a Reply