
Make your own outdoor cooking space equipped with beautiful concrete countertops to prepare meals on. With this DIY project, you’ll bring this dream to life. This initiative involves creating an outdoor kitchen that is not only functional but also can withstand varying weather conditions. The best part is that this project can be a fun and rewarding way to enhance your outdoor living area. By the end of this DIY project, you will have a lovely space where you can grill your favorite dishes, entertain friends, and make lasting memories.

DIY Outdoor Kitchen With Concrete Countertop
Materials List
- Steel studs
- Hardipanel
- Synthetic stucco
- Quikrete countertop mix
- Liquid color tint (optional)
- Tempered glass pieces for inlay (optional)
- Cheng products for concrete finishing
- Luan for the countertop template
- Melamine for countertop forming
- Reinforcing rod mesh
Tools Used
- Electric mixer
- Angle grinder
- Drill
- Screwdriver
- Tape measure
- Caulking gun
- Mixing tools
Step-by-Step Guide
Framing:
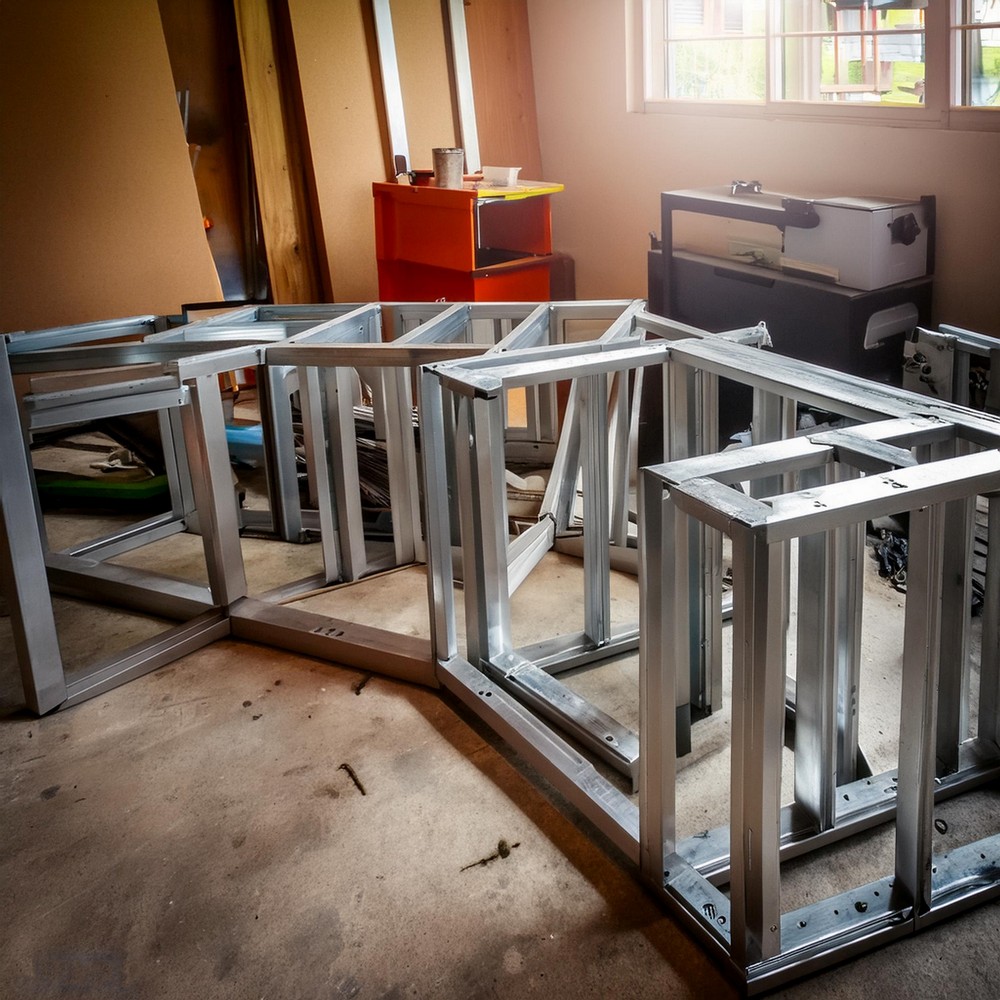
The blueprint begins with framing using steel studs. Accuracy crucial here as the dimensions must accommodate the grill and storage units perfectly. To protect against rust and corrosion, all steel cut edges and screw penetrations receive a coat of galvanized primer.
HardiPanel Substrate:
Hardipanel acts as the substrate, offering a robust foundation for the final surface. It’s cut to size and attached with screws, with joints reinforced by mesh tape and thin-set for added rigidity and critter resistance.
Synthetic Stucco Application:
Next, synthetic stucco is applied for a finished exterior surface. This can be troweled or sprayed on, chosen for its elastic properties, which support thermal expansion without cracking.
Countertop Template:
Using strips of luan, a precise countertop template was created without direct measurement. This simplified the design process for unusual countertop shapes and ensured the correct overhang and placements for cutouts.
Countertop Forming:
The countertops are formed from melamine sheets, designed for an upside-down pour for a smooth finish. Special attention is paid to creating robust molds and pre-fitting reinforcing rods, ensuring screw holes are sealed to prevent concrete from filling them.
Glass Inlay:
For a unique flair, tempered glass pieces are added into the countertop form, ready to be revealed in the grinding phase for a striking visual touch.
Concrete Pour, Grinding, and Polishing:
The heart of the project lies in the careful mixing and pouring of the concrete, followed by a week of curing. Afterward, the meticulous process of grinding and polishing brings out the shine of the countertops, with Cheng products adding the finishing touches.

Installation:
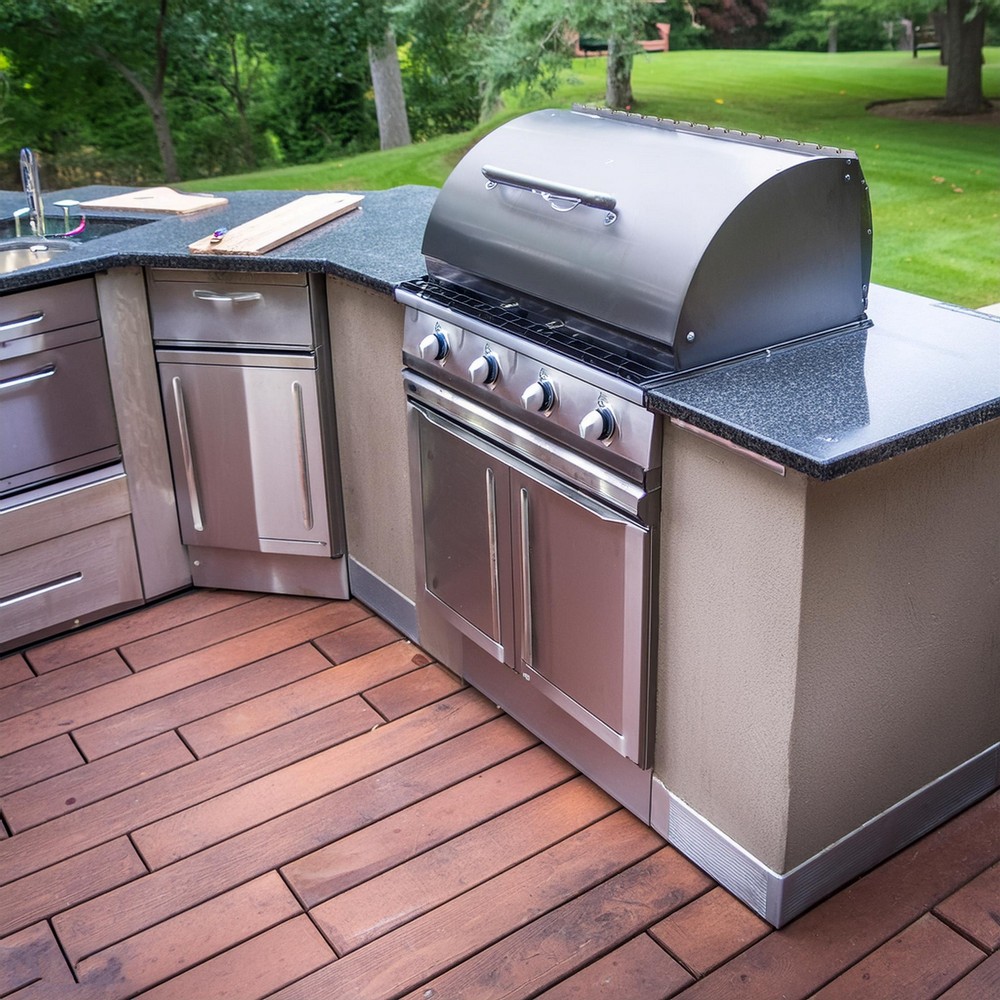
Despite their substantial weight, the countertops maneuvered onto the pre-prepared bases, adhered with silicone, and fitted with the barbecue grill and accessories. This final stage turns the constructed elements into a cohesive, functional outdoor kitchen.
This project not only provides a robust and elegant outdoor kitchen but also demonstrates the harmony of durability and design.

Leave a Reply