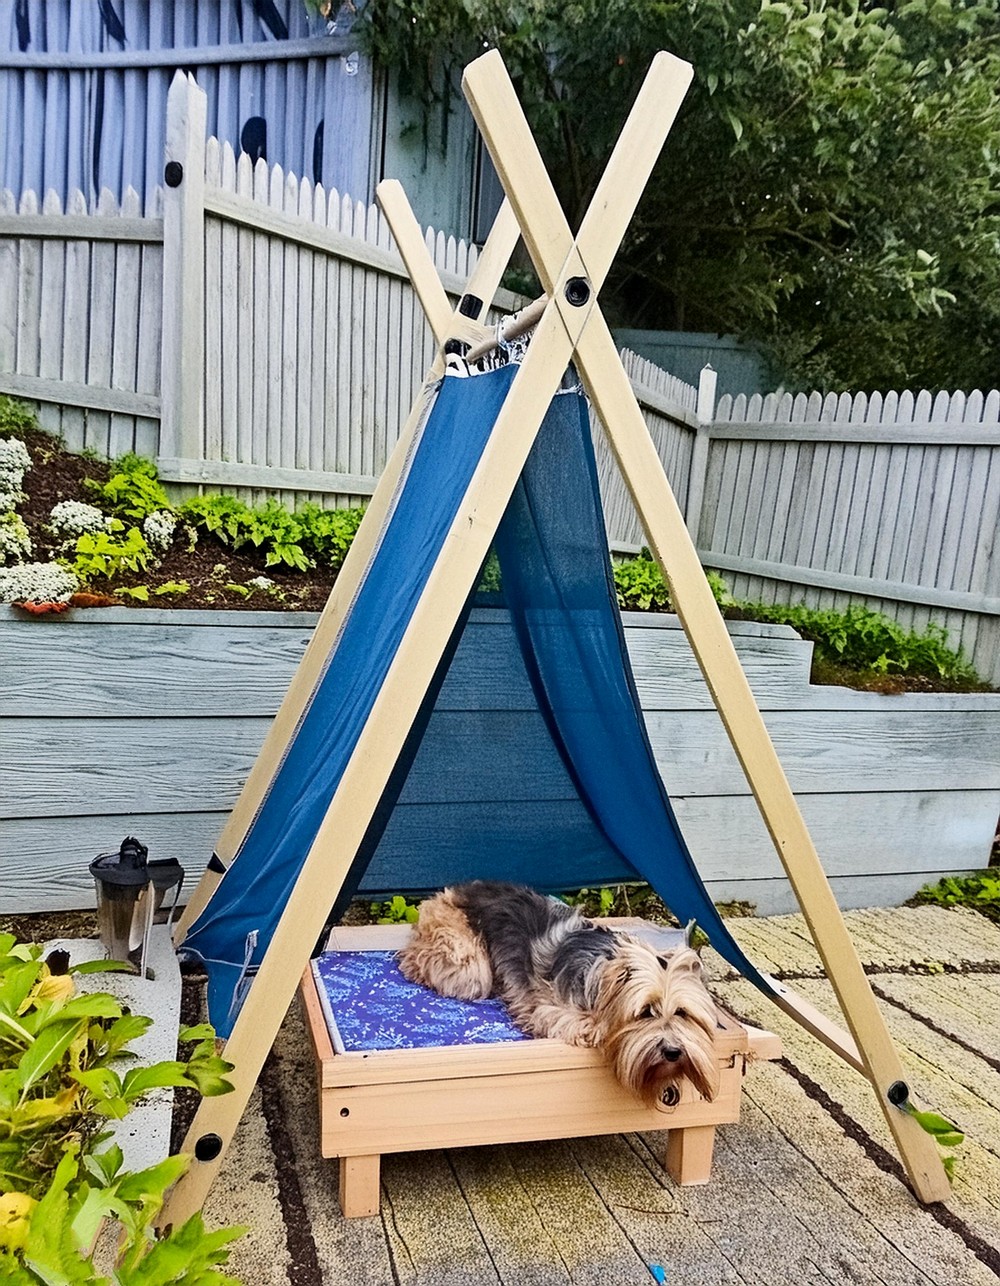
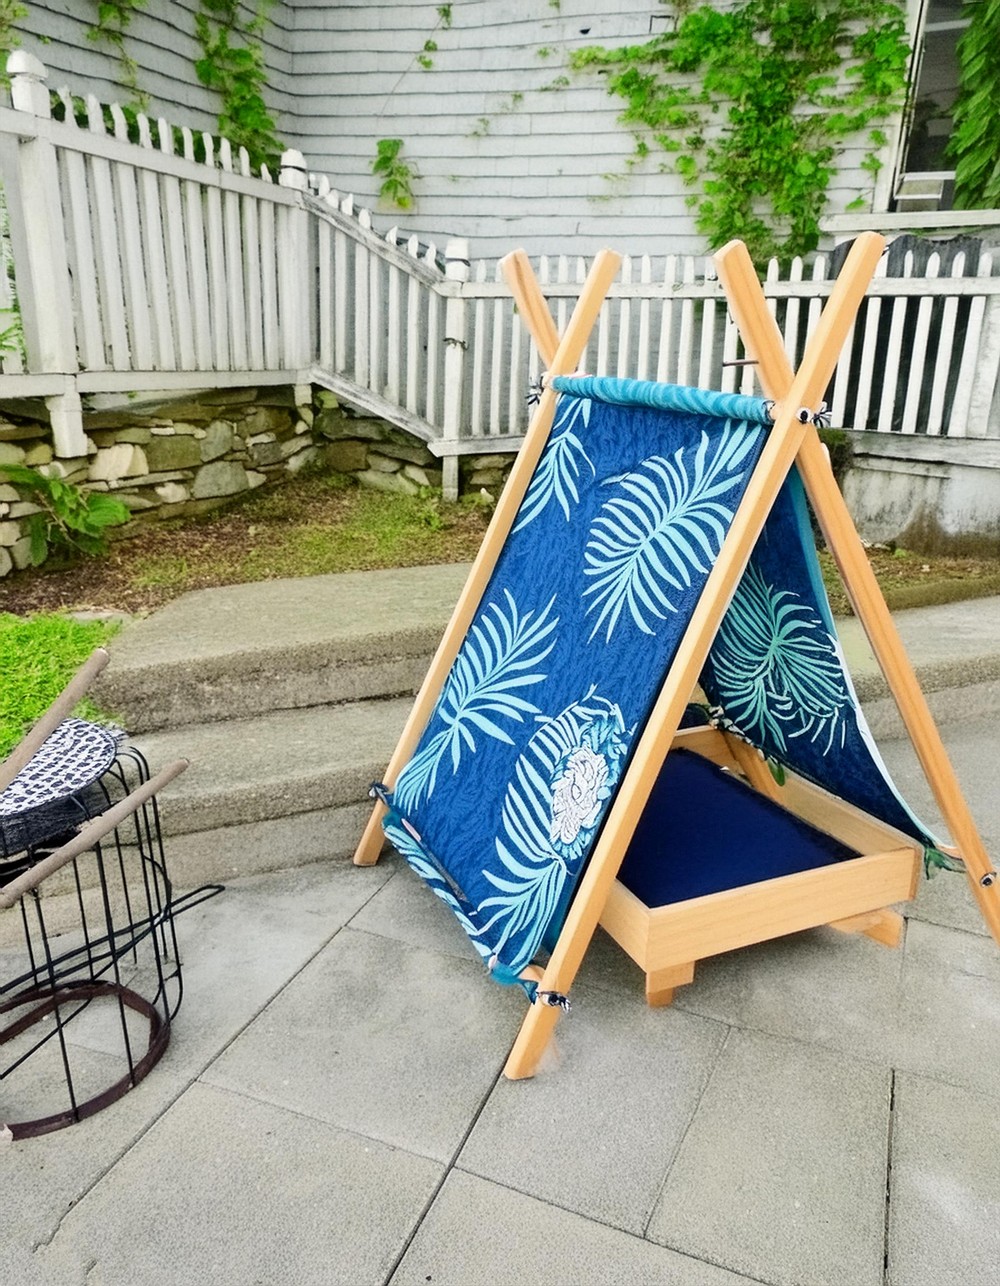
Let’s dive into an exciting and rewarding project perfect for pet lovers and DIY enthusiasts alike – creating an Outdoor Dog Bed and Portable Tent. Imagine crafting a cozy, shaded sanctuary for your furry friend, that not only complements your outdoor aesthetics but also caters to your pet’s comfort during those balmy days of summer. This project is not just about building something for your pet; it’s a labor of love, combining creativity, woodworking, and even sewing skills.
DIY Outdoor Dog Bed And Portable Tent Project

Materials List:
Wood Components:
- 1×6 Poplar (for the bed frame sides)
- 1×2 Poplar (for the bed’s rails, slats, and tent structure)
- 2×2 Poplar (for the bed’s legs)
- 5/8″ Dowels (for the tent poles)
- 1″ Dowel scraps (for tent pole caps)
Fabric Components:
- Fabric (utilized an old shower curtain)
- Ribbon (or an old PJ drawstring)
Others:
- Dog mattress
- Stain (Flagstone)
- Spray Paint (Midnight)
- Spar Urethane
Tools Required:
- Miter saw
- Random orbital sander
- Pneumatic nail gun
- Air compressor
- Drill
- Sandpaper
- Forstner bit
- Wide painter’s tape
- Wood glue, Super glue
- Measuring tape, Pencil
- Wood filler
- Paint supplies (brushes, rags, etc.)
- Yardstick, Cutting mat
- Rotary cutter
- Straight pins
- Sewing machine
- Thread
- Fabric tape
- Fray Check
Step-by-Step Guide:
Preparing the Wood for the Bed
- Begin by sizing the poplar wood for the bed frame according to the dimensions of the dog mattress you have or plan to use.
- Shape the outside frame of the bed with angled cuts for a neat finish.
- For the internal support, cut the 1×2 poplar into rails and enough slats that your mattress will rest on evenly.
- Short 2×2 poplar pieces will serve as the legs of the bed.
- Sand all components until smooth to the touch to ensure there are no sharp edges or splinters.

Assembling the Bed Frame
- Construct the frame by first taping the corners with painter’s tape for precision.
- Apply wood glue at the joints and secure them with a nail gun for a robust setup.
- Install the interior rails, utilizing temporary slats as placeholders to ensure correct positioning.
- Affix the legs at each corner, then secure the slats atop the rails, providing a stable base for the mattress.

Creating the Tent Structure
- With the bed framework set aside, focus shifts to the tent. Cut the 1×2 poplar to create the vertical supports.
- Precisely drill through the marked spots for the dowel joints.
- Sand down any rough areas to prepare for paint and staining.
Finishing Touches – Paint and Stain
- Stain the bed and tent components, then accent with spray-painted dowel caps for a pop of color.
- Seal the pieces with Spar Urethane to withstand the outdoor elements.
Erecting the Tent
- Assemble the tent to be both sturdy and collapsible; a clever use of glue secures the structure.
- Cap off the dowels to finalize the skeleton of the tent.
Fashioning the Tent Cover
- Reuse a shower curtain or comparable fabric, ensuring it drapes gracefully over the tent structure.
- Hem the edges for durability, then attach ribbon ties for easy installation and removal.

Completion and Enjoyment
Place the bed and tent outdoors, ready for your pup to enjoy. It’s not only a comfortable retreat but a testament to your craftsmanship and affection.
Following these detailed steps, you’re not just creating a dog bed and tent; you’re providing a sanctuary for your pet, crafted with love and care. Enjoy the process, and bask in the joy it brings to your furry companion!


Leave a Reply