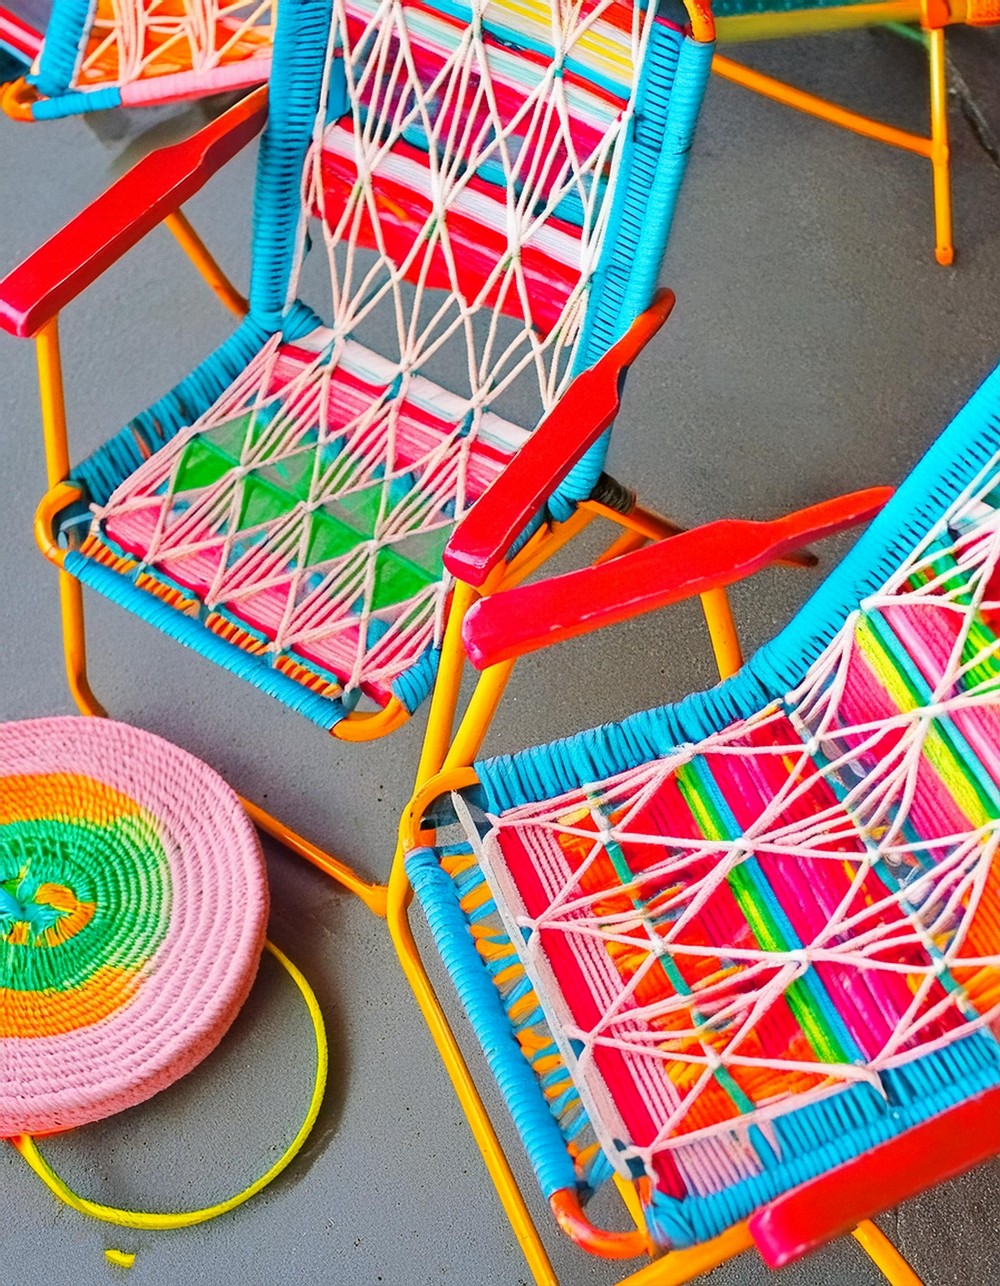
Are you looking for a fun and creative way to breathe new life into your old beach chair? In a blend of traditional craft and contemporary chic, transforming a simple beach chair with macramé can be your next engaging project. This DIY makeover intertwines the simplicity of macramé with the functionality of a beach chair, creating a piece that’s not only practical but aesthetically pleasing too. Ideal for both beginners and seasoned crafters, this makeover is a fabulous way to unleash your creativity and work on a project that combines both art and utility. Let’s get into the materials and steps required to make this vision a reality.

DIY Macrame Beach Chair Makeover
Materials List
To get started on this captivating project, you’ll need the following materials:
- A folding beach chair (preferably one that requires a makeover)
- Approximately 150 meters of 5mm macramé rope (adjust the quantity based on the chair size and design complexity)
- Scissors for cutting the rope
- Measuring tape to ensure precision in your rope lengths
- A lighter for sealing the ends of the rope, preventing fraying
Tools Required
- Your hands, primarily, as they’ll be doing most of the work in tying knots!
- Optionally, a small crochet hook could be useful for pulling through loops or tightening knots, but it’s not strictly necessary.

Step-by-Step Guide
Step 1: Preparing the Chair
Begin by thoroughly cleaning your beach chair, ensuring it’s free from any dirt or debris. If the chair has any existing fabric, carefully remove it while keeping the frame intact. This step sets the stage for your macramé transformation.
Step 2: Measuring and Cutting the Rope
Using your measuring tape, determine the length of rope you’ll need for each section of the chair. It’s wise to add a little extra to each measurement to account for the length taken up by knots. Cut the rope accordingly with scissors and use a lighter to slightly melt the ends, preventing fraying.
Step 3: The Basic Knots
Familiarize yourself with a couple of basic macramé knots. For this project, knots such as the Lark’s Head for attaching the rope to the chair frame, and square knots and half hitch knots for creating patterns and securing the rope, are essential.
Step 4: Attaching the Rope to the Chair Frame
Start by securing the rope to the top rail of the chair frame using Lark’s Head knots. Ensure it’s evenly spaced and firmly attached. This will serve as the foundation for your macramé pattern.

Step 5: Weaving the Seat and Backrest
Begin weaving the seat by creating rows of square knots, followed by designing the backrest similarly or with a pattern of your choice. The creativity in this step comes from the patterns you choose to incorporate, ranging from simple, repetitive knots to more complex designs.
Step 6: Finishing Touches
Once you reach the end of the chair frame, secure the final row of knots tightly and cut off any excess rope. Use a lighter to melt the ends slightly, ensuring they don’t unravel over time.
Step 7: Enjoying Your New Chair
Your macramé beach chair is now ready to make its debut! Whether lounging by the sea or adding a unique touch to your outdoor decor, this chair is not only a testament to your crafting skills but also a standout piece that’s sure to spark conversations.
Conclusion
With these steps, you’ve transformed a simple beach chair into a work of art. This project not only revitalizes a piece of furniture but also imbues it with personal style and flair. The beauty of DIY projects like this lies in the process—the joy of creating something by hand and the satisfaction of the final reveal. Enjoy your macramé masterpiece, the perfect ally for your next beach adventure or backyard retreat.


Leave a Reply