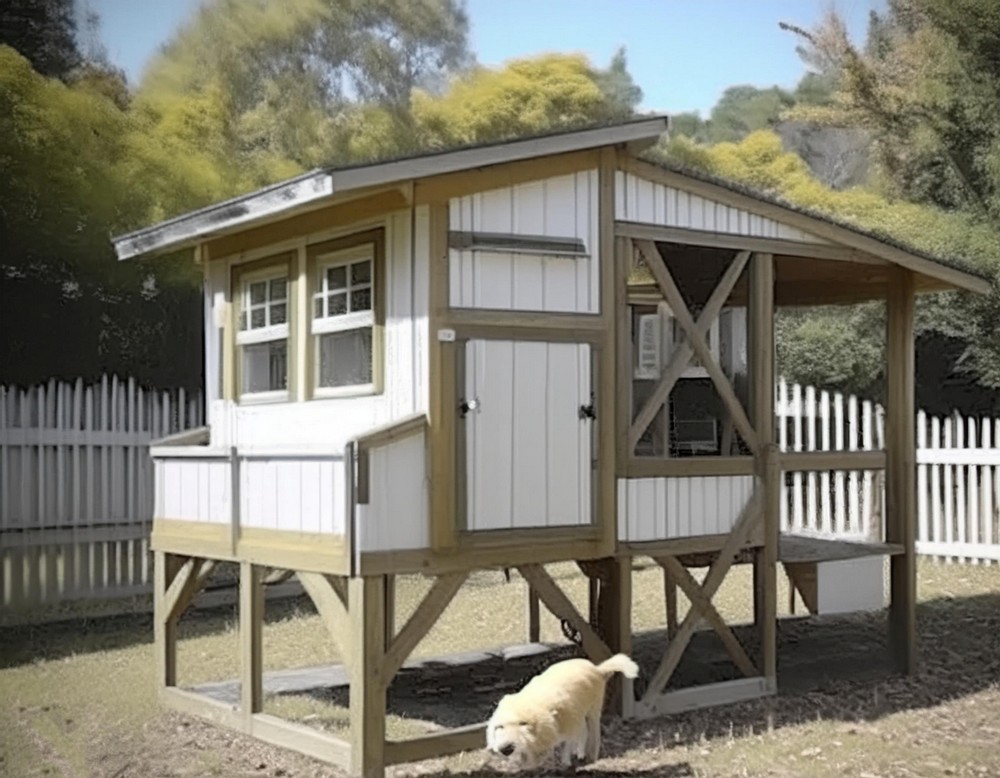
Raising chickens can transform your backyard into a vibrant source of joy, not to mention the freshest eggs you can get! But every flock needs a safe, comfortable home, and what better way to welcome your new feathered friends than building them a deluxe backyard DIY chicken coop? Whether you’re an experienced carpenter or picking up a hammer for the first time, creating a secure and stylish coop like this one will make your foray into urban farming incredibly rewarding. Let’s get cracking and build a cozy retreat that will keep your chickens clucking happily!
DIY Deluxe Backyard Chicken Coop Project For 6-8 Chickens

Materials List
- Automatic Chicken Door
- Chicken Feeder
- Chicken Waterer
- Level
- Speed Square
- Framing Nailer
- Impact Driver
- 18 Gauge Brad Nailer
- Multi Tool
- 48 pieces of 12 ft 2x4s (Three should be pressure treated)
- 2 pieces of 12 Ft 4x4s (Pressure Treated)
- 5 Sheets of T1-11
- 1 Sheet of OSB
- 1 Sheet of 1/2″ Ply
- 5 pieces of 16′ 1×4 Pine (for trim)
- 3 Rolls of 4’x25′ Hardware Cloth
- 1 Roll of 3’x25′ Hardware Cloth
- 5 Sheets of Corrugated Metal Roofing
- Screws/Nails
- Fender Washers (for attaching hardware cloth)
- 2 18×23 Shed/Playhouse Windows
- 1 12×18 Shed/Playhouse Window
Required Tools
- Miter Saw
- Jig Saw
- Track Saw (optional)
- Screwdriver
- Hammer
Steps to Building Your Deluxe Backyard Chicken Coop
Cutting and Assembling the Walls
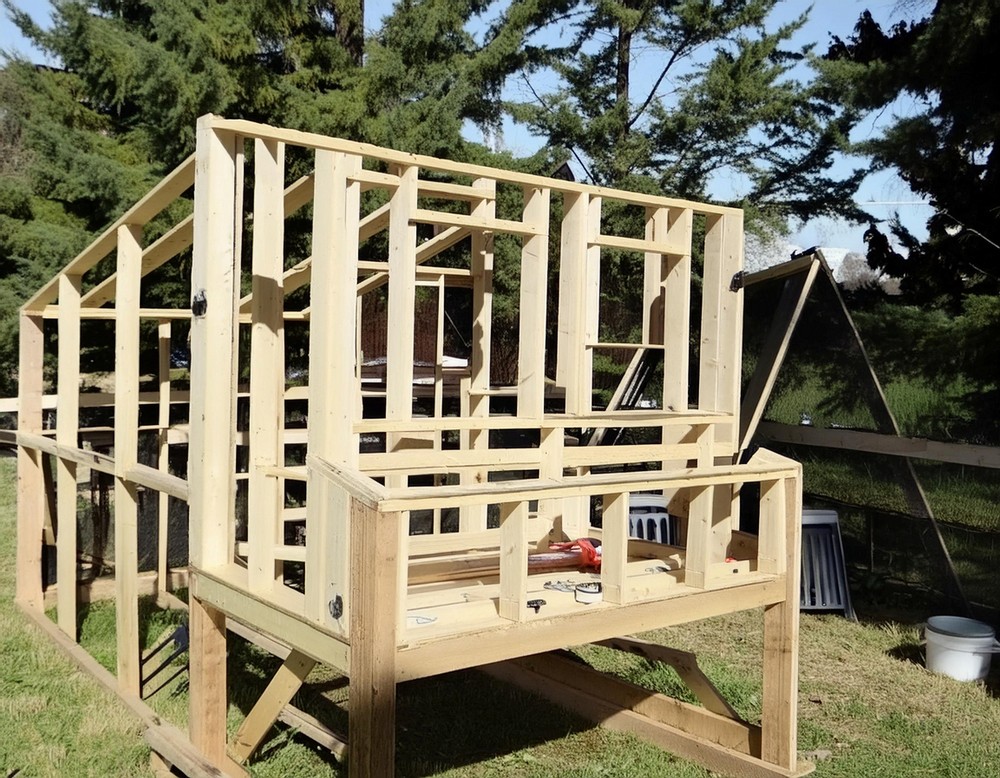
Transform long 2x4s into the building blocks of your coop’s walls and roof. Start by cutting down the lumber to size, using both standard and pressure-treated pieces. Construct the frame of your coop with 90-degree cuts for simplicity, opting for a framing nailer for quick assembly. Remember, the roof has a 15-degree slope to accommodate drainage and aesthetic appeal. Framed walls include strategically placed windows and a large access door for maintenance.
rafting an X Brace Door
Create a sturdy and visually appealing door for the chicken run using crisscross bracing with half-lap joints. This step requires no complex measurements; simply mark and cut where the boards intersect using your miter saw. This method ensures precision without the headache of complicated geometry.

Building the Base
The coop’s foundation relies on 4×4 posts cut with a 15-degree angle, supporting horizontal 2×4 beams for a sturdy base. Use pocket screws for a solid frame, ensuring it can support the weight of the sand floor you plan to add. The base size accommodates the size of the coop and the recommended square footage per chicken.
Erecting the Coop
With the base set, proceed to attach your preassembled walls, securing them firmly to the foundation. This step transforms individual walls into the outline of your future chicken coop.
Adding the Framing
Connect the coop to the run by ensuring the structures align seamlessly. Use concrete pavers for durable ground contact points. Complete the frame by installing the final walls and the nesting box, providing each chicken with a comfortable laying area.

Finishing with Siding and Accessories
Cover the frame with T1-11 siding, cutting out openings for windows and doors as needed. This not only strengthens the structure but also gives your coop a polished, weather-resistant exterior. Install all hardware accessories, such as the automatic door, feeder, and waterer, to ensure your chickens have a comfortable and functional home.

Conclusion
Building a deluxe backyard chicken coop might appear daunting at first, but with the right materials, tools, and guidance, it can be a remarkably rewarding project. Not only will you provide a secure haven for your chickens, but you’ll also add a charming feature to your backyard. This project is a perfect blend of functionality and style, ensuring your chickens are happy, healthy, and productive.


Leave a Reply