
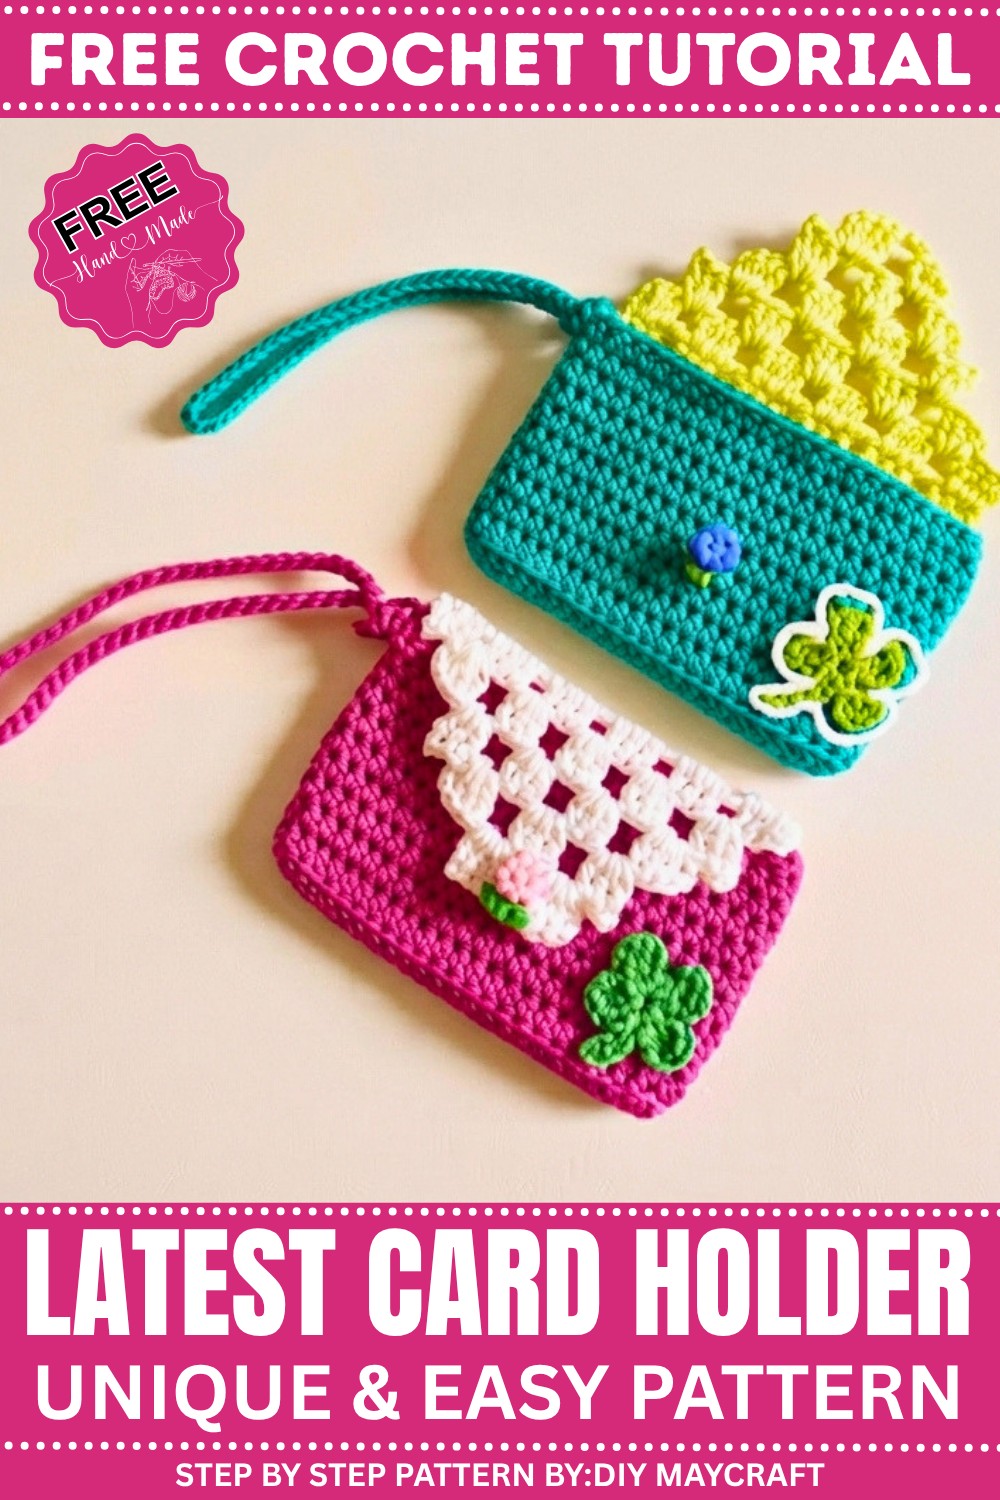
Keep important cards within easy reach through Free Crochet Card Holder Pattern with compact storage smart organization and everyday style.
A small, stylish accessory that keeps your cards neatly organized can make everyday life simpler and more enjoyable. This free crochet card holder pattern offers a practical and charming solution for carrying credit cards, IDs, and a few essentials without the bulk of a traditional wallet. Many people appreciate making such projects because they’re quick to finish and provide a perfect balance of functionality and personal flair. The finished card holder is not only useful but also adds a touch of handmade charm to your daily routine.
The card holder features a compact rectangular shape designed to fit cards snugly and securely. Its texture combines firmness with comfort, ensuring that your cards stay protected while the holder remains lightweight. You can tailor the colors to suit your taste, from bold and vibrant to neutral and minimalist shades. There’s also plenty of room for simple embellishments like buttons, embroidered initials, or small decorative stitches to make it truly unique. Thanks to its slim design, this little holder easily slips into pockets, handbags, or backpacks.
Free Card Holder Crochet Pattern with Simple Stitches
Suitable for beginners and intermediate crocheters alike, the pattern uses clear, straightforward instructions that guide you through every step. Along the way, you’ll learn useful techniques such as working precise shapes and finishing edges cleanly—all skills that enhance your overall crochet experience. This pattern encourages steady progress while helping you complete a practical item you’ll enjoy carrying every day.
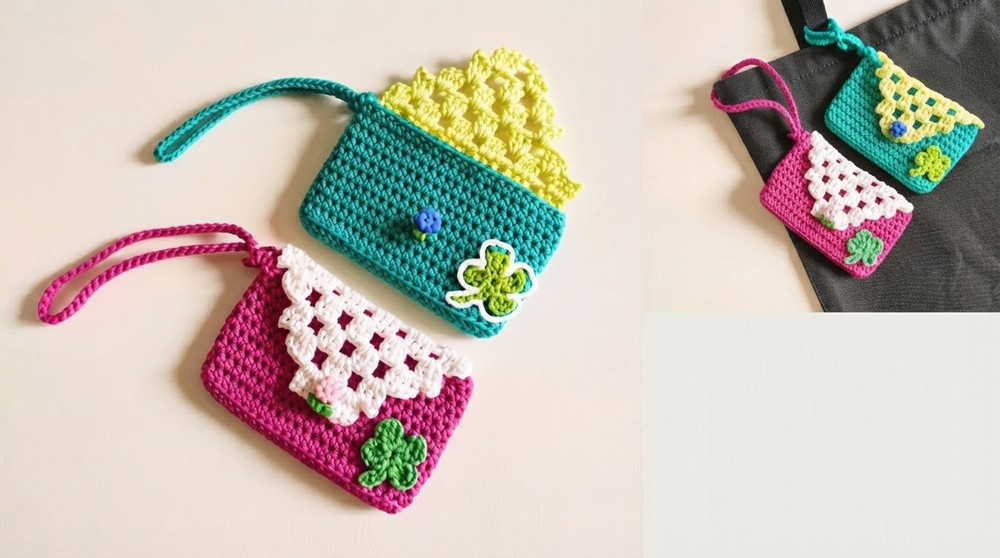
For anyone looking to add a functional, personalized touch to their daily essentials, this free crochet card holder pattern offers an enjoyable and rewarding project. Grab your hooks and yarn, and make a handy little accessory that’s both stylish and simple to use.
Crochet Mini Wallet Pattern – Card Holder
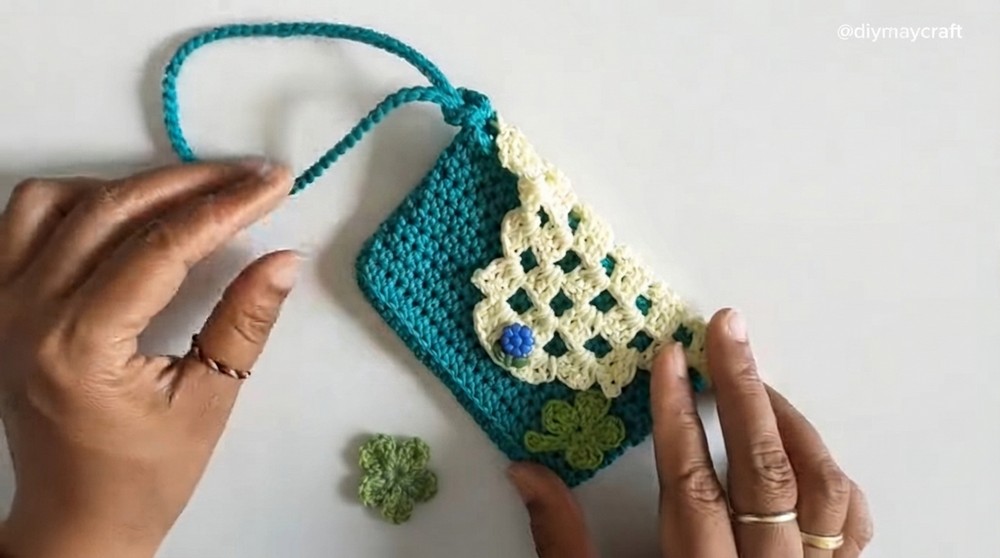
This detailed crochet pattern guides you through making a stylish and functional mini wallet designed as a card holder. Combining basic stitches with an elegant textured overlay and a clover decoration, this project is suitable for crochet enthusiasts seeking a practical accessory with handmade appeal.
This mini crochet wallet serves as a compact card holder, perfect for organizing essentials like credit cards, IDs, or small notes. The finished item features a firm yet soft texture created with half double crochets and an artistic overlay of double crochet motifs that add both beauty and dimension. A decorative clover motif enhances its design, while a secure button closure keeps contents safe. This wallet is also equipped with a matching hanger strap, lending convenience for portability. Its small size and neat construction make it ideal for everyday use or gifting.
Skill Level & Terminology
- Skill level: Beginner to Intermediate
- Terminology: US crochet terms
Materials & Tools
- Polycherry yarn or any smooth, medium-weight yarn
- Tulip crochet hook: size 4.0 mm (4/0)
- Sewing needle and thread for attaching the button
- Button (size to suit wallet flap)
- Scissors
- Lighter (for securing yarn ends)
Gauge
Gauge is approximate. Aim for consistent tension with half double crochet and double crochet stitches, yielding a firm fabric suitable for holding cards without stretching.
Abbreviations
- ch: chain
- sc: single crochet
- hdc: half double crochet
- dc: double crochet
- sl st: slip stitch
Special Stitch Instructions
- Working in Back Loops: In Row 2, half double crochets are worked into the back loop only, creating a subtle ridge texture.
- V-Stitch Double Crochets with Chain: A decorative motif formed by working 3 double crochets separated by chains to create an open, lacy pattern overlay.
Finished Size
Approximately the size of a credit card plus some margin — ideal for holding cards and small items comfortably.
Pattern Steps
Part 1: Foundation and Base Rows with Half Double Crochets
- Make a slip knot.
- Chain 24.
- Skip 2 chains from the hook, then into the 3rd chain from the hook: work 4 hdc into the same chain.
- Place a marker in the first hdc to avoid missing the join later.
- Work 1 hdc into each of the next 20 chains.
- In the last chain, work 4 hdc into the same stitch.
- Continue on the opposite side of the foundation chain, working 1 hdc into each of the next 20 chains.
- Join to the marked first hdc with a sl st to close the round.
You now have a rounded rectangular foundation with reinforced ends—this forms the base and sides of the wallet.
Part 2: Creating Textured Fabric (Row 2)
- Chain 2 (does not count as a stitch).
- Work hdc into the back loop only of each stitch around; include the same stitch as the chain 2 in this count.
- Mark the first hdc of this round.
- Total stitches: 48 hdc in back loop.
- Join with a sl st to the marked stitch.
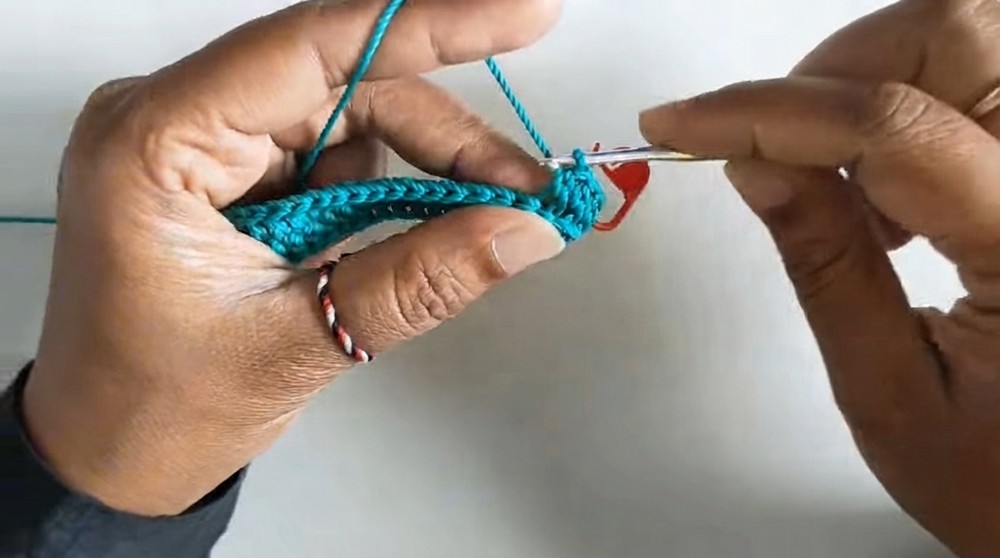
Working in back loops only produces a ribbed texture and a firmer fabric, ideal for durable wallet structure.
Part 3: Establishing Front Surface Texture (Rows 3 to 11)
-
- Chain 2 (does not count as a stitch).
- Work hdc into both loops of each stitch around (48 hdc per row).
- Join each row with a sl st to the first hdc.
- At the end of Row 11, break yarn and secure ends by tidying up and trimming with a lighter.
Rows 4
-
- Chain 2 (does not count as a stitch).
- Work hdc into both loops of each stitch around (48 hdc per row).
- Join each row with a sl st to the first hdc.
Rows 5
-
- Chain 2 (does not count as a stitch).
- Work hdc into both loops of each stitch around (48 hdc per row).
- Join each row with a sl st to the first hdc.
Rows 6
-
- Chain 2 (does not count as a stitch).
- Work hdc into both loops of each stitch around (48 hdc per row).
- Join each row with a sl st to the first hdc.
Rows 7
-
- Chain 2 (does not count as a stitch).
- Work hdc into both loops of each stitch around (48 hdc per row).
- Join each row with a sl st to the first hdc.
Rows 8
-
- Chain 2 (does not count as a stitch).
- Work hdc into both loops of each stitch around (48 hdc per row).
- Join each row with a sl st to the first hdc.
Rows 9
-
- Chain 2 (does not count as a stitch).
- Work hdc into both loops of each stitch around (48 hdc per row).
- Join each row with a sl st to the first hdc.
Rows 10
-
- Chain 2 (does not count as a stitch).
- Work hdc into both loops of each stitch around (48 hdc per row).
- Join each row with a sl st to the first hdc.
Rows 11
-
- Chain 2 (does not count as a stitch).
- Work hdc into both loops of each stitch around (48 hdc per row).
- Join each row with a sl st to the first hdc.
These rows build up the main body of the wallet with a smooth, consistent surface and solid structure.
Part 4: Preparing to Make the Decorative Overlay – Folding & Marking
- Fold the piece in half widthwise.
- Count and mark 23 stitches along the fold on the backside.
- Flip the work over to the front side.
- Attach yarn with a slip knot at marker point.

This folding creates the wallet body, and the marker locates the midpoint for the overlay.
Part 5: Decorative Overlay — First Row
- Chain 2 (not counted as a stitch).
- Into the same stitch where you joined yarn: work 1 dc.
- Into each of the next 2 stitches: work 2 dc each.
- Chain 2, skip 1 stitch, then work 3 dc in the next stitch, chain 2.
- Repeat from * to * across till reaching the marked stitch.
- End with 3 dc in the last stitch (no final chain 2).
This creates a lace-like, open overlay with clusters of double crochets separated by chains.
Part 6: Decorative Overlay — Second Row
- Chain 2, turn.
- Work 3 dc, chain 2, skip the 2 chains below.
- Repeat (3 dc, chain 2) skipping every 2 chains across.
- End row with 3 dc, ch 1, turn.
- Slip stitch 3 times into the next stitch to prepare for the next row.
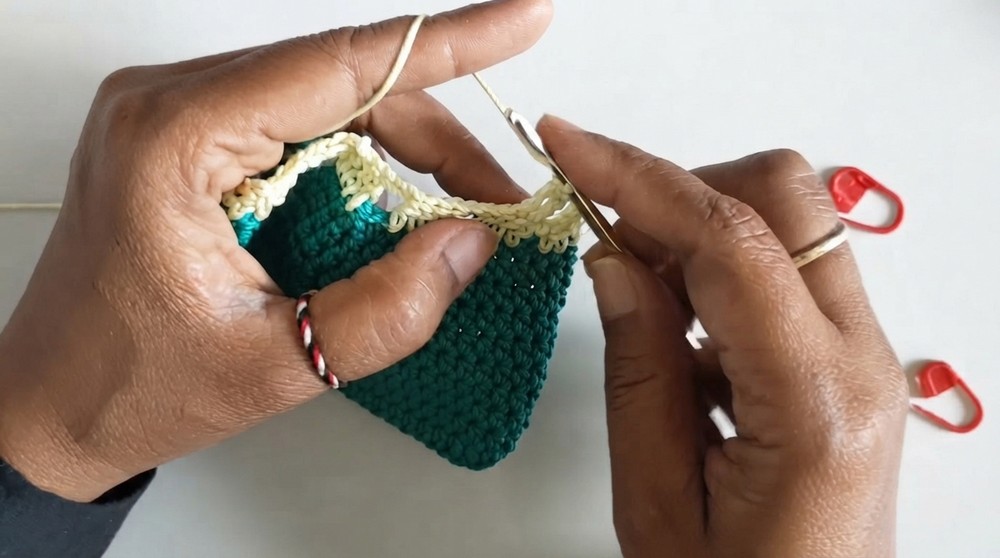
Continues building the openwork pattern, creating a net of double crochet clusters.
Part 7: Decorative Overlay — Third Row and Following
- Chain 2.
- Work 3 dc into the chain space, then 2 chains, then 3 dc into the next chain space.
- Repeat pattern across row, join with slip stitch after final motif.
- Chain 1.
Row forms overlapping V motifs that create a flower petal appearance.
Part 8: Continuing Overlay Pattern for Rows 4 to 6
- Row 4: Slip stitch 3 times, then 3 dc into first chain space, 2 chains, then 3 dc into next chain space; repeat 4 times in total.
- Row 5: Chain 1, slip stitch 3 times, 3 dc into first chain space, 2 chains, then 3 dc in next spaces; repeat for 3 motifs.
- Row 6: Chain 1, slip stitch 3 times, chain 2, 3 dc into first chain space, 2 chains, 3 dc into next chain space; join, then chain 1.
- Break yarn and secure ends with a lighter; tidy thread.
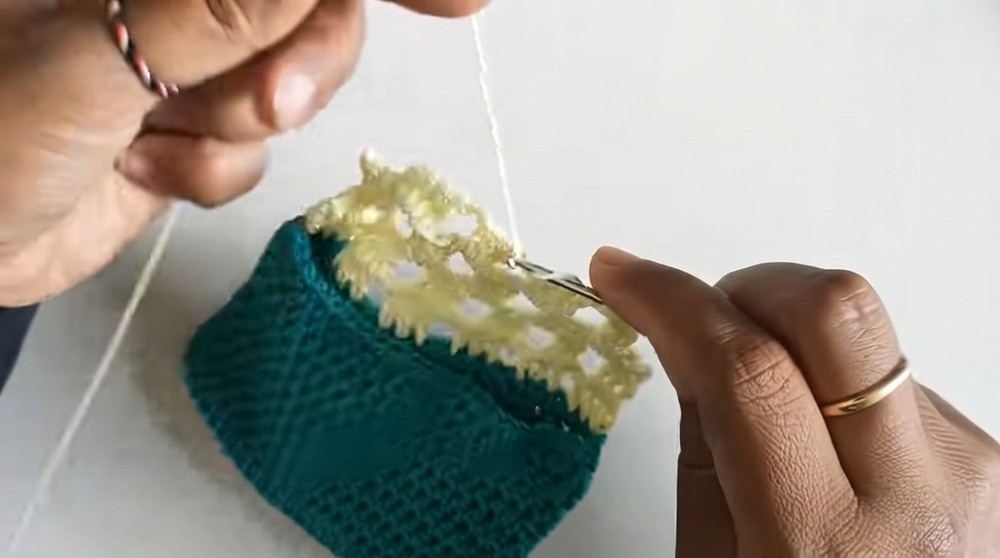
These rows add dimension and delicate lacy detail to the wallet front.
Part 9: Attaching Button and Making Clover Decoration
- Attach button securely with needle and thread to the back of the wallet flap aligning with overlay edge for closure.
- For clover motif:
- Start with a magic ring.
- Chain 5, skip one chain, make 5 sl st, last slip stitch joins inside magic ring.
- Chain 3 in ring, then repeat sequence (chain 3, dc, chain 3, sl st) three more times.
- Tighten, cut yarn, and secure threads.
The clover adds a sweet, handcrafted embellishment to the wallet.
Part 10: Making the Hanging Strap (Optional)
- Chain 70 or desired length.
- Join ends with sl st to form a loop.
- Work sl st in each chain around until returning to start.
- Secure and tidy ends.
- Attach strap by threading it through gaps in wallet’s knit fabric.
This strap affords portability and makes the wallet easier to carry or hang.
Assembly & Finishing
- Fold wallet along the middle marker so the main panel forms the pocket.
- Secure loose ends and sew button on the flap side ensuring closure fits perfectly.
- Sew clover motif decoratively onto the wallet front.
- Attach strap securely if using.
- Use lighter carefully to seal and tidy all yarn ends for a professional finish.
Stitches Used
- Slip knot
- Chain (ch)
- Half double crochet (hdc)
- Double crochet (dc)
- Slip stitch (sl st)
- Magic ring (for clover motif)
Starting Tips
- Begin by making the base foundation of 24 chains, reinforcing ends with multiple half double crochets.
- Work in rounds incrementally building a rectangle to form the body.
- Use stitch markers to avoid losing track, especially when changing loops or rows.
- Overlay decoration uses openwork clustering with double crochets and chains for texture.
- Finish with decorative accents, strap, and secure closures.
This mini wallet project offers a wonderful balance between practical crochet and elegant detail, suitable for beginner to intermediate crocheters. The techniques learned here—working in back loops, lace overlays, and motif crocheting—can inspire further personalized accessories. Enjoy making this functional and pretty piece!
Leave a Reply