
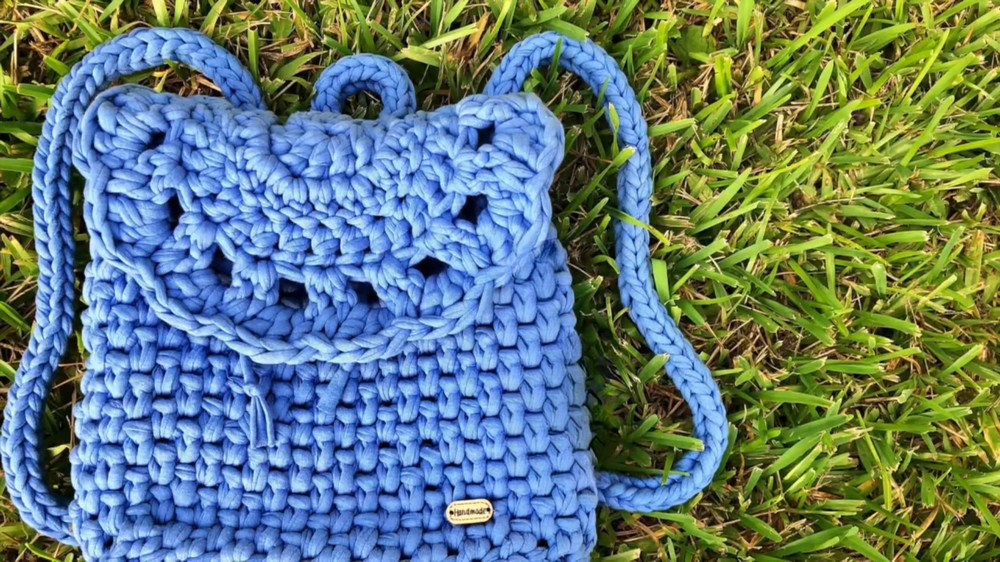
Whip up a trendy t-shirt yarn backpack with this free crochet pattern that’s as fun to make as it is to wear for turning heads wherever you go.
A backpack that is stylish, durable, and handmade is a game-changer for anyone who loves unique accessories. With this free crochet t-shirt yarn backpack pattern, you can create a sturdy yet beautiful bag that’s perfect for daily use, whether you’re out running errands, heading to school, or enjoying a casual outing. Made from eco-friendly t-shirt yarn, the backpack is not only functional but also trendy, with its textured appearance and modern design.
Free T-Shirt Yarn Backpack Crochet Pattern for Everyday Use
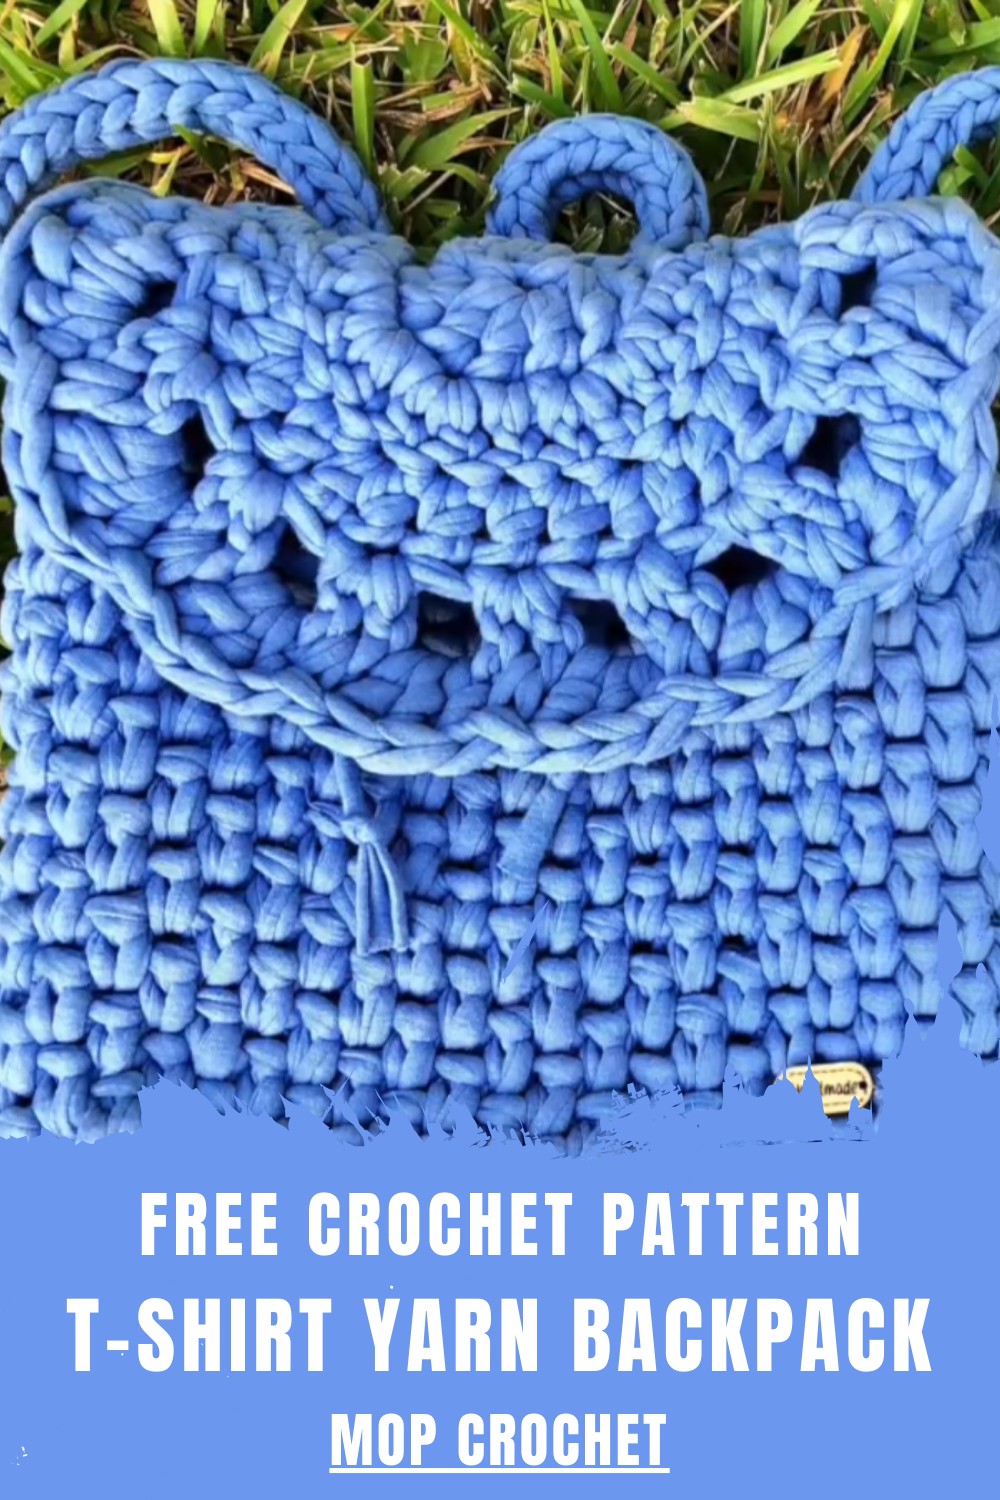
The soft yet strong material ensures it easily carries your essentials, and the drawstring closure adds both practicality and charm. Its earthy and cozy look pairs well with any outfit, making it a versatile addition to your wardrobe. Even beginners can enjoy creating this simple and fashionable crochet project. This pattern makes crocheting accessible, fun, and worthwhile, giving you a finished piece that’s stylish, sustainable, and truly one-of-a-kind.
Crochet T-Shirt Yarn Backpack Pattern
Skill Level
Intermediate to Advanced
Materials List
- Yarn: 1 kilogram of t-shirt yarn (chunky or bulky-weight yarn).
- Hook: 9 mm crochet hook.
- Scissors: For cutting yarn.
- Measuring Tape: For ensuring the correct dimensions.
- Stitch Markers: Optional, to mark starting points in rounds or key areas for accuracy.
Key Abbreviations (US Terminology)
- CH: Chain
- SL ST: Slip Stitch
- HDC: Half Double Crochet
- DC: Double Crochet
- INC: Increase (2 stitches in the same stitch)
Special Notes
- The base is worked in joined rounds, gradually increasing to achieve the desired shape.
- The body of the backpack is worked in a spiral pattern, requiring no joins at the end of rounds.
- Ensure stitch counts match at the end of each round to maintain consistent shaping.
- The handles are made using a simple cord technique for durability.
Pattern Instructions
Step 1: Create the Base
Round 1:
- Create a slip knot and CH 13.
- Starting in the second CH from the hook, work 1 HDC into each chain down the row (you’ll have 12 HDC).
- At the last chain, work 2 additional HDC into the same chain to curve around the edge.
- Continue working along the other side of the foundation chain: make 10 HDC, one in each chain.
- At the final chain, work 2 HDC (INC). Close the round with a SL ST into the first HDC.
Stitch Count at the End of Round 1: 26 HDC.

Round 2:
- CH 1 to start the round.
- Work 1 HDC (BLO) into the first stitch.
- Work 10 HDC, one into each stitch.
- At the next 3 stitches, make 1 INC (2 HDC in each stitch).
- Continue by working 11 HDC along the other side of the chain.
- At the last 2 stitches, make 1 INC in each of them. Close the round with a SL ST.
Stitch Count at the End of Round 2: 33 HDC.
Round 3:
- CH 1, make 1 INC (2 HDC) in the first stitch.
- Work 12 HDC, one in each of the next stitches.
- At the next 3 stitches, alternate between 1 INC and 1 HDC (make INC, HDC, INC, HDC, INC).
- Continue by working 11 HDC down the other side.
- Repeat the alternate INC/HDC pattern at the final 3 stitches. Close with a SL ST.
Stitch Count at the End of Round 3: 40 HDC.
Round 4:
- CH 1, 1 INC (2 HDC) in the first stitch.
- Work 13 HDC, one per stitch.
- At the next 3 stitches, alternate: INC, 2 HDC; repeat this 3 times.
- Continue by working 12 HDC on the opposite side.
- Repeat the alternate INC + 2 HDC pattern twice more before finishing. Close the round with a SL ST.
Stitch Count at the End of Round 4: 47 HDC.
Step 2: Create the Body
- Continue with the spiral-round technique for the body:
- CH 1, work 1 HDC into the back loop only (BLO) of the first stitch.
- CH 1, skip the next stitch, and HDC BLO in the next stitch. Repeat this pattern to the end of the round.
- Note that the spiral method requires no SL ST at the end of rounds—just continue with the pattern.
- In subsequent rounds, work 1 HDC BLO in the gaps created by the chain spaces of the prior row, interspersed with CH 1.
- Keep working this spiral pattern until the height of the backpack reaches approximately 25 cm.
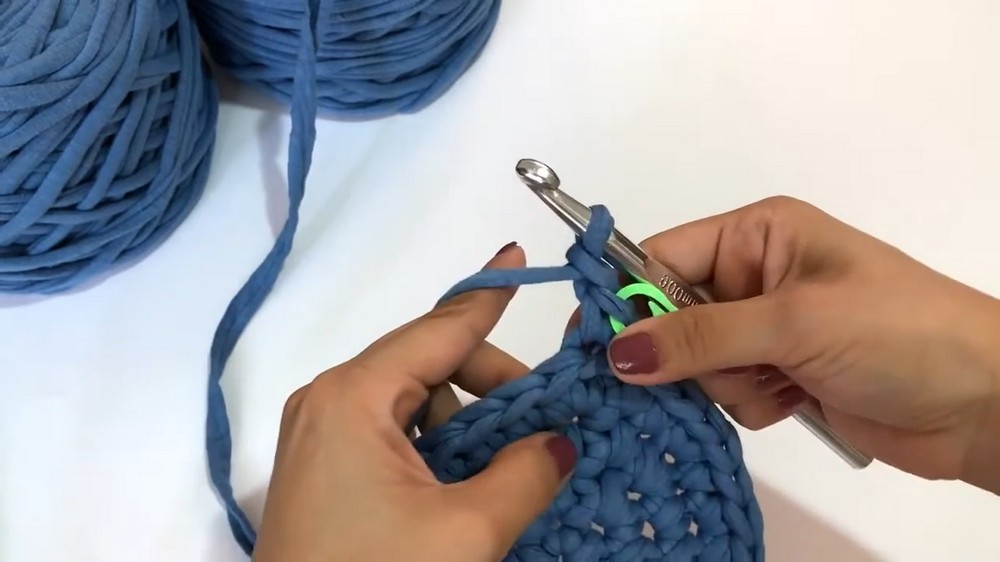
Step 3: Add the Decorative Flap
- Choose the center back of the backpack and attach yarn.
- Start with 17 CH to create the flap’s starting edge.
- Skip 8 stitches to the left, and start the flap by securing the foundation CH with SL ST at the 9th stitch from the center on both sides.
Flap Rows:
- Row 1: Turn, CH 1, and work 3 DC into each stitch along the chain. SL ST into the first stitch.
- Row 2: CH 1, turn, and work 1 INC in the first and last stitch, and DC into the remaining stitches.
- Row 3: CH 1, turn, work 3 INC in the first 3 stitches, DC across the rest, and repeat 3 INC at the other end.
- Row 4: CH 1, turn, alternate INC and DC across (e.g., INC, DC, INC), working both the beginning and end of the row.
Final Row: Create lace-like gaps across the flap by working INC, CH 2, skip a stitch, repeat to end.
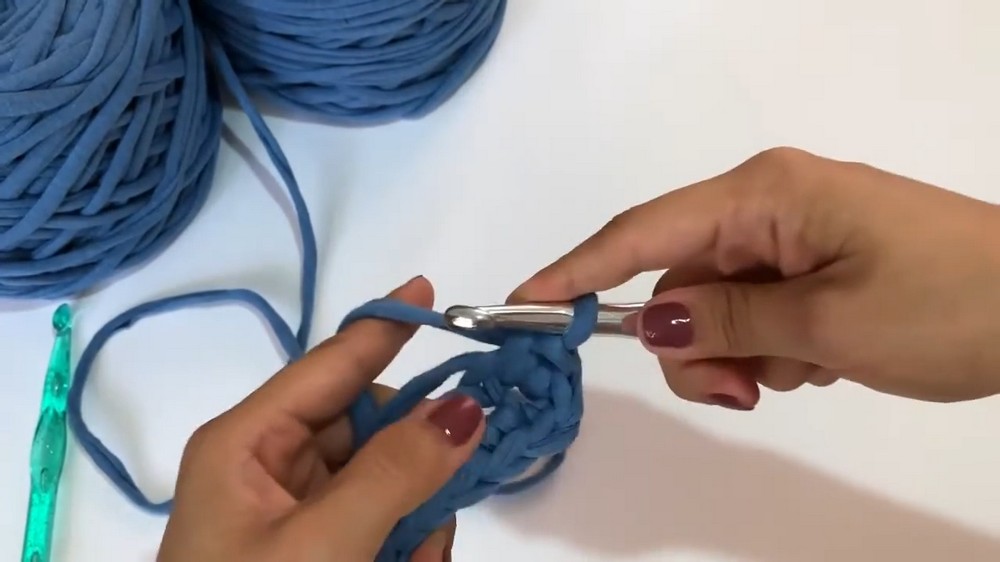
Step 4: Add the Handles and Closure Cord
Handle Construction:
- For each handle, make a slip knot and CH 3.
- For the short handle: Work until it measures 15 cm.
- For the long handles: Work until they measure 55 cm.
- To create the thick handle cord:
- Insert your hook into the second CH from the hook, YO (yarn over), and pull up a loop. Leave both loops on the hook.
- Repeat for the next CH. You should have 3 loops on the hook now.
- Continue this pattern, maintaining all 3 chains on the hook throughout the length of the strap.
- To finish the straps, weave the ends securely and sew the cords to the top corners of the backpack.
Step 5: Final Assembly
- Attach the flap: Secure the flap at the back section of the spiraled work.
- Add the handles securely, ensuring even placement for balance.
- Sew or attach any additional closure mechanisms such as buckles, buttons, or snaps.
Conclusion
Your crochet t-shirt yarn backpack is now complete! The durable t-shirt yarn ensures that the backpack is functional, while the decorative flap adds a stylish touch. This project is perfect for an eco-friendly accessory or as a handmade gift.
Tips for Success
- Stay consistent: Count stitches at the end of each base round to ensure symmetry.
- Tighten gaps: Pull your stitches snugly to prevent big holes when working with t-shirt yarn.
- Experiment: Embellish the backpack with additional details like tassels, pockets, or embroidery for a personalized look.
- Care: Handwash your backpack and reshape it during drying to maintain its structure.
Leave a Reply