
Tuck everyday cards into this Free Crochet Card Wallet Pattern that’s for neat organization compact storage and stylish space saving appeal.
Creating handmade items that blend style and practicality is truly satisfying, and a crochet card wallet is a perfect example. It offers a compact way to organize your cards, IDs, and a few bills, fitting neatly into your purse or pocket without adding any bulk. The Free Crochet Card Wallet pattern brings this idea to life with a clean, textured design that’s both functional and visually appealing.
The finished wallet has a firm yet soft feel, shaped into a sleek rectangle that holds its form well. Its texture adds subtle interest, giving it a handmade charm that stands out from mass-produced wallets. Because it’s crochet, this project allows plenty of room for personalization—whether that’s through your choice of colors, embellishments, or finishing touches—making it as unique as the maker behind it.
Card Wallet Free Crochet Pattern for Beginners

This project is wonderful for those familiar with basic crochet techniques, but it also invites motivated beginners to expand their skills in a manageable way. The pattern provides straightforward, step-by-step guidance to help you create a well-constructed wallet, teaching you helpful techniques through the process. When finished, it’s a practical accessory that showcases your handiwork and can be used daily or gifted with love.
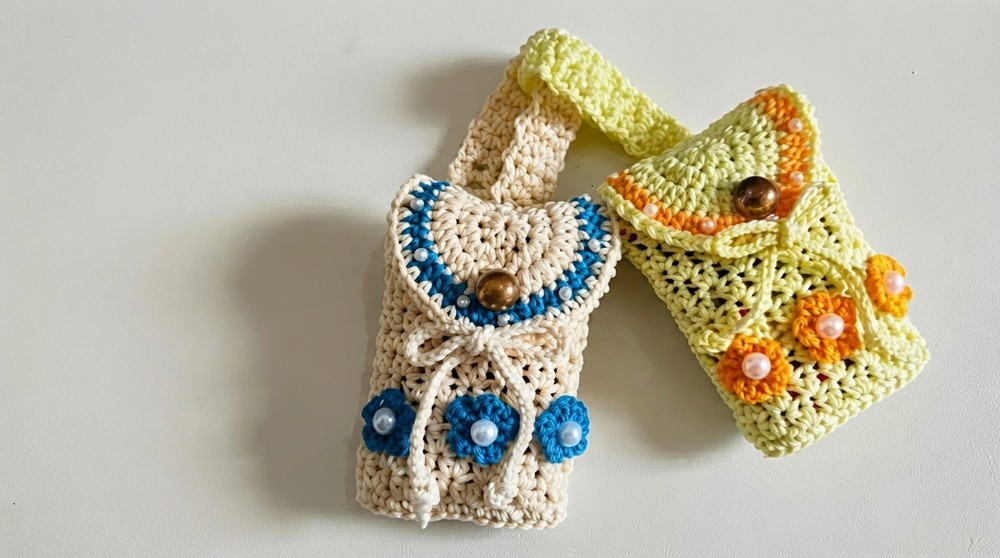
If you’re looking for a satisfying project that’s both useful and charming, this crochet card wallet is a wonderful choice. The pattern enjoy the rewarding experience of making something that’s both beautiful and perfectly suited to your everyday needs.
Crochet Wallet with Card, Tissue, & Lipstick Holder and Bag Hanger
A practical and elegant crochet wallet designed with multiple compartments for card holders, tissue holders, lipstick holders, and can double as a bag hanger. Featuring a solid base, a beaded lid, a strap, and a charming flower embellishment, this project blends functionality with a decorative touch.
Skill Level & Terminology
- Skill Level: Intermediate (requires knowledge of half double crochet, working in rounds, bead incorporation)
- Terminology: US crochet terms
Materials & Tools
- Yarn: Polycherry yarn (or any light sport weight yarn)
- Hook: Tulip 4/0 crochet hook (~3.5 – 4 mm)
- Other: Small beads (optional), tapestry needle, sewing needle and thread (for button and final assembly), scissors, lighter (for finishing ends)
Gauge
- The gauge is flexible; aim for a firm fabric to maintain wallet shape and durability. Adjust hook size if needed to achieve the right tension.
Abbreviations List
| Abbreviation | Meaning |
|---|---|
| ch | Chain |
| sc | Single crochet |
| hdc | Half double crochet |
| sl st | Slip stitch |
Special Stitch Instructions
- Half Double Crochet Increase: Work 2 half double crochets (hdc) into the same stitch to increase.
- Bead Incorporation: Thread beads onto yarn before crocheting; place beads on designated stitches to add texture and shine.
- Working in Back Loop Only (BLO): Insert hook only into the back loop of the stitch for texture.
- Magic Ring: A circular foundation stitch to start rounds with no hole in the center.
Finished Size
Approximately 7 inches (18 cm) wide by 4 inches (10 cm) tall (wallet body excluding strap).
Pattern Instructions
Part 1: Wallet Body
Row 1 (Foundation Row)
- Make a slip knot.
- Chain 15.
Row 2
- Skip the last chain, insert hook into the next chain.
- Work 3 single crochets (sc) into the same chain (forms a rounded corner).
- Work 1 sc in each of the next 12 chains.
- Work 3 sc in the last chain (second rounded corner).
- Work 1 sc in each 12 chains along the opposite side of foundation chain.
- Join with sl st to the first stitch.
- Total stitches: 30 sc.

This creates an oval foundation with rounded ends to shape the wallet base.
Row 3 (Back Loop Only)
- Ch 1 (does not count as stitch).
- Work 1 sc into the back loop only (BLO) of each stitch around (30 stitches).
- Join with sl st.
Back loop only work adds subtle texture and flexibility.
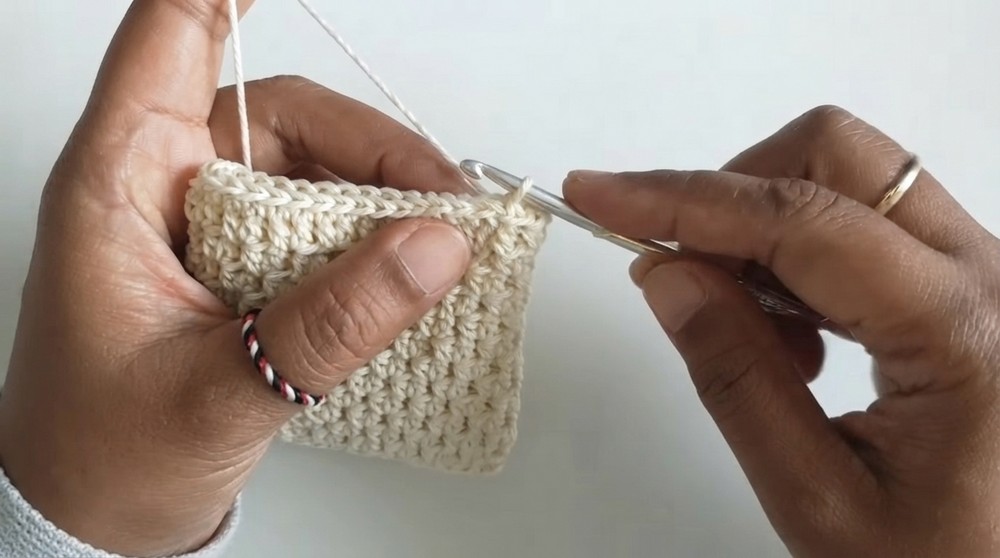
Row 4 (Half Double Crochet Increase Round)
- Ch 2 (does not count as stitch).
- In same stitch, work 2 half double crochets (hdc) (increase).
- Skip one stitch.
- In next stitch, work 2 hdc (increase).
- Repeat skip one stitch, 2 hdc in next stitch throughout the round.
- Join with sl st.

This round expands the wallet body evenly while introducing open spaces.
Row 5
Repeat Row 4 exactly, joining at the end with a slip stitch.
Rows 6
- Continue to repeat the pattern of Row 4 and Row 5 alternately up to the 14th row.
- Each round, increase by following the established skip one, increase pattern.
- Join each row with a slip stitch.
Rows 7
- Continue to repeat the pattern of Row 4 and Row 5 alternately up to the 14th row.
- Each round, increase by following the established skip one, increase pattern.
- Join each row with a slip stitch.
Rows 8
- Continue to repeat the pattern of Row 4 and Row 5 alternately up to the 14th row.
- Each round, increase by following the established skip one, increase pattern.
- Join each row with a slip stitch.
Rows 9
- Continue to repeat the pattern of Row 4 and Row 5 alternately up to the 14th row.
- Each round, increase by following the established skip one, increase pattern.
- Join each row with a slip stitch.
Rows 10
- Continue to repeat the pattern of Row 4 and Row 5 alternately up to the 14th row.
- Each round, increase by following the established skip one, increase pattern.
- Join each row with a slip stitch.
Rows 11
- Continue to repeat the pattern of Row 4 and Row 5 alternately up to the 14th row.
- Each round, increase by following the established skip one, increase pattern.
- Join each row with a slip stitch.
Rows 12
- Continue to repeat the pattern of Row 4 and Row 5 alternately up to the 14th row.
- Each round, increase by following the established skip one, increase pattern.
- Join each row with a slip stitch.
Rows 13
- Continue to repeat the pattern of Row 4 and Row 5 alternately up to the 14th row.
- Each round, increase by following the established skip one, increase pattern.
- Join each row with a slip stitch.
Rows 14
- Continue to repeat the pattern of Row 4 and Row 5 alternately up to the 14th row.
- Each round, increase by following the established skip one, increase pattern.
- Join each row with a slip stitch.
Row 15 (Finishing Round)
- Ch 1.
- Work 1 sc in each stitch around (30 sc).
- Join with slip stitch.
- Fasten off and tidy ends with a lighter.

The body is built steadily increasing in size with a firm last row for durability.
Part 2: Purse Lid with Beads
Row 1 (Magic Ring Foundation)
- Make a magic ring.
- Ch 2 (does not count as stitch).
- Work 10 half double crochets (hdc) into the ring.
- Tighten the ring by pulling yarn tail.
- Join with sl st.
Row 2
- Ch 2.
- Work hdc increase in each stitch around (20 stitches).
- Join with slip stitch.
Row 3
- Ch 2.
- Work hdc increase 18 times (one increase per stitch).
- Ch 2.
- Skip 2 stitches, then repeat the hdc increase 9 times for an open space pattern.
- Join with slip stitch.
- Ch 1 and mark the round for later.
Row 4 (Beaded Row)
- Thread 10 pcs of 2 mm size beads onto the yarn before starting.
- Attach yarn at the slip stitch point.
- Ch 2, hdc in the same stitch.
- Hdc in next stitch.
- On the third stitch, hdc with bead incorporated (slide bead close before completing stitch).
- Then, 3 plain hdc stitches in next stitches.
- Repeat the pattern 3 plain hdc, 1 hdc with bead around the row.
- For hollow parts, alternate between hdc with bead and plain hdc.
- Join with slip stitch.
- Ch 1, cut and fasten off the thread when done.
Beads add texture and a shimmering detail making the lid elegant.
Row 5 (White Thread & Chain Edging)
- Starting with white thread at the slip stitch, ch 1.
- Make 1 sc and 1 ch in each stitch around, creating a delicate mesh edging.
- Join with slip stitch, fasten off leaving 15-20 cm tail.

Part 3: Strap
Row 1
- Make slip knot and chain desired length.
- Skip 3 chains, hdc in 4th chain.
- Ch 1, hdc in same stitch.
- Skip 1 chain. Hdc in last chain.
Row 2 and Onward
- Ch 2, turn.
- Skip 1 stitch, work hdc, ch 1, hdc in cavity.
- Skip 1 stitch, hdc in last stitch.
- Repeat this for a total of 25 rows.
- Ch 1, sl st twice at the end.
- Fasten off and tidy ends.
Part 4: Assembly
- Sew the lid to the body by connecting marked points using the remaining thread and a tapestry needle.
- Attach buttons:
- One on the back of the wallet for securing the strap hook.
- One on the front flap for locking the lid.
Part 5: Flower Decoration
Basic Flower Motif
- Make a magic ring.
- Ch 2, 1 hdc, ch 2, sl st; repeat 5 times to create 5 petals.
- Pull thread tight, fasten off, tidy ends.
- Make two more flowers using the same method.
- Refer to the creator’s previous video for the ribbon making tutorial.
Final Assembly
- Join flower motifs and ribbon together, embellishing with beads as desired.
- Sew the flower assembly carefully onto the wallet flap.

Summary of Stitches Used
- Chain (ch)
- Single Crochet (sc)
- Half Double Crochet (hdc)
- Slip Stitch (sl st)
- Magic Ring
- Half Double Crochet Increase (2 hdc in same stitch)
- Bead Incorporation with crochet stitches
How to Start This Pattern
Begin by making the wallet body starting with a chain foundation and working single crochet in rounds to create an oval base. Increase stitches carefully as you build the body, alternating rows of half double crochet increases and skip stitches for a structured yet breathable fabric. Create the lid in rounds using a magic ring and half double crochet increases, incorporating beads into the fabric on designated rows for sparkle. Crochet a decorative strap with alternating half double crochet and chain stitches for texture. Assemble parts by sewing, attach buttons for functionality, and finish by embellishing with delicate flower motifs.
Final Notes
This crochet wallet balances functionality with class through structured stitches, beadwork, and embroidered flower embellishments. It’s a wonderful project combining multiple crochet techniques for a practical accessory that fits your essentials with style.

Leave a Reply