
Slip into style with this Free Crochet Purse with Silk Cord Pattern, for a unique shiny accessory that brightens every day with elegance.
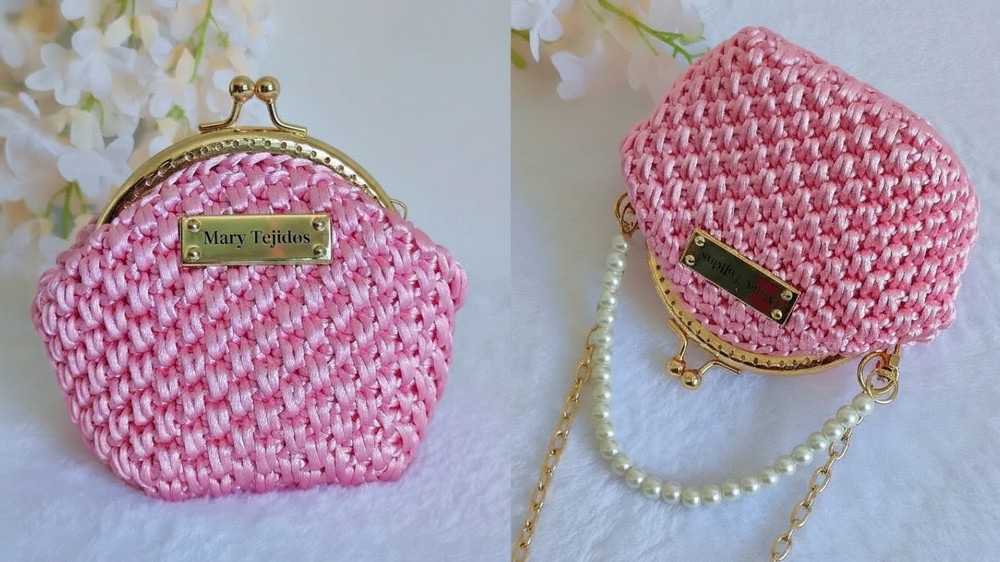
A small bag shines like a treasure in your hand with its silky shine and gentle touch making each day feel special. Soft to carry and smooth to hold this pretty accessory stands out wherever you go. The Crochet Purse with Silk Cord pattern gives you a purse that looks rich with its bright colors and gentle shine while being strong enough to hold your important things.
Free Crochet Purse Pattern Using Silk Cord
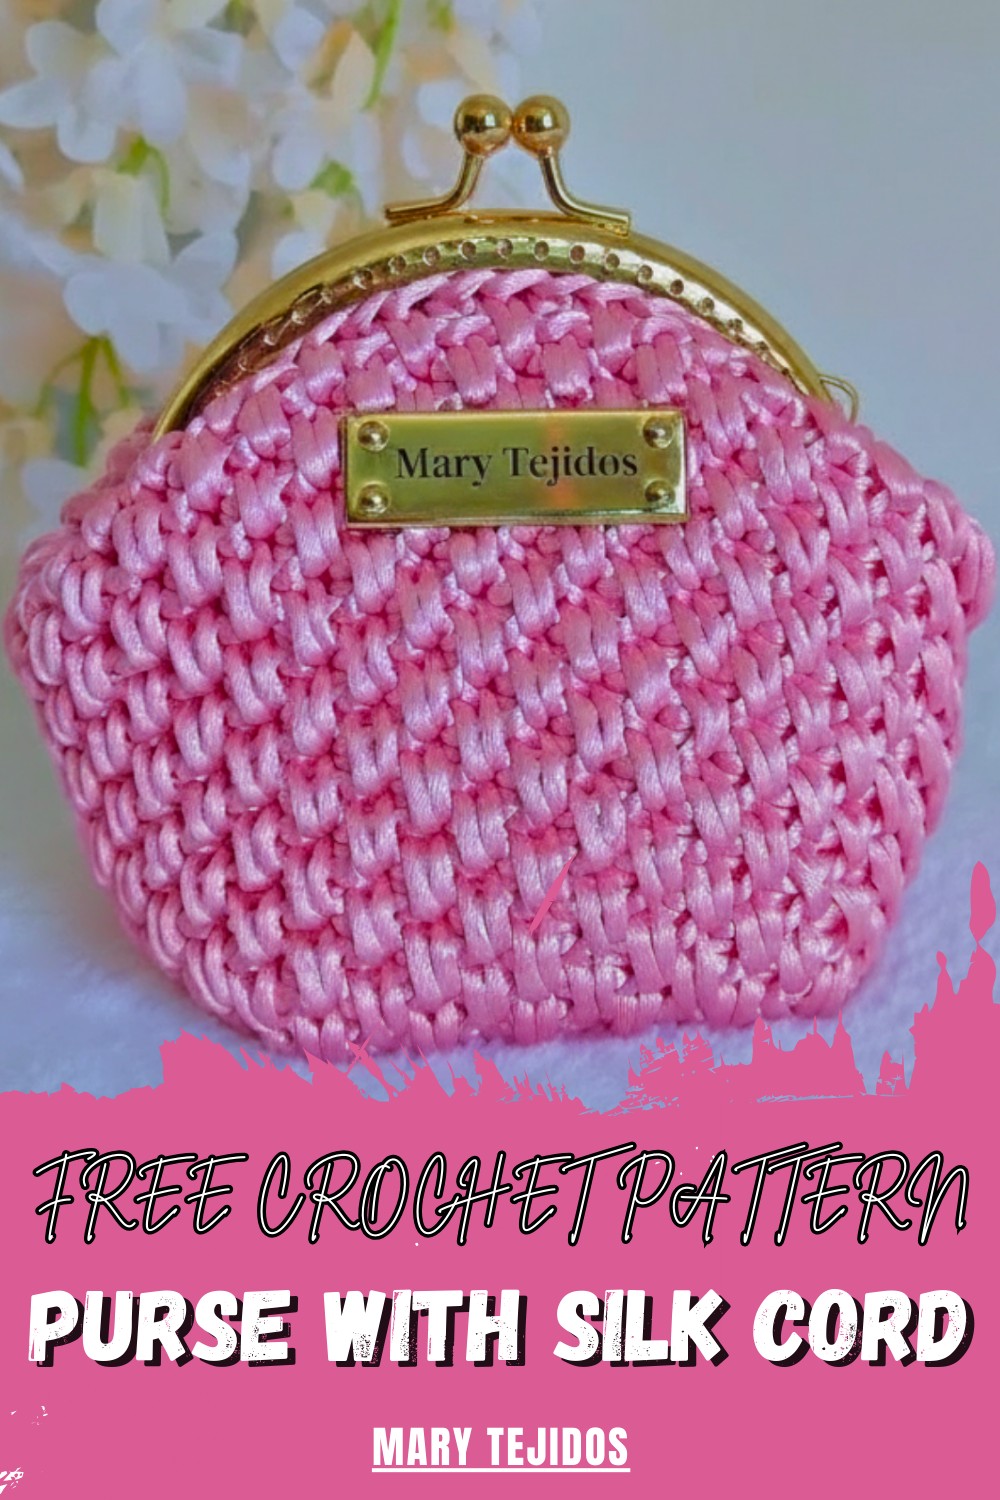
It can be used when shopping at the market or going to a party and fits easily in your hand or hangs gracefully by your side. This purse is light and comfortable so you can carry it all day without worry. Following the pattern is simple and the finished purse adds a touch of style to every outfit. You can keep your coins, keys or even special memories inside. The Crochet Purse with Silk Cord pattern makes every outing more joyful and helps everyone share in the beauty of handmade charm.
Classic Square-Base Crochet Coin Purse
Materials List
- Yarn: 2 mm silk cord (rat-tail cord) or similar smooth cord, color of your choice; approx. 1/2 roll (about 72 yards/meters)
- Crochet Hook: 3.5 mm for the body; 2.5 mm for finishing and weaving ends
- Frame: 10 cm kiss-lock metal frame, gold tone, with sewing holes
- Handle: 25 cm pearl handle (with jump rings), or chain (80 cm, aluminum with jump rings), optional
- Needle: Tapestry needle for joining and weaving ends
- Thread: Nylon thread for sewing to frame (matching or invisible)
- Notions: Scissors, lighter (for burning cord ends), stitch markers, measuring tape, tweezers (for finishing)
- Optional: Personalized metallic nameplate
Key Abbreviations (US Terms)
- ch: chain
- sc: single crochet
- sl st: slip stitch
- st(s): stitch(es)
- rep: repeat
- long sc: long/elongated single crochet (see Special Stitches)
- BLO: back loop only
Special Notes
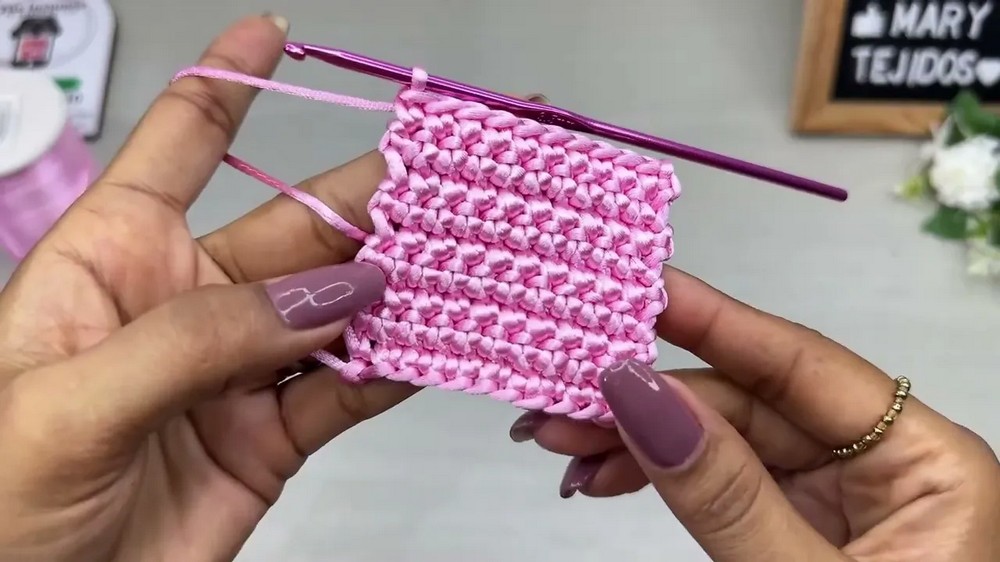
- Single Crochet Stitches: The purse’s body alternates between short single crochet (through BLO or as normal) and long single crochet (inserted into the base of the previous row—like a spike stitch).
- Cord Tension: Keep stitches even, especially when working long sc, to maintain a neat side profile.
- Finishing: Always carefully burn/melt cord ends to prevent unraveling.Special Stitches
- Long Single Crochet (Spike Stitch):
Insert the hook into the base of the corresponding stitch from the previous row. Yarn over, pull up a loop to the height of a regular sc, yarn over again and pull through both loops on hook.
Pattern Instructions
1. Square Base
- Foundation:
- Make a slip knot.
- Ch 10 (counts as foundation chain).
- Ch 1 to turn.
- Row 1:
- Working in back bumps of the chain, sc in 2nd bump from hook and each bump to end. (10 sc)
- Ch 1, turn.
- Rows 2–9:
- Sc in each st across (10 sc).
- Ch 1, turn.
- Repeat until you have 9 rows total.
- (Check Sizing):
- The square base should fit comfortably within the frame, centered, and not extend beyond the frame’s edge.

2. Single Crochet Border with Corners Increases
- Border Round:
- At the end of Row 9, Ch 1 and rotate to work around the square.
- Work sc evenly down the first side, one sc in the end of each row. (8 sc—not including corners.)
- At every corner: Work 3 sc into the corner stitch to shape the base.
- Repeat for all four sides. For each straight side, work 8 sc, and 3 sc at each corner.
- Join with a sl st to the first sc of the border round.
- Final stitch count: 44 sc around.
3. Fasten Off & Finish Base
- Weave in and tuck any loose ends with a smaller hook or tapestry needle.
- Carefully melt the cord ends with a lighter to prevent fraying.
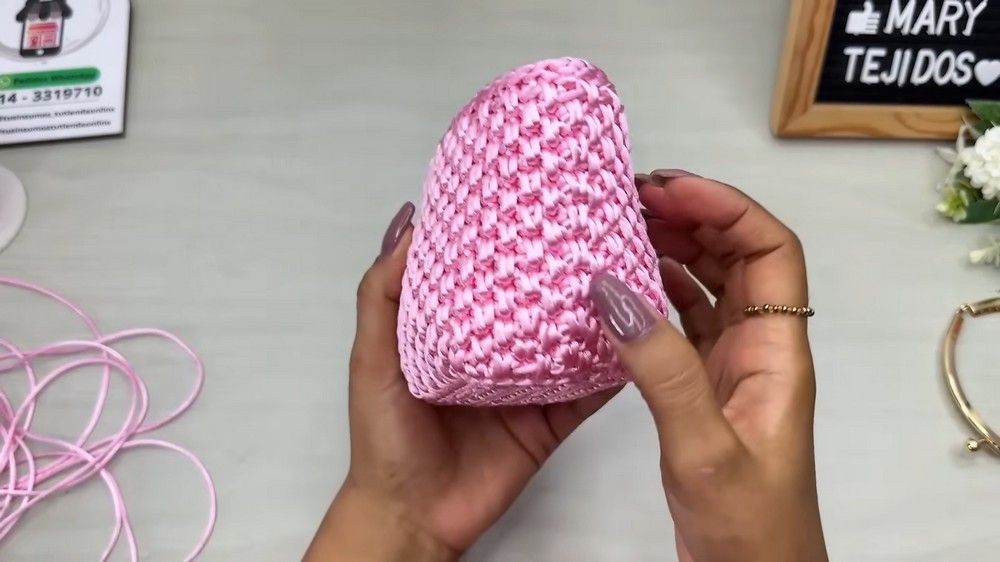
4. Purse Body
- First Round (Body Foundation):
- With the right side facing down, attach yarn to any st.
- Work sc into each st around, but insert the hook through the center of the stitch AND the back loop for added firmness. (44 sc; maintain st count from border.)
- Join round with invisible join, pulling the yarn to the back.
- Body Stitch Pattern:
- Alternate rounds of short and long sc:
- Short sc: Insert hook into BLO of the st above and complete a regular sc.
- Long sc: Insert hook into base of the previous sc (one row below), elongate to match stitch height, yarn over, pull through both loops.
- Start each round alternating (if previous round began with short sc, start with long sc, and vice versa).
- Continue this short/long sc pattern for each round.
- Always finish with an invisible/slip join.
- Alternate rounds of short and long sc:
- Continue Working:
- Repeat the alternating stitch pattern for 18 rounds total (or until the body reaches desired height—approx. 11–12 cm).
5. Edging and Sizing Adjustment
- If finished purse is a little too wide for the frame, work 2–3 rounds of loose slip stitches around the top to slightly reduce the opening while creating a neat edge.
- Always work slip stitches loosely to avoid shrinking the mouth too much.
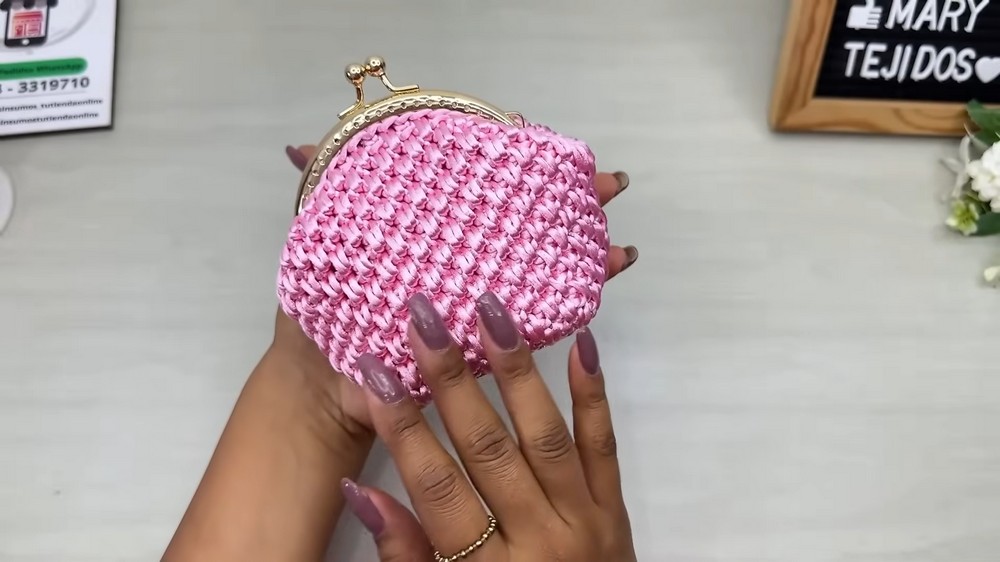
6. Finishing and Assembly
- Finishing:
- Cut yarn, fasten off with invisible join to first stitch, and weave ends inside the purse.
- Burn the cord ends with a lighter for a clean finish.
- Attach to Frame:
- Thread a length of nylon/waxed thread onto a needle.
- Place purse inside frame, aligning the corners.
- Sew to frame through each hole using backstitch (or running stitch, going back and forth to reinforce).
- Make sure purse is centered and not bunched.
- Attach Handle/Chain (Optional):
- Use the jump rings at each end to secure the handle or chain to the frame.
- Final Touches:
- Attach any personalized tags as desired.
Conclusion
You have completed a sophisticated coin purse with a structured base, eye-catching texture, and metallic hardware. The finished purse measures approximately 12 cm (height) by 15 cm (width), with a sturdy and elegant look. One roll of cord is enough for roughly two purses.
Pattern Correction & Tips
- Correction: Ensure sides are even and corners line up with frame for symmetrical final shape.
- Tip: Alternate stitch pattern precisely—always check what stitch the previous round ended with so you begin the new round with the opposite type.
- Tip: If your purse mouth is too wide for the frame, adding more slip stitch rounds will draw it in slightly without needing to redo the body.
- Tip: Burn cord ends with a lighter immediately after weaving in to prevent untwisting.
- Tip: Take time aligning and sewing to the frame for a professional finish.
Leave a Reply