
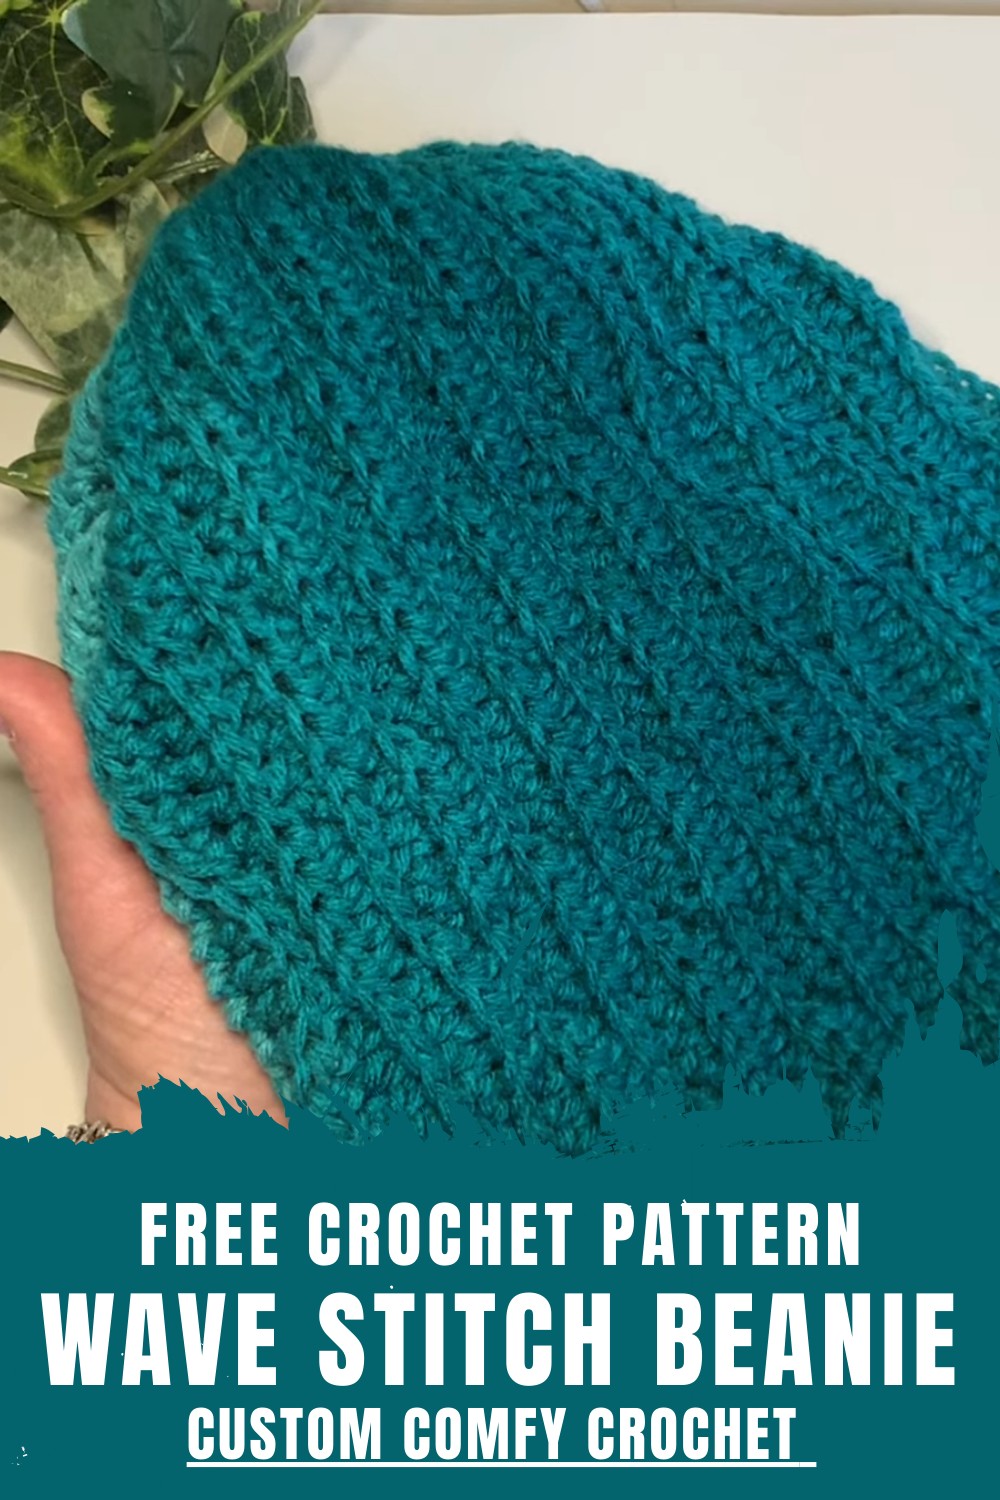
Feel the joy with this free crochet wave stitch beanie pattern and warm up your style with gentle waves and easy beautiful handmade flair.
Gentle waves roll across a cozy hat that brings warmth and smiles everywhere you go. With the crochet wave stitch beanie pattern, you can have a stylish beanie full of beautiful texture and playful ripple lines. This design feels friendly on your skin and gives your look a pop of color or a soft touch, depending on your favorite shades.
Crochet Wave Stitch Beanie Pattern Free and Simple
Easy instructions and a simple rhythm make this project perfect for anyone, even if it’s your first time picking up a hook. People love how this beanie works for every season, keeps heads warm, and brings a special handmade charm. Give it to loved ones or keep it for yourself—everyone enjoys the happy feeling and lovely style this beanie brings day after day.
Wave Stitch Beanie Free Crochet Pattern
Materials List
- Yarn: Red Heart Ombre or any medium weight (#4) yarn (sample uses ombre for color effect)
- Hook: 6.5 mm crochet hook (larger than yarn label for drape and easier slip stitches)
- Yarn Needle: For seaming and weaving in ends
- Scissors: For cutting yarn
- Stitch Marker: (Optional, for marking starting point when cinching top)
- Pom-pom (optional): For the beanie top
Key Abbreviations
- ch – chain
- sl st – slip stitch
- sc – single crochet
- hdc – half double crochet
- st(s) – stitch(es)
- BLO – back loop only
This pattern uses US crochet terminology.
Special Notes
- Back Loop Only: All slip stitches, single crochets, and half double crochets are worked in the back loop only (BLO) unless otherwise noted.
- Two-Row Repeat: The wave pattern alternates every two rows between sections of sl sts and hdc.
- Brim: The brim is made using single crochet stitches at the end of each row.
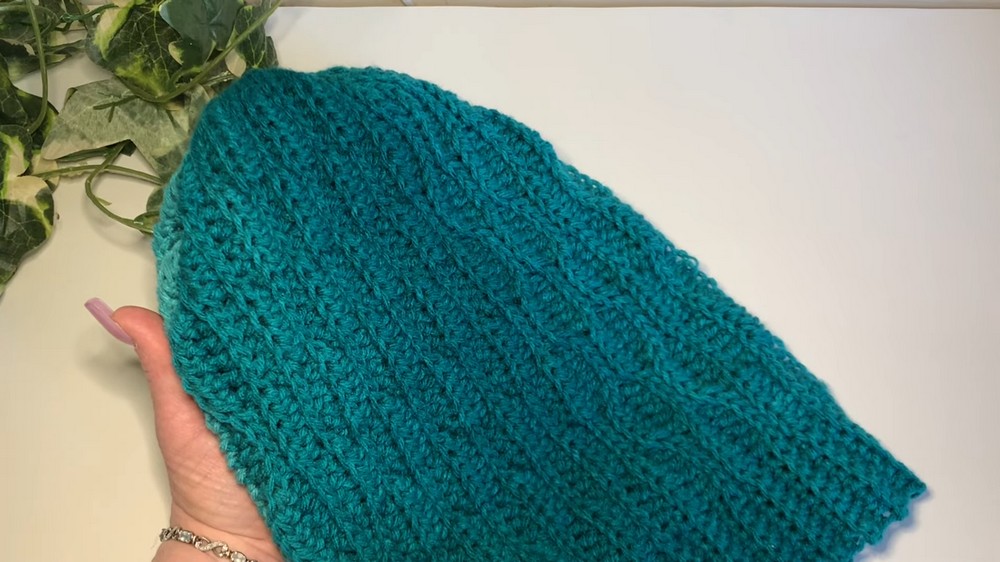
- Fit: Finished panel should measure approx. 19½” long for an adult; adjust for desired fit.
Pattern Instructions
1. Foundation & Set-Up
- Chain 54.
- This forms the height of your beanie (adjust chain number for desired height).
- Turn. Begin your first repeat row (work in BLO starting from row 2 onward):
2. Wave Stitch Row (Row 1)
- The stitch repeat per row is:
[5 sl st, 5 hdc] x N, ending with 8 sc for brim.- Repeat [5 sl st, 5 hdc] as many times as you can across the row, ensuring the final 8 sts are sc for the brim.
Row 1:
- Sl st in BLO of first 5 sts.
- hdc in BLO of next 5 sts.
- Repeat steps 1 and 2 until you have 8 sts left in row.
- sc in BLO of last 8 sts (for brim).
3. Continuing the Pattern (Two-Row Repeat)
Row 2:
- Ch 1, turn.
- sc in BLO of first 8 sts (for brim).
- Then alternate:
- 5 sl st in BLO.
- 5 hdc in BLO.
- Repeat steps 3 until end of row.
- Always end with the section you began with (i.e. align your slip stitch and hdc sections for pattern continuity).
Rows 3–X:
- Repeat Rows 1 and 2 (as above).
- After every 2 rows, swap the slip stitch and hdc sections for the “wave” effect.
- Always keep all stitches loose, especially slip stitches, for easier work in subsequent rows.
Continue pattern until the finished piece fits comfortably around the head (approx. 19½” for most adults; measure as you go).
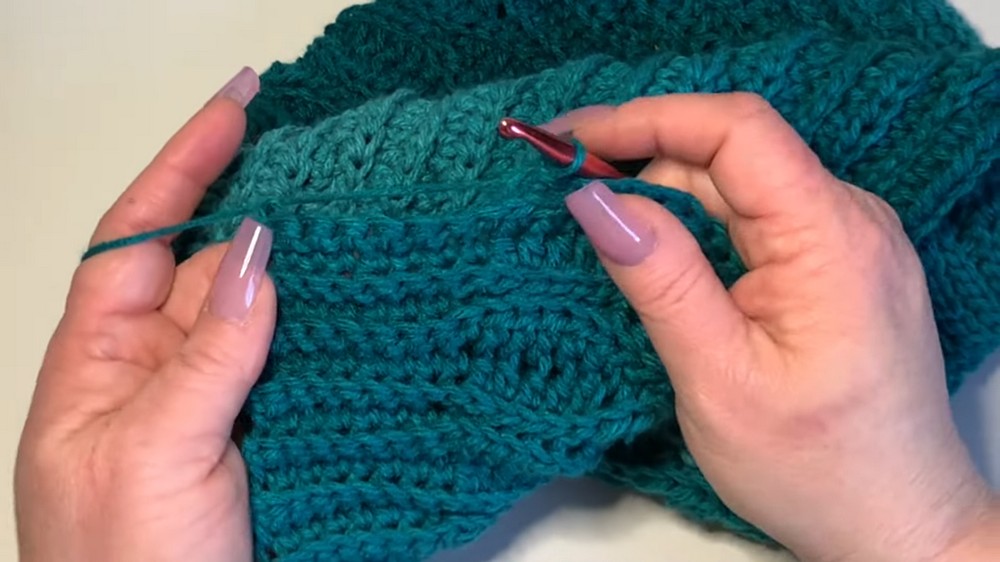
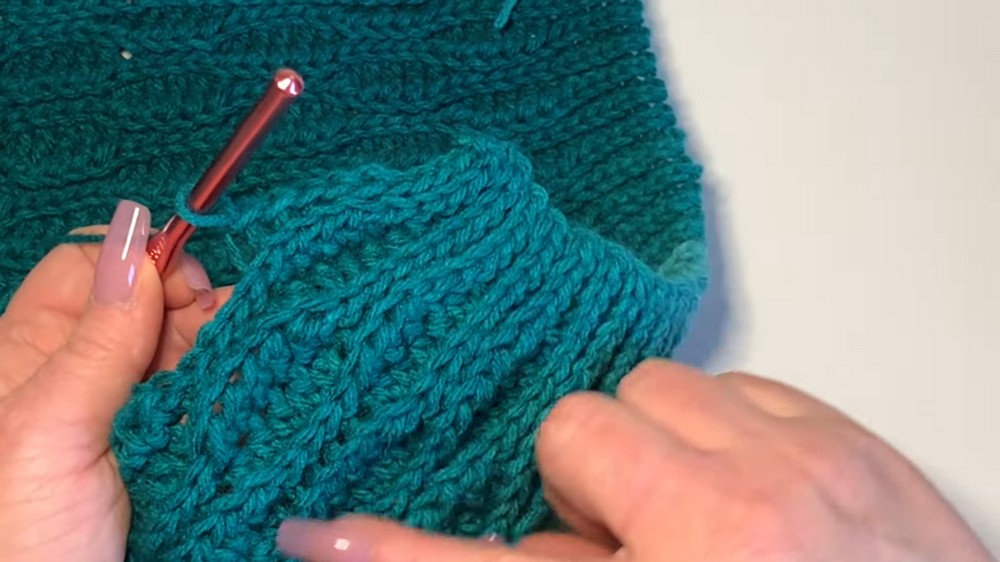
4. Seaming the Sides
- Fold the piece with right sides facing in.
- Ch 1, align the starting chain side and last row.
- Slip stitch seam in BLO of both edges across (all 54 sts).
- Try to seam stitch-for-stitch for best finish.
- Fasten off, leaving a long tail for cinching the top.
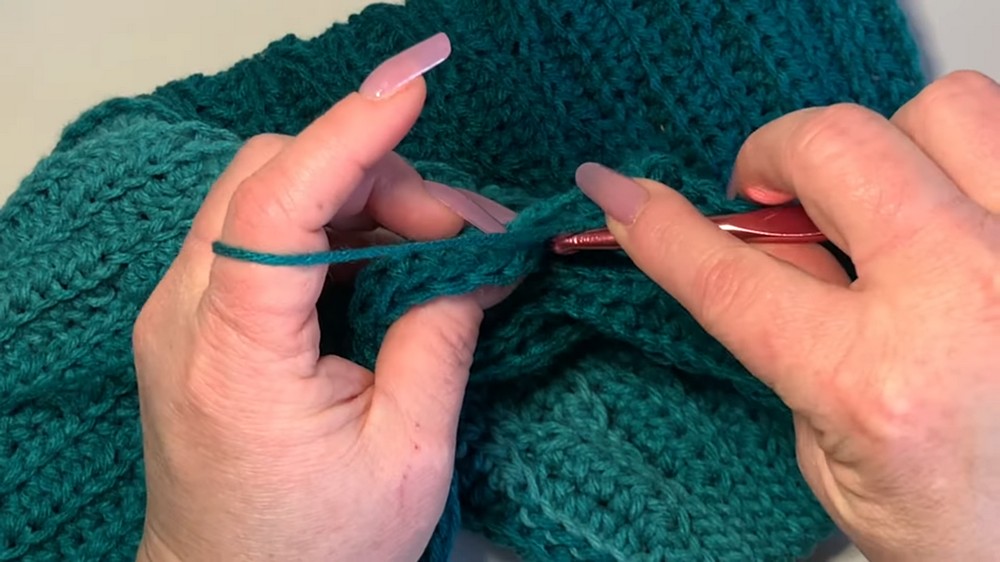
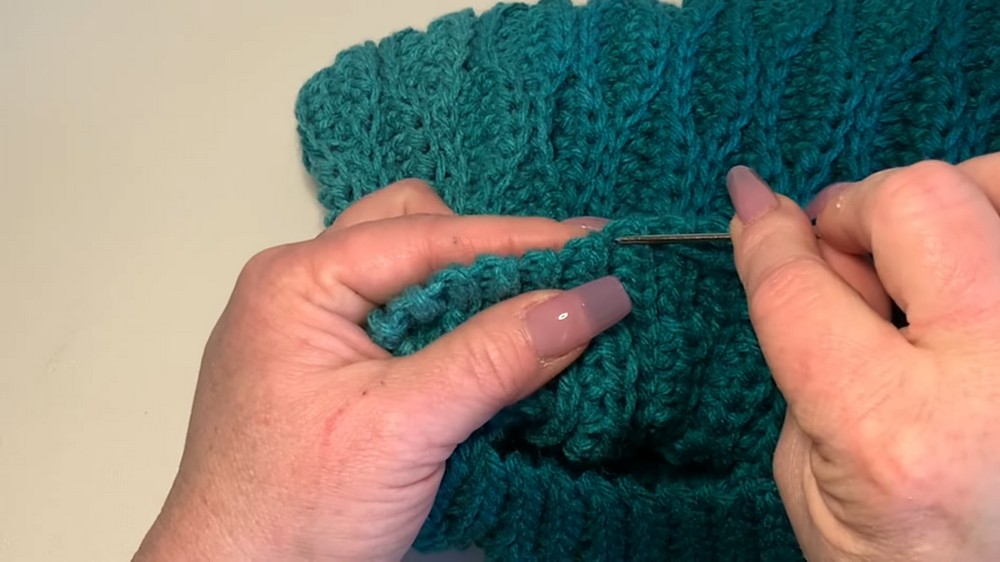
5. Closing the Crown
- Turn the hat right side out.
- Thread the yarn needle with the long tail.
- Weave needle in and out around the top edge stitches (BLO), gathering evenly around.
- Draw string tightly to cinch hat closed.
- Pass needle through the top center a few times in different directions to secure.
- If desired, sew on a pom-pom to cover the closure.
6. Finishing
- Weave in all remaining yarn tails on the inside of the hat.
- Turn up the brim for a classic look, or leave it unfolded for a slouchy beanie style.
Conclusion
This beautiful beanie uses a simple two-row repeat wave stitch, worked mainly in the back loop for attractive texture and stretch. It is easy to customize for size or style (slouchy or fitted, brimmed or not), and works up beautifully in ombre or solid yarns.
Pattern Correction
- Ensure all stitches are kept loose, especially slip stitches, to make working into them on subsequent rows easier.
- Always maintain the alignment of wave stitch sections, so that slip stitches and hdc sections match up as pattern progresses for a continuous wave.
- For a seamless pattern, end with the final row matching the starting edge (sl st sections lined with sl st, hdc with hdc).
Tips
- If slip stitches are too tight, size up with your hook or consciously keep a loose tension.
- Try on the beanie before seaming to ensure the fit is snug but comfortable.
- This is a highly stretchable stitch, so do not make your beanie too loose.
- Optional: Finish with a pom-pom for a classic beanie, or leave plain for a textured look.
Leave a Reply