
Protect your hands in style with this free crochet potholder pattern that add cheerful color and easy homemade charm to every kitchen moment.
Searching for a way to add color to your kitchen and protect your hands too? A Crochet Potholder pattern is both beautiful and practical, turning simple yarn into a handy piece of art. With its soft texture and bright design, this charming potholder keeps fingers safe from hot pots and saves tables from heat. Its sturdy build means it stays strong and lovely, wash after wash, no matter how often you use it.
Free Crochet Potholder Pattern for Cozy Cooking
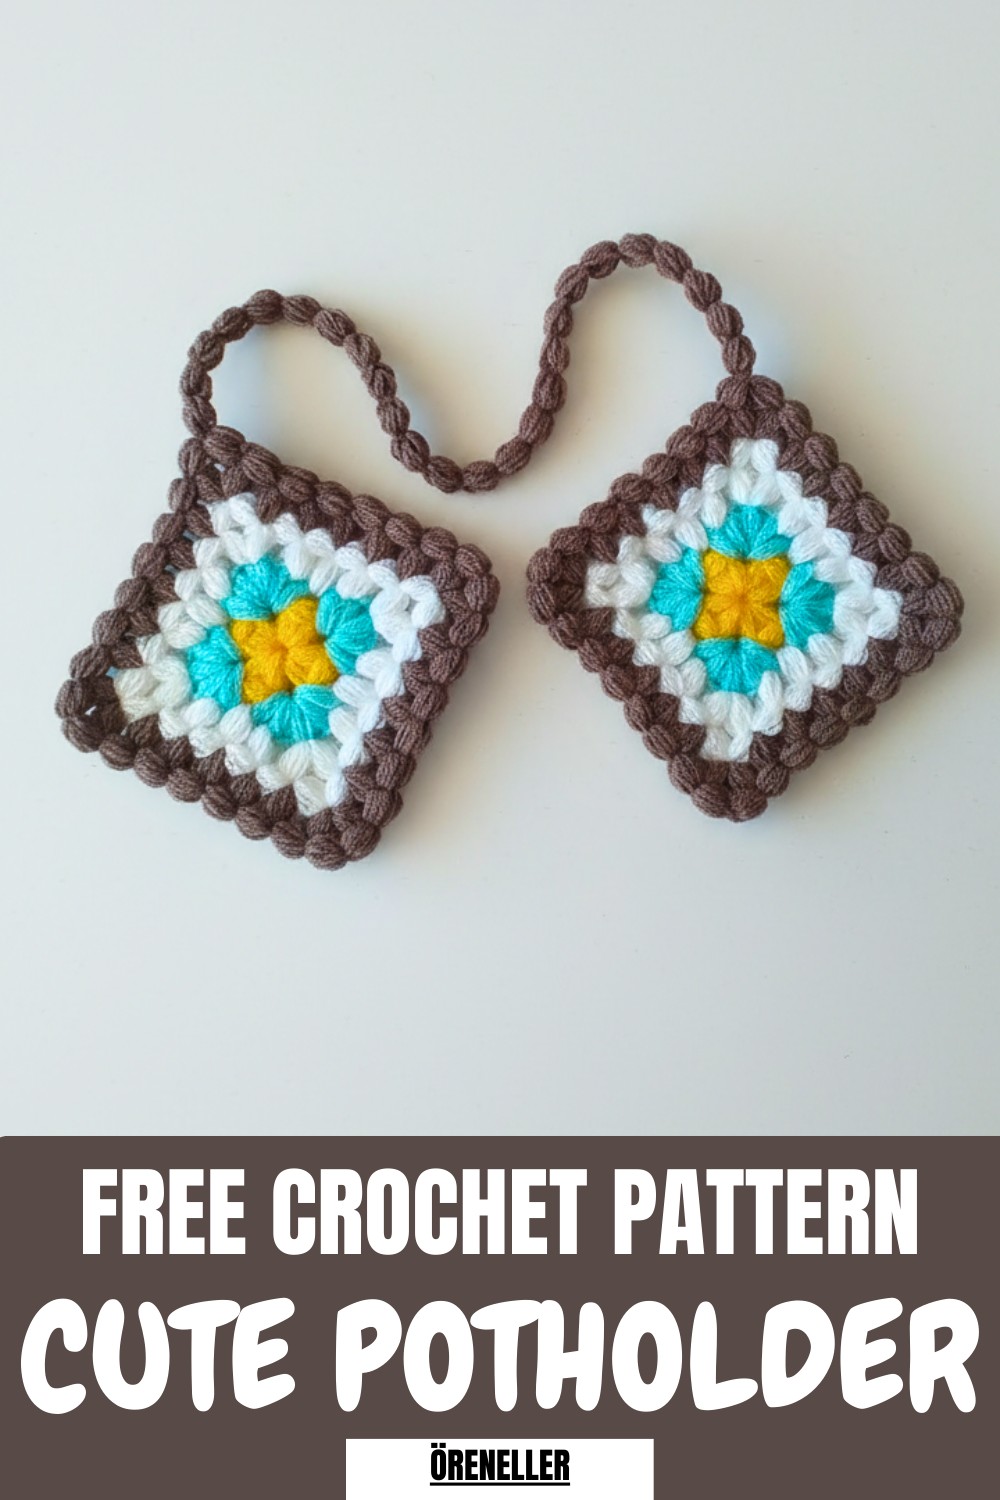
Hanging by the stove or resting in a drawer, the crochet potholder brings not just safety, but also a warm, homemade feeling to any space. Creating one with a special Crochet Potholder pattern is more than making a kitchen tool—it’s adding a touch of love, color, and care to every meal you make.
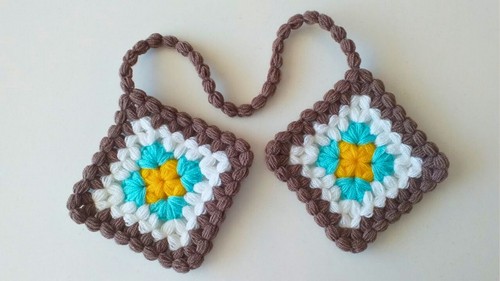
Multicolor Puff Stitch Potholder (with Handle) Pattern
Materials
- Yarn: 4 colors of sturdy, worsted-weight (fiber) yarn (suitable for kitchen use)
- Crochet Hook: 3.5 mm–4 mm (E–G) aluminum hook (size as preferred for your yarn)
- Yarn needle: For weaving in ends
- Scissors
Key Abbreviations (US Terms)
- MR – Magic ring
- ch – Chain
- st(s) – Stitch(es)
- sl st – Slip stitch
- yo – Yarn over
- puff – Puff stitch (see Special Stitches)
Special Stitches
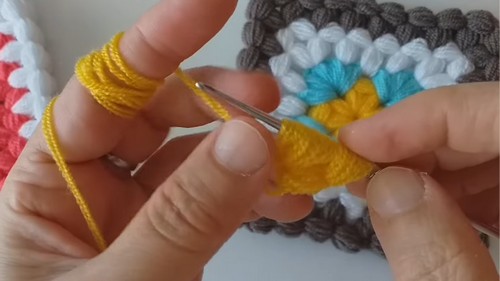
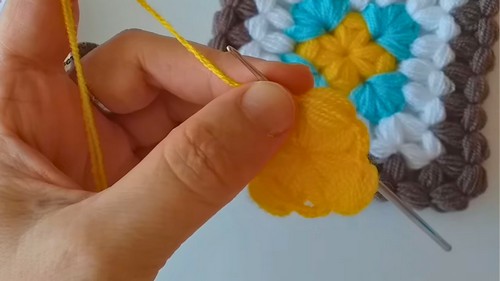
Puff Stitch (4-loop Puff):
- Yo, insert hook into designated space or st, yo, pull up a loop (repeat 4 times; 9 loops on hook),
- Yo, pull through all 9 loops, ch 1 to close puff.
Special Notes
- You will work in the round with color changes between each round.
- The number of puffs (called “peanuts” in the video) grows each round to create a square motif.
- Handle is formed with a long puff-stitch chain.
- Use fewer or more color rounds to suit your preferences and yarn amount.
- This pattern is very forgiving—a slight variation in puff stitch count will not affect result as long as each side remains consistent.
Step-by-Step Pattern
1. Center and Round 1 (First Color)
- Start with MR.
- Ch 4 (counts as the first space).
- Work 4 puff sts into the ring, ch 2 between each puff.
(Total: 4 puffs, separated by ch-2 spaces.) - Pull tight to close ring.
- Sl st to top of first puff (or initial ch) to join.
- Fasten off and weave in center tail.
2. Round 2 (Second Color)
- Join next color in any space between two puffs.
- Ch 2 to secure.
- In the same space, make 1 puff st, ch 2. Repeat for a total of 2 puffs in each corner space, with ch-2 between them.
- In end-of-round spaces, always work 2 puffs separated by ch-2.
- Between corner groups, work 1 puff, ch 2, repeat to next corner.
- Continue around so you have 5 puffs per side (1 in each space and 2 in each corner).
- Join with sl st to top of first puff.
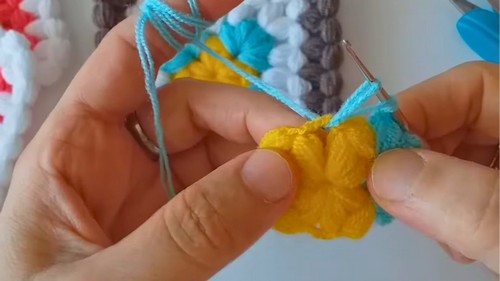
3. Round 3 (Third Color)
- Join yarn in a corner space.
- Ch 2 to secure.
- (Corner): In same space, work [puff, ch 2, puff], all in same space.
- (Side): In each space on side, work puff, ch 2.
- (Corner): In corner, again [puff, ch 2, puff] in same space.
- Continue pattern around.
- At the end, sl st to first puff, fasten off, and weave in ends.
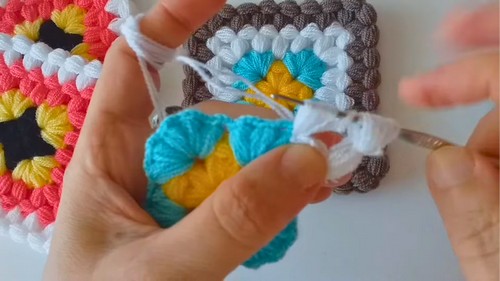
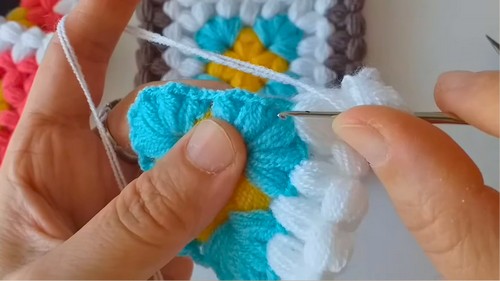
4. Round 4 (Fourth Color)
- Join yarn in any side space between two corner puffs.
- Ch 2 and make one puff in same space, ch 2.
- (Corner): In corner space, [puff, ch 2, puff].
- Continue making side puffs (puff, ch 2) in each space along the side, corners as above.
- This round increases your motif slightly; you will have three puffs in each corner and puffs between.
- Complete the round and join, as before. Fasten off.
5. Handle
- Attach yarn at any corner.
- Ch 1, optional: sl st to next space for even positioning.
- Work 25 puff stitches in a row, closing each with ch 1 (do not join in a ring; leave as a chain).
- If you want a shorter handle, make 20; for longer, make 30 puff stitches.
- Attach free end to the opposite corner with a sl st (through the motif for neatness).
- Fasten off and weave in all ends.
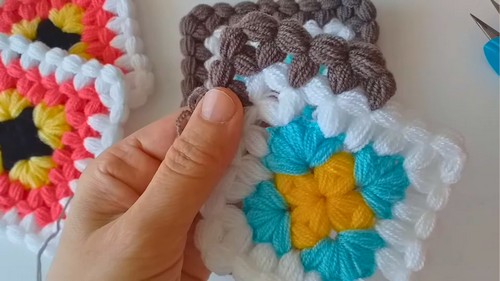
Conclusion
This multi-color puff stitch potholder is not only decorative, but practical. The thick puff stitches create a safe and heat-resistant surface for kitchen use. The included handle allows for easy hanging.
Pattern Correction
- Ensure you ch 2 between all puffs and between all corners for a flat motif.
- Do not skip side spaces; always place a puff in each for square growth.
- The handle should NOT be made as a loop if you use safety in mind; keep it secure.
Tips
- When changing color, always fasten off and weave in ends immediately for a clean finish.
- If your motif curls, gently shape and block.
- For best results, use sturdy synthetic or fiber yarn that withstands washing and heat.
- Make the handle the desired length by adjusting puff count.
Leave a Reply