
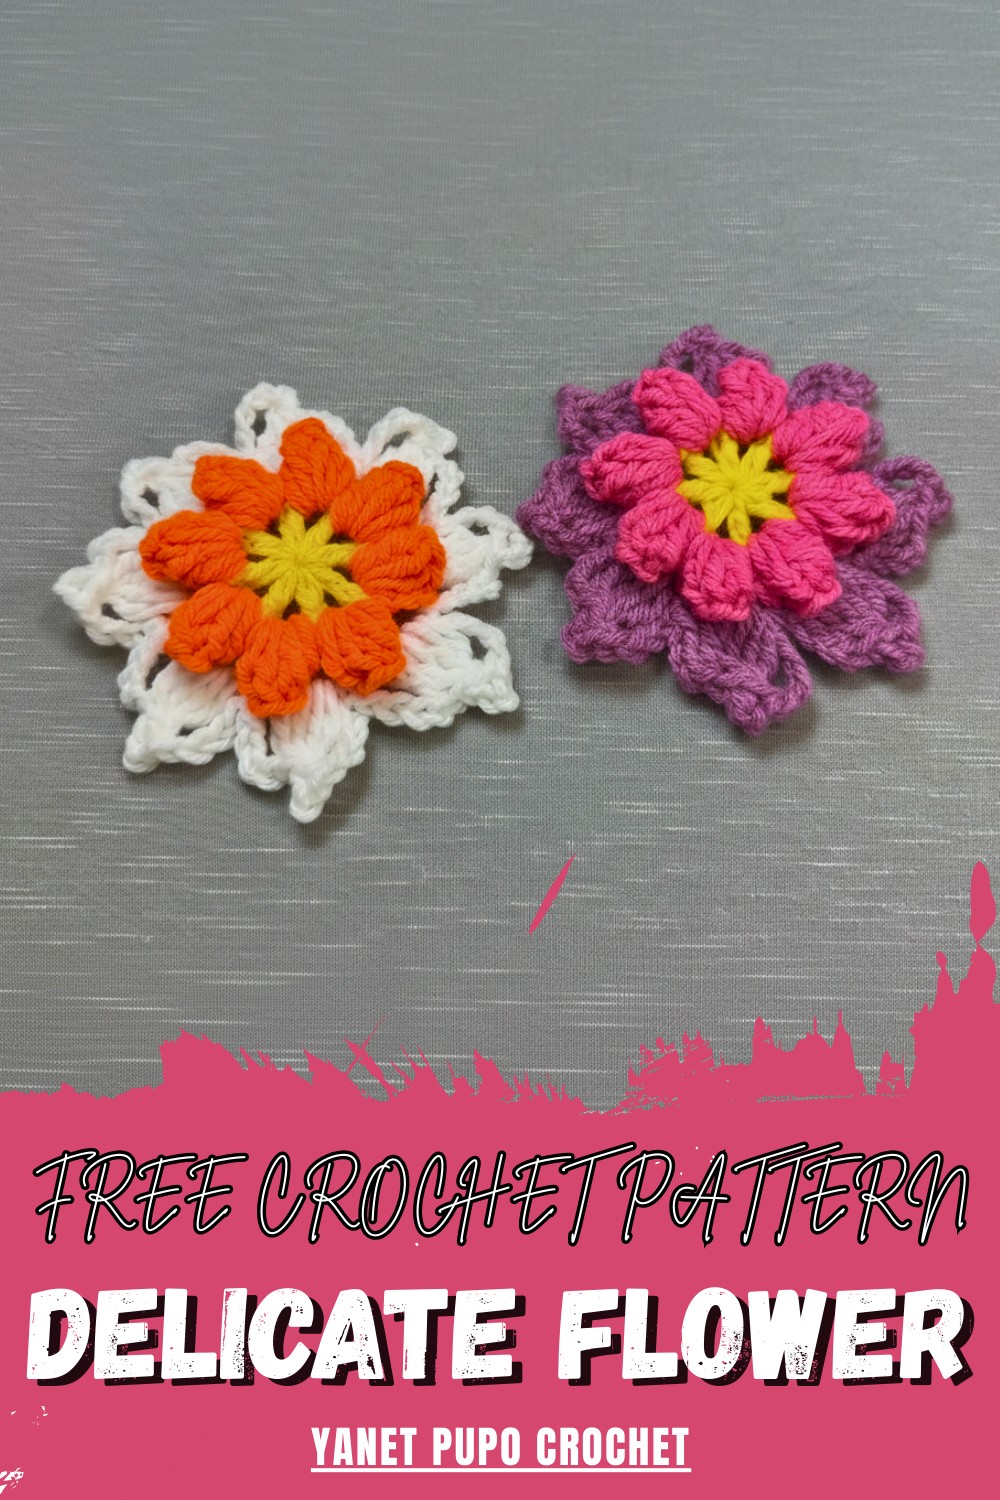
Grow your decor with this free crochet flower pattern, that shows detail adds fresh charm and suits home accents gifts and special moments.
A tiny bloom begins to grow from simple loops forming soft petals that feel calm and pleasing to see. The Crochet Flower pattern helps shape a neat and lovely flower with a round center and smooth edges that look clean and bright. Its small size and gentle form make it useful for decorating clothes, bags, hair clips, or small spaces that need a fresh touch.
Must Try Crochet Flower Pattern Free for Beginners
It can also be used to decorate gifts and simple items to give them a pretty look. The guide is clear and easy to understand so anyone can complete it without worry. The finished flower looks cheerful and full of charm, giving a light and happy feeling. It offers beauty, creativity, and joy, turning simple material into a sweet floral piece that adds color, softness, and a lovely style to everyday life.
Decorative Layered Crochet Flower Pattern
Materials
- Yarn: Worsted weight (#4) yarn, approx. 10g per flower; use several colors as desired
- Crochet Hook: 3.75 mm (US size F–G)
- Tapestry needle: For weaving in ends
- Scissors
Key Abbreviations (US Terms)
- MR – Magic ring
- ch – Chain
- sl st – Slip stitch
- sc – Single crochet
- hdc – Half double crochet
- dc – Double crochet
- st(s) – Stitch(es)
- beg – Beginning
Special Notes
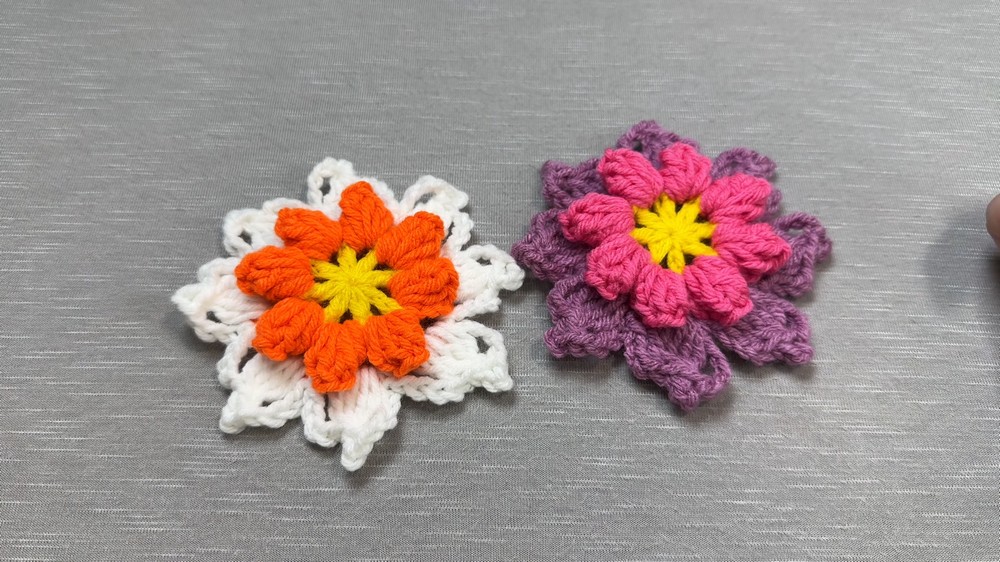
- Flower is worked in three layers: base rings, petals, and surrounding overlay.
- Use a different color for each round for a colorful flower.
- Stitch counts matter for symmetry—count carefully.
- For the 3rd (outer) round, petal height comes from “unfinished double crochets,” grouped together and secured at the top.
Step-by-Step Pattern
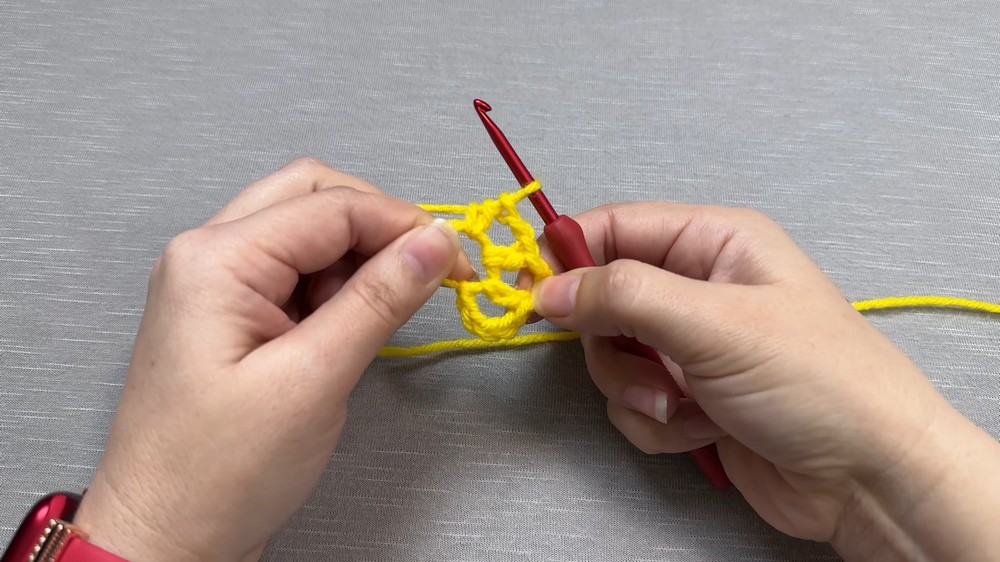
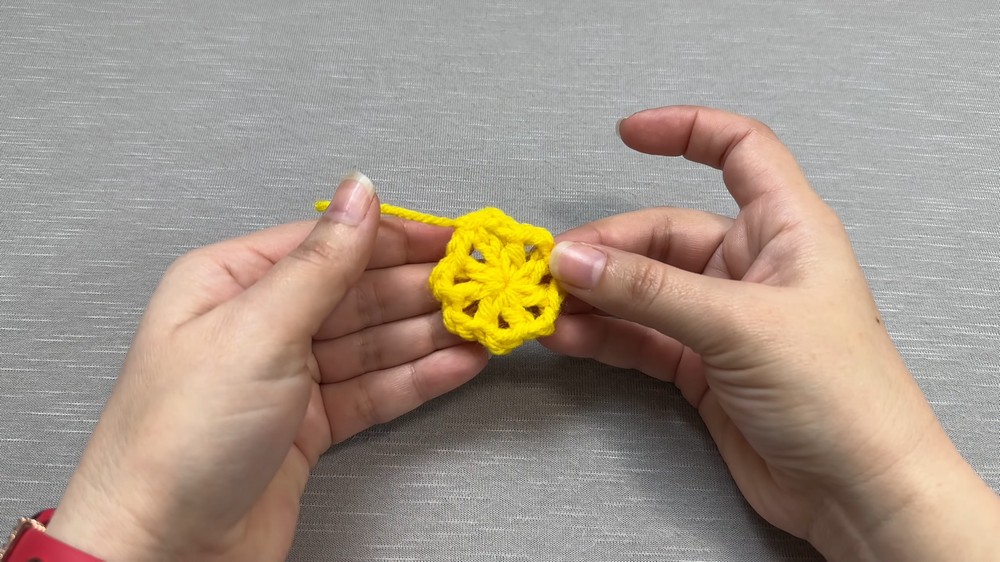
1. Base: Center and First Layer of Petals
With first color:
- Start with an MR (magic ring).
- Ch 4 (counts as a foundation arch).
- [Yarn over, insert hook, pull up loop, yarn over, pull through all loops on hook (hdc)], ch 2; repeat from * a total of 8 times, always working into the ring.
- You will create 8 ch-2 spaces with an hdc in between each.
- After final ch-2, sl st to 2nd ch of initial ch-4 to join and form a ring of 8 spaces.
- Fasten off first color and weave in ends.
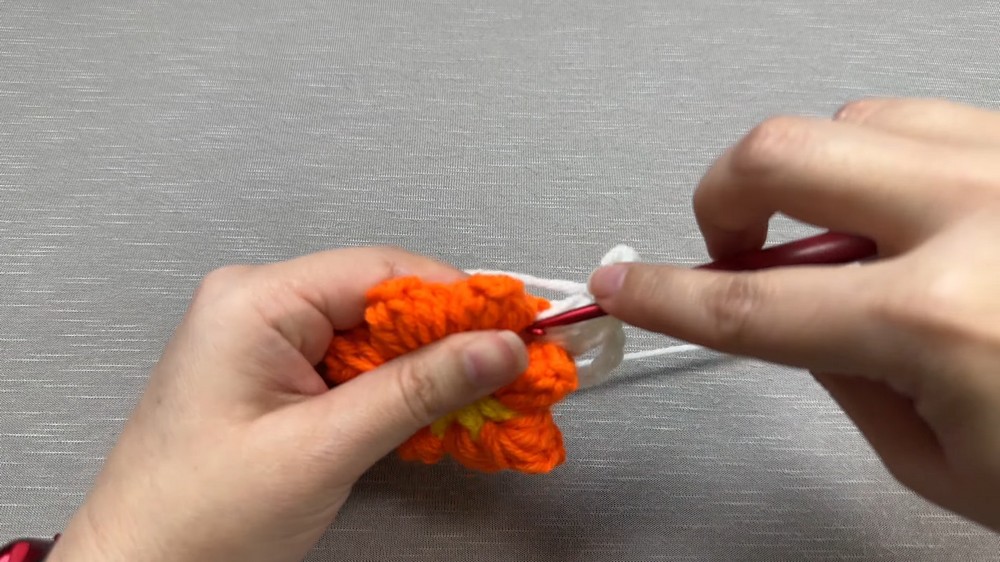
2. Second Layer: Full Petals (Second Color)
Attach second color to any ch-2 space:
- Ch 3 (counts as first dc).
- 5 dc into the same ch-2 space (you have 6 dc total in the first petal).
- Sl st into the 3rd ch of the starting ch-3 to close the petal (petal forms a small loop at top).
- Ch 2 (slightly loose, or ch 3 if you crochet tightly)—this forms a bridge to the next petal.
- In next ch-2 space: 6 dc, then sl st into the first dc of this petal to close, then ch 2 (or ch 3).
- Repeat until you have 8 petals total, each with 6 dc.
- After the last ch 2/ch 3, sl st to the base of the starting ch-3.
- Fasten off and weave in ends.
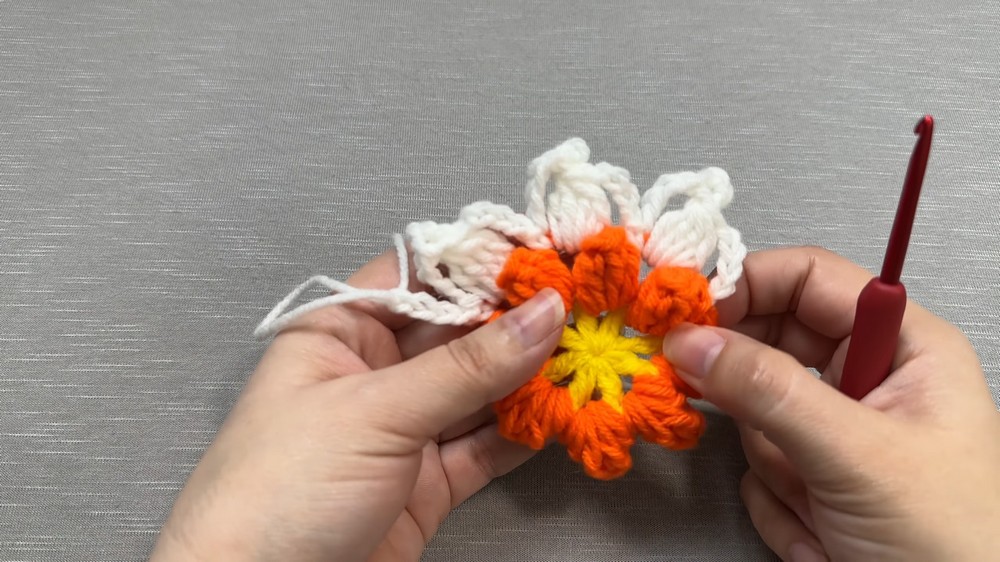
3. Third Layer: Overlay Petals (Third Color/Contrast)
Attach third color in any ch-2/ch-3 bridge between petals:
- Ch 4 (height for petal).
- In the next ch-2/ch-3 bridge: Work four unfinished dc as follows:
- Yo, insert into bridge, yo, pull through, yo, pull through 2 loops, do not finish; keep remaining loop on hook.
- Repeat for a total of 4 times (you will have 5 loops on your hook).
- Yo and pull through all 5 loops.
- Ch 3, bring yarn through all strands, sc into top of cluster just created (to secure).
- Ch 4 (to descend), sc into same space (petal).
- Repeat steps 2–4 in each bridge around (total of 8 petals).
- At the end, after the last ch-4, sl st to base of first ch-4.
- Fasten off and weave in ends.
- Gently arrange petals so they lay flat.
Conclusion
This decorative layered flower is a quick, eye-catching embellishment ideal for scarves, hats, headbands, or home décor. It is versatile—choose any color combination and always count your stitches for uniformity. The overlay technique in the final round produces dramatic, textured petals.
Pattern Correction
- Always check stitch counts after each round, especially after creating petals.
- If your stitches are too tight, use 3 chains instead of 2 between petals for a flatter result.
- Weave in ends after each color change to keep the flower tidy.
Tips
- For a more “leafy” look, use green for the final round.
- These flowers look beautiful as appliqué or grouped for floral arrangements.
- Stiffen the finished flower with fabric starch if a more rigid shape is needed.
- Mix yarn leftovers for unique, multicolored effects.
Leave a Reply