
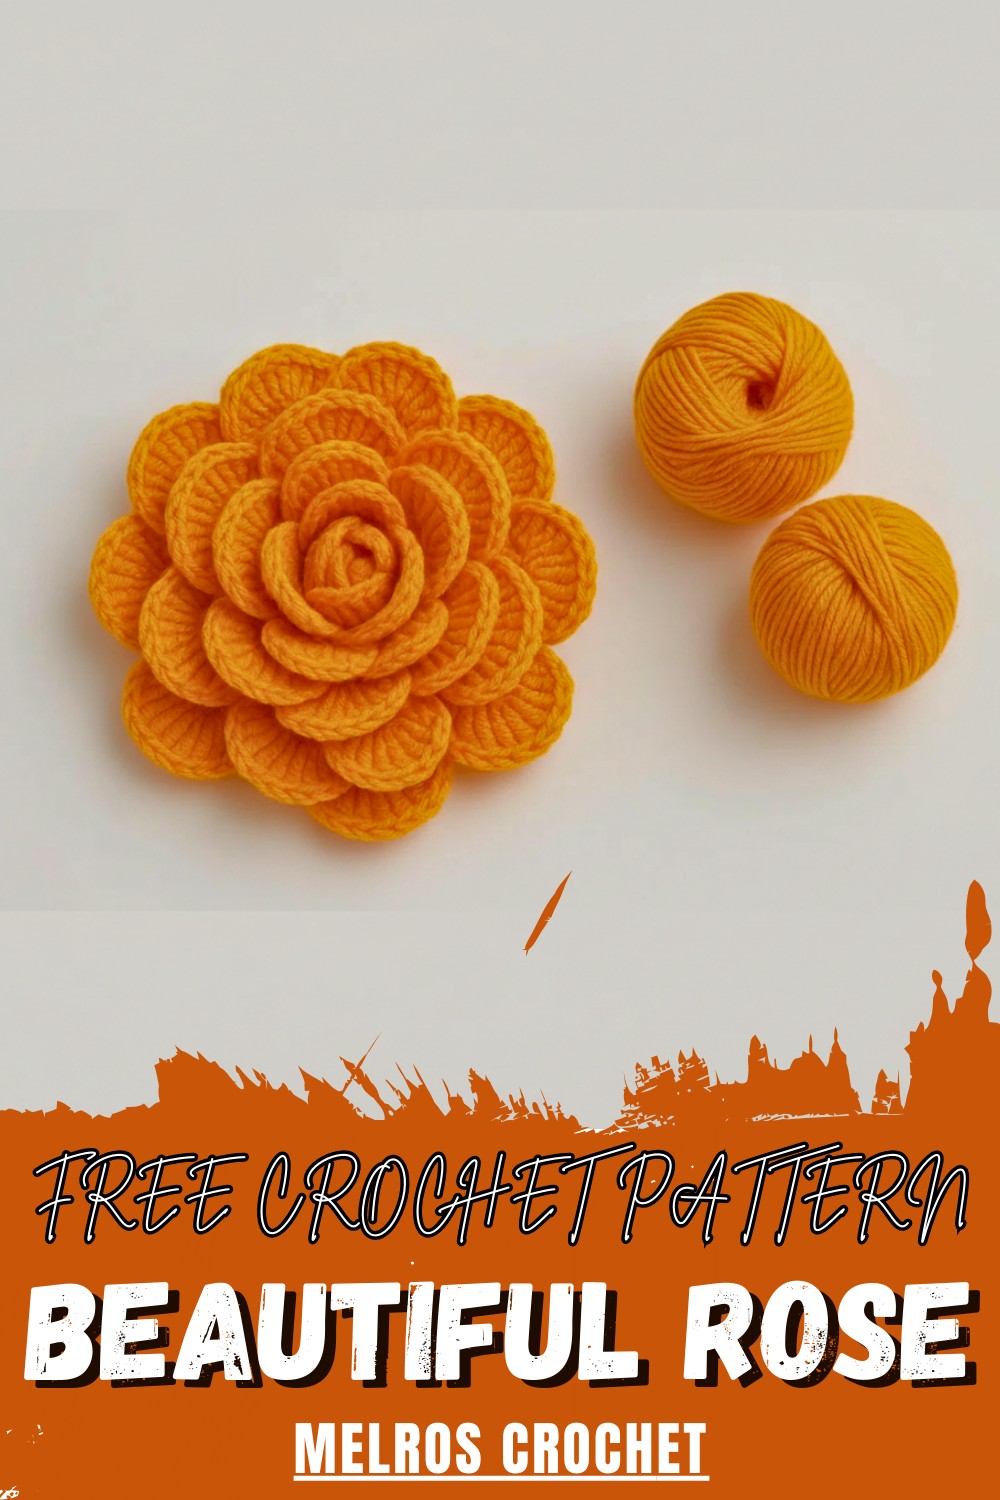
Let your hands bloom with beauty as you shape using this lovely free crochet rose pattern that’s simple, beginner-friendly, & full of charm.
No wilted flower waits forgotten in a vase when a single bright handmade bloom is always ready with a crochet rose pattern. This soft, colorful petal stays fresh and cheerful every day, making it a perfect touch for any home, no matter the size. A crocheted rose rests on a favorite shelf, brightens up a bag, or pins to a hat or scarf for a gentle splash of color.
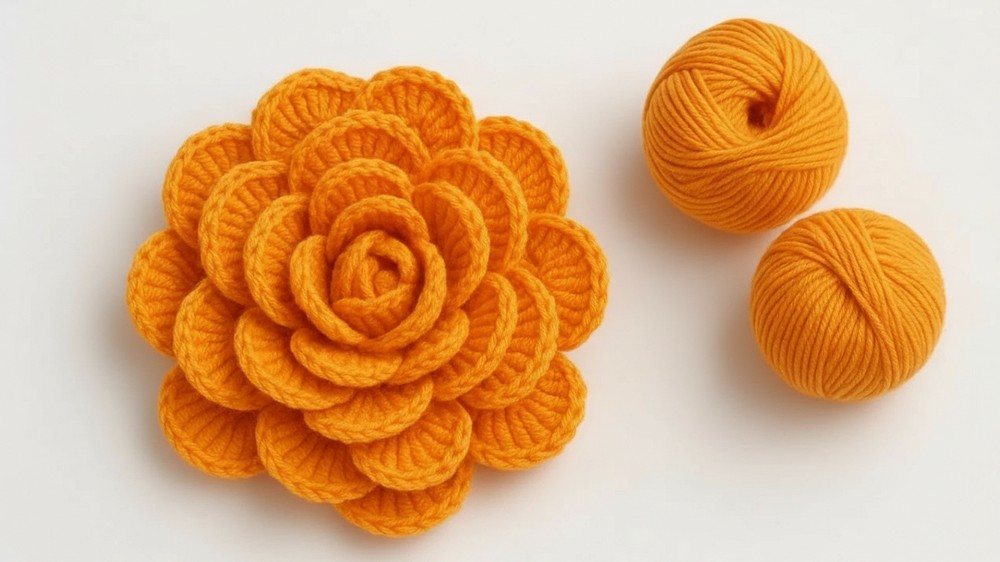
Free Crochet Rose Pattern for Gifts and Decor
No water is needed, and there’s never a mess—yet it brings real comfort and happiness wherever it goes. With a crochet rose pattern, gentle beauty fills any space and makes even simple gifts heartfelt and lasting. No need to read or write; hands alone shape each petal into a warm, lasting treasure, brightening days just by being near.

Free Crochet Rose Pattern
Materials
- Yarn: Light/DK weight yarn (suggested: “Mango” color, or your choice; suitable for 2.5–3 mm hook)
- Hook: Size 3 mm crochet hook (or size appropriate for yarn)
- Tapestry needle: For sewing petals together
- Stitch markers or pins: To hold shape while assembling (optional but helpful)
- Scissors
Abbreviations (US Terms)
- ch: chain
- dc: double crochet
- sc: single crochet
- st(s): stitch(es)
- sl st: slip stitch
Special Notes
- The initial chain is made in multiples of 4.
- Rose-size is easily adjusted by increasing or decreasing the number of starting chains (always in multiples of four).
- Finished rose consists of 14 petals using 56 starting chains.
- All stitches are worked in rows, then the strip is rolled and sewn to form the flower.
Pattern Instructions
Step 1: Foundation Chain
- Ch 56 (in multiples of 4 for a different size; sample uses 56).
- Ensure your initial knot is tight and secure.
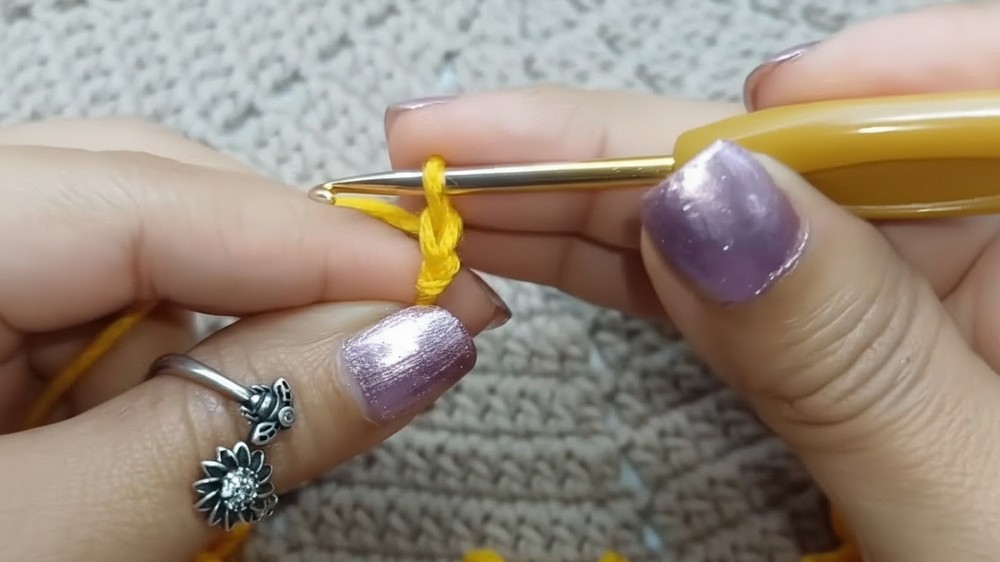
Step 2: Row 1 – Base Row (Foundation for Petals)
- Skip the first 3 ch from the hook (these act as the first dc).
- Dc in the 4th ch from the hook.
- Dc in each ch across to the end of the row. (You will have 54 dc, plus the initial 3 ch which count as a dc.)
- Turn your work.
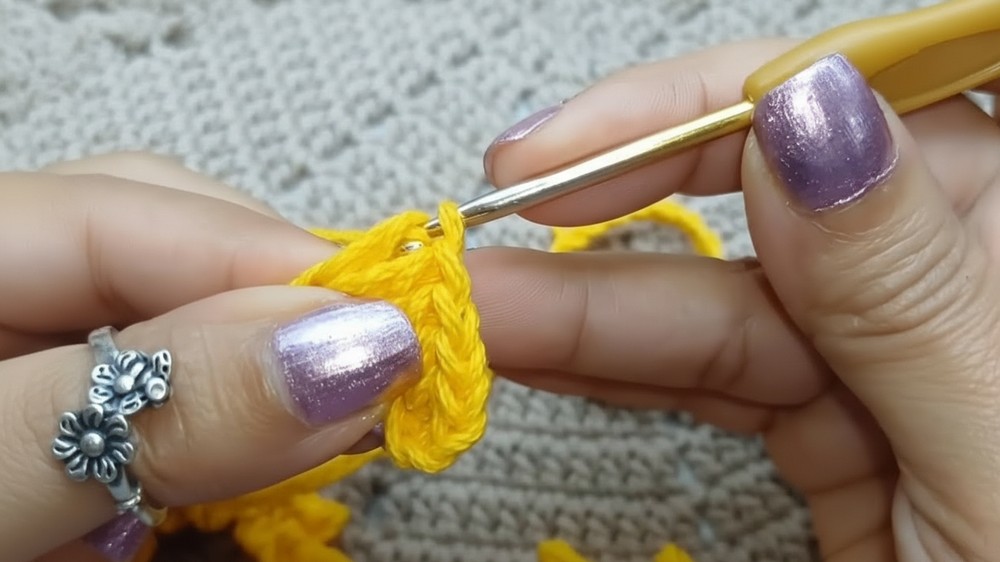
Step 3: Row 2 – Making Petal Spaces
- Ch 2 to start the row (counts as the first dc).
- Ch 4 (for petal separation).
- Turn your work.
- Dc in the same st (at the base of the turning chain): This forms a V shape or “fan” (this is your first motif).
- Skip 3 sts, in the 4th st, dc, ch 4, dc in the same st.
- Repeat from * until the end of the row.
- You should have 14 motifs/petals at the end of this row.
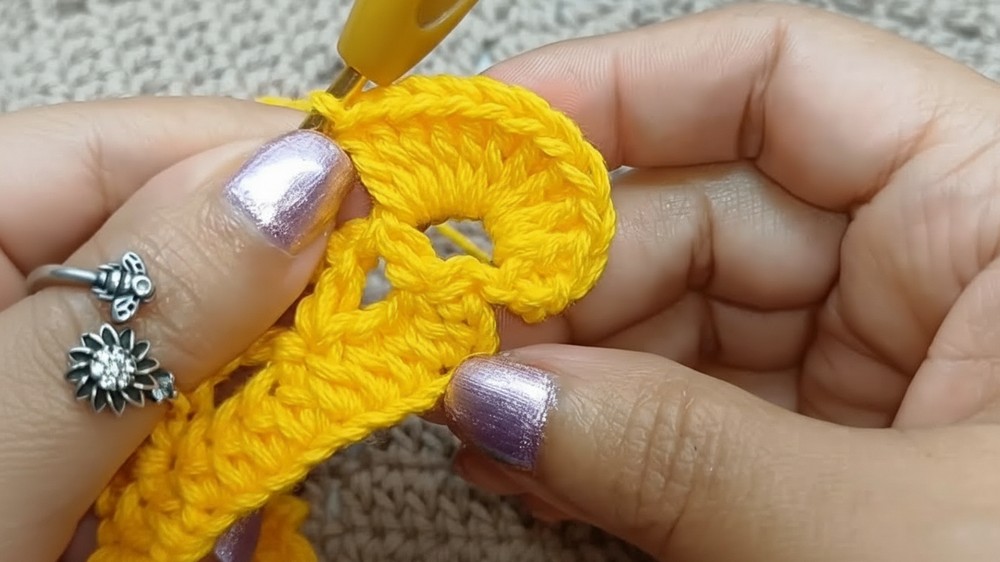
Step 4: Row 3 – Making Petals
- Ch 1 and turn.
- In each ch-4 space of each petal motif:
- Work 10 dc into the ch-4 space (this forms the rounded petal).
- Sc in the space between motifs to anchor the petal.
- Repeat for each petal motif.
- For the last petal: After the final petal, if there is extra space, you may work up to 12 dc in the final motif to keep the strip even.
- Finish with sl st or sc to anchor, ch 1, then cut the yarn, leaving a long tail for sewing.
Assembly
- Lay the strip out with petals facing upwards.
- With right side facing you, begin at one end and gently roll (coil) the petal strip into a rose shape so the petals form a spiral.
- Use stitch markers or pins to hold the shape as you adjust petals for a natural look.
- With the long tail and tapestry needle, sew through the base of the petals along the underside, repeatedly weaving back and forth through the roll to secure the flower. Take care not to pull too tight; allow the rose to maintain a gentle, full shape.
- Secure the end and weave in any loose ends. Trim excess.
- Gently shape petals for a natural finish.

Pattern Correction
- Ensure you are skipping exactly 3 stitches between petals when forming your ch-4 petal spaces; skipping the wrong number will result in an incorrect petal count.
- Each petal should have exactly 10 dc (except possibly the last, which may use 11–12 to complete the end evenly).
Tip
- This pattern is very forgiving and can be varied by adjusting petal size (number of dc per petal) or rose size (total number of petals).
- Use leftover yarn for multicolored roses.
- For sturdier roses (for baskets, brooches, etc.), crochet tightly and anchor securely when assembling.
- For 3D roses, you can glue or sew to felt bases or add leaves and stems as desired.
Conclusion
This pattern provides a quick and beautiful crochet rose that can be used in diverse crafts and accessories. The flexible sizing and easy construction make it a perfect project for beginners, yet lovely enough for advanced crocheters to enjoy. Combine several roses for bouquets, basket embellishments, or charming appliqués in your next project.
Leave a Reply