
Making your own selfie stick can be a super fun project! Imagine being able to snap amazing top-view photos and strike your best poses without the struggle of holding your phone at awkward angles. Our DIY Selfie Stick series is here to help!
DIY Selfie Stick

We’ve put together a bunch of easy ideas that will guide you through creating your perfect selfie companion. From simple materials you can find at home to a few quick steps, you’re on your way to capturing all your special moments just the way you want. So be ready for an exciting adventure into the world of DIY selfie sticks, it’s going to make taking pictures a whole lot more enjoyable!
Make a Super Selfie Stick
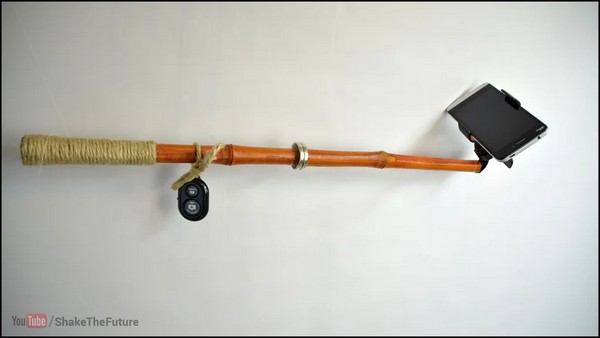
Uses: This special selfie stick is for anyone who loves taking photos without the hassle of short arms or asking strangers for help. It’s perfect for snapping selfies, group photos, and even pictures from high or hard-to-reach places. Plus, it can attach to things like lamp posts, making it awesome for hands-free shots!
Materials:
Bamboo stick (cut from a garden Tiki-Torch)
Mobile phone holder for the car
2 x Large, Round Neodymium magnets (30mm x 5mm)
Bluetooth Shutter Release Remote Control
String
Glue
Making:
Start with cutting a bamboo stick to your preferred length, then split it in half. Next, attach big, strong magnets to one half. These magnets keep your selfie stick together and easy to open with just one hand! For the handle, wrap it with string for a good grip. Then, attach a mobile phone holder to one end. To control your camera from a distance, tie a Bluetooth remote to the handle. And that’s it! You’ve made a portable, easy-to-use super selfie stick.
WikiHow’s Cassette Case Selfie Stick
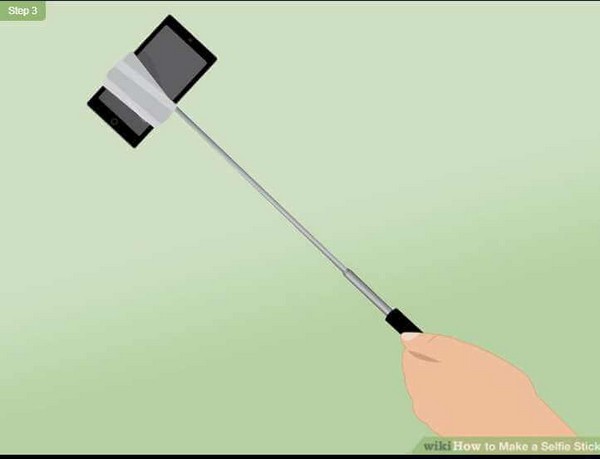
Uses: Ideal for taking pictures from a nice distance, this homemade selfie stick is an inventive way to use everyday objects to hold your phone securely. Whether it’s selfies, group photos, or creative angles you’re after, this selfie stick is wonderfully simple and effective for the job.
Materials:
Flagpole or similar pole
Empty cassette case
Dish sponges
Popsicle sticks
Scotch tape
Glue
Making:
Making your DIY selfie stick starts with joining a cassette case to a pole – a unique blend of old-school and modern tech. Once you’ve attached the case, tuck your phone snuggly between soft sponges glued to the case to keep it steady. Finish up by securing the phone with clear tape after placement, ensuring it’s ready for your next snapshot adventure without slipping or sliding.
The Cyber Omelette DIY selfie stick
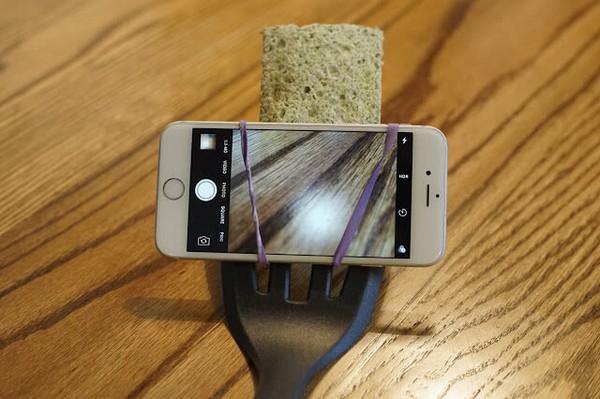
Uses: The genius addition of headphones with volume control allows for easy photo-taking without the need to touch your screen – just press the volume button to capture your moment!
Materials:
Spatula
Sponge
Elastic bands
Headphones with volume control
Smartphone that captures photos with volume buttons
Making:
To make this unique selfie helper, begin with attaching a smartphone to a spatula using a sponge and elastic bands. This nifty setup not only holds the phone securely but also positions it perfectly for taking those memorable photos. Plug in the headphones, and, you’re ready to snap away using the volume control buttons as a remote shutter.
How to make a DIY selfie stick
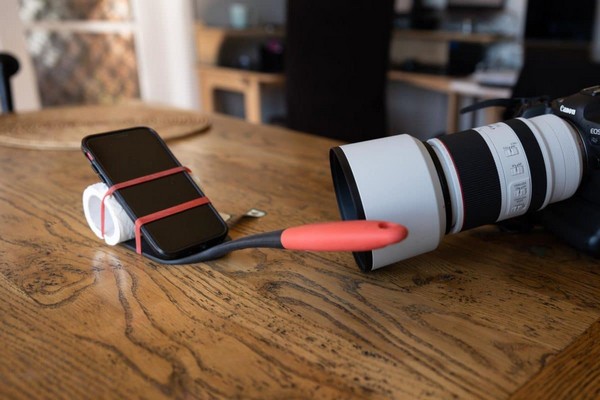
Uses: A DIY selfie stick is a fantastic tool for taking wide, professional-looking photos by yourself. It’s perfect for self-taken LinkedIn pictures, ensuring your face and shoulders fit well into the frame, showing off in natural proportions. Plus, it gives you the freedom to move around your space to find the best lighting.
Materials:
Spatula
Elastic bands or hair bands
Toilet roll (for angling the phone)
Masking tape
Broomstick or handle
Wire coat hanger
Optional: Rubber band
Making:
There are two simple ways to create your own selfie stick. The first involves a spatula, where you attach your phone at an angle for better photo angles. The second, a bit more involved, uses a wire coat-hanger reshaped and attached to a stick, offering more flexibility in adjusting your camera’s angle.
DIY Making a Tripod Selfie Stick
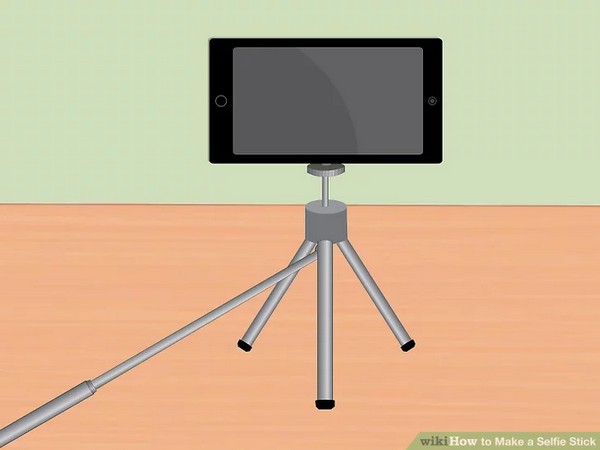
Uses: It lets you take steady shots and videos from a distance, perfect for selfies, group photos, and even recording your adventures with ease. It’s especially handy because it stands on its own, giving you a hands-free experience to get creative with your photos or videos.
Materials:
Extendable flagpole
Mini tripod
Screws and nut
Scotch tape
Drill
Making:
First, you pair a flagpole with a mini tripod, ensuring they fit together well. Simply attaching the tripod to the pole with a combination of screws for a more permanent solution or tape for a quick fix offers flexibility in approach. The idea is to make a secure setup where your phone can be mounted on the tripod, which is then attached to the pole. This gives you a long-reaching arm for your camera and the stability of a tripod that can stand on its own or be held up for wider angles.
DIY Making a Cassette Case Selfie Stick
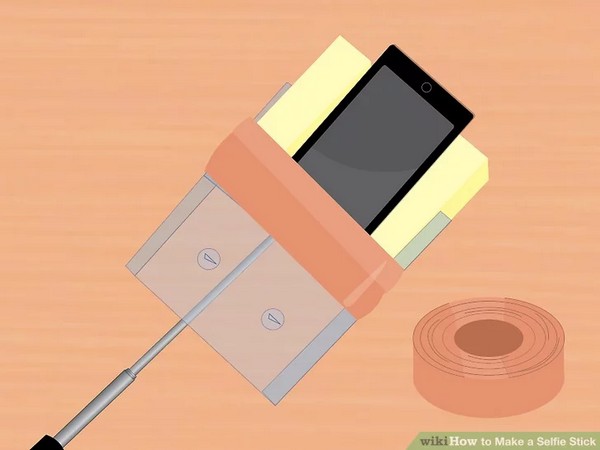
Uses: Isn’t it wonderful how a few simple items can come together to make something practical? The DIY Cassette Case Selfie Stick is a perfect example. This low-cost marvel can help you click perfect selfies without the need for someone else to capture your best moments.
Materials:
An Empty Cassette Case
A Flagpole
Scotch Tape
Sponge
Two Dish Sponges
Popsicle Sticks
Making:
Initially, attach an empty cassette case to a flagpole using scotch tape. Introduce a sponge to create the ideal selfie angle. Voila! The case on a stick is ready. For securely accommodating the phone, adhere two dish sponges on either side of the cassette case. The versatility of the flagpole allows for adjustable length, so you can customize your selfies according to your preference. Secure your phone in place with tape before stepping out for your selfie adventure. Most importantly, ensure your phone and the camera lens don’t feel the weight of the tape.
DIY Super Selfie Stick
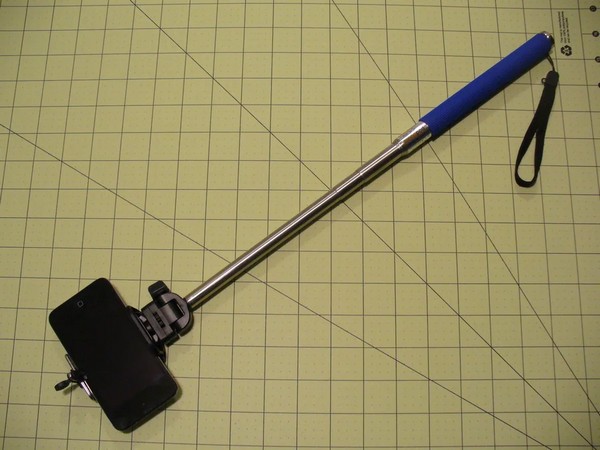
Uses: Imagine capturing a full group without missing anyone or snapping the vast expanse of the Grand Canyon right from your hand. This selfie stick doesn’t just bring people together; it brings the whole scene together, making every picture an expansive, inclusive memory.
Materials:
Strips, 1 1/2”, 3 hole
Right angle brackets
Small bolts
Nuts
Medium bolt
Flat Plate (3 holes by 3 holes)
Spanner
Hex wrench
Making:
Crafting your very own Super Selfie Stick is a journey filled with innovation and recycling. It starts with finding a telescoping pole, like the one from a broken retractable trade show banner — a treasure waiting to be reclaimed. Then, taking a camera mount from a small tripod, and ingeniously attaching it to the pole with Erector set parts for that perfect hold. Lastly, adding a mobile phone mount finalizes this creation, transforming it into a tool for capturing memories from a new, wider perspective.
DIY Floating Selfie Stick
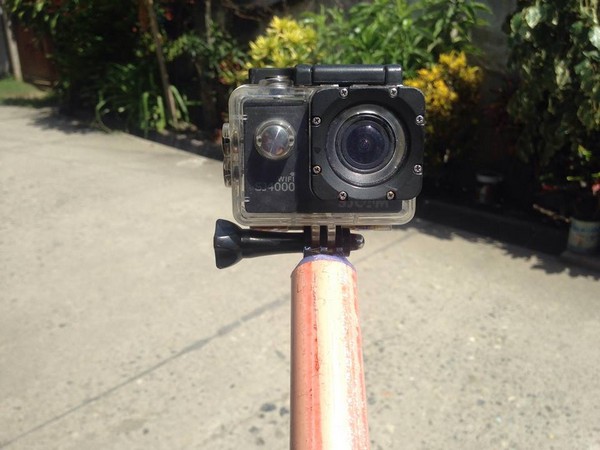
Uses: This magnificent stick can float, making it a handy accessory while swimming. Whether you’re gliding alongside graceful marine life or seizing a joyous pool party moment, your waterproof camera or GoPro will never drift away unnoticed. This very stick embellishes the fun of clicking pictures in an aquatic environment.
Materials:
Used or New Electrical PVC Pipe
GoPro Mount Extender
Stick Glue
Glue Gun
Soft drinks cap
Making:
The beauty of creating a Floating Selfie Stick lies in the ease of its process. Start by preparing a used or new electrical PVC pipe, cutting it to the length that suits you best. The next step involves your GoPro Mount Extender, which needs to be securely placed into the pipe using melted glue from a glue gun. Then we form the core of our floating mechanism by sealing the other side of pipe with a soft drink cap.
This is diligently done using glue, effectively trapping the air inside the pipe to make our selfie stick buoyant. Glue over the edge of the pipe and then cover it with the cap, pressing it firmly to ensure perfect sealing. Let your creation dry, and voila! Your Floating Selfie Stick is ready to create wonders.
Leave a Reply