
Make a fun Free Crochet Multi Puffed Sleeved Cardigan Pattern that feels warm and looks lovely with simple steps that beginners can follow and enjoy.
A simple thread slowly turns into a soft and pretty cardigan that feels nice to wear every day. The Free Crochet Multi Puffed Sleeved Cardigan pattern shows how to make a beautiful cardigan with a round and full sleeve that looks soft and stylish. The puff sleeve gives the cardigan a special shape that looks a little loose and very comfortable.
Free Crochet Stylish Puffed Sleeve Cardigan Pattern for All Seasons
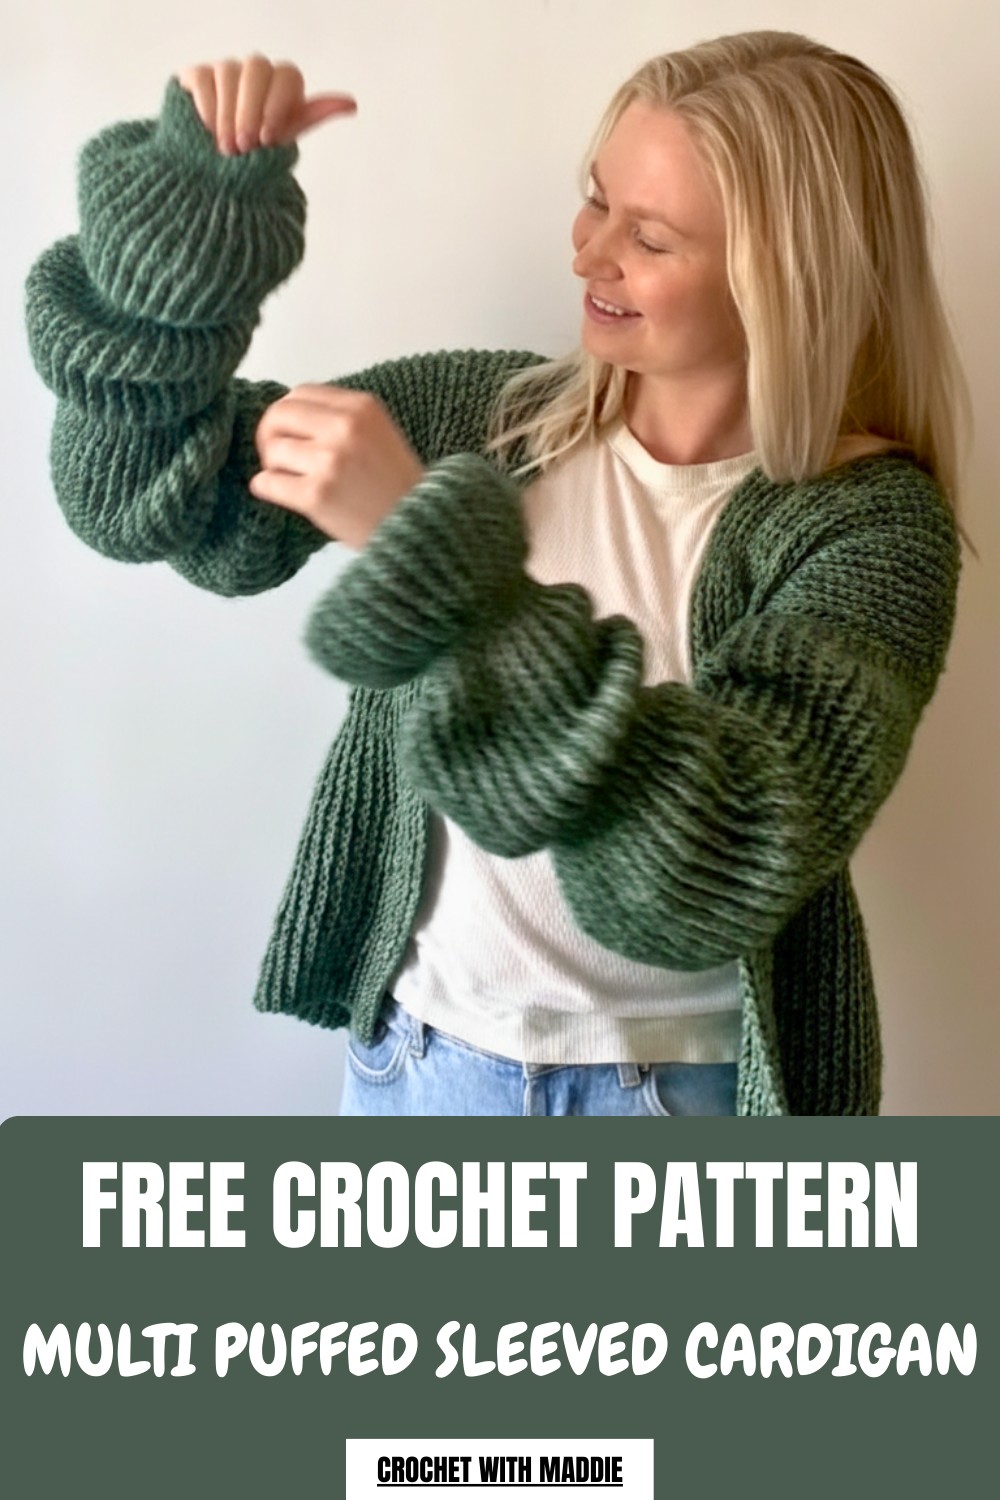
It has a neat open front and a smooth body, so it is easy to wear at home or outside. The soft texture keeps the body warm while still feeling light. This cardigan is useful for cool weather and can match simple clothes. It is easy to follow and can be made in different sizes and colors, so each piece looks unique and personal.
Multi-Puffed Sleeve Cardigan Crochet Pattern
Materials
- Yarn:
- Blend of cotton, wool, and acrylic. Choose a thick yarn with a recommended hook size of 6 mm.
- Approximately 11 skeins (consider purchasing 12 skeins to ensure you don’t run out).
- Hooks:
- 4 mm crochet hook.
- 5 mm crochet hook.
- 7 mm crochet hook.
- Additional Tools:
- Tapestry Needle: For weaving in ends, seaming, and adding details.
- Scissors: For cutting yarn.
- Stitch Markers: To keep track of sections while attaching or shaping pieces.
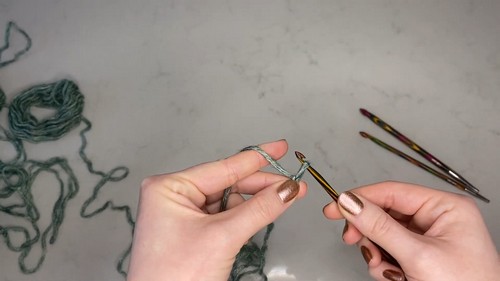
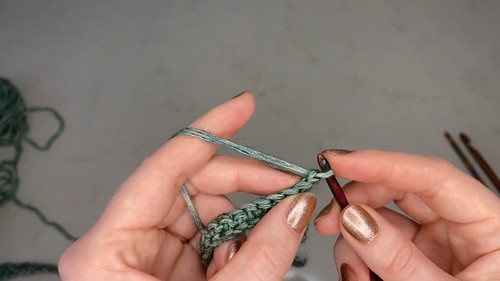
Special Techniques
- Gauge Sections with Different Hook Sizes
- The cardigan alternates between 4 mm, 5 mm, and 7 mm hooks to achieve the “puffed” sections. Follow instructions carefully for hook changes.
- Back Loop Only (BLO):
- Throughout most of the pattern, stitches are worked into the back loop only for a ribbed effect.
- Slip Stitch Seam:
- Seams are joined with slip stitches for a clean finish, creating a cohesive look along the sides, shoulders, and sleeves.
- Zigzag Gathering:
- Yarn is threaded back and forth using a needle to gather sections and create the “puffed sleeve” effect.
Finished Size
- Width (back piece): ~42 cm (16.5 inches).
- Length: ~52 cm (20.5 inches).
- Size is approximately Small to Medium. Adjust for larger sizes by adding rows or modifying chain amounts proportionally (noted in the pattern).
Gauge
- Single crochet stitch using a 7 mm hook: 10 sc x 10 rows = ~10 x 10 cm (4 x 4 inches).
Step-By-Step Pattern
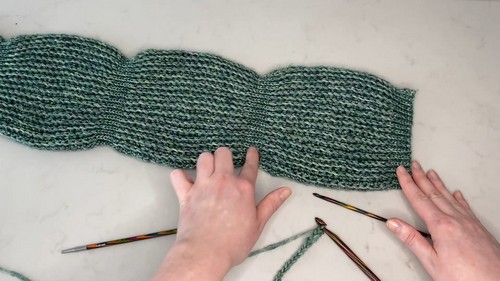
Step 1: Back Piece
The back piece alternates between sections of single crochets and slip stitches, worked using different-sized hooks to create varied textures.
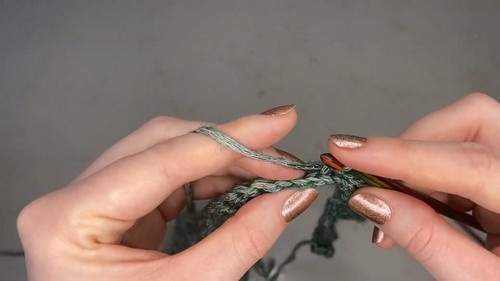
Foundation Chain:
- Start with a 4 mm hook, and chain 12. (Forms the waistband section.)
- Switch to a 7 mm hook, and chain 20.
- Switch to a 5 mm hook, and chain 6.
- Switch back to a 7 mm hook, and chain 20.
- Switch to a 5 mm hook, and chain 6.
- Switch back to a 7 mm hook, and chain 21.
Row 1:
- Using the 4 mm hook, work sc into each chain of the initial 12 stitches.
- Switch to the 7 mm hook and continue working sc into the next 20 chains.
- Switch to the 5 mm hook and work slip stitches (sl st) into the next 6 chains.
- Switch back to the 7 mm hook and work sc into the next 20 chains.
- Switch again to the 5 mm hook, work sl st into the next 6 chains.
- Finally, with the 7 mm hook, work sc into the last 21 chains.

Rows 2–110:
- Turn your work, and chain 1.
- Work into the back loop only (BLO) in the same stitch pattern as Row 1:
- 4 mm hook: sc in the first 12 stitches (BLO).
- 7 mm hook: sc in the subsequent 20 stitches (BLO).
- 5 mm hook: sl st in the next 6 stitches (BLO).
- Continue alternating hooks and stitch types as in Row 1.
- Complete a total of 110 rows. Modify row count for desired length.
Step 2: Front Pieces
The two front pieces use the same stitch pattern as the back piece but are smaller.
Foundation Chain:
- Begin with the 4 mm hook, chain 12.
- Switch to the 7 mm hook, chain 20.
- Switch to the 5 mm hook, chain 6.
- Switch back to the 7 mm hook, chain 21.
Rows 1–50:
- Follow the same hook and stitch pattern as for the back piece.
- Complete 50 rows per front piece.
Step 3: Sleeves
The sleeves have additional sections to create length and volume.
Foundation Chain:
- With the 4 mm hook, chain 12.
- Switch to the 7 mm hook and chain 20.
- Switch to the 5 mm hook, chain 6.
- Switch back to the 7 mm hook, chain 20.
- Add another section:
- With the 5 mm, chain 6, 7 mm chain 20, 5 mm chain 6.
Rows 1–110:
- Work sc using back loop only (BLO) for the 4 mm and 7 mm hook sections.
- Work slip stitches (sl st) using BLO for the 5 mm sections.
- Complete 110 rows.

Note: The sleeves will appear extremely long but will gather during assembly to create the puffed look.
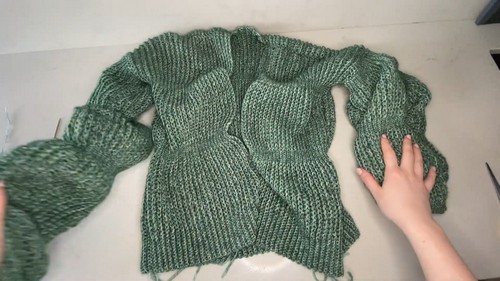
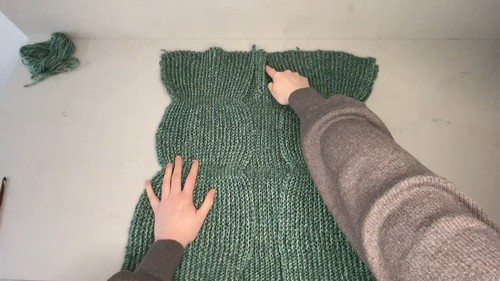
Step 4: Assembly
Attach Front Pieces to Back Piece:
- Place the back piece flat with the wrong side facing up.
- Align each front piece with the back piece (wrong sides together).
- Using a 5 mm hook, attach the pieces by working single crochet stitches along the side edges (seams).
Attach Sleeves:
- Fold the sleeve to find the center point and mark it with a stitch marker.
- Match the center of the sleeve to the shoulder seam of the cardigan.
- Use the 5 mm hook, and attach the sleeves with single crochets along the armhole (working evenly into each stitch of the armhole and sleeve).
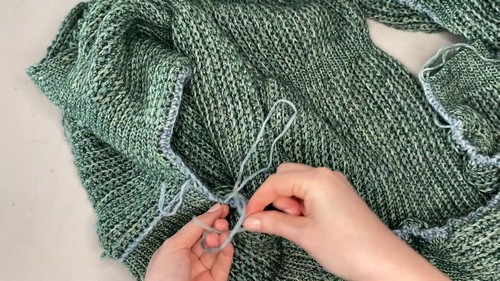
Gather Sleeves:
- To create the “puffed sleeve” effect:
- Thread a needle with yarn and create a zigzag stitch along the inner 7 mm hook section of the sleeve.
- Pull to gather slightly, reducing the length by half.
- Secure the gathered yarn with a knot and weave in the end.
Step 5: Finishing Touches
Seams:
- Once all pieces are attached, fold the cardigan inside out and use single crochet slip stitches to close the side seams and the undersides of the sleeves.
Weaving Loose Ends:
- Use a tapestry needle to weave in all loose yarn ends carefully, ensuring the stitches are secure and neat.
Optional: Edging
- If desired, add a ribbed edging to the cardigan’s opening or cuffs using single crochet in BLO for a clean finish.
Final Words
Congratulations on completing your Multi-Puffed Sleeve Cardigan! This cardigan’s textured sleeves and cozy body make it a standout piece in your handmade wardrobe. The versatility of the pattern allows for endless customization—experiment with colors, yarns, and lengths to make the design uniquely yours.
Tips for Best Results
- Count Stitches Regularly:
Especially when alternating hook sizes, double-check your stitch counts to avoid gaps or uneven sections. - Maintain Consistent Tension:
Uniform tension ensures smooth transitions between the different hook sizes and maintains the cardigan’s shape. - Block the Cardigan:
Lightly block the finished cardigan to even out stitches and enhance its drape. - Use Durable Seams:
Slip stitching securely along seams adds durability and structure to your cardigan.
Leave a Reply