
Decorate your projects with this Crochet Flower Pattern for vibrant blooms that brighten your creations and a touch of beauty effortlessly.
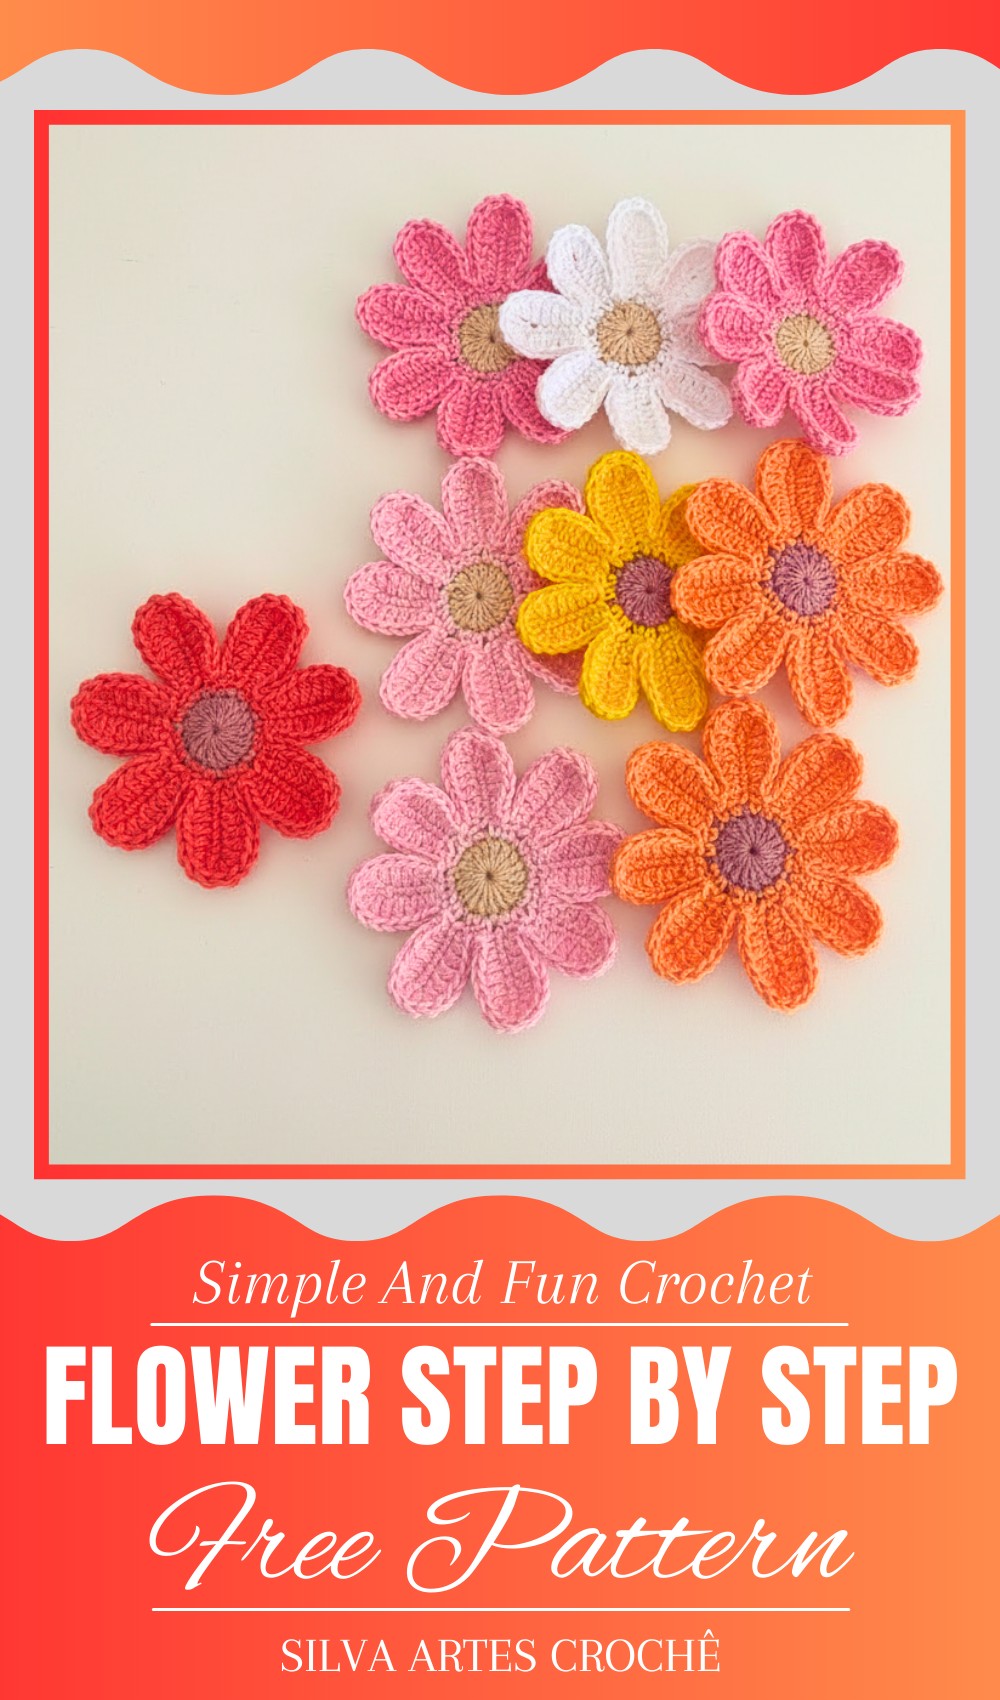
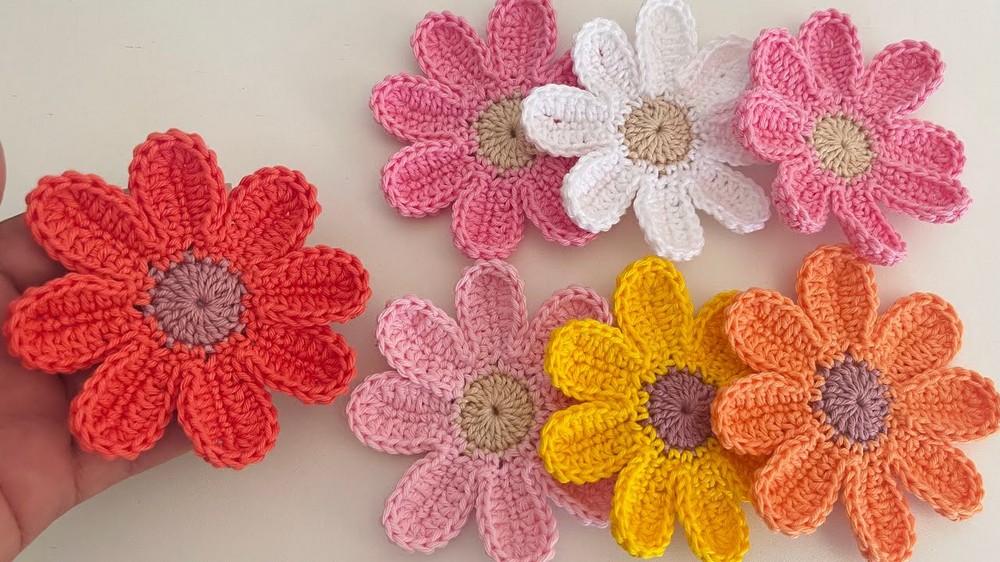
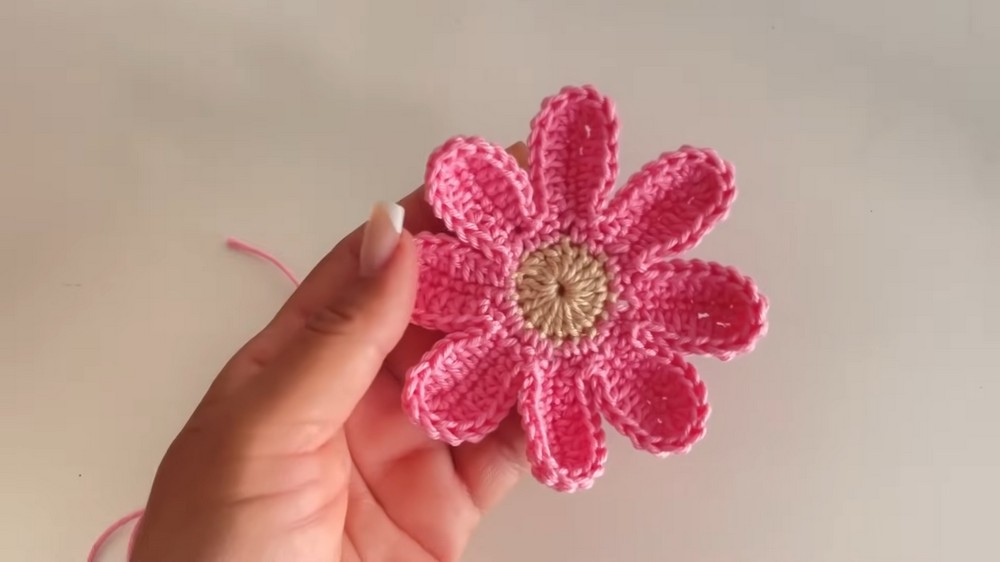
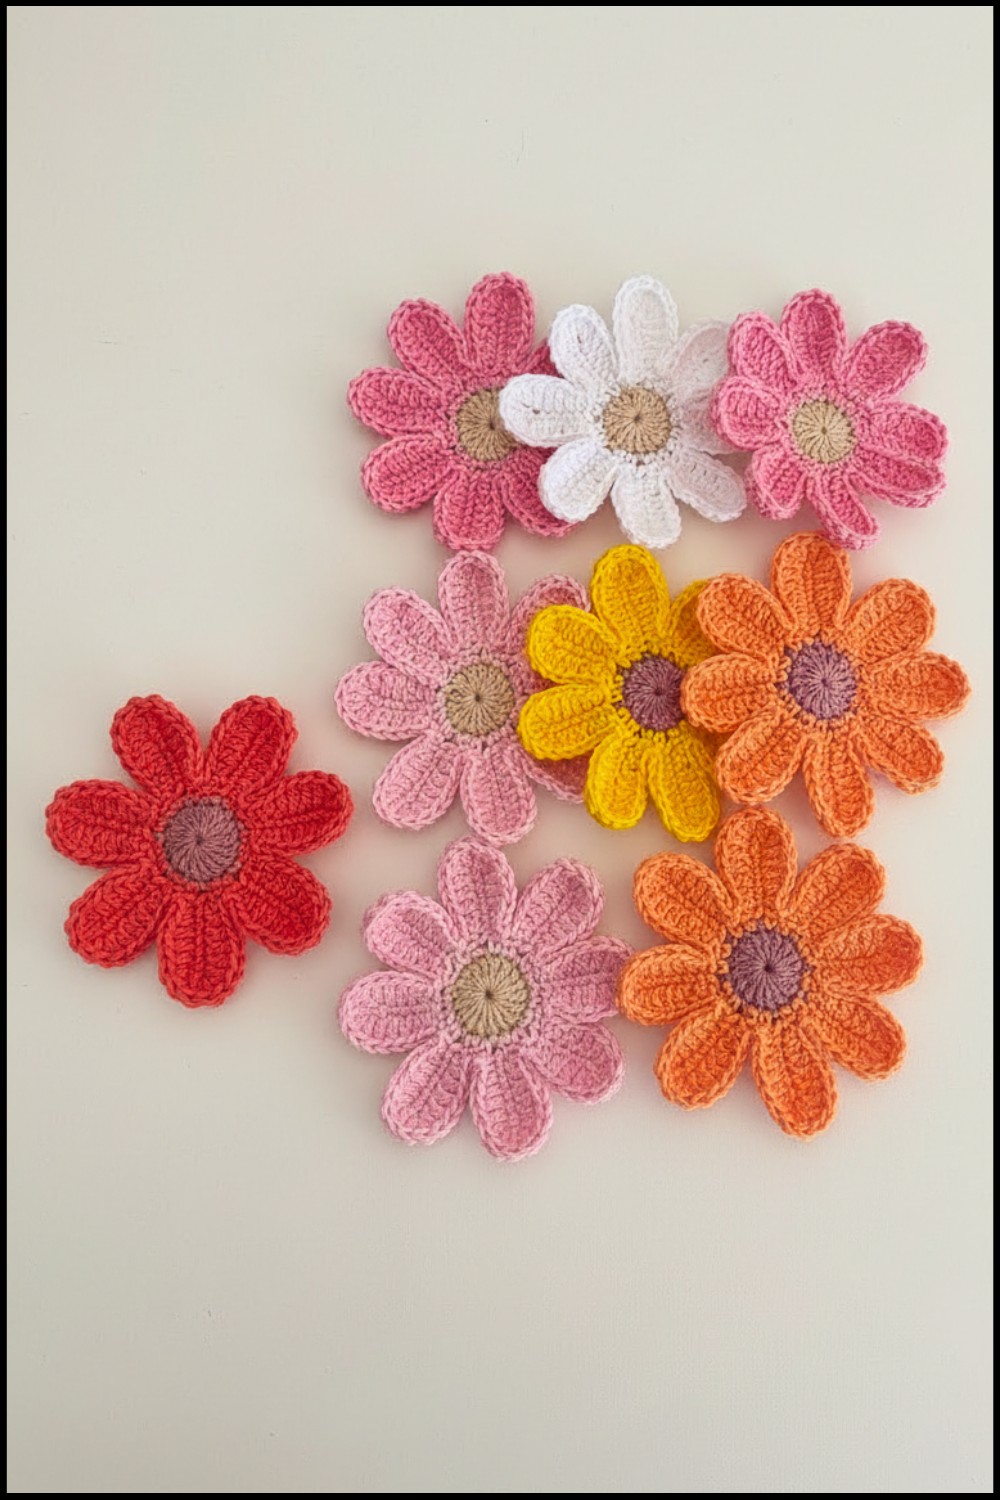
Nothing brightens a room like a splash of color and nature’s charm. The Crochet Flower pattern brings a tiny bloom to life with a soft petal and a cheerful look that anyone can enjoy. Its delicate shape and vibrant color make it perfect for decorating a table, a book, a bag, or even as a little hair accessory. You can choose a shade like red, pink, yellow, or mix colors to make the flower unique and eye-catching.
Creative Crochet Flower Pattern for Scrapbooks, Bags, or Hats
This little flower is light and easy to place anywhere, adding beauty and happiness to your home, school, or workplace. It also makes a thoughtful gift for a friend, family member, or child because it feels personal and full of care. The true charm of this flower lies in its simple yet elegant design and soft texture that everyone can appreciate. It is not just decoration but a small piece of joy that brings color and cheer wherever it goes.
Materials List
- Yarn Type: Amigurumi yarn or any similar-weight yarn of your choice
- Color 1: Yellow (center of the flower)
- Color 2: Pink (petals of the flower)
- Crochet Hook: 2.5mm (US size recommended)
- Additional Tools:
- Scissors for finishing
- Darning needle or tapestry needle for weaving in ends
Key Abbreviations
- Ch: Chain
- Sc: Single Crochet
- Hdc: Half Double Crochet
- Dc: Double Crochet
- Sl st: Slip Stitch
- St: Stitch
- Rep: Repeat
Special Notes
- Pattern is written in US crochet terminology.
- Keep your tension consistent throughout to ensure uniform petals.
- Use a contrasting or complementary color for the flower’s petals to enhance its beauty.
- The pattern uses a magic ring; familiarize yourself with this method, or replace it with a chain 4 method if preferred.
Step-by-Step Flower Pattern
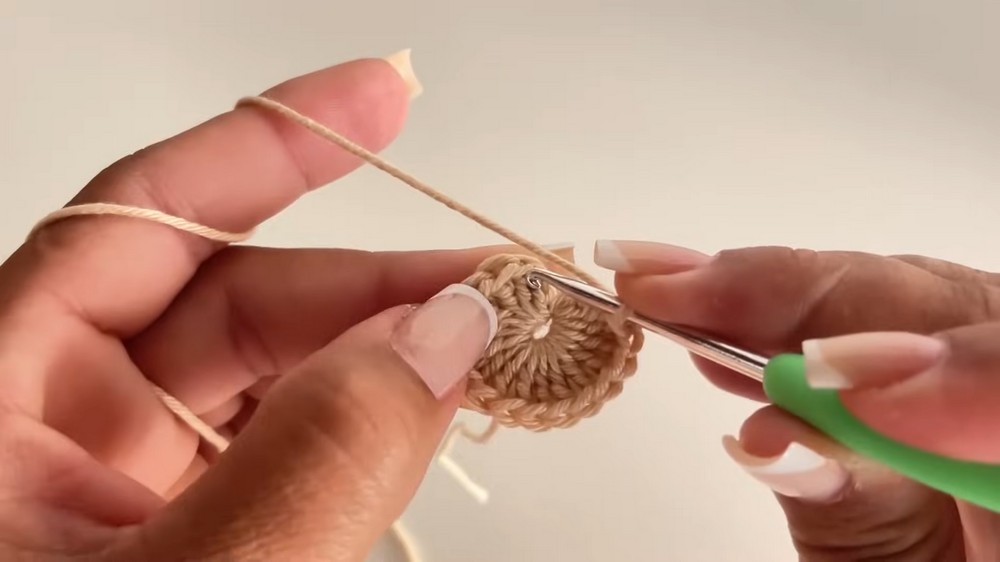
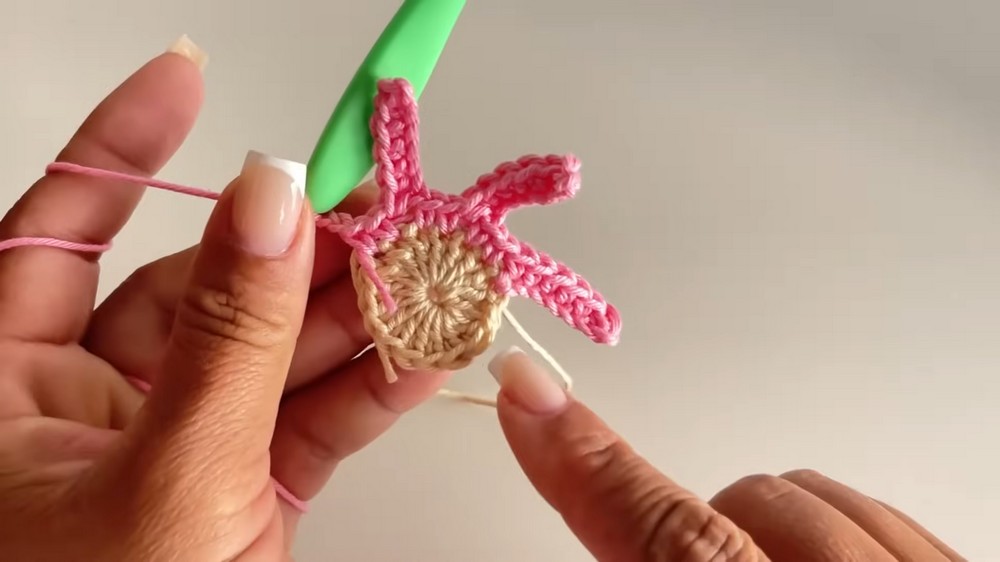
Step 1: Create the Center of the Flower
- Start with Color 1 (yellow or your desired center color).
- Create a magic ring.
- If unfamiliar with this method, you can Ch 4, join with a Sl st into the first chain to form a ring.
- Inside the magic ring:
- Ch 2 (these chains will NOT count as a stitch).
- Work 16 Dc into the ring.
- Pull the ring tight to close and form a circle.
- Join with a Sl st into the first Dc to complete the round.
- Fasten off Color 1. You can weave in the ends now or later when switching colors.
Step 2: Attach Color 2 for Petals
- Attach Color 2 (pink or your desired petal color) into any stitch from the previous round using a Sl st.
- Ch 1 to secure the new yarn.
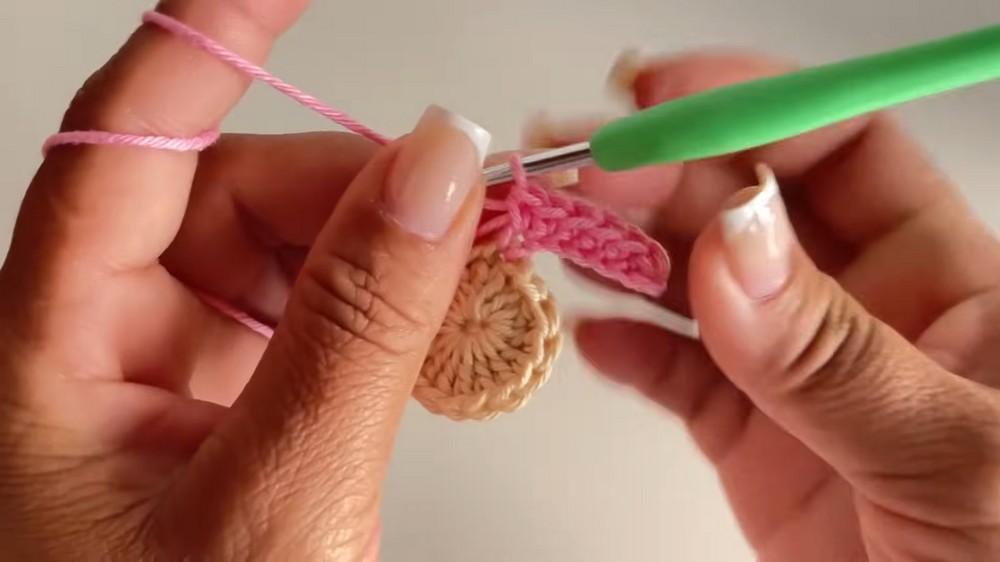
Step 3: Form the First Layer of the Petals
- Carry yarn tail along the back while you crochet for a hidden finish.
- From the attached Sl st, work:
- Ch 7 (this forms the base chain for the first petal).
- Starting from the second Ch from the hook, work the following back down the chain:
- 1 Sc in each chain. (You’ll have 6 Sc in total).
- Join the Sc row back to the flower center:
- Insert your hook into the next Dc from the previous round, and work 1 Sl st.
- Rep Steps 2–4 around the center:
- Create 7 chains for each petal, Sc down each chain, and join with a Sl st into the next Dc.
- You will have 8 petals in total.
- Once you’ve completed the last petal, finish the round with a Sl st at the base of the first petal.
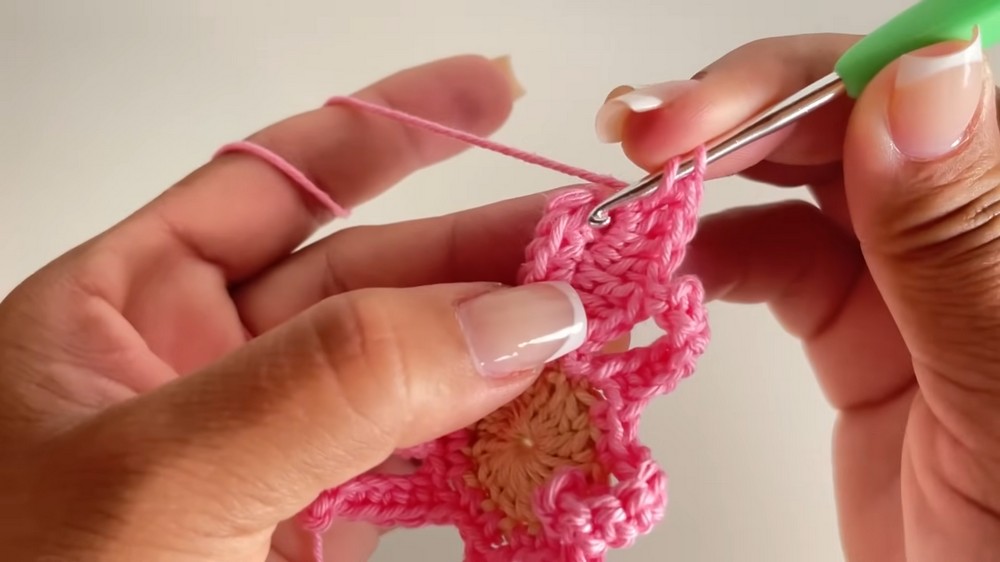
Step 4: Add the Petal Detailing
- We’ll now add texture to each petal by working within the chain stitches of each petal. Always begin at the base of the chain.
- Follow this pattern for each petal:
- Sc in the first chain.
- Hdc in the second chain.
- Dc in each of the next three chains.
- 3 Dc in the last chain (this curve helps shape the petal).
- Rotate to work on the other side of the chain:
- Work 3 Dc in the base chain on the opposite side of the petal.
- Dc in the next three stitches.
- Hdc in the next stitch.
- Sc in the last stitch.
- Join with a Sl st between two petals (in the flower’s center).
- Rep the detailing steps for all 8 petals, ensuring you maintain the symmetrical curve of each petal.
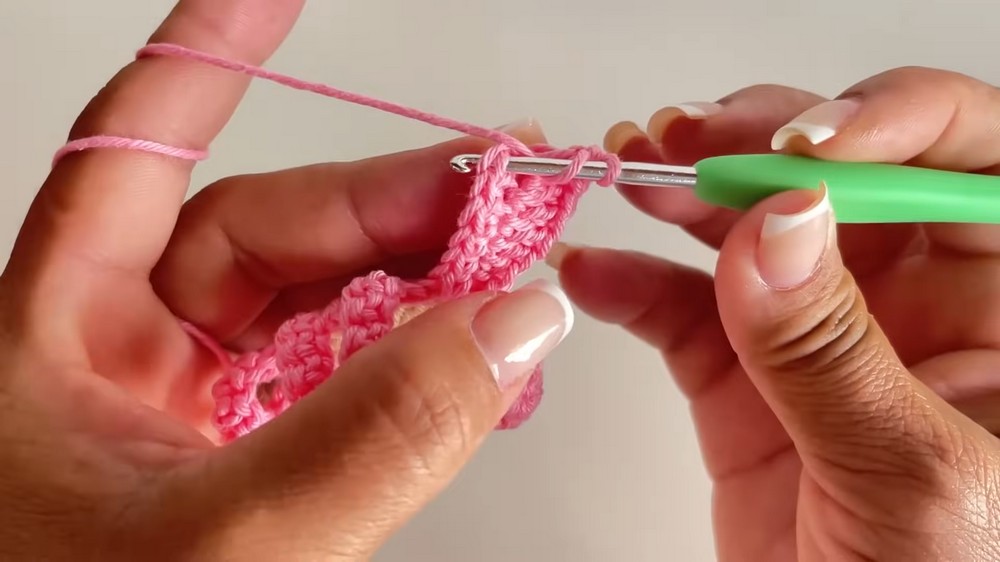
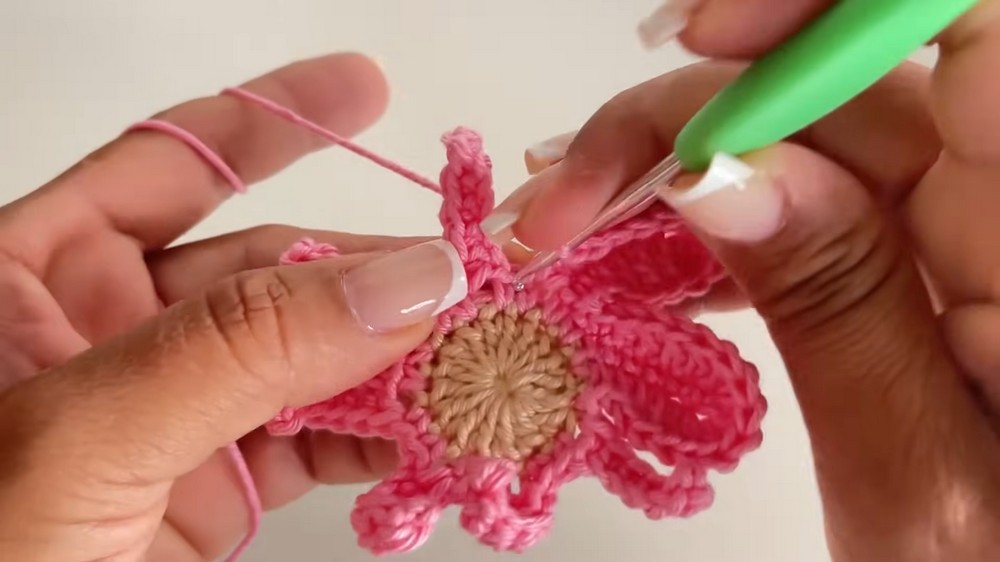
Step 5: Finish the Flower
- Once all 8 petals are completed and detailed, join the last petal to the base with a Sl st.
- Fasten off your yarn and weave in all loose ends with a darning needle.
Conclusion
This crochet flower pattern is simple yet elegant, making it ideal for decorating a wide variety of projects. Experiment with different yarn colors to create unique flowers for every occasion. With its detailed petals and seamless finish, this flower is sure to become a favorite go-to design.
Pattern Correction
- Petal Curves: Ensure you are correctly working the 3 Dc in the last and base chains to create a proper curve for each petal.
- Petal Joining: When joining each petal to the center, make sure you Sl st directly into the next Dc of the flower center to keep the petals evenly spaced.
Tips
- Magic Ring Alternative: If you struggle with the magic ring, you can Ch 4 to form a ring instead.
- Color Options: Choose contrasting or gradient colors for the petals and center to make the flower stand out.
- Increase Size: Use a larger hook and a thicker yarn for a bigger flower.
- Blocking: Lightly block your completed flowers for an even and polished look.
Leave a Reply