
Make your belongings fun using a free crochet raccoon keychain pattern, adding playful flair to backpacks or pencil cases.
Holding a tiny raccoon keychain in your hand can bring a smile to anyone’s face. This charming accessory is made using simple yet effective crochet techniques like magic ring, double crochet, slip stitch, and clever color changes that give life to the raccoon’s distinctive markings and fluffy ears. The pattern gently guides you through forming a perfect round base, shaping the cute snout, and adding character with beige, brown, and white yarn tones.
Quick Crochet Raccoon Keychain Pattern for Charming Accessories
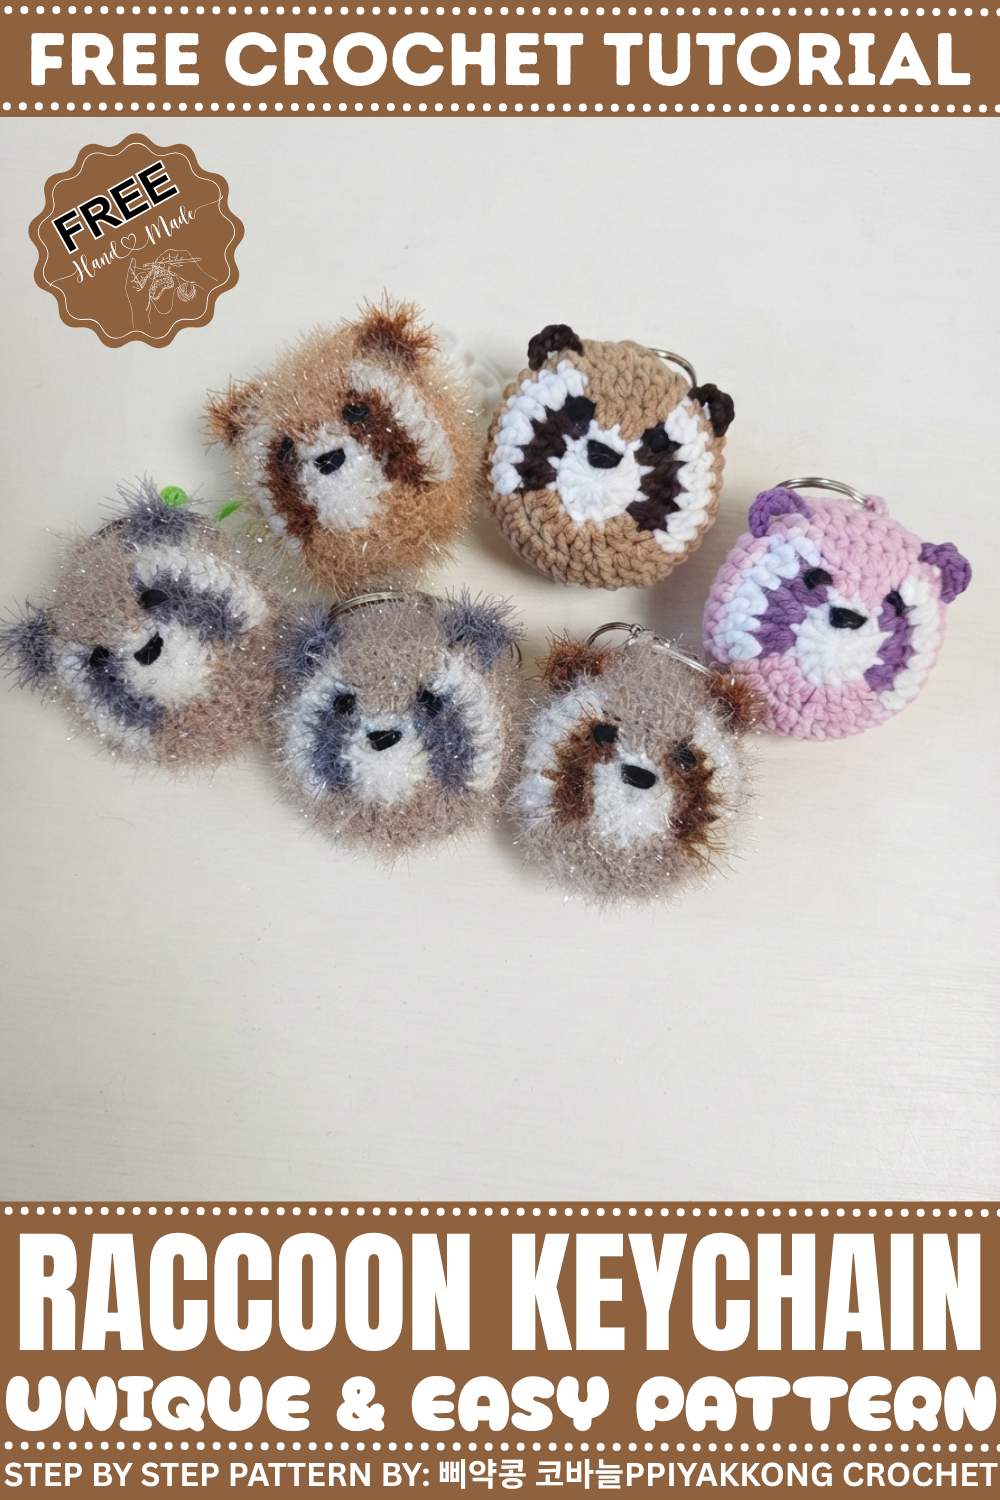
Beginning with a magic ring, every stitch works together to build a sturdy but soft figure that feels great to touch. Gradual increases and decreases help sculpt the raccoon’s face, while switching yarn colors at just the right places captures its playful look. The black thread detail for the eyes and nose adds a sweet finishing touch. Whether you choose dishcloth yarn for more texture or regular yarn for a sleek design, this keychain comes together beautifully and makes a wonderful little gift or personal keepsake.
More Ideas From the Same Techniques
The stitches and color transitions used here can be applied to many other delightful projects. The magic ring combined with double crochet is perfect for making toys with rounded shapes or adding animal faces to scarves and hats. The way color is changed smoothly in this keychain can be adapted for creating striped patterns or detailed motifs in blankets and cushions. This pattern is a wonderful starting point for anyone wanting to practice shaping and colorwork in crochet while making pieces full of personality.
Crochet Pattern: Raccoon Keyring
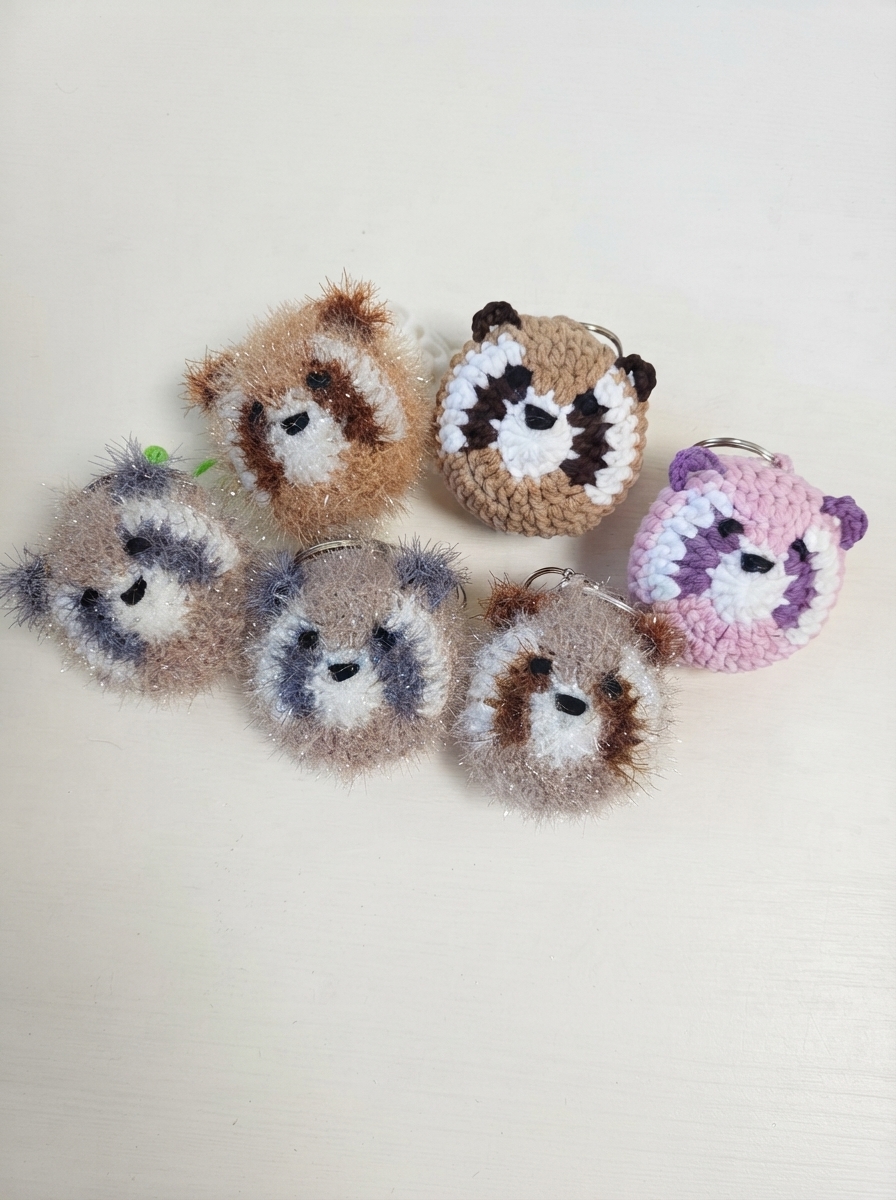
This adorable Raccoon Keyring pattern is the perfect crochet project to create a cute accessory or a thoughtful gift for loved ones! Whether made with soft, regular yarn or textured dishcloth yarn for a fluffy look, this keyring is a versatile and fun endeavor. Its compact design makes it ideal for crafting personalized gifts, and the process introduces various techniques such as creating amigurumi, switching colors, shaping facial features, and working with different types of yarn.
Skill Level & Terminology
- Skill Level: Confident Beginner / Intermediate Beginner
- Terminology: US Crochet Terms
This pattern uses basic crochet stitches like chains, slip stitches, and double crochets. You’ll also work with more intermediate techniques such as color changes, stitch increases for shaping, and assembly of small details like the ears and facial features.
Stitches Used:
- Chains (ch)
- Slip Stitches (sl st)
- Double Crochet (dc)
- Half-Finished Double Crochet (used for color changes)
Materials & Tools
- Yarn:
- For dishcloth yarn version: Use textured scrubber yarn in complementary colors (e.g., beige and brown). Suggested examples: #27, #37, and #75.
- For standard yarn version: Use Nomi yarn or any smooth acrylic yarn. Recommended colors: #59 (dark beige) and #76 (deer brown) for the raccoon body and contrast.
- Black embroidery thread (approx. 30 cm) for the nose and eyes.
- Hook: Size 5 mm crochet hook.
- Keyring: A keyring attachment with a lobster clasp or similar design is ideal.
- Stuffing: Polyester fiberfill or scrap yarn for stuffing the body.
- Tools:
- Scissors.
- Tapestry needle (for sewing features).
Gauge
Gauge is not critical to this project, as you can adjust the size by modifying your yarn weight and hook size. However, for reference:
10 dc x 5 rows = 2 inches (5 cm) with your chosen yarn and hook size.
Abbreviations List
| Abbreviation | Meaning |
|---|---|
| ch | Chain |
| sl st | Slip Stitch |
| dc | Double Crochet |
| dc2tog | Two double crochet stitches worked together |
| st(s) | Stitch(es) |
| sp | Space |
Special Stitch Instructions
Double Crochet Two Together (DC2TOG)
- Yarn over, insert the hook into the stitch, yarn over and pull up a loop (3 loops on hook).
- Yarn over, pull through 2 loops, leaving 2 loops on the hook.
- Yarn over, insert the hook into the next stitch, yarn over and pull up a loop (4 loops on hook).
- Yarn over, pull through 2 loops.
- Yarn over and pull through remaining 3 loops.
Note: This is used to create shape by joining two stitches into one during decreases.
Color Change
- Work an unfinished stitch in the current yarn color until the last loop remains on the hook.
- Drop the current yarn color and pick up the new color.
- Yarn over with the new color and pull it through the last loop on the hook to finish the stitch.
- Continue stitching with the new color, leaving the previous color strands and tail ends securely hidden as you crochet.
Finished Size
- Height: ~7–8 cm (3 inches), depending on yarn weight and tension.
- Width: ~5–6 cm (2.5 inches).
What You’ll Learn from This Pattern
- How to create small-sized 3D crochet projects.
- How to manage color changes for facial and body detailing.
- Proper stuffing techniques to give items a firm shape.
- Neatly weaving ends and using tapestry needles for embroidery and attachment.
The Pattern Itself
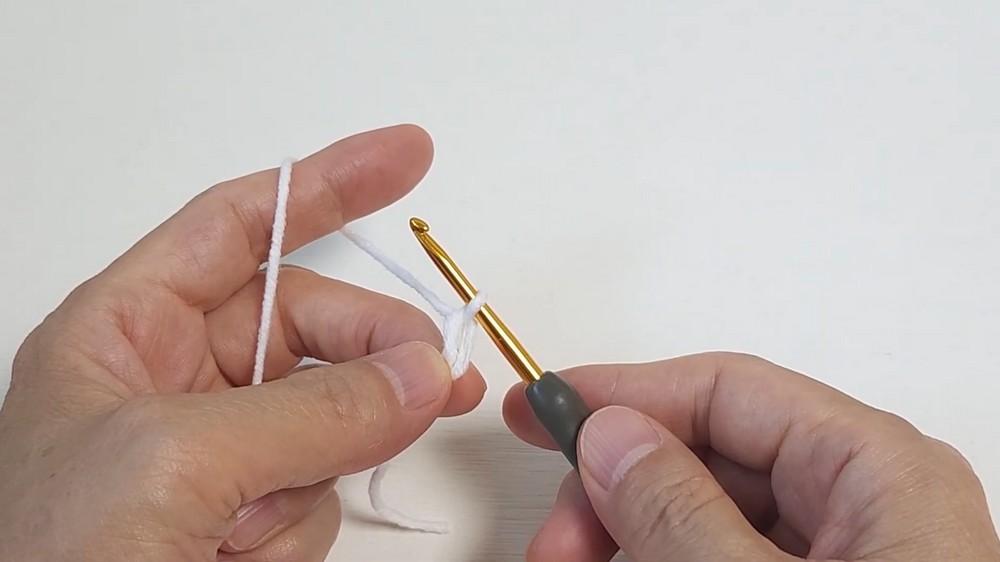
Part 1: Raccoon Body
- Round 1:
- Make a magic ring.
- Work 12 dc into the ring. (12 sts)
- Pull the tail of the magic ring to close the loop.
- Slip stitch into the first dc to join. Chain 1 and cut the yarn.
This forms the base of the raccoon body as a round circle.
- Round 2:
- Change to beige yarn. Attach with a sl st in any stitch.
- Ch 3 (counts as first dc).
- Work 2 dc into each stitch around. (24 sts total)
- Slip stitch into the first ch-3 to join.
This round builds the foundation for the raccoon’s body.
Part 2: Adding the Color Pattern
Yarn Colors: Beige and Brown (use both for switching).
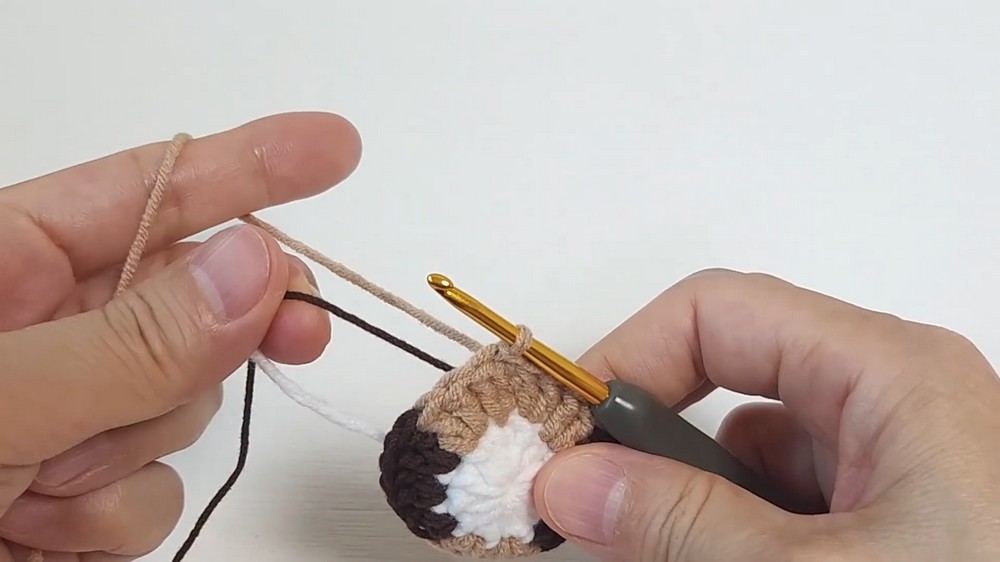
- Round 3:
- Attach yarn to any stitch with a sl st and ch 3 (counts as first dc).
- Begin color striping as follows:
- Work 1 dc in the first st (beige).
- Switch to brown: Work 2 dc in the next st. Continue hiding the tails while switching colors in sets of two stitches (beige and brown).
- Repeat the instructions 1 beige dc + 2 brown dc around. (36 sts total)
- Slip stitch to the top of the starting ch-3, pull the loop slightly long, and cut the brown yarn.
Switching colors strategically creates the characteristic markings of a raccoon’s coat.
- Round 4:
- In each stitch around, work 1 dc (no increases or color changes). (36 sts total)
- Join with a sl st to the start of the round.
This round adds height to the keyring, shaping its round 3D structure.
- Round 5:
- As in Round 4, work 1 dc into each st around, slip stitching to join.
Rounds 4 and 5 form the main raccoon’s body. Adjust by adding more rows if you want a taller figure.
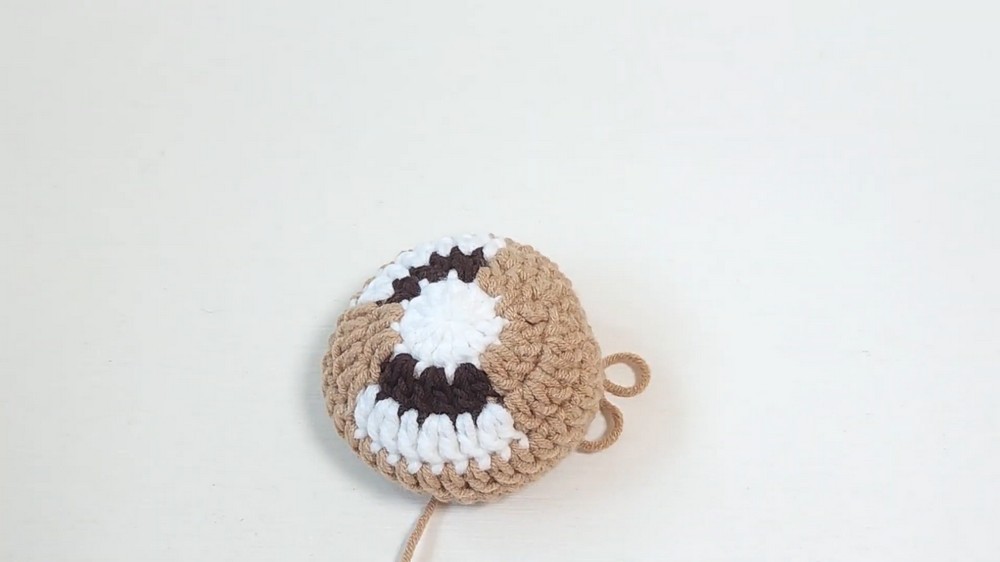
Part 3: Ears
Yarn Color: Brown.
- Right Ear:
- Identify the space between the 4th and 5th rows on one side of the body.
- Insert the hook, attach brown yarn, and ch 3 for the base.
- Turn the work and sl st into the adjacent stitch, 3 sc in the same ch space, sl st.
- Cut the yarn, leaving a small tail.
- Left Ear:
- Repeat the above steps on the opposite side of the body.
The ears give the raccoon its distinct animal-like features.
Part 4: Face Detailing
Yarn Color: Black.
- Use approx. 30 cm of black embroidery yarn to sew the nose and eyes.
- For the nose, work several passes around two double crochets at the bottom of the face.
- For the eyes, stitch small oval shapes, symmetrically placed on either side of the center nose.
The facial features bring the raccoon keyring to life, adding charm and cuteness.
Part 5: Assembly, Stuffing & Finishing the Body
- Stuffing:
- Stuff the body firmly with polyester stuffing. Ensure the shape is rounded and full but not overstuffed.
- Top of the Body – Rounds 6–8:
- Work the decreases for the top closure as follows:
- Round 6: Work 1 dc in each st, then dc2tog in the next two stitches (repeat to the end of the round).
- Round 7: Alternate between 1 dc and dc2tog around.
- Round 8: Work all remaining sts as dc2tog clusters, pulling the top closed.
- Work the decreases for the top closure as follows:
- Handle:
- Using brown yarn, attach it between the 5th and 6th rows.
- Ch 6 and sl st into the same sp to form a small loop.
This section gives the raccoon a polished and functional structure.
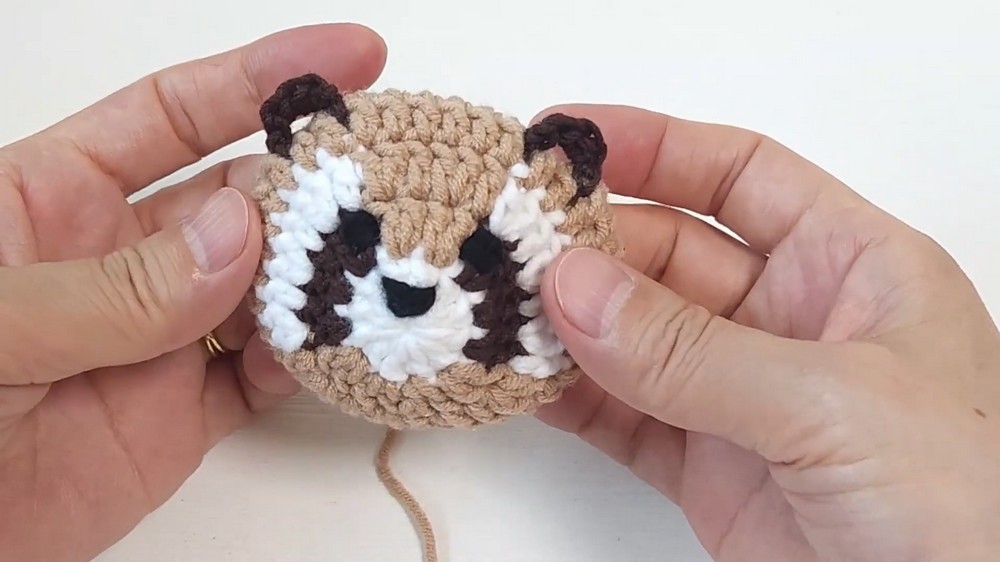
Part 6: Attaching the Keyring
- Using a lobster clasp keyring, attach one end to the small loop created on top of the body.
- Secure the keychain loop firmly in place.Now your raccoon keyring is ready to be used or gifted!
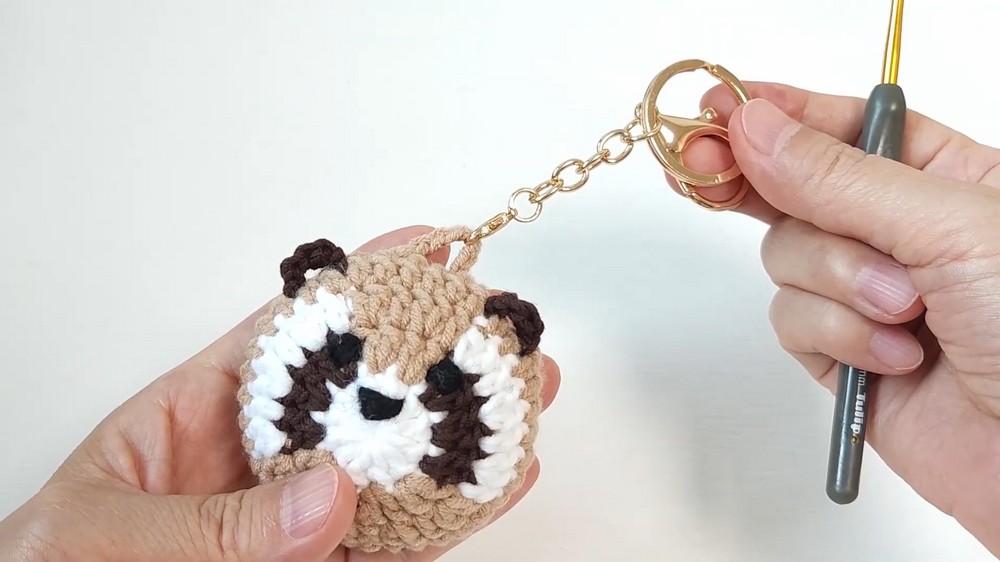
Assembly & Finishing
- Use a tapestry needle to weave in all loose ends neatly.
- The stuffing should be even, and the facial embroidery should look symmetrical.
Why I Love This Pattern
The Raccoon Keyring is a project that combines functionality with adorable design. It’s pocket-sized, making it ideal as a gift or personal key accessory. The best part of this pattern is learning to combine colors and stitches to create realistic facial features. Once complete, this keyring can be paired with other handmade items or used as a decorative charm.
Leave a Reply