
Shell up some fun with this Free Crochet Turtle Amigurumi Pattern, adding a cute, playful touch to your décor, desk, or handmade collection.
Crocheting a tiny turtle with yarn brings a delightful mix of fun and creativity to your hands. This project uses basic stitches like magic ring, single crochet, increases, decreases, and slip stitches, which combine simply to shape the turtle’s rounded shell, head, legs, and tail. Watching the little shell grow round and textured through steady rounds is satisfying, especially as you get the hang of switching the increases on and off to keep the shape even and smooth.
Expand Your Skills with More Projects
The stitches and shaping techniques featured here open the door to many other amigurumi creations or small accessories. Starting with a magic ring and using increases and decreases helps crochet various rounded shapes, perfect for animals, fruits, or cute pillows. This basic shell pattern can inspire hats, coasters, or even bags with lovely curved edges. Once comfortable with this turtle, you will find many chances to bring soft, cuddly yarn friends to life with your own twist.
Adorable Crochet Turtle Amigurumi Pattern for Handmade Cuteness
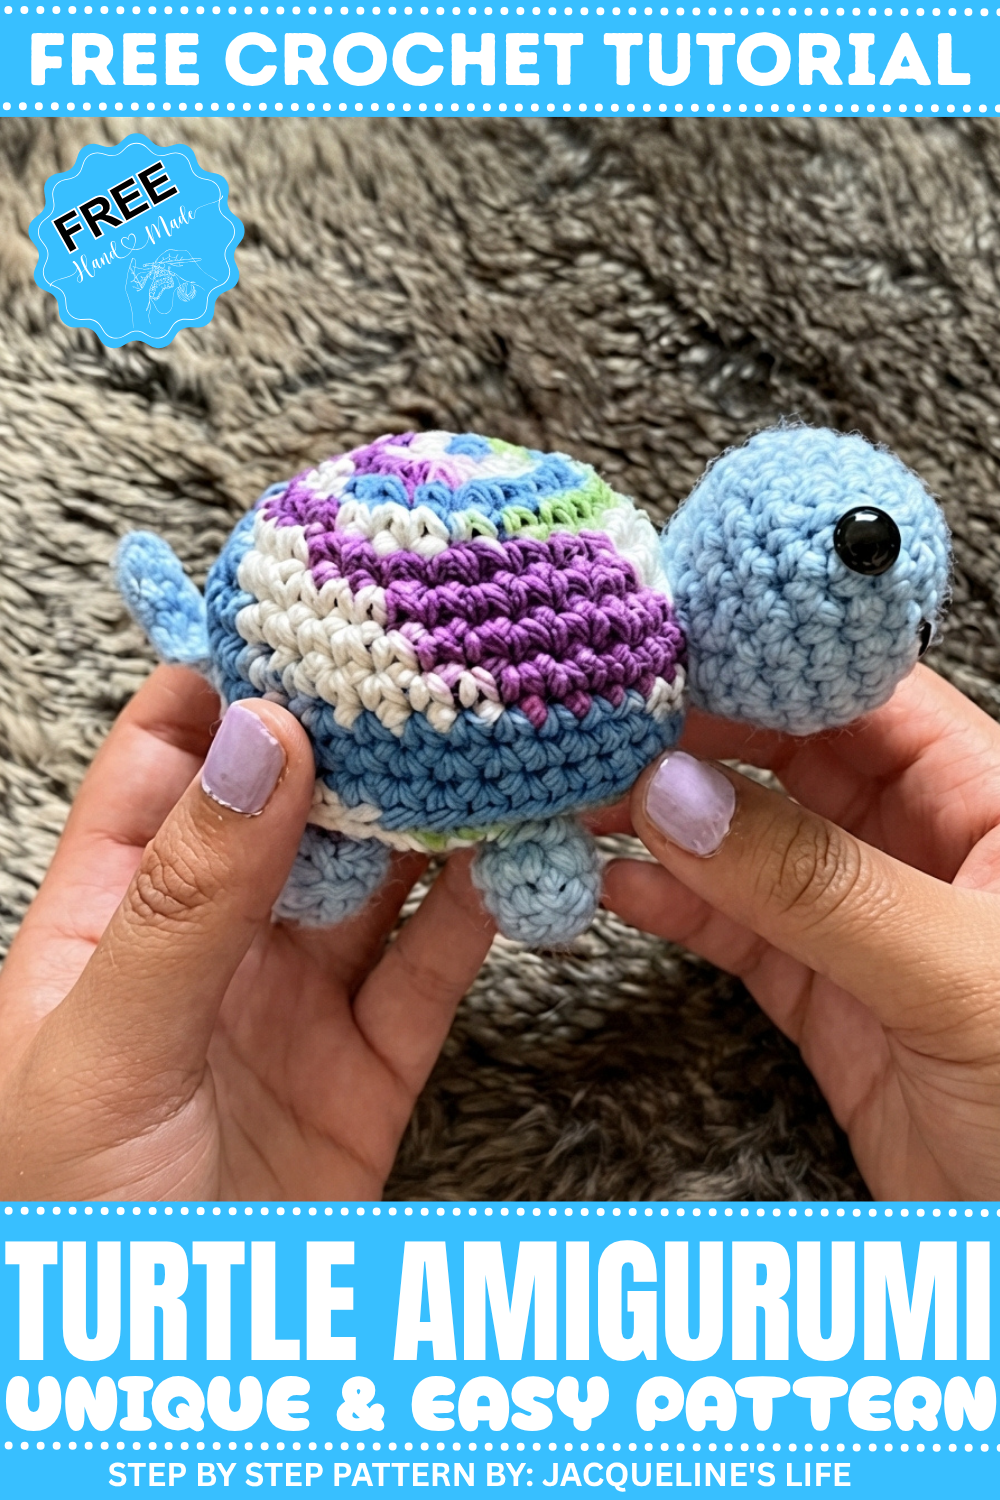
The pattern guides you through starting with the magic circle to make a tight center and gradually expanding the stitches to form a soft, firm shell. Working in only the back loops at certain rounds creates a nice flat surface that helps the turtle keep its shape as it comes together. The charm of this project also lies in personal touches like adding safety eyes and stitching a tiny smile with embroidery yarn, turning the finished piece into a sweet little friend.
The use of stuffing lets you decide how full or squishy you want your turtle, affecting its size and how well it stands. While attaching the feet and tail might seem a bit tricky due to their small size, these steps bring the project to life. For those who want to avoid sewing, a glue gun can be a quick alternative for securing limbs neatly.

Crochet Pattern: Adorable Turtle
In this pattern, we’ll create the cutest turtle amigurumi complete with a shell, head, legs, and tail. The project is beginner-friendly and features simple stitches to crochet a 3D turtle that can be used for decoration, a gift, or even turned into a keychain. The unique proportions of the turtle make it charming and playful, and there are plenty of ways to customize it by varying the colors or adjusting the limb length.
Skill Level & Terminology
- Skill Level: Beginner
- Terminology: US Crochet Terms
This pattern features foundational crochet techniques, including working in rounds, increases, decreases, back loops, and slip stitches. Even beginners will be able to follow along and learn some universal tips for amigurumi.
Materials & Tools
Yarn:
- Body: A solid-color worsted-weight yarn (e.g., 1-pound yarn).
- Shell: Variegated or solid worsted-weight yarn (e.g., sugar and cream yarn).
- Embroidery Yarn: Black embroidery thread for the turtle’s smile.
- Optional: Different yarn textures for experimenting with proportions.
Tools:
- Hook Size: 5 mm crochet hook.
- Safety Eyes: 6 mm or appropriate size for your turtle design.
- Fiberfill Stuffing (or scrap yarn for stuffing).
- Glue Gun: For attaching limbs if you prefer not to sew.
- Scissors: For cutting yarn ends.
- Stitch Markers: To track the first stitch of each round.
Gauge
Gauge is not critical for this project, but aim for tight, consistent stitches to prevent stuffing from showing through. A typical gauge:
12 sc x 6 rounds = 4 x 4 inches (10 x 10 cm) using worsted-weight yarn and a 5 mm hook.
Abbreviations
| Abbreviation | Meaning |
|---|---|
| ch | Chain |
| sc | Single Crochet |
| inc | Increase (2 sc in the same stitch) |
| dec | Decrease (joining 2 stitches into one) |
| sl st | Slip Stitch |
| blo | Back Loops Only |
Special Stitch Instructions
Magic Circle:
The magic circle is used to start crocheting in rounds without leaving a hole in the middle.
- Wrap the yarn around your fingers (two or three wraps).
- Insert the hook under the first strand, pull up the second strand, and twist to secure.
- Chain to lock the ring, then stitch into it as instructed.
Invisible Decrease:
Used for shaping the head and shell.
- Work into the front loops only of the next two stitches.
- Yarn over and pull through both loops (2 loops on hook).
- Yarn over again and pull through the last two loops.
Finished Size
- Height: ~8 cm (3 inches) from tail to shell top (depending on stuffing).
- Width: ~6 cm (2.5 inches) including shell.
Ideal for amigurumi collectors, small tokens, or tabletop decorations.
What You’ll Learn
- How to create 3D crochet shapes using basic stitches like single crochets.
- Techniques like switching increases and working the back loops for smoother finishing.
- The magic circle method for seamless construction.
- Creative assembly techniques using glue or sewing where needed.
The Pattern
1. Turtle Shell
- Round 1 (Magic Circle):
- Create a magic circle and work 6 sc into the ring. Pull the tail to tighten the loop closed. (6 sc)
- Slip stitch into the first sc to join the round.
- Create a magic circle and work 6 sc into the ring. Pull the tail to tighten the loop closed. (6 sc)
- Round 2:
- Work 2 sc in each stitch (inc). (12 sc)
- Round 3:
- 1 sc into the first stitch, inc into the next stitch. Repeat around. (18 sc)
- 1 sc into the first stitch, inc into the next stitch. Repeat around. (18 sc)
- Round 4:
- 1 sc into each of the first 2 stitches, inc into the 3rd stitch. Repeat around. (24 sc)
- Round 5:
- 1 sc into each of the first 3 stitches, inc into the 4th stitch. Repeat around. (30 sc)
- Round 6:
- 1 sc into each of the first 4 stitches, inc into the 5th stitch. Repeat around. (36 sc)
- 1 sc into each of the first 4 stitches, inc into the 5th stitch. Repeat around. (36 sc)
- Rounds 7–11:
- Work 1 sc into each stitch without increasing. (36 sc per round)
At this stage, the shell should be structured and rounded. This forms the turtle’s base.
- Round 12 (Back Loops Only – Decreasing):
- In blo, decrease over the first 2 stitches (dec), sc into the next 4 stitches. Repeat around. (30 sc)
- Round 13:
- 1 sc into each of the first 3 stitches, dec over the next 2 stitches. Repeat around. (24 sc)
- Round 14:
- Start with a dec, then sc into the next 2 stitches. Repeat around. (18 sc)
- Begin stuffing the shell lightly. Restuff as needed while continuing to close the round.
- Round 15:
- Work decreases (dec) across all stitches. (12 sc)
- Round 16 (Closing):
- In blo, pull the yarn through the loops of all remaining stitches. Tighten and weave in the end.
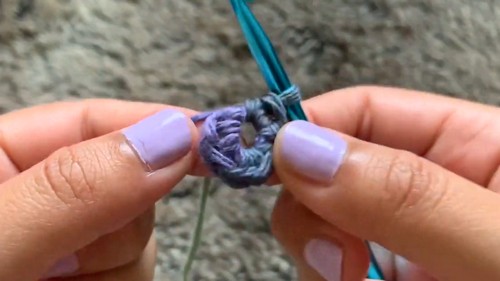


The shell is complete! Adjust stuffing for ideal shaping and size.
2. Turtle Head
- Round 1 (Magic Circle):
- Work 5 sc into a magic circle and pull tight. (5 sc)
- Round 2:
- Work 2 sc into each stitch (inc). (10 sc)
- Round 3:
- 1 sc into first stitch, inc into the next. Repeat around. (15 sc)
- Round 4 (Last Increasing Round):
- inc into first stitch, sc into next 2 stitches. Repeat around. (20 sc)
- Rounds 5–7:
- Work 1 sc into each stitch without increasing. (20 sc per round)
- Round 8 (Invisible Decrease):
- dec over the first 2 stitches, sc into the next 2 stitches. Repeat around. (15 sc)
Insert safety eyes and embroider a mouth at this stage.
- Round 9:
- Start with 1 sc, then dec over the next 2 stitches. Repeat around. (10 sc)
- Stuff the head firmly.
- Round 10:
- Work decreases (dec) across all stitches. (5 sc)
- Close the head using the same method as the shell.

3. Turtle Legs (Make 4)
- Round 1 (Magic Circle):
- Create a magic circle and work 6 sc into the ring. (6 sc)
- Rounds 2–3:
- Work 1 sc into each stitch. (6 sc per round)
The legs are small and quick to create but might require careful stitch handling due to the tight spaces.

4. Turtle Tail
- Start with a chain of 5:
- ch 5, then turn.
- Row 1:
- Work 1 sc in each chain.
- Fasten off and weave in the ends.
Assembly
- Attach the head:
- Position the head near the center of one end of the shell. Glue or sew firmly.
- Attach the legs:
- Place legs symmetrically, slightly under the shell’s edge. Glue or sew.
- Attach the tail:
- Position the tail at the opposite end of the head. Tie or glue into place for added security.
Why I Love This Pattern
This Turtle Pattern is quick, customizable, and undeniably adorable. It’s a perfect project for gifting or keeping as a desk buddy. The flexibility to adjust proportions (body, head, limb sizes) and vary stuffing allows for endless possibilities.
Leave a Reply