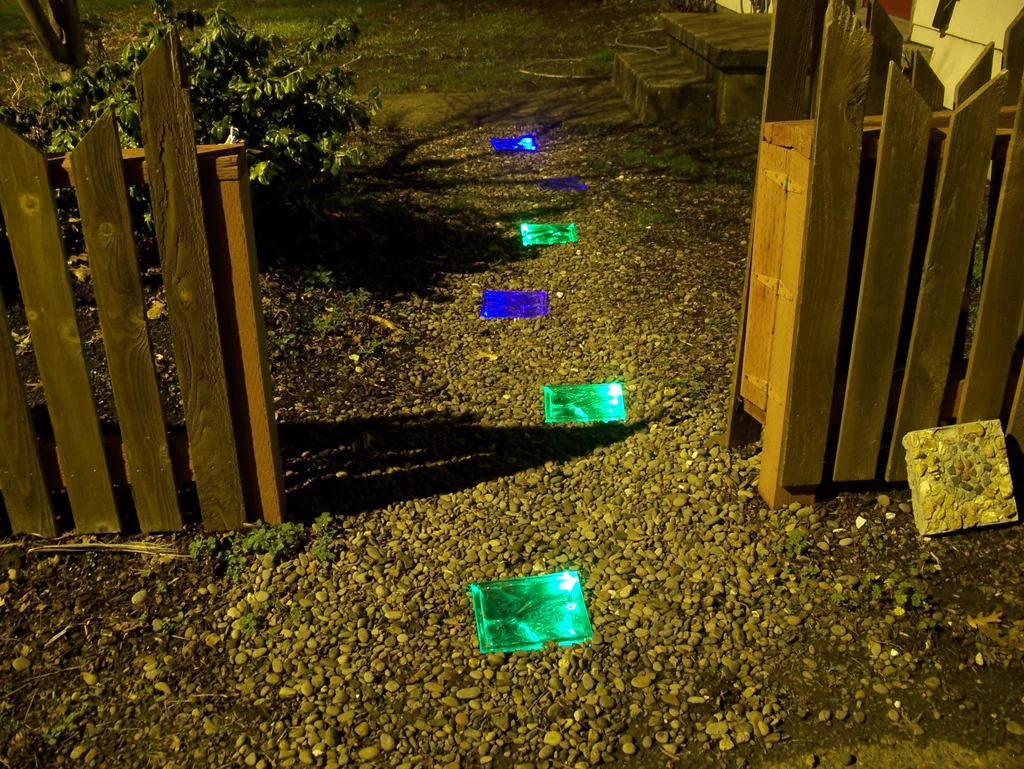
There’s something truly enchanting about a walkway that glimmers gently underfoot, guiding your path with a soft glow. It’s the bridge between the romance of a starlit sky and the practicality of modern living. Creating a solar-powered walkway not only beckons you toward the warm embrace of your home but also serves as a charming portal into the world of DIY electronics.
Solar Powered Walkway

It’s a delightful project for anyone with a penchant for sustainable living and a flair for outdoor beautification. Imagine intertwining the allure of clean energy with the practical charm of a lighted path; this is your chance to manifest that image into twinkling reality.
Materials Needed
- Glass blocks (suitably shaped for a walkway)
- Fine gravel (to create a visually appealing base beneath the glass)
- Solar lights designed to attach to a patio umbrella
- Speaker wire (to connect the lights with the glass blocks)
- Epoxy or silicone (for sealing and waterproofing)
- Hot glue (to position the LED in place)
Tools Required
- Soldering iron (for wire connections)
- Wire cutters/strippers (for cutting and stripping the speaker wire)
- Staple gun (for securing the wires along their path)

Step-by-Step Guide For Making Your Solar-Powered Walkway
Preparing the Walkway
Finding the Perfect Spot: Elect a spot for your lighted path—a welcome trail from driveway to front door could be idyllic.
Setting the Stage: Trial place a glass block where you foresee the light will go. Dig a cozy niche for it to sit in, just deeper than its final position.
Laying a Refined Base: Sprinkle the hole with a layer of fine gravel, which not only adds a sophisticated underglow through the glass but also prevents direct contact with earthy soil.
Positioning the Glass Block: Nestle the block within, backfilling and compacting until it’s slightly proud of the pathway, destined to settle naturally.
Harnessing Solar Power
Choosing the Right Solar Light: Seek out a solar light that offers a detachable solar panel. This means a singular solar panel can power multiple lights instead of having each light powered individually.
Finding a Place for the Solar Panel: The solar panel finds its sunny abode atop your roof, while the battery housing tucks neatly away, inconspicuous in its utility.
Wiring for Power: Extend the connection between these siblings with extended speaker wire, allowing them to communicate over the distances necessary.
Engineering the System
Diving into the System: As you delve into the solar lights, extract the panel from its housing.
Laying Out the Wire Path: Lay out the wire path, reaching from the panel’s permanent rooftop perch to the battery’s discrete hideaway, adding a little extra slack—better to have too much wire than not enough.
Extending and Connecting: Extend the LED wires from the housing with speaker wire, ensuring a solid solder joint.
Mounting and Routing: Mount the panel and housing, routing and stapling wires neatly away.
Lighting the Blocks: The next step involves some creativity: affix an LED on each glass block, securing it with a dab of hot glue followed by a hardy seal of epoxy or silicone.
Assembling the Pathway
Mapping Out the Path: Mark the future homes of each glowing stone on your path.
Determining the Wiring: Determine wire lengths, adding room for routing and connections.
Cutting and Soldering: Cut and label wires, soldering one end to each glass block.
Protecting the Connections: Guard all connections against the elements with a generous sealant coat.
Placing the Blocks: Assemble the path, settle each block into its gravel bed, and connect the weaving trail of speaker wire, finally joining the system with the solar light housing.
Finishing Touches
Securing and Waterproofing: Once every wire and block is in place, confirm that all elements are secure and waterproofed.
Burying the Wiring: Bury the wiring, activate the system, and stand back to admire the near-magical result of your endeavor.
Final Thoughts
While your new solar-powered walkway gleams outside, occasionally drawing the odd attention of pass-buyers, you’ll relish in the joy of your eco-friendly creation. Admiration from visitors and the personal pleasure of your handiwork culminate in a successful project.
Remember, should your lights falter, they may require a tweak or repair—but a well-assembled system should provide enchantment for many evenings to come. Share your illuminated journey with others, and your walkway will not just light the path to your door but also spark inspiration in someone else’s DIY dreams.


Leave a Reply