
Boost autumn fun with this Free Crochet Pumpkin Keychain Pattern, a cute, festive, and quick project perfect for adding charm to any set.
There’s something truly delightful about creating small, handmade accessories that brighten up everyday items, and this free crochet pumpkin keychain pattern is just that kind of project. It’s a sweet little piece perfect for fall, but with just a few simple changes, you can transform it into a hanging ornament, a bag charm, or even a playful decoration for your desk. Its versatility means you can enjoy crocheting it multiple times with fresh twists each time.
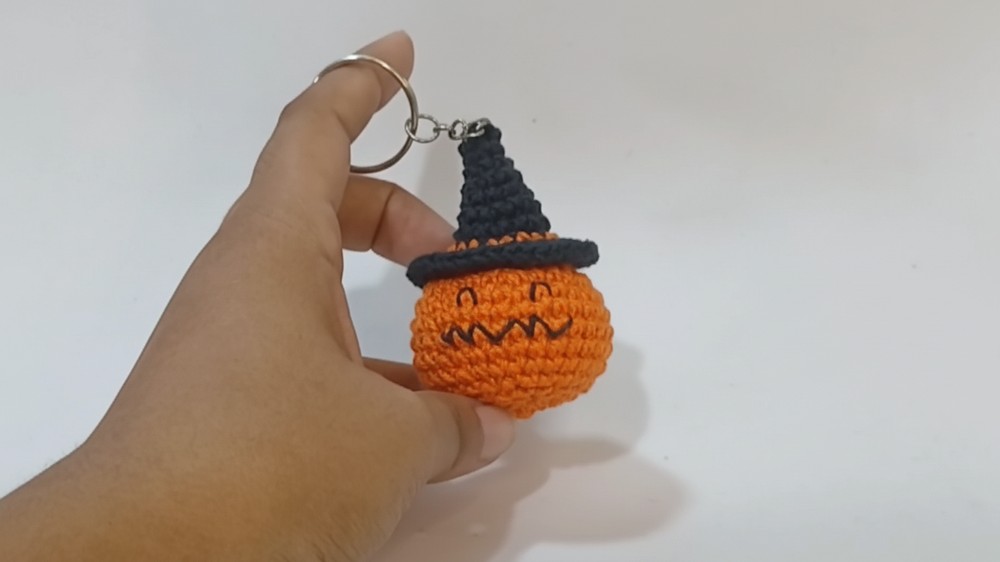
This pumpkin keychain charms with its rounded, plush shape and soft, smooth texture thanks to the tight single crochet stitches. The classic pumpkin segments are cleverly defined by subtle cinching at the top, giving it a lifelike, three-dimensional look. What really sets this project apart is the cute miniature witch hat perched on top, adding a fun and whimsical flair. Overall, the piece is both cozy and festive, blending traditional fall vibes with a touch of personality, making it a perfect accessory to accompany the season.

Designed with beginners in mind, the main stitch used throughout this pattern is the single crochet, worked in rounds with simple increases and decreases to shape the pumpkin beautifully. If you’re comfortable with the magic ring technique, basic stitch work, and following round-by-round instructions, this project offers a great opportunity to sharpen your amigurumi skills while creating something delightful.
Whether you’re making this pumpkin keychain as a thoughtful gift, a seasonal decoration, or a charming wearable accent, it fits right in as a cozy little collectible that’s easy to love. If you enjoy quick, satisfying projects that let you personalize your work and celebrate seasonal spirit, this pumpkin keychain pattern is a wonderful choice to add to your crochet repertoire. Keep your hook handy—there’s lots of joy in making these cute pumpkins!
Pumpkin Keychain with Little Witch Hat Crochet Pattern
Summary
This delightful pumpkin keychain with a tiny witch hat is a charming crochet accessory perfect for Halloween or autumn-themed decorations. The project creates a small, round pumpkin with defined segments, finished off with a playful witch hat on top. Worked in tight single crochet stitches through rounds of increases and decreases, it has a neat, amigurumi-style appearance. The embroidered eyes and mouth add personality and warmth, making this piece especially inviting as a keychain or gift. This pattern strikes a lovely balance between simple construction and eye-catching detail, making it an excellent beginner-friendly project with plenty of room for personal touches.
Pattern Notes
- Worked in rounds with magic rings, increases, and decreases to shape a slightly rounded pumpkin body and a miniature witch hat.
- The pumpkin is closed at the top by cinching yarn segments to create a ridged, classic pumpkin look.
- Color changes on the hat add dimension; you can customize the color palette freely for different festive moods.
- Embroidery on the pumpkin’s face allows fun customization — smile, eyes, and mouth can be reshaped based on personal style.
- The keychain ring can be attached securely either by stitching or with glue.
Skill Level
- Suitable for beginner crocheters familiar with basic stitches and understanding of working in rounds.
- Basic skills: magic ring, single crochet (sc), increase (inc), decrease (dec), slip stitch (sl st), color changes, and embroidery.
- Some experience with finishing techniques including cinching and sewing beneficial but not necessary.
Materials
- Worsted weight yarn in:
- Orange (for pumpkin body)
- Black (for witch hat)
- Optional contrasting color (e.g., orange or purple) for hat detail
- Crochet hook size 3.5 mm (E) or size as suitable to yarn
- Tapestry needle for weaving in ends and embroidery
- Fiberfill or mercerized stuffing to fill pumpkin firmly
- Black embroidery thread or thin yarn for eyes and mouth
- Keychain ring (optional, if using as keychain)
- Scissors
- Stitch markers or paper clips (optional)
- Hot glue gun (optional for attaching hat securely)
Measurements / Sizing
- Finished pumpkin diameter approximately 2.5 – 3 inches (6.5 – 7.5 cm).
- Witch hat height approximately 1.5 – 2 inches (4 – 5 cm).
- Overall height with hat about 3.5 – 4 inches (9 – 10 cm).
- Can be resized by using different yarn weights or adjusting hook size.
Gauge and Stitch Pattern
- Gauge is not critical for amigurumi but tight stitches help maintain a neat shape and prevent stuffing from showing.
- Stitch pattern: Worked mostly in single crochet rounds with increases to widen and decreases to taper the shape.
Gauge Swatch Tips
- Make a 10 cm square swatch in single crochet to check tension.
- Adjust hook size if stitches are too loose to ensure firmness.
- Tighter crochet work yields better shape and durability.
Stitch Abbreviations
- ch = chain
- sc = single crochet
- inc = increase (2 sc in the same stitch)
- dec = decrease (crochet two stitches together)
- sl st = slip stitch
Special Stitches
- Magic Ring: Create an adjustable loop for starting rounds, pulling tightly to close the ring after stitching initial stitches into it.
- Decrease (dec): Insert hook into next stitch and pull up a loop, then into following stitch pull up a loop. Yarn over and pull through all loops to close two stitches into one.
- Color Change in Round: Completing last yarn over of a stitch with new color yarn to maintain clean joins.
The Crochet Pattern!
Pumpkin Body
- Round 1: Make a magic ring. Ch 1 (does not count as stitch). Work 6 sc into the ring. Pull tail tight to close. (6 stitches)
- Round 2: Ch 1, inc in each stitch around (2 sc in each stitch). (12 stitches)
- Round 3: Ch 1, 1 sc, inc repeat 6 times. (18 stitches)
- Round 4: Ch 1, 2 sc, inc repeat 6 times. (24 stitches)
- Round 5: Ch 1, 3 sc, inc repeat 6 times. (30 stitches)
- Rounds 6–10: Ch 1, sc in each stitch around, no increases. 5 rounds total with 30 stitches each.

Note: At the end of each round, join with sl st or continue stitches in continuous rounds using a stitch marker.
- Round 11 (Begin decreases): Ch 1, 3 sc, dec repeat 6 times. (24 stitches)
- Round 12: Ch 1, 2 sc, dec repeat 6 times. (18 stitches)
- Round 13: Ch 1, 1 sc, dec repeat 6 times. (12 stitches)
- Stuff pumpkin firmly with fiberfill.
- Round 14 (Final decreases): Ch 1, dec repeat 6 times. (6 stitches)
- Cut yarn leaving a long tail. Pull this tail tightly to close the hole. Weave the tail securely into the pumpkin body.

Finishing Pumpkin Shape
- After closing, finish off by cinching the top to create six distinct ridges (segments), simulating a pumpkin’s shape.
- To do this, take a tapestry needle threaded with yarn and weave it through the front loops of the 6 “points” around the top, pulling tightly to shape, knot, and hide ends.
Embroidering the Face
- Using thin black thread or yarn, embroider the eyes on row 6.
- Insert needle into top of row 6 stitches and form eyes using single stitches shaped like the letter “B,” crossing back and forth to create cute eyes.
- For the mouth, embroider a small “B” shape below eyes on a lower row to give a sweet smile.
- Tie off and hide yarn ends carefully inside the pumpkin.

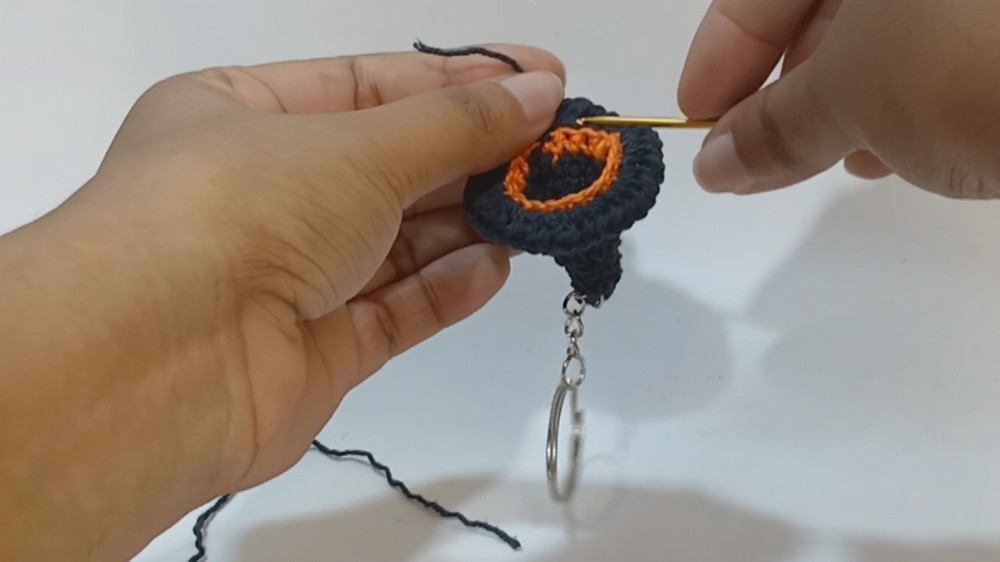
Witch Hat
- Make a magic ring with black yarn.
- Ch 1, crochet 6 sc into the ring. Close the ring tightly. (6 stitches)
- Crochet 3 additional rounds of 6 sc each (no increases).
- Next round: Ch 1, 1 sc, inc repeat 3 times. (9 stitches)
- Following round: sc in each stitch around (9 stitches).
- Next round: 2 sc, inc repeat 3 times. (12 stitches)
- Next round: 3 sc, inc repeat 3 times. (15 stitches)
- Next round: 4 sc, inc repeat 3 times. (18 stitches)
- Change yarn color to orange (or desired color for rim) mid-round after last increase stitch by finishing that stitch with the new color.
- Crochet 1 round sc in new color without increases.
- Switch back to black yarn for final detail.
- Final round: Ch 2, work increases into front loops of each half double crochet stitch (or mid stitches), increasing evenly around to shape hat upwards.
- Slip stitch to join. Fasten off, leaving a yarn tail for attachment.
Assembly
- Attach the witch hat securely to the pumpkin top by sewing with yarn tails or using hot glue.
- Ensure the hat is centered and stable if used as a keychain or ornament.
- Weave in all loose ends.
Optionally attach a keyring through crochet stitches at the top of the hat or pumpkin.
Finished Size and Usage
- Approximate height including hat: 3.5 to 4 inches (9–10 cm).
- Pumpkin diameter approx. 2.5 to 3 inches (6.5–7.5 cm).
- Ideal as a keychain, bag charm, or small Halloween decoration.
- Lightweight and portable with vibrant colors.
Conclusion & Tips
- This project is a joyful mix of basic crochet skills ideal for beginners eager to make personalized autumn gifts.
- The defined pumpkin ridges formed by cinching add a professional touch to the finished amigurumi.
- Playing with yarn colors, you can modify the witch hat to match fall themes or your own festive style.
- Embroidery lets you inject character—feel free to experiment with facial expressions!
- Assembly with careful sewing or glue guarantees durability, especially for an item handled often like a keychain.
- Don’t forget to enjoy the process and share your creations for others to enjoy!
Leave a Reply