
Spark joy and whimsy with this free crochet dragon amigurumi pattern packed with playful details and simple instructions anyone can enjoy.
Bring a little fantasy to your crochet collection with a tiny dragon friend. The Free Crochet Dragon Amigurumi Pattern is a fun crochet toy project that turns soft yarn into a cute creature full of charm.
This dragon has a small body, a round head, tiny legs, and a long tail that gives it a playful shape. Its little wings and horns are the standout details that make it look like a real fantasy creature in miniature form. The crochet texture feels soft and cozy, while the neat stitches give the dragon a clean and lovely finish.
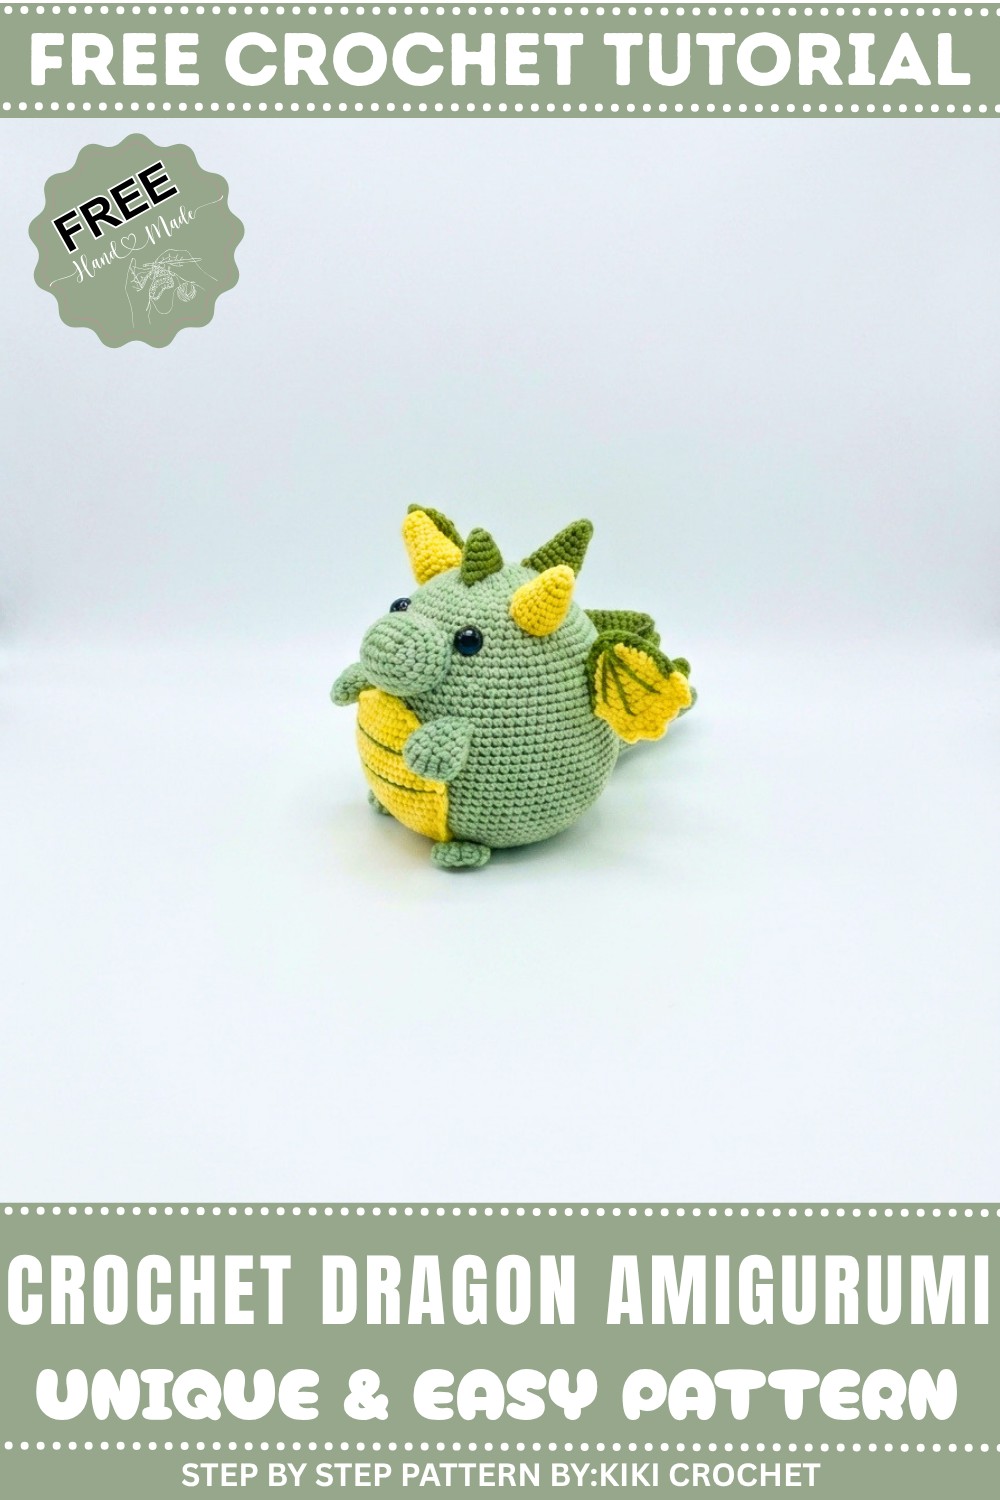
Free Crochet Dragon Amigurumi Pattern for Fantasy Inspired Decor
Bright colors can make this amigurumi even more fun. You can choose green for a classic dragon look or pick pink, blue, purple, or any shade you love. Place the finished toy on a shelf, desk, bedside table, or child’s room. It can also sit beside books and other amigurumi toys as part of a cute little display.
Making this dragon is a joyful project for anyone who enjoys small crochet toys. Each part is worked separately before coming together as one tiny character. The round face, curved tail, wings, and little feet slowly give the dragon its own personality. You can add small details to make your dragon look sweet, funny, or a little bold.

The project is presented by a creative designer who gives this magical creature a simple and friendly crochet style. For extra visual help, the Kiki Crochet YouTube channel can be useful while working on the different parts.
When finished, this dragon can become a fun keepsake or a special handmade gift. Children may love it as a tiny toy, while crochet fans can keep it with their amigurumi collection. Its cute shape, soft texture, and fantasy look also make it a lovely decoration for any cozy space.
Amigurumi Dragon Crochet Pattern
This detailed crochet pattern guides you through creating an adorable, chubby Amigurumi Dragon from start to finish. The project involves crocheting the body, tail, limbs, snout, horns, belly, wings, and spines individually, before assembling all parts into a charming dragon. Using color combinations of light blue, dark blue, yellow yarns, and appropriate crochet techniques, you will achieve a visually appealing and tactile toy suitable for gifting or display.
Quick Overview of Pattern
- Crochet the body in continuous rounds with strategic increases and decreases for shaping.
- Create the tail separately in rounds following increasing stitch counts to shape tapering.
- Craft limbs with both increased and decreased stitches, finishing with embroidered toes.
- Make distinctive details like snout, horns, belly, wings, and dorsal spines (gai) using a variety of stitches.
- Assemble and stuff the individual pieces firmly, then sew or glue them securely for lasting durability.
Notes
- The pattern uses continuous spiral rounds for smooth shaping, no joining at the end of rounds unless specified.
- Invisible decreases are used to create neat curves without gaps.
- Back loop only (BLO) technique adds texture and dimension where required (e.g., body shaping rounds).
- Careful stuffing is essential; stuff gradually to maintain smooth shapes without lumps.
- Assembly requires needle sewing and optional use of glue for securing safety eyes or delicate parts.
Skill Level
Intermediate to advanced: Suitable for crocheters comfortable with amigurumi basics, spiral rounds, invisibile decreases, working with color changes, back loop stitches, and shaping through increases/decreases.
Materials
- Cotton yarn: Milk cotton
- 2.5 mm crochet hook
- Yarn needle
- Scissors
- Fiberfill stuffing
- Large safety eyes: 8mm, 3mm and 4mm
- Glue gun (for eye attachment)
Measurements / Sizing
- Approximate finished height: 20-25 cm tall, depending on crochet tension and stuffing.
- Body diameter starts around 8 cm wide at the fullest point.
- Tail length tapers from approximately 15 cm to a tapered tip.
- Limbs sized proportionally for balance.
- Wings spread around 15 cm wide when attached.
Gauge and Stitch Pattern
- Primary stitch: single crochet (sc) worked in continuous spirals
- Increases: 2 sc in one stitch (inc)
- Decreases: single crochet two stitches together (dec) or invisible decrease (inv dec) for smooth finish
- Back loop only (BLO) stitches used to add textural details
- Starting rounds use magic ring (MR) to avoid holes
Stitch Abbreviations
- ch = chain
- sc = single crochet
- inc = increase (2 sc in one stitch)
- dec = decrease (sc two stitches together)
- inv dec = invisible decrease
- sl st = slip stitch
- BLO = back loop only
- MR = magic ring
Special Stitches
- Invisible decrease (inv dec): pick front loops only of adjacent stitches and crochet together for neat shaping.
- Back loop only (BLO): crochet into back loop of stitch to create ridged texture, mainly on body rounds for visual interest.
The Crochet Pattern!
1. Body
- Work continuously in spiral rounds without joining at round ends.
R1:
- MR, 8 sc into ring (8 sts)
R2:
- Increase in every stitch (16 sts)
R3:
- (1 sc, 1 inc) repeat 8 times (24 sts)

R4:
- (1 sc, 1 inc, 1 sc) repeat 8 times (32 sts)
R5:
- (3 sc, 1 inc) repeat 8 times (40 sts)
R6:
- Work 40 sc evenly (no increase)
R7:
- (2 sc, 1 inc, 2 sc) repeat 8 times (48 sts)
R8:
- (5 sc, 1 inc) repeat 8 times (48 sts + 8 inc = 56 sts)
R9–R10:
- 56 sc evenly
R11:
- (3 sc, 1 inc, 3 sc) repeat 8 times (64 sts)
R12:
- (7 sc, 1 inc) repeat 8 times (72 sts)
R13–R17:
- 72 sc evenly
R18:
- (4 sc, 1 inc, 4 sc) repeat 8 times (80 sts)
R19–R33:
- 80 sc evenly
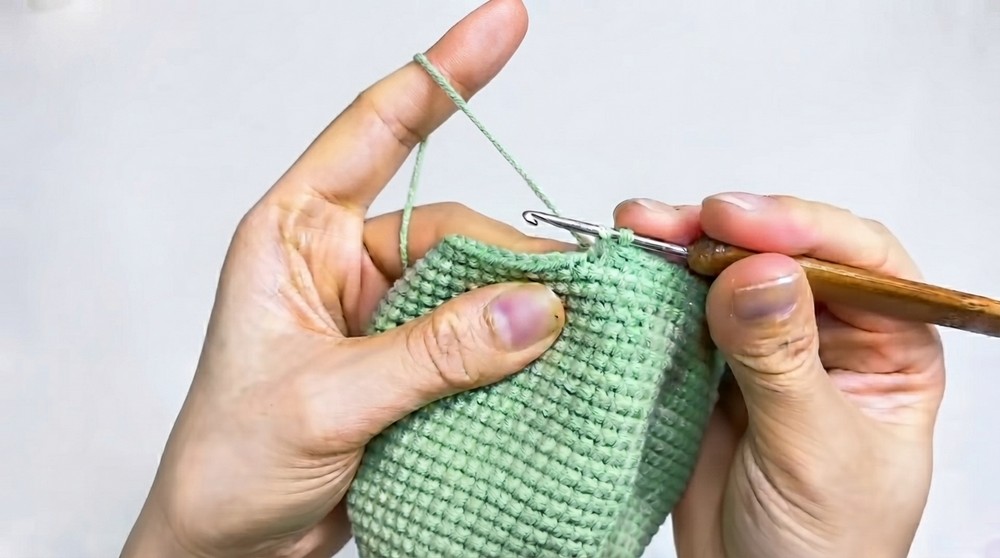
R34:
- (4 sc, 1 inv dec) repeat 8 times (72 sts)
R35:
- (7 sc, 1 dec) repeat 8 times (64 sts)
R36:
- (3 sc, 1 dec, 3 sc) repeat 8 times (56 sts)
R37 (BLO):
- (5 sc, 1 dec) repeat 8 times (48 sts)
R38:
- (2 sc, 1 dec, 2 sc) repeat 8 times (40 sts)
R39:
- (3 sc, 1 dec) repeat 8 times (32 sts)
R40:
- (1 sc, 1 dec, 1 sc) repeat 8 times (24 sts)
- Start stuffing firmly.
R41:
- (1 sc, 1 dec) repeat 8 times (16 sts)
R42:
- 8 decreases (close with needle).
2. Tail
R1:
- MR, 6 sc into ring
R2:
- 6 sc
R3:
- (1 sc, 1 inc) repeat 3 times (9 sts)
R4–R5:
- 9 sc
R6:
- (1 sc, 1 inc, 1 sc) repeat 3 times (12 sts)
R7–R8:
- 12 sc
R9:
- (3 sc, 1 inc) repeat 3 times (15 sts)
R10–R11:
- 15 sc
R12:
- (2 sc, 1 inc, 2 sc) repeat 3 times (18 sts)
R13–R14:
- 18 sc
R15:
- (5 sc, 1 inc) repeat 3 times (21 sts)
R16–R17:
- 21 sc
R18:
- (3 sc, 1 inc, 3 sc) repeat 3 times (24 sts)
R19–R20:
- 24 sc

R21:
- (7 sc, 1 inc) repeat 3 times (27 sts)
R22–R23:
- 27 sc
R24:
- (4 sc, 1 inc, 4 sc) repeat 3 times (30 sts)
- Finish with a slip stitch.
3. Limbs
Chain 4:
R1:
- Starting from 2nd chain from hook: 1 sc, 1 sc, 3 sc in last chain, working on opposite side of chain: 1 sc, 2 sc in last chain (total stitches as per video).
R2–R6:
- Work increases and decreases to shape foot following demonstration.
- Finish with surface embroidery to depict toes.

4. Snout
- Chain 7. Work around chain as follows:
Row 1:
- Skip 1st chain, 2 sc in 2nd chain, 4 sc, 4 sc in last stitch; turn and work on opposite chain side: 4 sc, 2 sc in last stitch (16 stitches total).
Row 2:
- 1 sc, 2 sc in next, 5 sc, 2 sc in next, 1 sc, 2 sc in next, 5 sc, 2 sc in next (20 sts).
Row 3:
- 2 sc, 2 sc in next, 6 sc, 2 sc in next, 2 sc, 2 sc in next, 6 sc, 2 sc in next (24 sts).
Row 4:
- 3 sc, 2 sc in next, 7 sc, 2 sc in next, 3 sc, 2 sc in next, 7 sc, 2 sc in next (28 sts).
Row 5:
- 1 sc in every stitch (28 stitches); slip stitch to finish.

5. Horns (Yellow Yarn)
Small Horn (Make 2):
- MR with 6 sc., increase rounds to 9, 12, then finishing at 15 sc.
Medium Horn (Make 2):
- Similar to small horn, increase rounds up to 15 sc by Row 8.
Large Horn (Make 1):
- Follow small horn base, increase past Row 8 to 18 sc at Row 9 and Row 10.
6. Belly (Yellow Yarn)
- Begin with 13 chain stitches.
- Even numbered rows: increase by 2 sc in the first and last stitch to expand shape.
- Continue increasing pattern until Row 18, shaping belly contour for attachment.

7. Wings (Yellow Yarn)
- Start with MR of 8 sc.
- Increase stitches each round to reach 32 stitches.
- Fold wing in half to work scallops using combinations of sc, double crochet, and treble crochet stitches.
- Finish by adding a green border around edge for definition.
8. Gai (Dorsal Spines)
- Create small, medium, and large spine pieces using MR and increasing sc stitches similar to horns.
- Variate size for realistic spine effect.
Assembly & Finished Size
- Attach the belly piece carefully to the underside of the body.
- Stuff and sew the snout securely to the face.
- Sew arms and legs symmetrically on both sides of the body.
- Attach horns and dorsal spines evenly along the head and back.
- Sew wings securely to the sides.
- Insert safety eyes; use glue gun for extra security if desired.
- The finished dragon stands approximately 20-25 cm tall, with a balanced, chubby silhouette and detailed surface features.
Conclusion
This Amigurumi Dragon pattern combines meticulous shaping, color contrasts, and varied crochet techniques to produce a visually captivating and cuddly toy. The use of continuous spiral rounds with strategic increases and invisible decreases results in smooth, beautifully contoured components. Textured wings, articulated limbs, and decorative spines add richness to the design. By following the pattern patiently and assembling thoughtfully, crafters of intermediate skill levels can create a lasting and lovable dragon stuffed companion.
Leave a Reply