
Stack the fun with DIY Uv Resin Bunny Burger Set, featuring little bunny ears, colorful burger layers, and a glossy finish for cute displays.
A burger does not have to look ordinary when it becomes a tiny resin decoration. Give it bunny ears, soft colors, and playful food details, and it takes on a completely different personality.
The DIY Uv Resin Bunny Burger Set combines a familiar snack shape with an animal theme. The rounded burger layers can be arranged to show a bun, filling, and little accents that suggest lettuce or cheese. Bunny ears on top are the detail that sets this idea apart. A matching second piece or small side item can help the set feel complete, depending on the design you want.
Featured By: PolymomoTea
DIY Uv Resin Bunny Burger Set Idea
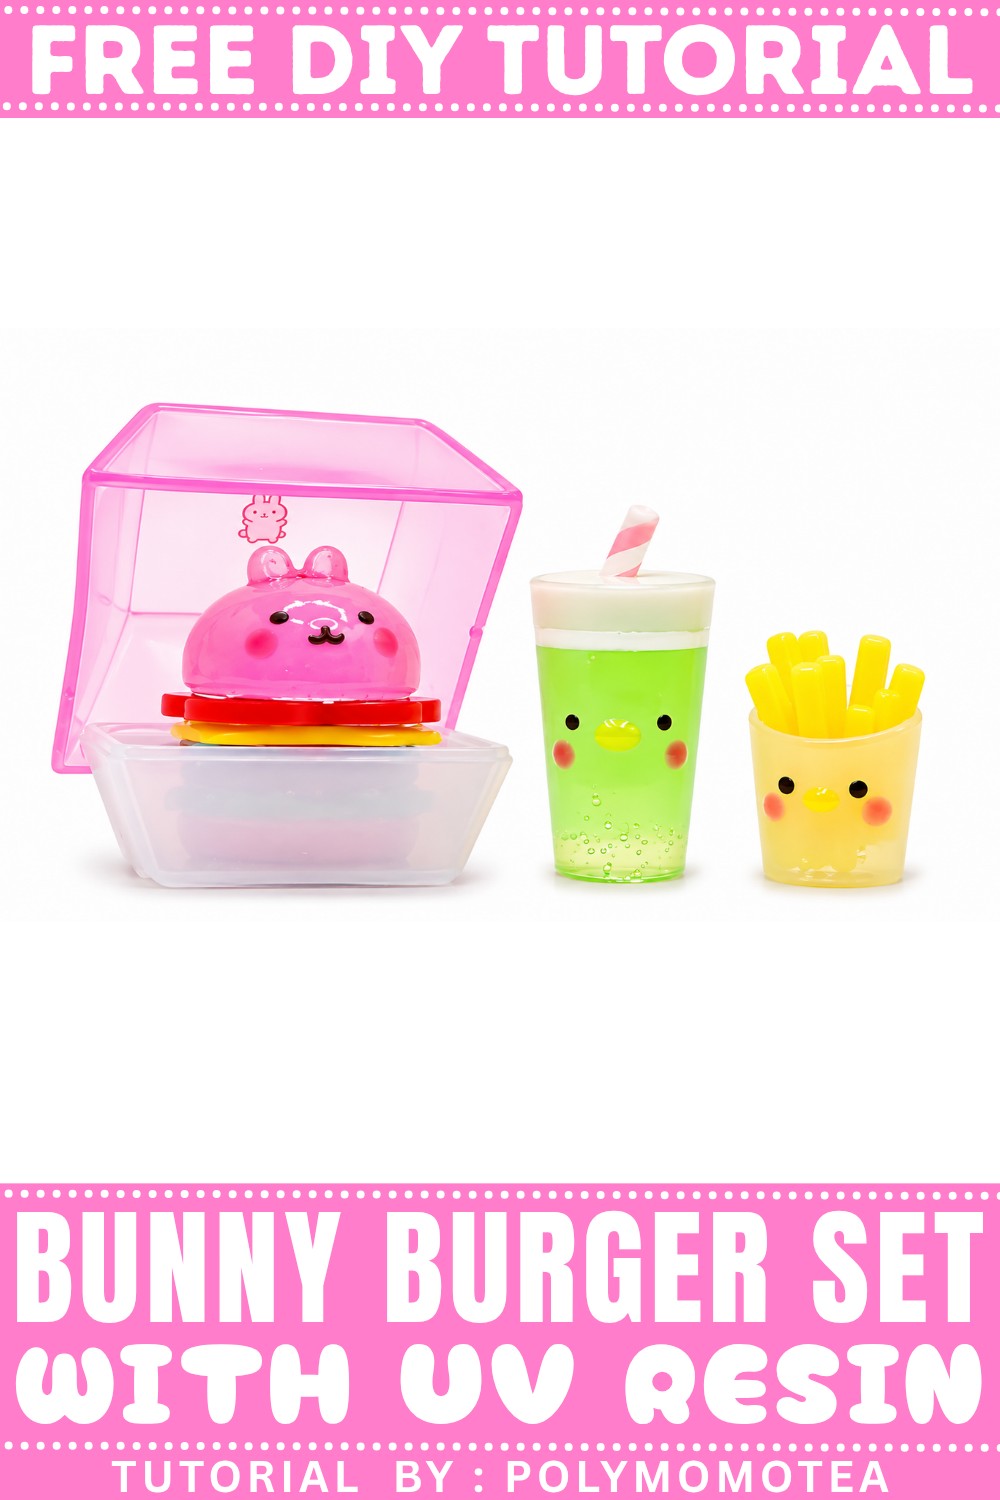
UV resin offers a glossy surface and can be used with suitable molds to form small parts. Choosing colors before you begin will help the pieces look good together. Pastel shades can give the bunny a gentle style, while stronger colors help the burger layers stand out. Cure every section as directed by the resin manufacturer, and avoid touching uncured resin with bare skin.
The set works as a cute display on a table, a photo prop for a miniature collection, or a handmade surprise for someone who likes food-themed decorations. It has a cheerful, slightly funny look without needing a complicated scene. Small details do the work here, from the ears to the layered burger shape.

How to Make an Animal-Themed Burger Set with UV Resin
A Beginner-Friendly Step-by-Step Miniature Tutorial
Miniature food crafts are a charming way to bring playful art into your everyday life. In this tutorial, you’ll learn to make a cute animal-themed burger set using colored UV resin and molds—featuring a bunny burger, bunny-decorated box, fries in a kawaii container, and an adorable green drink. Inspired by the Sophie & Toffee Elves Box (Fast Food Miniatures), this project uses supplies commonly found in resin craft kits, but you can also use similar materials from local craft stores.
Whether you’re a beginner or looking for a new challenge, this guide covers each step in clear, simple language. Learn to layer resin, add facial features, and assemble your own fast food scene—all in miniature!

Essential Materials & Tools
Materials
- Colored opaque UV resin:
- Green (for lettuce and drink)
- Red (for tomato and blush)
- Yellow (for cheese and fries)
- Brown (for burger)
- Pink (for bun, bunny ears, and blush)
- White (for box, nose, and eyes)
- Pigment balls or powders (for custom coloring)
- Super glue (for assembly)
- Bunny stickers and heart stickers
- UV glaze or top coat (optional, for shine)
Tools
- Burger mold sets (for layering lettuce, tomato, cheese, burger, and bun)
- Box mold (for burger container)
- French fry mold and fry case mold
- Drink mold and drink lid mold
- UV lamp (for curing resin)
- Mixing cups and stirrers (for pigment mixing)
- Craft stick or silicone brush (for details)
- Tweezers (for sticker placement and handling tiny parts)
Step-by-Step Instructions
1. Making the Animal-Themed Burger
Step 1: Prepare Burger Layers
- Let’s make the fillings:
- Lettuce: Use colored opaque UV resin in green. Pour into the mold and cure under the UV lamp.
- Tomato: Use red resin, cure as above.
- Cheese: Use yellow resin, cure as above.
- Burger patty: Mix brown pigment (using pigment balls or powder) into UV resin, pour and cure as above.
- Create the bun:
- For a fun twist, mix pink pigment into UV resin and pour into the bun mold. Cure thoroughly.
- Once cured, demold each piece carefully.


Step 2: Assemble the Burger
- Stack in order:
- Follow the classic burger stack: Lettuce (bottom), burger patty, cheese, tomato, and finally the pink bun on top.
- Glue the burger together:
- Use super glue to stick the bun to the rest of the burger layers so your burger stays together.

Step 3: Make the Bunny Face
- Add bunny ears:
- Using pink resin, form two small dots on top of the bun. Cure.
- Build up the ears by adding DOT after DOT, curing each layer until you have two rounded bunny ears.
- Add facial features:
- Nose: Apply a tiny dot of white resin and cure.
- Eyes: Two dot eyes using white resin, cure.
- Smile: Draw a “W” smile line with resin; cure.
- Blush: Use red resin for cute blush dots and cure.
- Final cure:
- Make sure all features are cured well so you have a sturdy, adorable bunny burger.

2. Making the Burger Box
Step 1: Mold the Box
- Shape the top box:
- Mix pink pigment into UV resin, pour half into the box mold, and tap lightly on the table to remove bubbles. Cure under the UV lamp.
- Shape the bottom box:
- Mix white resin and pour into the mold for the base. Cure.
- Demold both pieces:
- Once fully cured, gently remove both parts. You should have a cute container for your burger.
Step 2: Decorate the Box
- Apply stickers:
- Place a bunny sticker on the top or middle of the box.
- Add a heart sticker nearby for extra kawaii charm.
- Seal with resin:
- Add a drop of UV resin to a corner, press the box so it’s slightly open, and cure to keep the box in a “partially open” position.
Step 3: Assemble the Box and Burger
- Fit the burger into the box:
- Place your bunny burger in its cute box home. Enjoy how adorable your set looks so far!
3. Making the Fries and Container
Step 1: Mold the French Fry Case
- Pour white resin:
- Add white UV resin to the fry case mold. Cure.
- Demolding is tricky; be patient and gently peel the container out.
Step 2: Add the Animal Face
- Face details:
- Nose: Use yellow resin, cure.
- Eyes: Tiny white dot eyes, cure.
- Blush: Use red resin for blush on the fry container cheeks, cure.
Step 3: Mold the Fries
- Pour yellow resin:
- Fill the french fry mold with yellow resin, cure, and demold.
- Assemble:
- Place the fries into the fry case for a complete animal-themed fries accessory!

4. Making the Drink
Step 1: Mold the Cup
- Mix green pigment:
- Mix green pigment into clear UV resin and pour into your cup mold.
- Cure, and demold carefully. The cup should be smooth and glossy.
Step 2: Mold the Lid
- Pour white resin:
- Fill the lid mold and cure.
- Attach lid:
- Place the lid onto the cup, pressing gently.
Step 3: Add Animal Features
- Animal face on the drink:
- Nose: Use yellow resin, cure.
- Eyes: Use white resin, cure.
- Blush: Use red resin, cure.
- Final cure:
- Make sure the facial features are cured and firmly attached.

Tips for Success & Creative Variations
- Layer resin slowly and cure each step: Prevents bubbles and ensures crisp results.
- Try other animals: Shape ears differently, add spots or stripes, try cat or bear faces.
- Use clear resin for drinks: Add tiny fruit pieces, glitter, or beads for more realism.
- Decorate boxes and containers: Use stickers, paint, or tiny resin shapes.
Conclusion
You’ve now created a complete animal-themed burger set—with a bunny burger, decorated box, cute fries container and fries, and a matching drink—all in miniature using UV resin! You used layering, mold pouring, coloring, and detailing with resin, as well as simple assembly techniques and creative decoration.
These adorable miniatures are perfect for dollhouses, shelves, gifts, or just to bring a smile to your workspace. Experiment with new colors, animals, and fast food items as you grow in confidence.
Leave a Reply