
Spark creativity with this delightful crochet granny square vest pattern that combines cozy comfort and eye-catching colors perfectly.
Vibrant Crochet Vest Pattern to Add Fun to Any Outfit
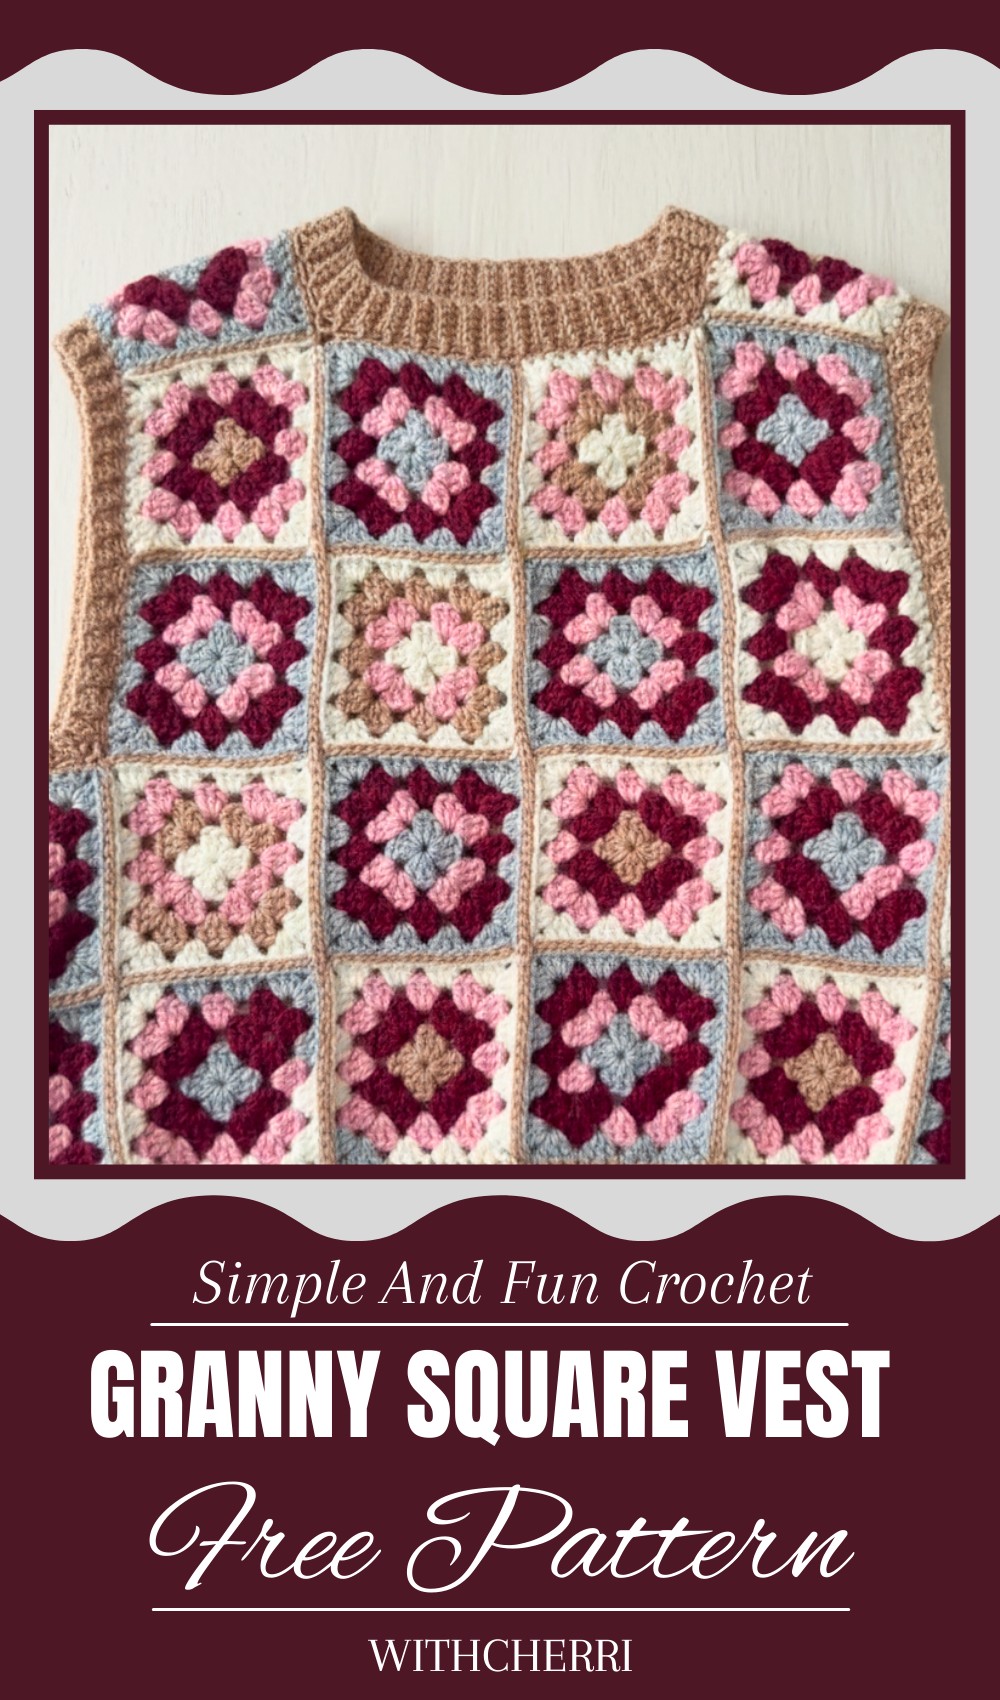
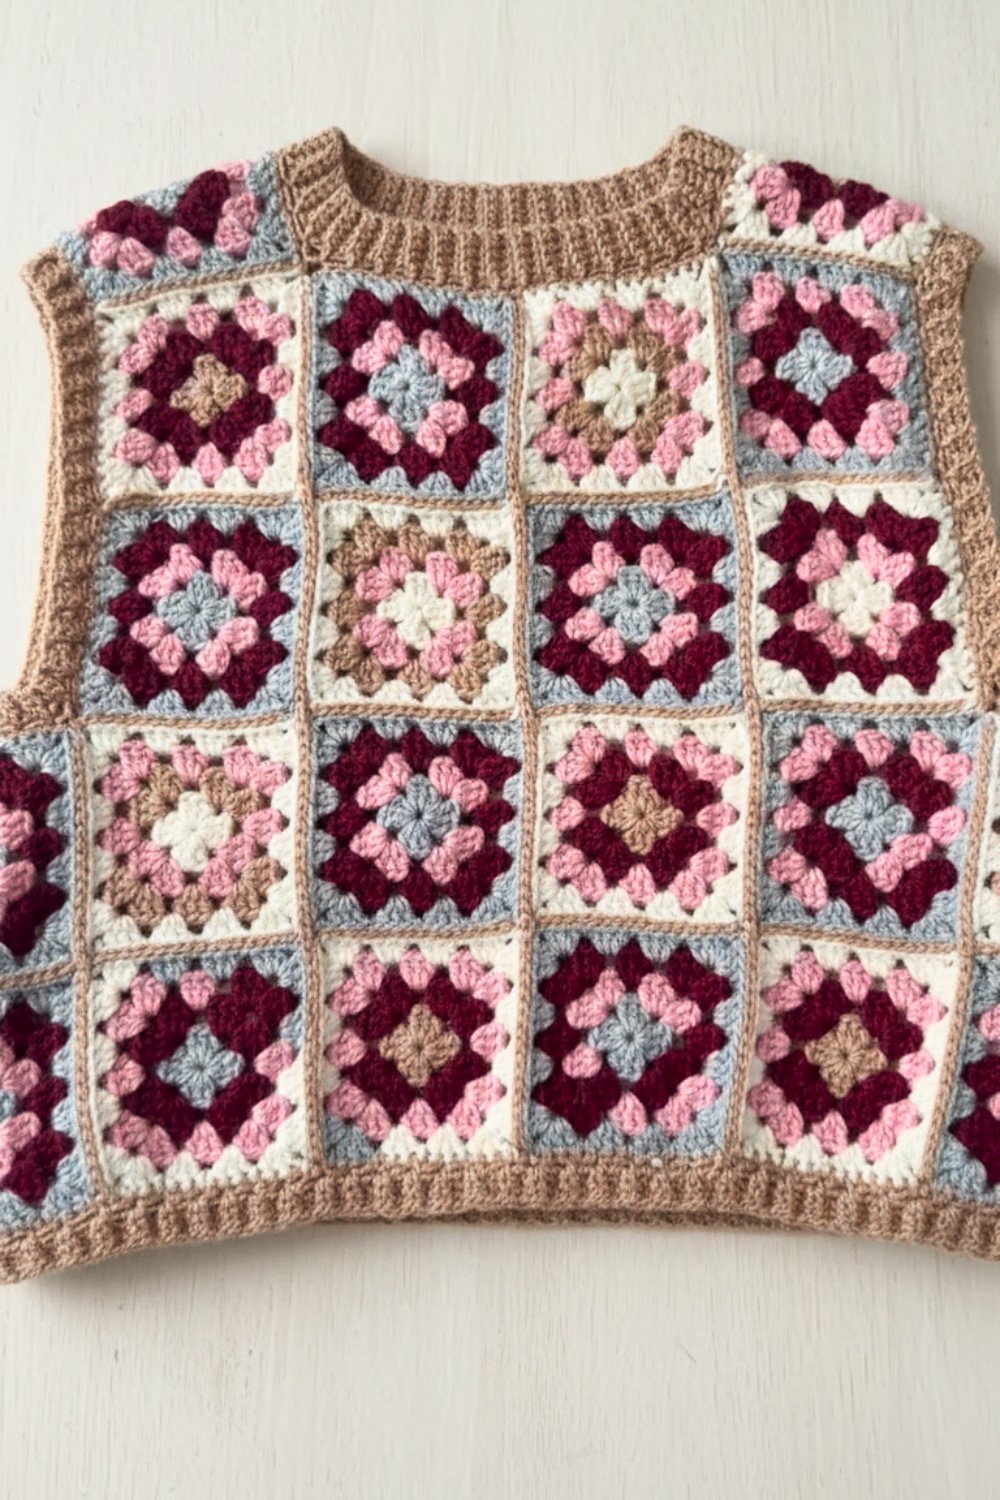
Simple patchwork made of colorful little squares, each one stitched together with care and love. This charming design brings warmth and style in a unique way. The crochet granny square vest pattern is a beautiful way to create a cozy garment that feels handmade and special. Made from small square pieces called granny squares, the vest shows off bright colors and lovely shapes that catch the eye.
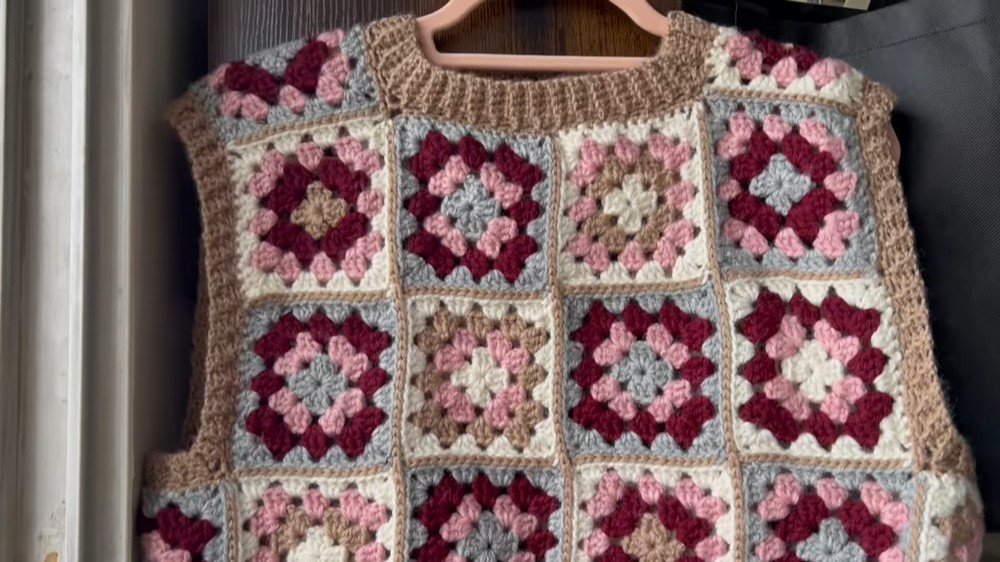
It looks both vintage and trendy, perfect to wear over a plain shirt to add a spark of creativity and comfort. This vest is lightweight, easy to wear, and suits many seasons, making it a fun choice for everyday fashion or festivals. Its open, airy design also keeps you cool while still offering a layer of warmth. Whether you like bold colors or soft pastels, this pattern lets you express your personality beautifully, turning simple yarn into a stylish statement piece.
Granny Square Sweater Vest Pattern
Special Features
- Classic granny square motif with multicolor options.
- Versatile vest design customizable by adding or subtracting squares.
- Ribbed trim around armholes, neckline, and vest bottom for a polished look.
- Eco-friendly and budget-wise project using yarn already in your stash.
Level of Difficulty
- Beginner to Intermediate
- Basic crochet stitches (chain, slip stitch, double crochet) with changing colors and basic seaming.
Materials Needed
- Yarn in several colors (the example uses 5 different color combos for the squares)
- Crochet hook size H/8 (5 mm) or appropriate for your yarn
- Scissors
- Yarn needle for finishing and weaving in ends
Step-by-Step Pattern
1: Making a Basic Granny Square
- Create a Slip Knot on the yarn color you have chosen for the base (e.g., gray).
- Chain 3.
- Slip Stitch back into the first chain to form a ring.
- Chain 4 — this will form the first side and corner of your square.
- Chain 2 to create a corner.
- Make 3 dc into the ring again.
- You have just completed sides one and two with a corner between.
- Chain 2 for the next corner.
- Repeat 3 dc into the ring, followed by chain 2 (corner).
- For the final side, chain 2, then make 2 dc into the ring because the initial chain-4 counts as one dc.
- Slip stitch into the 2nd chain of the beginning chain-4 to close the round.

Tip: If you accidentally do 3 dc at the last side, your square will be lopsided. Remember to only do 2.
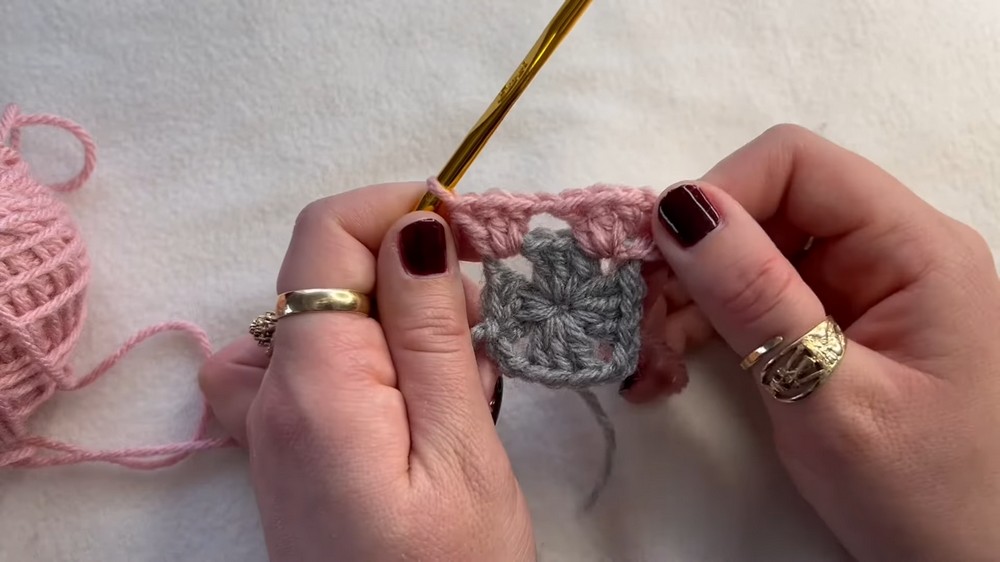
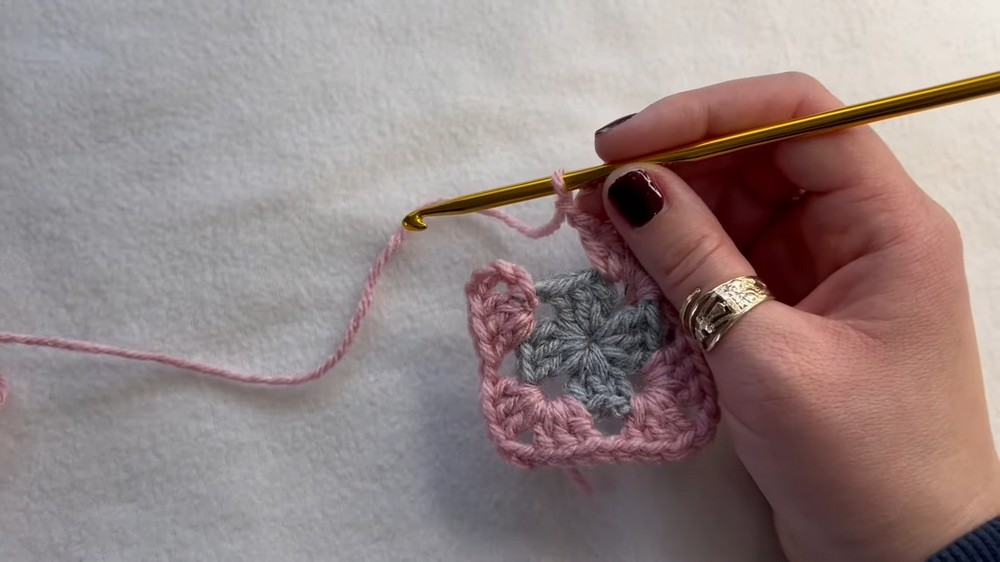
2: Changing Colors on Granny Squares
- Cut the yarn leaving a small tail (~2-3 cm).
- Loop the new color through the corner where you will begin.
- Attach the new yarn with a slip knot at the corner opposite where you ended the previous color for neatness.
- Chain 4 to start the new round.
- Make 3 dc into the corner gap of the previous round.
- Continue the round with groups of 3 dc separated by chains (corners with chain 2).
- Complete the round and slip stitch into the 2nd chain of the beginning chain-4.
- Cut yarn and weave in ends or continue with more rounds.
3: Building the Granny Square through Rounds
- For Round 2, each side has 2 groups of 3 dc separated with chain 1.
- For Round 3, increase to 3 groups of 3 dc per side.
- For Round 4, increase to 4 groups of 3 dc per side.
- Always finish each round with 2 dc in the last corner before slip stitching to close.
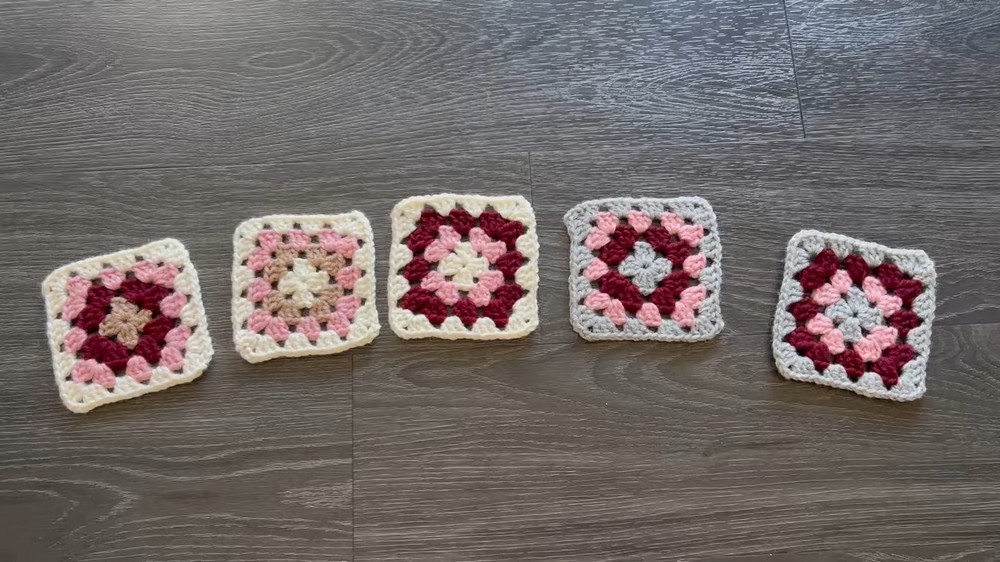
4: Making Multiple Granny Squares & Arranging the Vest
- Make about 38 granny squares using your chosen colors.
- Each square should measure approximately 4 in x 4 in (~10 cm square).
- Arrange squares in panels:
- Front panel: 4 x 4 squares
- Back panel: same as front
- Side seams: 2 squares high
- Adjust number of squares based on your measurements and desired vest size.
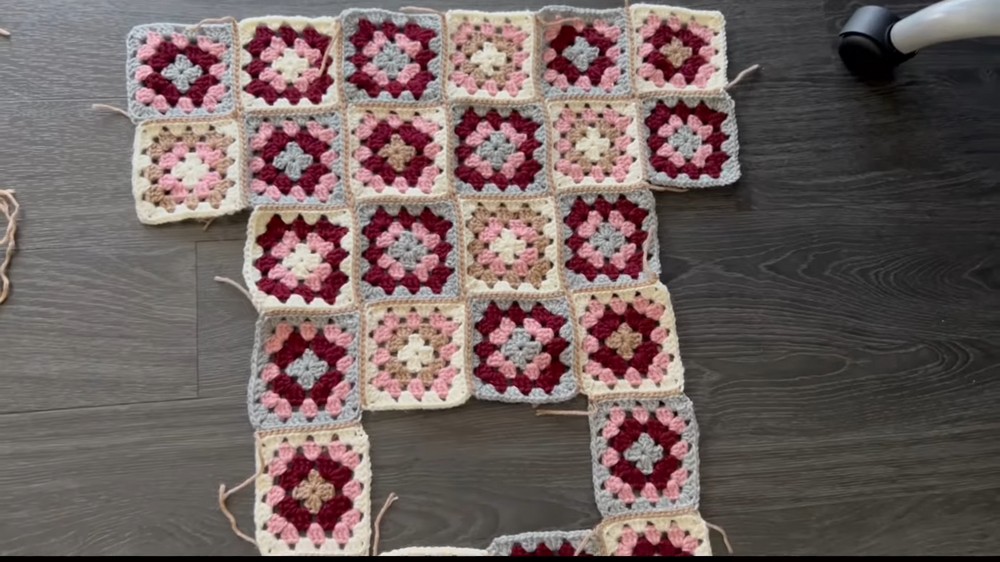
5: Joining Granny Squares with Single Crochet Seam
- Lay two granny squares with wrong sides together.
- Match corners and chain-2 spaces for even alignment.
- Insert hook into corner chain of first square, then second square.
- Yarn over, pull through both loops.
- Insert hook into next stitch of both squares, yarn over and pull through all loops (single crochet).
- Continue single crocheting along one edge until the squares are joined.
- Finish seam by cutting yarn and pulling through last loop.
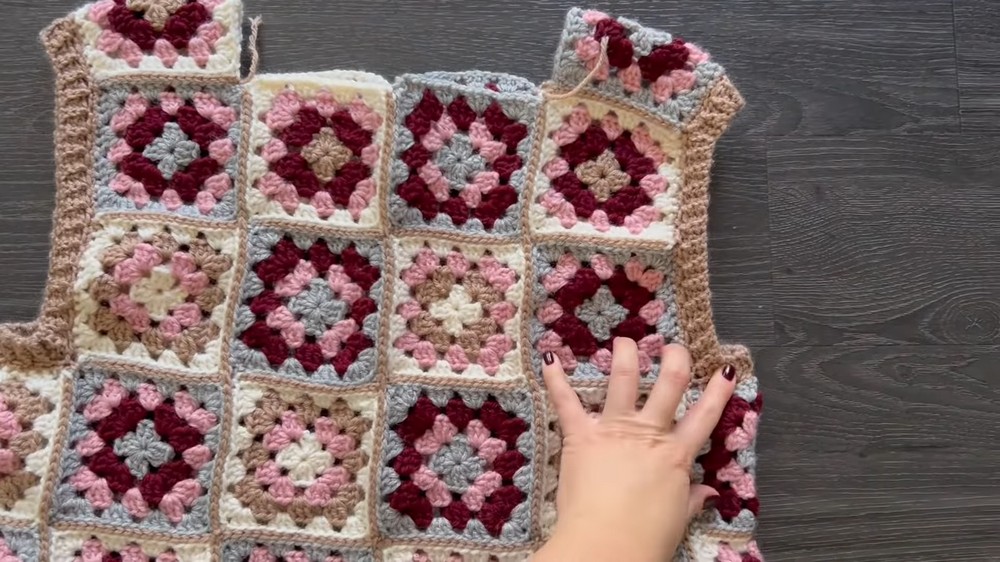
- Join squares into vertical strips, then seam strips together to form vest.
6: Adding Ribbing to Armholes
- Attach yarn at armhole edge.
- Single crochet 3 stitches, skip 1 stitch, repeating this pattern around the armhole.
- Slip stitch to join end of round.
- Chain 4 to turn.
- Work single crochets in the back loop only of previous round’s stitches (skip chain 4 stitch).
- Slip stitch every other stitch to create ribbing.
- Repeat rounds, decreasing by skipping stitches to cinch armhole.
- Join with slip stitch at end of each round.
7: Ribbing for Neckline
- Same method as armhole ribbing but work 5 stitches long ribbing for a wider collar.
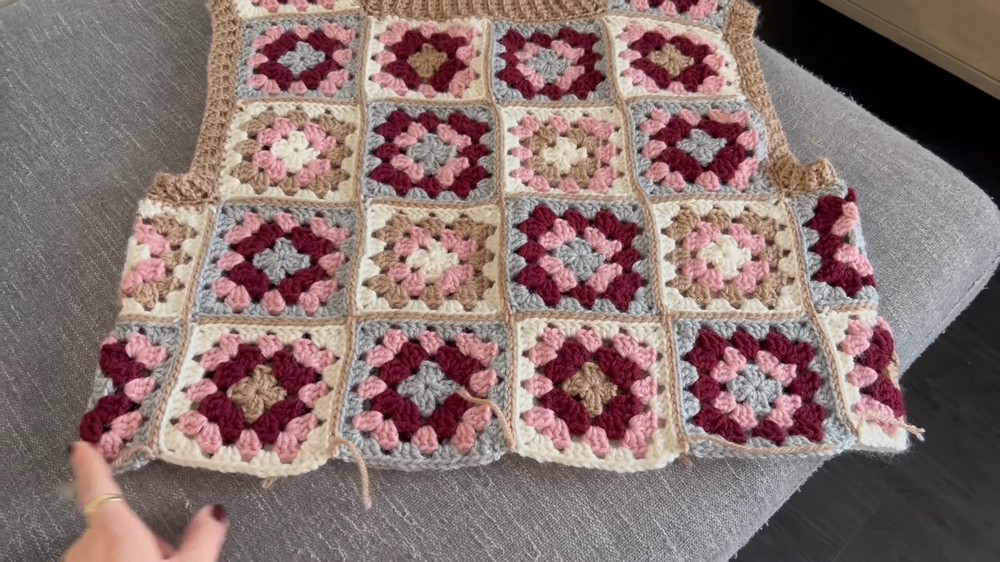
8: Ribbing for Bottom Edge of Vest
- Work ribbing same as armholes and neckline but over 7 stitches to create longer ribbing.
- Catch any loose yarn ends as you crochet to avoid too much weaving in later.
Tutor’s Suggestions
- Weave in ends right after finishing each granny square to save time.
- Take time to block your granny squares before assembly for a neater look.
- Accurate stitch alignment during seaming yields professional results.
- Adjust the number of granny squares to customize size and fit.
Uses of This Sweater Vest
- Lightweight layering piece for all seasons.
- Great for using up scrap yarn.
- Stylish handmade gift.
- Suitable for casual wear or dressing up.
Crochet Tip
When changing yarn colors in granny squares, always leave a short tail and crochet over it for a few stitches to secure, which prevents unraveling and keeps the back neat.
Conclusion
This granny square sweater vest tutorial offers a fun way to create a wearable piece using your leftover yarn. The classic granny square technique combined with well-placed ribbing brings a cozy and attractive garment to life. Customize colors and size freely, and enjoy the satisfaction of making a one-of-a-kind crochet vest.
Leave a Reply