
Stay cozy this winter with a free crochet earmuffs pattern that offers warmth, comfort, and style, perfect for personal use or as a heartfelt handmade gift.
Keep your ears cozy and stylish with a fun and easy project anyone can try! A free crochet earmuffs pattern offers a charming way to combine practicality with creativity. These handmade earmuffs are not just a winter necessity but also a delightful accessory that adds a personal touch to any outfit. Soft, comfortable, and customizable, they are perfect for keeping the cold away while showcasing your unique style.
Free Crochet Earmuffs Design for Everyday Warmth and Style

Whether you prefer bright colors for a playful look or earthy tones for a classic vibe, this pattern allows endless possibilities to match your taste. Ideal for gifting or personal use, crochet earmuffs are lightweight, portable, and easy to carry. Their beauty lies in their simplicity, making them a beginner-friendly project that looks stunning when finished. It’s an affordable and heartwarming crochet that brings warmth, both literally and emotionally.
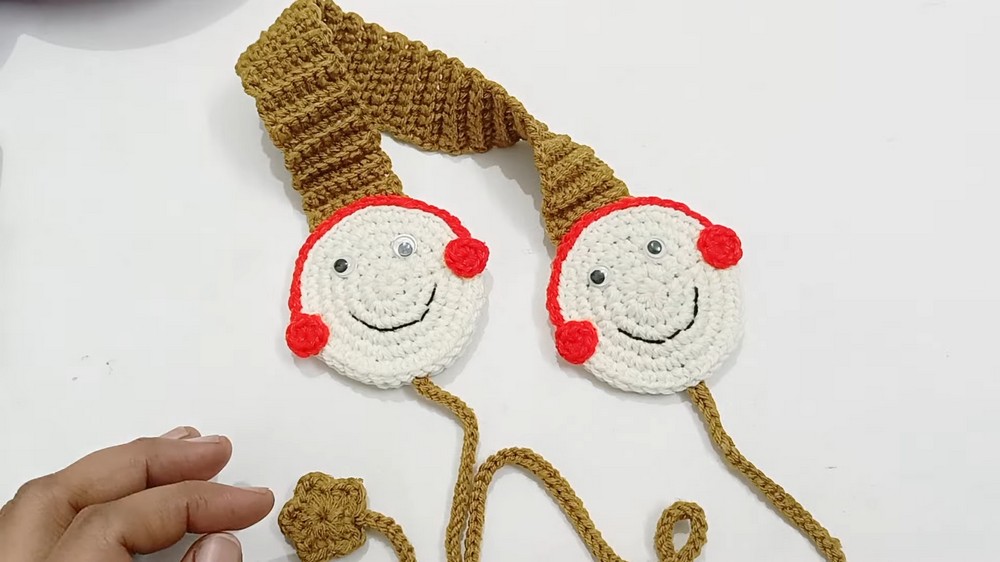
Crochet Hair Band with Cartoon Face Pattern
Skill Level
Beginner to Intermediate. Basic crochet skills such as single crochet, double crochet, slip stitch, and magic ring will be required.
Finished Size
- Length: Fits children’s heads, approximately 14 inches (adjustable based on child’s head circumference).
- Width: 2 inches (can be customized).
Gauge
Not critical for this project, but roughly:
- 12 chains = 2 inches in width.
- Adjust the number of chains or rows to create your desired length and width for the belt.
Materials
- Yarn:
- Soft wool or acrylic yarn (ideal for winter wear).
- Various colors for the belt and cartoon face (e.g., red for the belt, white, black, pink, or other accents).
- Hook: 3 mm crochet hook.
- Eyes:
- Plastic cartoon eyes, available online.
- Alternatives: Black beads or embroidered eyes using black thread.
- Glue: Hot glue gun (or glue sticks melted using a lighter).
- Additional Tools:
- Scissors.
- Yarn needle (for weaving in ends).
- Measuring tape.
Customization Suggestions
- Width: Adjust the initial chain count based on the desired width of the hair band.
- Cartoon Face: Swap the star design for other fun shapes such as hearts, flowers, or animals.
- Colors: Use leftover yarn in various colors for diverse designs and make multiple hair bands.
- Border: Add a contrasting-colored border around the belt for enhanced appearance.
Pattern Instructions
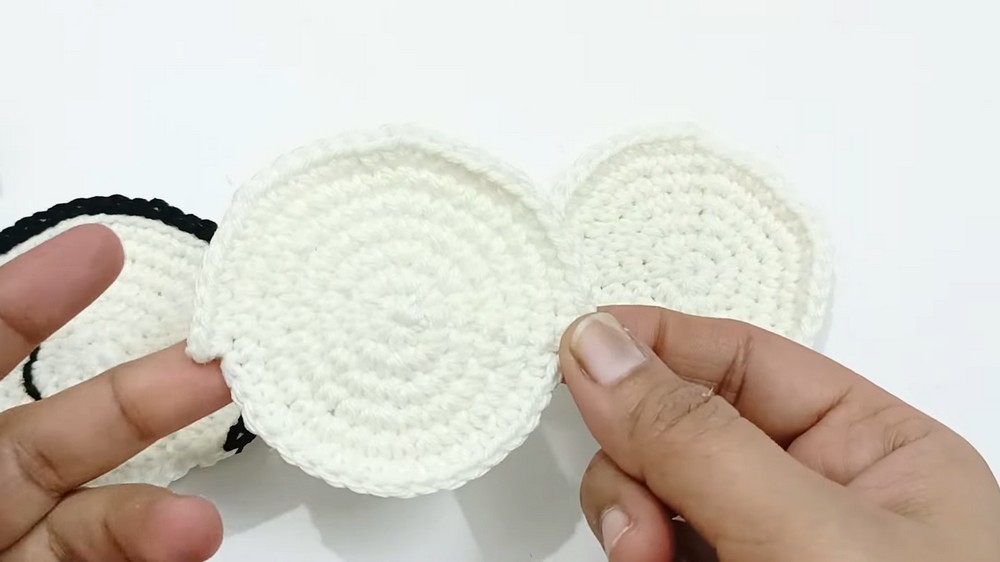
Step 1: Crochet the Belt
Foundation:
- Start with a slip knot.
- CH 12 for a belt width of 2 inches.
- Adjust this number for a wider or thinner belt.
Row 1:
- Skip the first chain.
- SC into the second chain and every chain across (total of 11 SC).
- Turn your work.
Rows 2–60:
- CH 1.
- Pick up the back loop only and SC into each stitch across to create a ribbed texture.
- Continue for 60 rows (approx. 14 inches in length).
- Tip: Test the length by measuring the belt from one ear to another across the child’s head.

Finishing the Belt:
- Fasten off and weave in any loose ends.
- Optionally, single crochet around the entire edge of the belt using a contrasting color for a decorative border.

Step 2: Create the Strings
- Join two strands of yarn together to make the string sturdier.
- Start with a slip knot, leaving a longer tail for weaving in.
- CH 100 (or approximately 14 inches, depending on your desired length).
- Fasten off, leaving a longer tail.
- Make two strings and attach one to each end of the belt:
- Use a yarn needle to weave the tails into the end stitches securely.
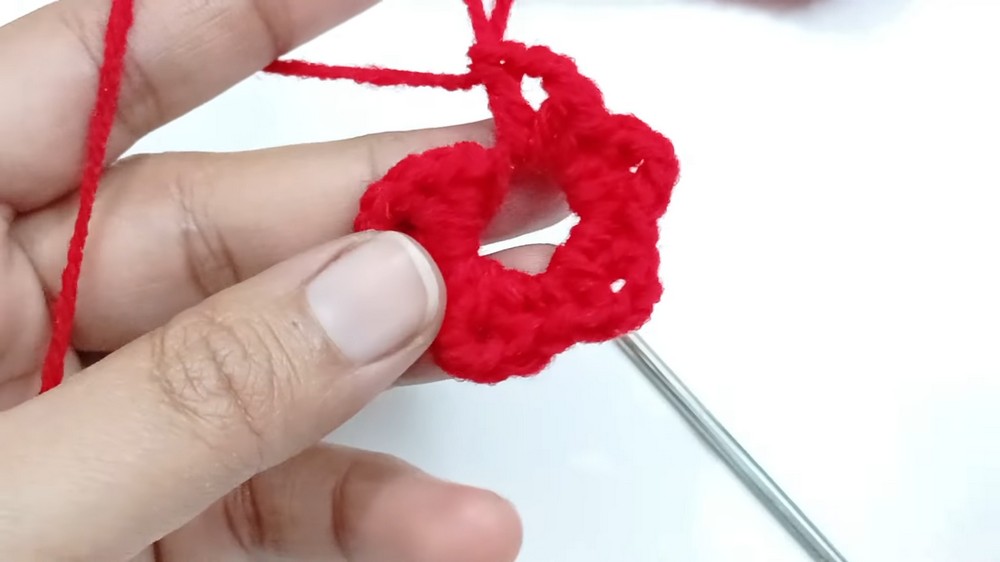
Step 3: Crochet the Cartoon Face – Star Design
Foundation – Magic Ring:
- Create a magic ring and CH 1.
Round 1:
- Work 5 SC into the ring.
- Tighten the ring.
- Join with a SL ST to the first SC.

Round 2:
- CH 2.
- In each stitch: [SC, DC, CH 2, DC, SC] to form a star point.
- SL ST into the first SC to complete the round.
- Fasten off and weave in ends.
Step 4: Smile and Eye Details
Eyes:
- Attach cartoon eyes using a hot glue gun.
- Alternative: Sew black beads or embroider small black circles for the eyes.

Smile:
- Embroider a smile using black thread:
- Thread the yarn needle and create small curved stitches.
- Secure the thread on the back side and weave in ends.
Step 5: Additional Features
Circles for Decoration
- Magic Ring: Create a magic ring and CH 1.
- Work 6 SC into the ring.
- Pull to tighten and join with SL ST. Fasten off.
- Make a few circles in different sizes or colors as accents for the belt.
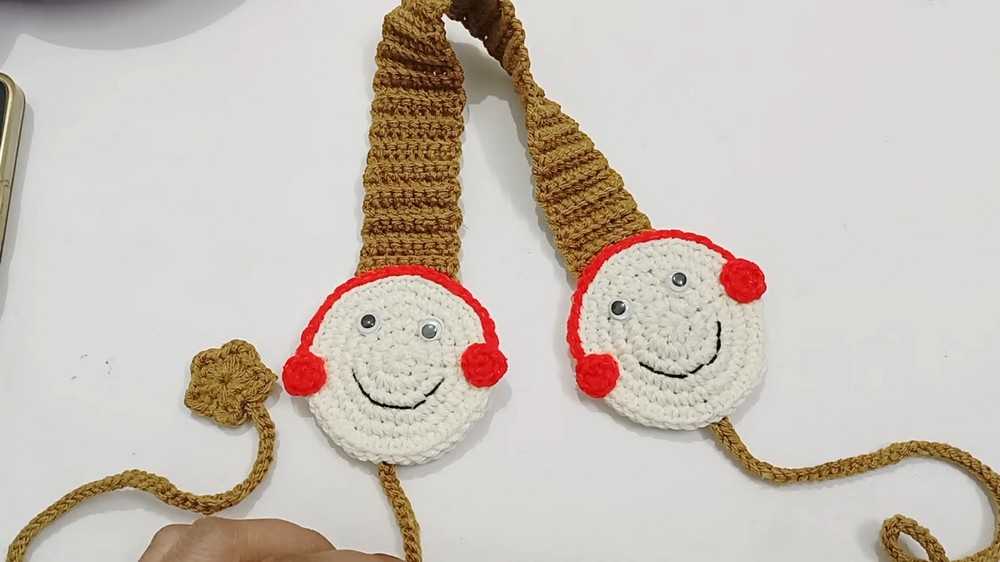
Step 6: Assemble the Hair Band
- Use a hot glue gun to attach the cartoon star design to the center of the belt.
- Decorate the sides with additional circles, layers, or accents.
- Secure all loose threads, and test the hair band’s stretch before finishing.

Special Techniques
- Back Loop Only: Creates ribbed texture for the belt for stretch and flexibility.
- Magic Ring: Ideal for starting the cartoon face or decorations to avoid gaps in the center.
- Slip Stitch Outlining: Defines the edges of decorative pieces like the cartoon face.
Tips for Success
- Stretch: Ensure the belt has some flexibility by lightly stretching it while crocheting.
- Glue Care: Use a minimal amount of glue to avoid messes and ensure the decorations stay securely attached.
- Measurement: Always measure the child’s head for perfect fitting.
Conclusion
Congratulations! You’ve successfully crocheted a charming children’s hair band featuring a cartoon face. This project is perfect for gifting or for your little ones to enjoy. With its stretchy belt, adorable design, and customization options, this hair band is both practical and stylish.
We hope you enjoyed this tutorial! Feel free to explore other shapes and designs for the cartoon face, and experiment with colors to make each hair band unique. Remember to share your creations—they make a lovely gift for kids during the colder months.
Leave a Reply