
Feel chic with this free crochet granny boho blouse pattern, offering a unique and airy style that’s perfect for any casual or artsy occasion.
Wearing something that feels as light as a breeze and as beautiful as nature itself. A crochet boho blouse is exactly that—designed to bring effortless style and comfort to anyone who wears it. With its intricate patterns and delicate texture, it creates a perfect balance of elegance and casual charm. Its flowing, lightweight design makes it a great choice for staying comfortable during warm days while also being stylish enough for meet-ups and outings.
Free Crochet Boho Chic Blouse Pattern You’ll Keep Forever

The boho touch gives it a unique, artsy appearance, making it stand out no matter how it’s styled. Pair it with jeans, skirts, or layer it over dresses to create endless looks that suit any occasion. This crochet blouse isn’t just clothing—it’s a piece of art that’s made to be worn and loved. A perfect combination of beauty and practicality, it’s a must-have for anyone who loves handmade fashion with a timeless appeal.

Step-by-Step Crochet Pattern: Bohemian Desert Blouse
Materials Needed
- Yarn:
- DK weight yarn such as Yarn Holic or any similar 4-ply to 5-ply yarn.
- Approximately 400-500 grams (depending on size and desired length).
- Crochet Hook:
- 5.5 mm hook to create a slightly chunky, relaxed drape.
- You can use the yarn’s recommended hook size (4 mm) for a more structured look, but a larger hook offers a softer finish.
- Additional Tools:
- Scissors.
- Measuring tape.
- Stitch markers or scrap yarn (to mark front/back and sleeve openings).
Special Techniques Used
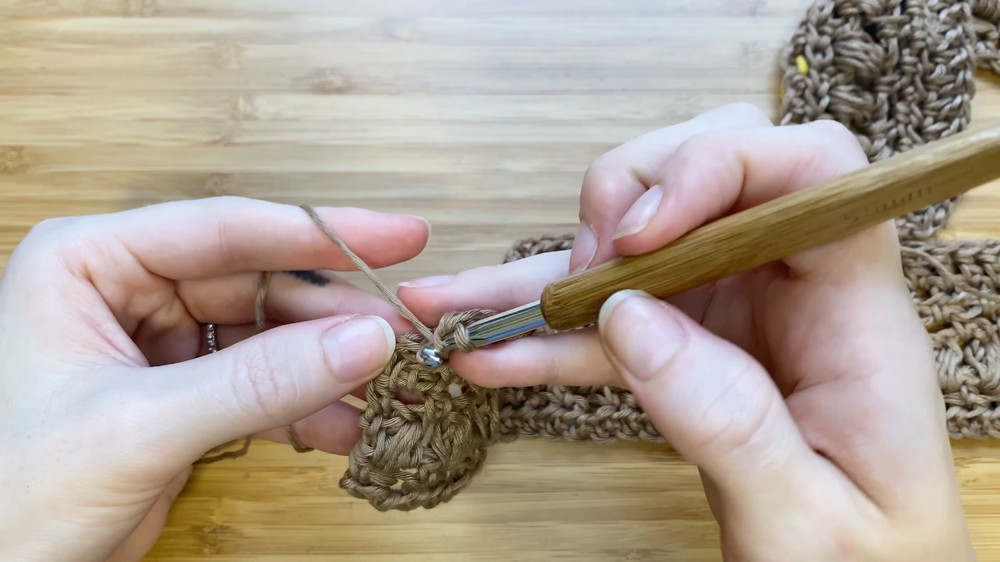
- Slip Knot: Begin your work.
- Foundation Chain: Loose chains to create the blouse’s length.
- Half Double Crochet (hdc):
- Yarn over, insert hook into stitch, pull up a loop, yarn over, and pull through all three loops on the hook.
- Double Crochet (dc):
- Yarn over, insert hook into stitch, pull up a loop, yarn over, pull through two loops, yarn over, pull through the remaining two loops.
- Puff Stitch:
- Yarn over, insert into stitch, pull up a loop (repeat this 4 times to make 9 loops on the hook), yarn over, pull through all loops, and chain 1 to close.
- Back Loops Only (BLO): Insert hook into the back loop of the stitch for ribbing joins.
- Slip Stitch Join (back loops only):
- Used to achieve a neat seam in joining panels.
Measurements
- Top Length: Measure from where you want the fabric to fall in the front (shoulder to hem length). The same measurement will be used for both front and back panels.
- Sleeve Opening: Adjust based on how loose or tight you want the sleeves to be.

Pattern Instructions
Step 1: Take Measurements and Create the Foundation Chain
- Using the measuring tape, measure from where you want the front hem to start to the back hem (over the shoulders). Write down this measurement.
- Chain the corresponding length loosely:
- Example: For 28 inches, chain approximately 100 stitches (adjust for your specific measurement).
- Add 3 additional chains to complete the foundation chain as an odd number is required for the pattern.
Step 2: First Panel (Front)
Row 1 (Foundation Row):
- Half Double Crochet (hdc) in the third chain from your hook.
- Continue working hdc stitches across the foundation chain.
- Work into the back “knobs” of the chain for a neater edge.
- Mark the right side of your work with a stitch marker or scrap yarn.

Row 2:
- Chain 3, turn your work. This counts as 1 hdc + ch 1.
- Skip the next stitch, work 1 hdc into the following stitch, then chain 1.
- Continue this pattern of hdc, ch 1, skip a stitch, until the end of the row.
- Place the last hdc into the top of the turning chain from the previous row.
Row 3 (Puff Stitch Row):
- Chain 2, turn your work.
- Work puff stitches into each chain-1 space from the previous row:
- Yarn over, insert hook into the chain space, pull up a loop (keep the loops loose). Repeat this 4 times to create 9 loops on the hook. Yarn over and pull through all loops.
- Chain 2 (chain 1 to close the puff, and chain 1 to separate).
- Continue working puff stitches across the row, ending with 1 hdc in the last stitch for stability.
Row 4:
- Chain 3, turn your work (counts as 1 hdc + ch 1).
- Work hdc into each chain-1 space between puff stitches. Chain 1 after each hdc.
- End with the final hdc in the top of the turning chain.
Row 5:
- Chain 2, turn your work.
- Work solid hdc stitches across the row (1 hdc in each stitch or space).
- Place the last hdc into the top of the turning chain.
Row 6 (Double Crochet Row):
- Chain 3, turn your work. This counts as the first dc.
- Work 1 dc into each stitch, moving across the row.
- Finish with a dc into the top of the chain 2 from the previous row.
Repeat Rows 2-7:
- Continue the pattern repeat (Rows 2 to 7) until the panel is wide enough to fit your shoulders and down your arm.
- For reference, the example includes 4 pattern repeats (8 inches wide) per panel.
- Once all rows are complete, tie off the yarn and weave in the ends using a yarn needle.
Make a Second Panel (Back):
- Repeat all steps above to make an identical second rectangular panel.
Step 3: Assemble the Blouse
- Position the Panels:
- Lay the two panels out with the right sides facing up. Place the starting foundation chains next to one another.
- Join the Front (V-Neck):
- Decide how deep you’d like the V-neck to be: Place a stitch marker (or scrap yarn) at the desired point on both panels.
- Place right sides together, aligning the foundation rows, and join using slip stitches through the back loops until you reach the marker.
- Join the Back:
- Similarly, join the back neckline with a slip stitch seam, placing the two panels, right sides together. Adjust the back join’s height for a comfortable neck opening.
- Join the Sides:
- Try the blouse on and adjust your sleeve opening width.
- Use stitch markers to secure both sides for alignment.
- With right sides together, slip stitch up each side to join the body, leaving the sleeve openings unjoined.


Optional Step: Add Tassels
- Wrap yarn around a book or object to cut multiple even-length strands.
- Fold 2 strands in half to form a loop.
- Insert your hook into a puff stitch or double crochet row from behind. Pull the folded loop through, pass tails through the loop, and tighten.

Final Step: Weave in Ends
Using a yarn needle, weave in all loose ends for a clean finish. Trim any uneven yarn ends from the tassels for a polished look.
Final Words
Congratulations—you’ve completed the Bohemian Desert Blouse! This simple and versatile design makes for a perfect lightweight summer accessory or layering piece. The artistic texture and tassels give this top its boho charm.

Tips for Success
- Relaxed Stitches: To ensure the flowy, bohemian look, maintain loose tension or go up a hook size for larger stitches and better drape.
- Yarn Choice: Opt for light, breathable, and soft yarns like cotton blends or DK-weight acrylics for a comfortable fit.
- Customization:
- Adjust the sleeve size, blouse length, and neckline depth to create your preferred style.
- Experiment with ombré, variegated, or solid yarns for different effects.
- Blocking: Block your panels to ensure uniform sizing and straight edges before joining. Dampen and pin the panels on a towel to shape them and allow to air dry.
- Styling: Pair this blouse with high-waisted jeans, shorts, or skirts for a breezy, festival-ready bohemian vibe.
Leave a Reply