
Personalize favorite accessories with Free Crochet Bag Keychain Pattern offering stylish accent for purses backpacks and everyday essentials.
One of my favorite quick projects to make recently has been this adorable little bag that’s perfect for attaching to your keys or bags. Using the Free crochet Bag Keychain Pattern, you can easily make this charming accessory that is both practical and stylish. With just a few small adjustments, this pattern can become a tiny pouch for coins, a lip balm holder, or even a cute charm for backpacks and purses, making it a versatile option for anyone wanting a creative and useful item.
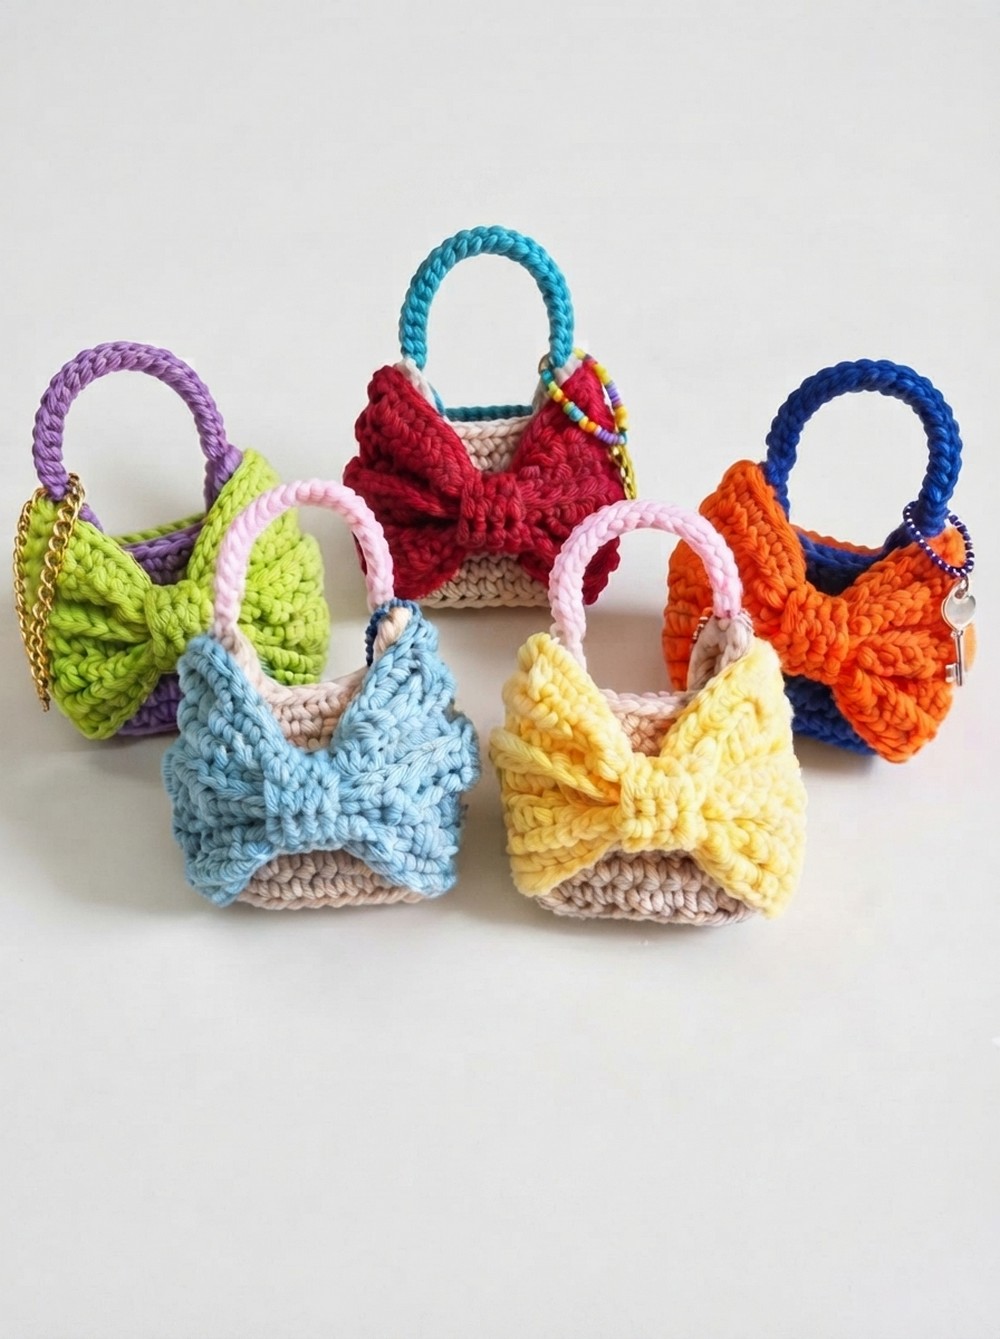
This small bag looks neat and polished with its compact shape and simple texture. It fits comfortably on a keyring without adding bulk but still offers space for small essentials. The rounded edges and flap closure give it a neat, finished appearance that feels thoughtfully designed. A button or a little decorative detail can add extra charm, making this piece stand out from ordinary keychains. It’s the perfect blend of functionality and delicate style, bringing warmth to everyday items.
Free Crochet Bag Keychain Pattern Using Scrap Yarn

Designed with beginners in mind, this project is straightforward and fun. It requires some basic familiarity with crochet but doesn’t overwhelm, making it a pleasant and rewarding experience. Aside from being a useful accessory, this keychain bag makes an excellent handmade gift.
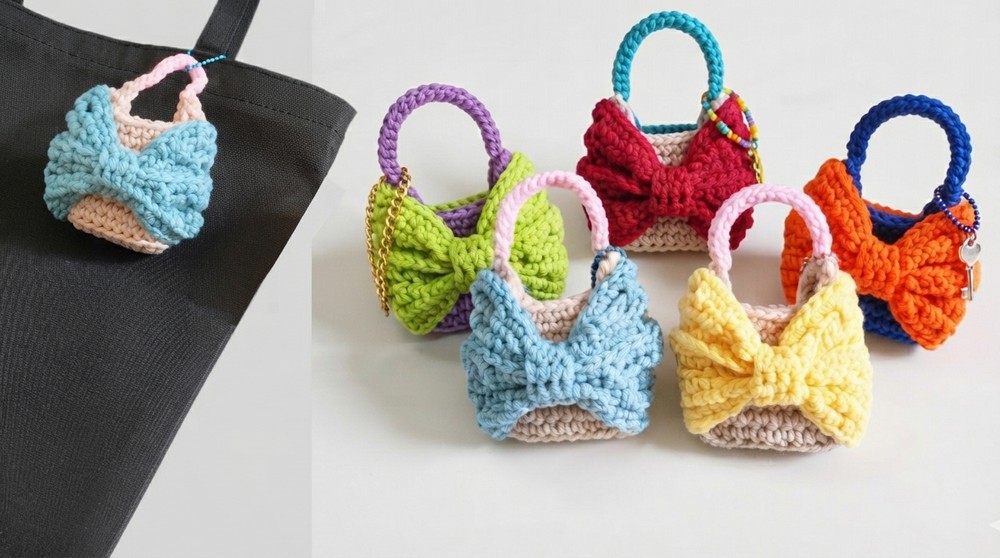
It’s thoughtful, unique, and small enough to carry anywhere—ideal for personal touches that brighten someone’s day. Whether adding a decorative touch to your keys or offering a meaningful present, this project fits beautifully into various interests and occasions.
Mini Bag Accessory Project
Elevate your accessory collection with this charming, multi-purpose mini bag. Perfect for housing wireless earbuds or keeping small items organized, this project combines functionality with a sweet aesthetic. This pattern is written in US Crochet Terminology and is suitable for beginners familiar with basic stitch construction.
Skill Level & Terminology
-
Skill Level: Beginner.
-
Terminology: US Crochet Terms.
Materials & Tools
-
Yarn: Milk Cotton Yarn.
-
Hook: 3.5mm (Tulip 6/0).
-
Tools: Tapestry needle for sewing and finishing, and sharp scissors.
Gauge
- Not critical for this project; adjust hook or yarn weight for desired size.
Abbreviations List
-
ch: Chain
-
sc: Single crochet
-
sl st: Slip stitch
-
dec: Single crochet decrease (two unfinished single crochets combined into one)
-
dc: Double crochet
-
blo: Back loop only
-
inc: Single crochet increase (two single crochets in the same stitch)
Special Stitch Instructions
- Single Crochet Decrease (dec): Insert hook into next stitch, pull up a loop, insert hook into following stitch, pull up a loop, yarn over and pull through all loops on hook.
Finished Size
The final piece is compact and designed for small utility purposes. Dimensions will vary slightly based on your personal tension.
The Pattern: Bag Base
-
Round 1: Create a slip knot. ch 12. In the 12th chain from the hook, work 3 sc in one hole. Work 9 sc down the side of the chain. In the final chain at the end, work 3 sc in the same hole. Turn and work 9 sc up the opposite side. Join with a sl st (Total: 24 sc).
-
Round 2: ch 1. Work 24 sc into the blo around. Join with a sl st.
-
Round 3: ch 1. Work 24 sc in each stitch around. Join with a sl st.
-
Round 4: ch 1. Work 24 sc in each stitch around. Join with a sl st.
-
Round 5: ch 1. Work 24 sc in each stitch around. Join with a sl st.
-
Round 6: ch 1. Work 24 sc in each stitch around. Join with a sl st.
-
Round 7: ch 1. Work 24 sc in each stitch around. Join with a sl st.
-
Round 8: ch 1. Work 24 sc in each stitch around. Join with a sl st.
-
Round 9: ch 1. Work 24 sc in each stitch around. Join with a sl st.
-
Round 10: ch 1. Work 24 sc in each stitch around. Join with a sl st.
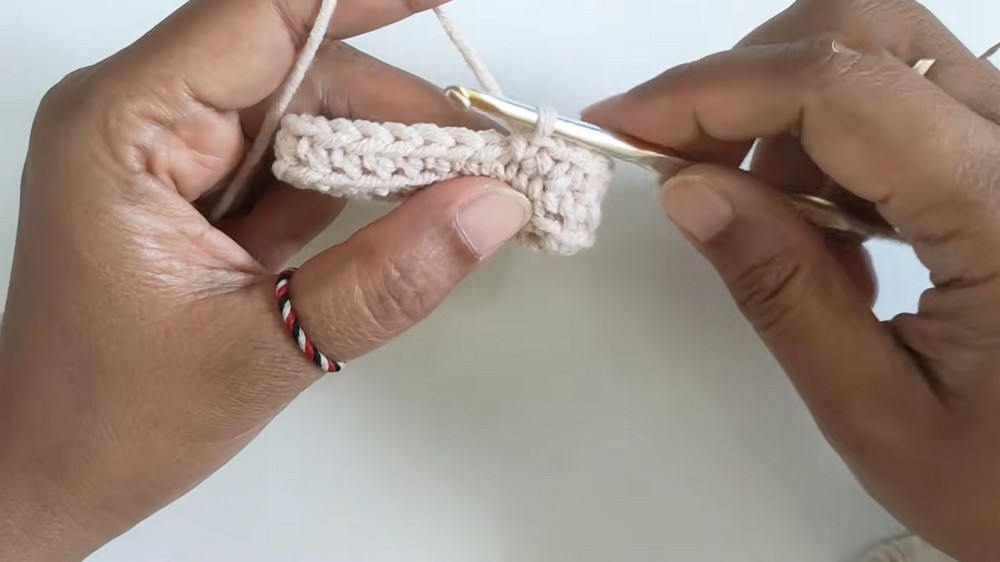

Round 1 establishes your oval base, which is the foundation of the entire bag. Working in the back loop only during Round 2 is a crucial step that creates the “corner” or edge that helps the bag stand up vertically.
The Pattern: Handles
-
Handle Row 1: ch 1. Work 6 sc.
-
Handle Row 2: ch 1, turn. Work 1 dec (using the first two stitches), work 2 sc, work 1 dec (using the final two stitches). (Total: 4 sc).
-
Handle Row 3: ch 1, turn. Work 1 dec twice. (Total: 2 sc).
-
Handle Row 4: ch 1, turn. Work 1 dec. (Total: 1 sc). ch 1, break thread and tidy.
-
Second Handle: Skip 6 stitches on the main body from the first handle and repeat the identical process for the second handle (Rows 1–4).
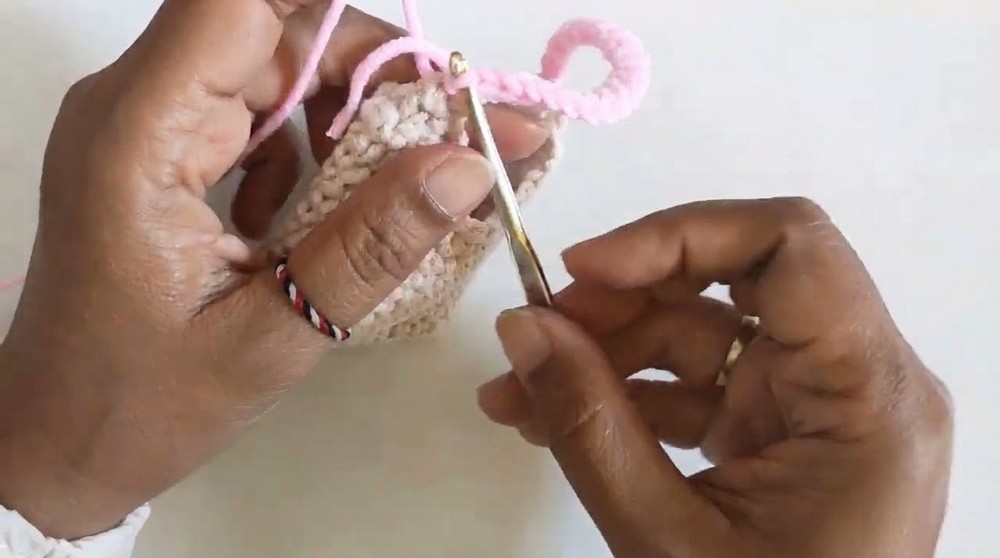
The handles are worked in rows rather than rounds to create the necessary gaps for the bag opening. The decreasing stitches are what give the handles their tapered, professional shape.
The Pattern: Strap
-
Strap Row 1: Take your yarn and make a slip knot. Insert your hook into the top of the first handle. ch 20.
-
Strap Row 2: Join the chain to the opposite handle with a sc.
-
Strap Row 3: Work a sl st 20 times back along the chain to reinforce the strap. Finish with a sl st in the starting hole. Cut and secure the yarn.
The strap provides the structure for hanging the bag. If you prefer a longer or shorter strap, simply add or subtract the number of chains here, but remember to adjust your slip stitch reinforcement to match.
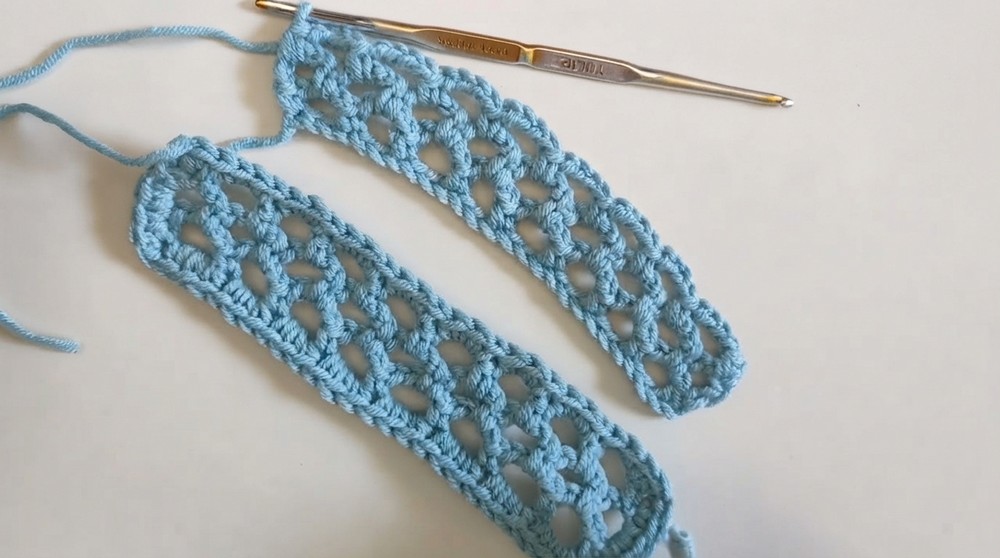
The Pattern: Net Motif
-
Foundation: Make a slip knot. ch 26 (24 + 2).
-
Round 1: Work 1 sc into the chain, ch 4, skip 2 chains. Repeat until the end.
-
Round 2: ch 5, turn. Into the first cavity, work 1 sc and ch 4. Move to the next space, work 1 sc and ch 4. Repeat. In the final space, work ch 2, and 1 dc into the last sc.
-
Round 3: ch 1, turn. Work 1 sc in the same hole, ch 4. In the next space, work 1 sc and ch 4. Repeat until the end. In the final space, work 4 ch and 1 sc.
-
Round 4: Repeat the instructions from Round 2.
-
Round 5: Repeat the instructions from Round 3.
The net motif is the decorative layer. Consistent tension on your chain stitches is important here to ensure the net holes remain uniform in size across the entire piece.
Assembly & Finishing
-
Edging: Return to the main bag body. Work 1 sc into the holes of the single crochet rows. In the double crochet rows, work 2 sc into the hole to maintain density.
-
Corners: In the right-angle corners, work an inc (2 sc in one hole) to keep the fabric flat.
-
Filling the Net: In each cavity of the motif, work 3 sc. Repeat this around the entire bag perimeter until the end. Finish with an inc at the final corner and join with a sl st.
-
Closing: Sew the top and bottom sheets together at the back using a tapestry needle.
-
Ribbon Tie: ch 4, then work 3 sc back and forth for 7 rows. Sew the ends together and attach this rectangular strap to the bag to hold your ribbon fold in place.
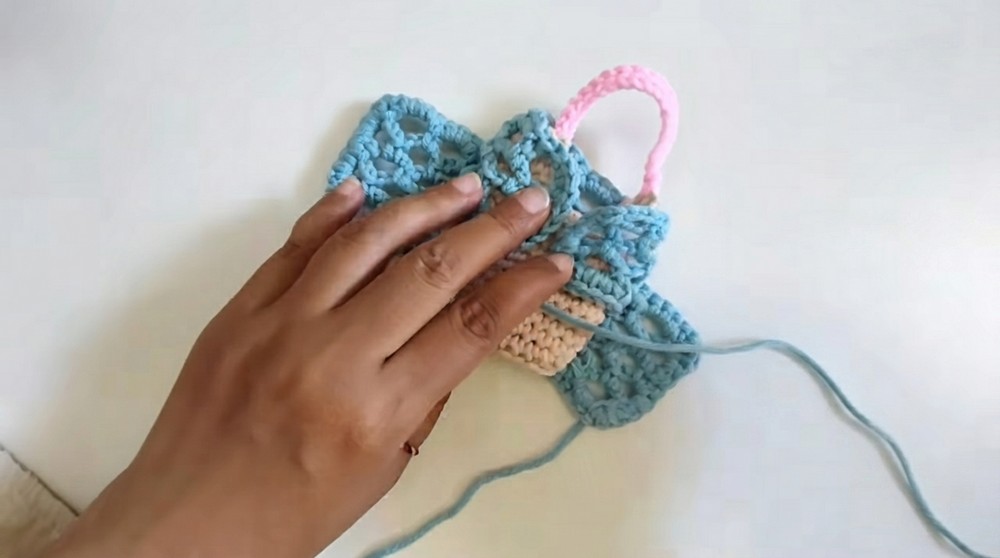
For the finishing, ensure you sew the net to the bag securely. The final ribbon tie is the signature look of this project, so take care to center it before stitching it down permanently.

Final Notes
- This mini bag uses single crochet, slip stitch, chain stitches, and single crochet decreases to create a functional and decorative piece. The net motif adds a delicate lace effect for sophistication. The strap’s length can be customized to fit your need.
Summary for Users Who Prefer Plain Instructions
-
- Start with the oval base by chaining and adding stitches at ends.
- Build the body by working around rows of single crochet stitches.
- Shape small handles by decreasing stitches in successive rows.
- Add a strap by chaining and slip stitching back on the chain.
- Create a net pattern with a combination of single crochets and chain spaces.
- Finish by sewing pieces together and making a ribbon detail.
Leave a Reply