
Charm your accessories with this free crochet ladybug keychain pattern that’s combining playful design and practicality for a touch of everyday whimsy.
Too often, keychains are boring and lack personality. But with the Free Crochet Ladybug Keychain Pattern, you can create something unique and full of charm! This adorable crochet project transforms a simple keychain into a delightful handmade accessory. Thanks to the creative designs shared by DIY Maycraft, even beginners can enjoy making this fun little project.
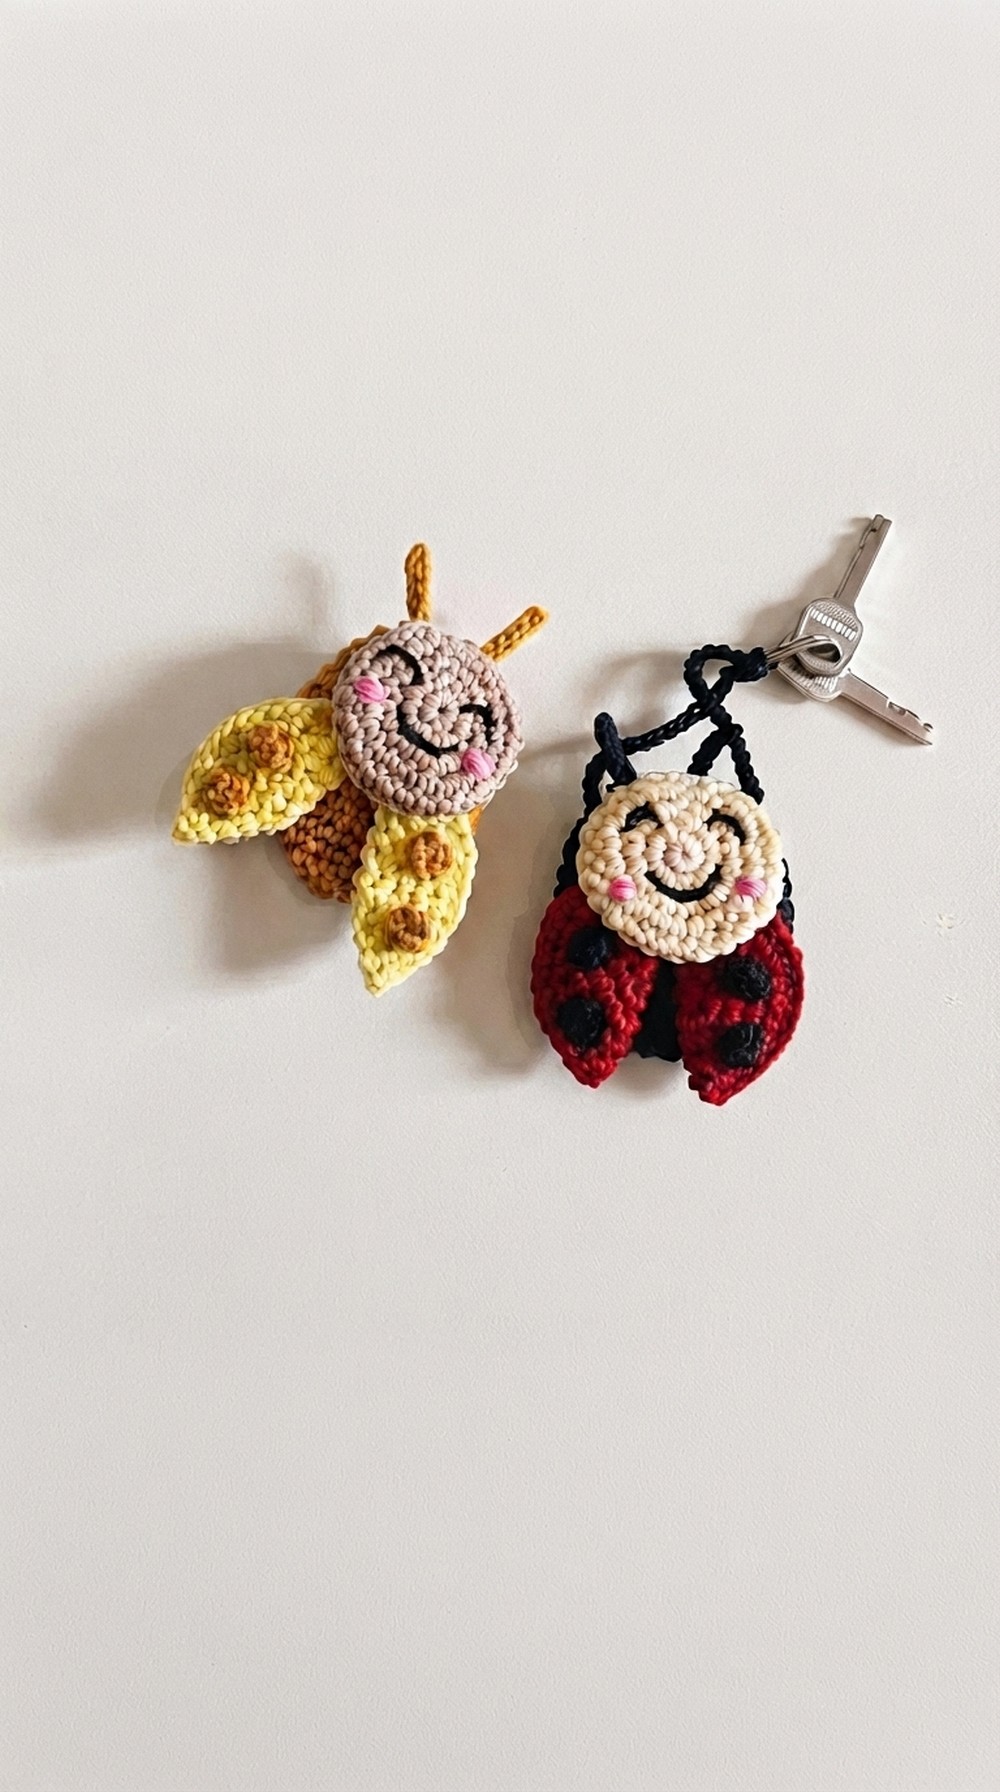
Shaped like a cheerful ladybug, the keychain features a bright red body, cute black spots, and tiny antennae that bring it to life. Its small, lightweight design is perfect for adding a playful touch to keys, backpacks, or purses. Whether you want to brighten up your daily essentials or gift someone a handmade surprise, this little ladybug is sure to be appreciated.
Ladybug Keychain Free Crochet Pattern for Bag Charms

The Free Crochet Ladybug Keychain Pattern stands out because it’s sweet, simple, and practical. It’s a quick project that doesn’t take much time, making it ideal for busy crochters or those just starting their crochet journey. The finished product is not only fun but also meaningful, showcasing effort and care in every stitch.
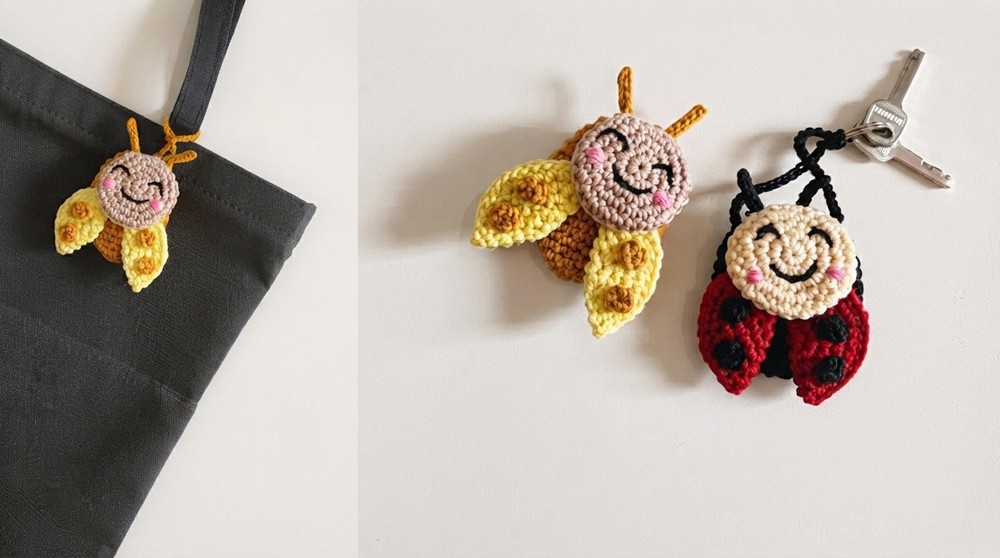
Designed to bring joy, this keychain is a perfect decoration for your everyday items or a thoughtful handmade gift for friends and family. DIY Maycraft’s clear and beginner-friendly tutorial makes it easy for anyone to create this lovely piece, no matter their skill level. Add a little touch of nature-inspired charm to your accessories with this delightful crochet keychain!
Ladybug Keychain Crochet Pattern
The ladybug keychain is a delightful and compact crochet project combining simple shapes and textured details to create an adorable insect-inspired accessory. Using Polycherry yarn paired with a fine 4/0 Tulip crochet hook, this pattern builds components for the ladybug’s body, wings, head, and antennae from a common base pattern, then assembles them into a charming keychain complete with embroidered facial features and decorative polka dots. The detailed step-by-step instructions guide you through shaping the parts, joining, and final finishing touches to ensure a polished and endearing finished product.
Quick Overview of the Pattern
- Use a magic ring-based common base pattern for all rounded pieces, creating uniform shapes for the body, wings, and head.
- Construct the wings in yellow yarn with an extended row to provide the correct size and fold into characteristic shapes.
- Form a body in mustard yarn with increasing and decreasing rows to achieve the rounded form.
- Create and attach a head from two beige pieces with front loop detailing for facial shaping.
- Make antennae by crocheting short chains attached via slip knots for flexibility.
- Embroider eyes, mouth, and polka dots to complete the ladybug’s distinctive look.
- Add a long chain loop for attaching the keychain to bags or keys.
Notes
- Consistency in stitch tension is important for matching the components so that they fit together well during assembly.
- Using the same base pattern for head and wing pieces simplifies the project and ensures harmony in shapes and sizes.
- The folded wing construction with slip stitches creates a lifelike wing shape.
- The front loop detailing on the head helps provide subtle facial curves without complicated shaping.
- Slip knot antennae offer a flexible and playful finishing touch.
- Embroidery done carefully adds personality and charm to the finished insect.
- The keychain loop is made with 40 chains, allowing easy attachment to hooks or rings.
Skill Level
Intermediate — requires familiarity with:
- Working in rounds beginning with a magic ring (MR).
- Increasing and decreasing stitches within rounds.
- Working slip stitches for joins and edging.
- Creating front loop only stitches for shaping.
- Embroidery techniques for eyes and mouth.
- Joining multiple crocheted components.
- Crochet chains and slip knot incorporation.
Materials
- Polycherry yarn in the following colors: yellow (wings), mustard (body), beige (head), and black (details/embroidery).
- Crochet hook size 4/0 (2.5 mm), preferably Tulip brand.
- Tapestry needle for embroidery and sewing parts.
- Scissors and lighter (or preferred method) to secure yarn ends.
- Stitch markers (optional) for rounds and shaping.
Measurements / Sizing
- Finished ladybug body diameter is approximately 1.5 to 2 inches when assembled.
- Wings have a width slightly wider than the body, achieved by adding an extra round and folding.
- The head is proportionate and shaped with front loop detailing.
- Antennae measure about 6 chain stitches in length, flexible enough to curve naturally.
- The entire assembled keychain including the loop is roughly 3 to 4 inches in length depending on chain loop size.
Gauge and Stitch Pattern
- Gauge is flexible but consistent tension is critical for close fit of components.
- The common base pattern stitches are single crochet (sc) worked in rounds with increases.
- The body uses extended rows maintaining stitch counts to form a cylindrical shape, with decreasing rows at the end for tapering.
- Slip stitches (sl st) are used in wing assembly for neat joining and folding.
- Front loop only single row details give subtle raised texture on the head.
Stitch Abbreviations
- MR = Magic Ring (adjustable ring)
- ch = chain
- sc = single crochet
- inc = increase (work 2 sc in one stitch)
- dec = decrease (crochet 2 sc stitches together)
- sl st = slip stitch
- flo = front loop only (working stitches only through front loop of stitch)
Special Stitches and Techniques
- Magic Ring (MR): Adjustable ring to start rounds with a tight, small center hole.
- Increase (inc) in rounds: Work 2 sc stitches in the same stitch to expand the round.
- Decrease (dec) in rounds: Crochet 2 sc stitches together reducing stitch count.
- Slip stitch (sl st): Used for joins and edging.
- Front Loop Only (flo): Insert hook only under the front loop of the stitch to create raised texture lines.
- Slip knot antennae: Slip knots made into front loops followed by chain stitches and slip stitches to make flexible antennae.
The Crochet Pattern!
Common Base Pattern (for Head and Wings)
Round 1:
- Begin with a magic ring (MR).
- Work 6 single crochet (sc) stitches inside the MR.
- Pull the ring tight.
- (6 stitches)
Round 2:
- Work 6 increases (inc) — 2 sc in each stitch around.
- Total stitches: 12 sc.
Round 3:
- 1 sc, 1 inc (2 stitches in next stitch), repeat 6 times.
- Total stitches: 18 sc.
Round 4:
- 2 sc, 1 inc, repeat 6 times.
- Total stitches: 24 sc.
Wings (with Yellow Yarn)
- Starting from the row 4 base (24 sc) of the common pattern, add a 5th row:
- 3 sc, 1 inc, repeat 6 times.
- Total stitches: 30 sc.
- Fold the piece in half.
- Join the folded edges together with 15 slip stitches (sl st).
- Fasten off and set aside.


Body (Mustard Yarn)
- Follow the common base pattern Rows 1-4: finish at 24 sc.
- Continue to work Rows 5-11, maintaining 24 sc in each row (no increases or decreases, work even).
- Row 12: 2 sc, 1 decrease (dec), repeat 6 times.
- Total stitches after decrease: 18 sc.
- Row 13: Work 24 sc again (this round increases back; presumably by work around or slight modification).
- Finish and fasten off the piece.
- At the end, create a chain of 40 stitches for the keychain loop.
- Attach securely to the body.


Head (Beige Yarn)
- Crochet two identical pieces using the common base pattern (Rows 1-4; 24 sc each).
- Join these two pieces together using 24 single crochet (sc) stitches along their edges.
- Shape the front of the head with front loop only (flo) detailing:
- Work 4 rows of 5 sc stitches each in front loops to create shading and form.
- Fasten off.
Antennae
- Insert slip knots into the front loops of the head at appropriate spaced positions.
- Chain 6 stitches after making each slip knot.
- Slip stitch back along the chain 5 times to give flexibility and slightly shorten it.
- Secure ends and fasten off.
Finishing Touches
- Use black yarn and a tapestry needle to embroider the eyes and mouth on the head.
- Use the same black yarn to add four small polka dots on the wings for ladybug detailing.
- Sew the head cap securely onto the body.
- Make sure all ends are woven in neatly.
- Attach keychain hardware through the chain loop made at the body’s end.


Assembly & Finished Size
The ladybug keychain assembles into a compact, rounded insect approximately 2 to 3 inches in size (width and height), ideal for keychains or bag charms. The wings fold neatly around the body and are held with slip stitches. The head is slightly domed with subtle front loop detailing, antennae provide playful accents, and embroidered features add character. The chain loop is long enough to attach to keys or clips securely.
Conclusion
This ladybug keychain crochet pattern offers an engaging combination of simple base stitches and thoughtful shaping techniques. Utilizing a uniform base pattern for various components streamlines construction while maintaining harmony between the pieces. The addition of front loop detailing, slip knot antennae, and embroidered accents elevates the project beyond basic amigurumi, adding intricate dimensionality and charm. Perfect for intermediate crocheters aiming to build skills in rounding, shaping, and assembly, this project results in a sweet and functional accessory that delights as a gift or personal keepsake.
Leave a Reply