
Brighten your table with the Free crochet Toast Coaster Pattern, featuring easy steps, quick stitching, & a coaster perfect for kitchen decor.
Turning everyday items into delightful handmade treasures can bring joy to both the maker and anyone who uses them. Starting your day with a cute little toast coaster resting under your morning coffee cup – isn’t that a fun and cozy touch? This crochet toast coaster pattern is not only charming but also practical. Made primarily using the single crochet stitch, it gives the coaster a tight and sturdy fabric that’s perfect for protecting your surfaces from heat and moisture. The soft light brown center paired with a darker brown crust adds a realistic and inviting look, reminding you of fresh, warm toast ready to brighten your day.
Sweet Crochet Toast Coaster Pattern Perfect for Coffee Lovers
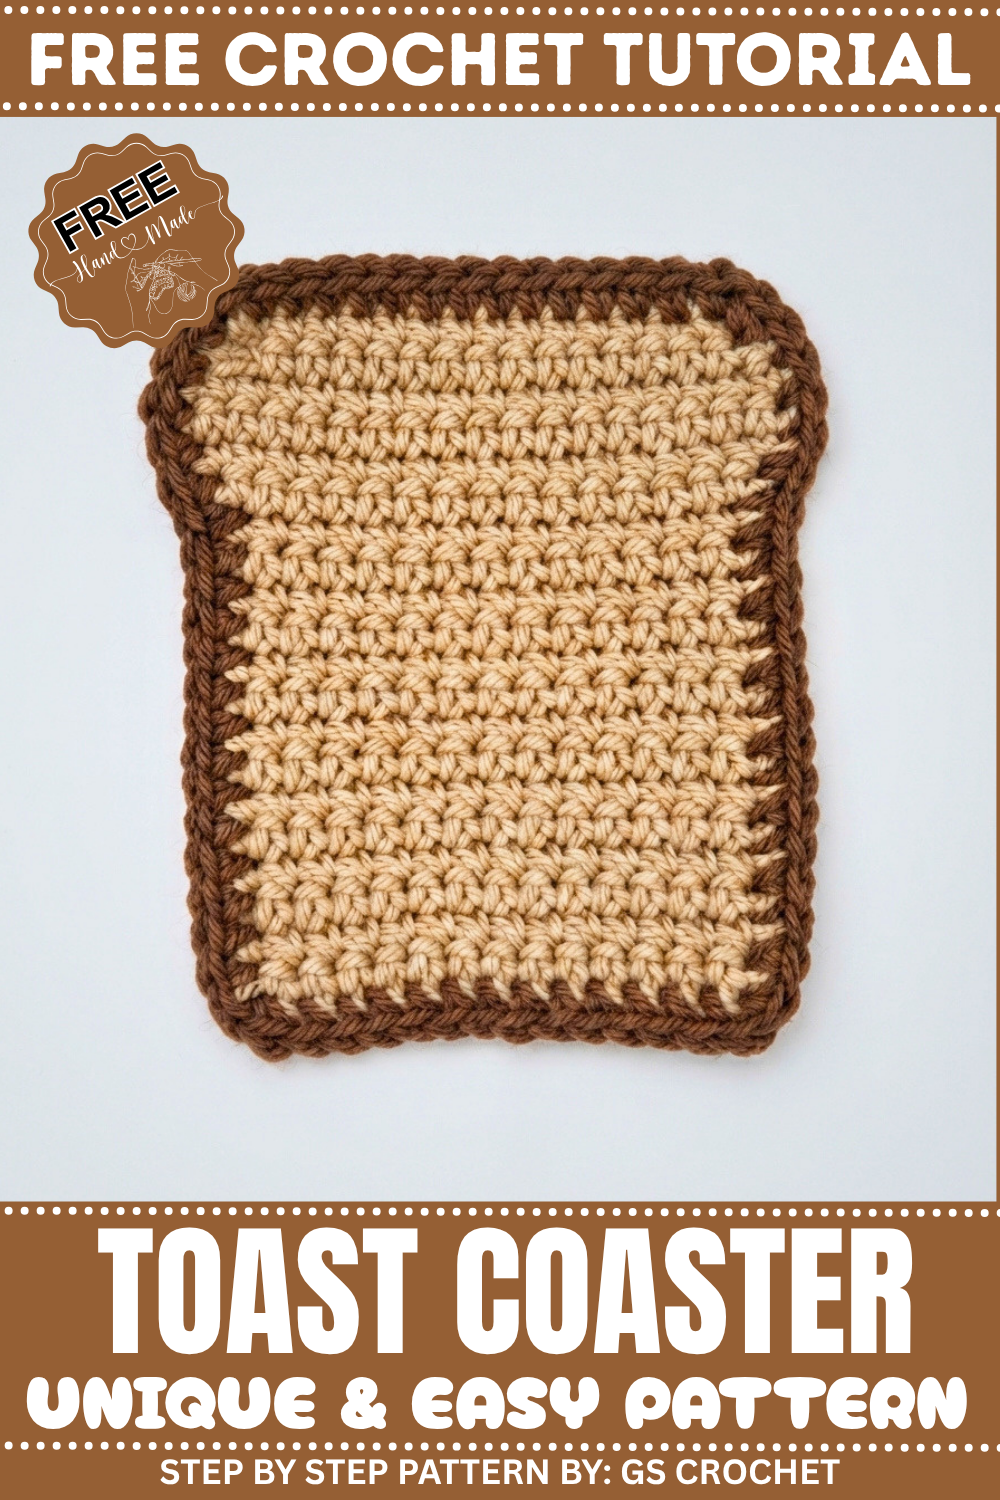
The step-by-step process is simple and beginner-friendly, making it a great project for those just learning to crochet. You’ll work in rows, creating basic chains and single crochet stitches, then build the crust with clever increases and single crochets to give it that lovely rounded edge. The pattern also gently introduces important skills like turning your work, counting stitches, and finishing off securely to prevent unraveling. As you crochet, you’ll see your piece take shape beautifully, encouraging you to keep going with confidence and satisfaction.
Other Fun Creations Using This Pattern
Once you feel comfortable with these stitches and techniques, you can easily adapt this pattern to create other cozy kitchen accessories like mini placemats, fruit-shaped coasters, or cute sandwich-themed decorations. Changing colors and sizes offers endless possibilities to add a personal touch to your home or gifts. This simple pattern lays a strong foundation for learning more playful, practical crochet projects in your crocheting journey.
Crochet Pattern: Toast Coaster
Add a delightful touch to your table with this adorable crochet toast coaster! This beginner-friendly pattern is perfect for those looking to practice basic crochet stitches and experiment with simple color changes. Handmade with love, this pattern is both functional and decorative, and it makes a lovely gift for any foodie in your life.
Follow this detailed step-by-step pattern to make your toast coaster, which features the “bread” portion worked in rows and the “crust” completed later by crocheting along the edges.
What You’ll Learn From This Pattern
- How to create a foundation chain and work rows of single crochet stitches.
- Techniques like increasing and decreasing stitches for shaping.
- Working around edges to add decorative borders.
- The difference between the front and back loops of a stitch for neat finishing.
Skill Level & Terminology
- Skill Level: Beginner
- Terminology: US Crochet Terms
Materials & Tools
- Yarn:
- Worsted weight (Category 4) yarn in:
- Light brown: for the bread portion.
- Dark brown: for the crust.
- Worsted weight (Category 4) yarn in:
- Hook:
- 3.5 mm crochet hook.
- Additional Tools:
- Darning needle (optional).
- Scissors.
Gauge
- For this pattern, gauge is not critical, but ensure your stitches are snug for a sturdy coaster.
- Suggested gauge: 4 stitches x 5 rows of single crochet = 1 inch.
Abbreviations
- ch – Chain
- sc – Single Crochet
- inc – Increase (2 sc in the same stitch)
- dec – Decrease (single crochet two stitches together)
- sl st – Slip Stitch
- st(s) – Stitch(es)
Special Stitch Instructions
How to Make a Slip Knot:
- Place the yarn over your index and middle finger, leaving a 3–4 inch tail.
- Wrap the working yarn around your two fingers to create an “X.”
- Insert the hook under the bottom strand and pull up the top strand.
- Remove your fingers, tighten the yarn gently, and adjust the loop size to fit comfortably on your hook.
Finished Size
- Width: Approximately 4 inches (10 cm).
- Height: Approximately 4½ inches (11.5 cm).
How to Start & Stitches Used
This pattern begins with a foundation chain followed by successive rows of single crochet stitches to form the bread portion. Then, you’ll use color changes to work the “crust” border around the edges. The pattern uses basic stitches like single crochet, increases, and decreases, making it perfect for beginners to practice their skills.
Step-by-Step Instructions
1. Starting the Bread Base
- Begin with the light brown yarn to crochet the main part of the toast.
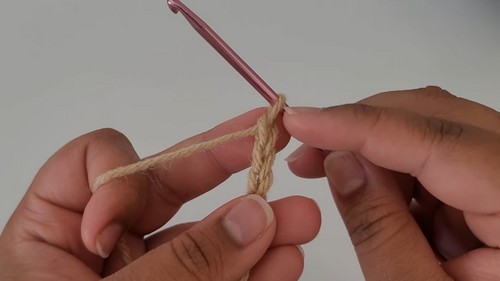
- Create a slip knot and chain 14 chains.
- Starting with the second chain from the hook, work single crochet stitches into each chain across (you should end up with 13 stitches).

2. Building the Bread Rows
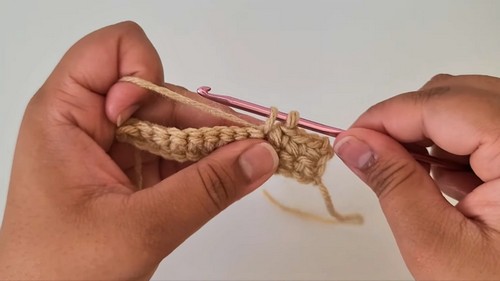
- At the end of each row, chain one and turn your work.
- Work single crochet stitches into each stitch across.
- Repeat this process for 14 rows in total to build the bread base.
3. Adding Curves to the Toast
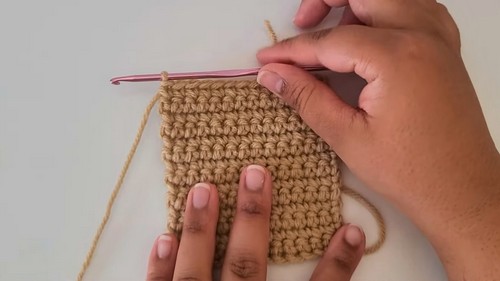
- For row 15, begin increasing at the first and last stitches to create rounded edges.
- Continue this concept of increasing on both edges for row 16.
- Work two additional rows (rows 17–18) of regular single crochet stitches without any increases.
4. Shaping the Toast Top
- Start decreasing at the beginning and end of row 19 to shape the top.
- Repeat the decrease process for row 20 (the final row for the bread base).
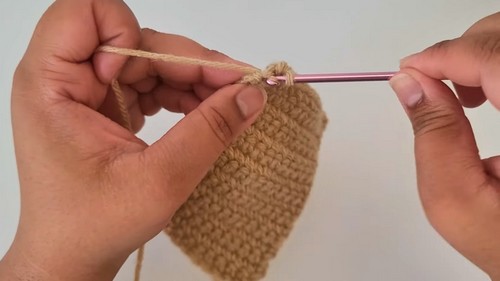
5. Adding the Crust
- Switch to the dark brown yarn to create the crust.
- Attach the yarn to the top edge of the bread.
- Crochet single crochets evenly across the top, down the sides, along the bottom, and back up to the top.
- Add increases at the corners to give a rounded, smooth finish.
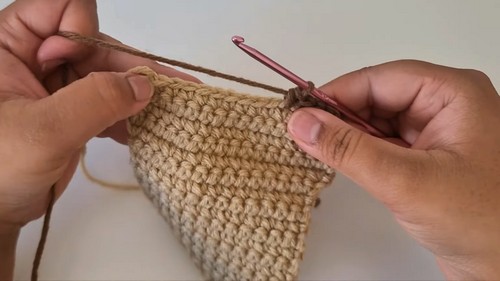
6. Fastening Off
- Finish the border with a slip stitch into the first stitch of the dark brown row.
- Chain one, cut the yarn, and pull it through the stitch to secure.
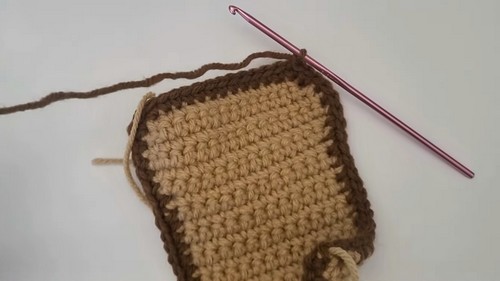
7. Weaving in Ends
- Use a darning needle (or crochet hook if you don’t have one) to weave in all loose ends.
- Work the ends into the back of the coaster, ensuring neatness and durability.
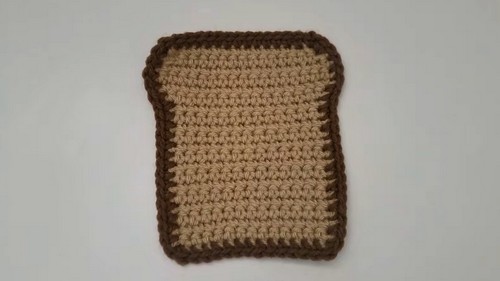
Tutor’s Suggestions
- Adjust the number of rows or stitches if you want a smaller or larger coaster.
- Hold the yarn tightly for a neat appearance, but not so tight that it’s hard to work with.
- Stretch the stitches slightly when working along the sides for even placement.
- Use stitch markers to maintain proper placement for the crust increases.
- If you’re a beginner, take your time with the chaining process to avoid puckering or uneven edges.
Why I Love This Pattern
This toast coaster is both practical and creative, making it a perfect gift or table accessory. I love how easy it is to adapt: change the colors for different types of bread (white, rye, whole wheat), or even add embroidered butter or jam for extra flair. It’s a quick project that’s engaging, handmade, and sure to brighten anyone’s day.
Conclusion
The toast coaster is an enjoyable crochet project that combines a playful design with practicality. Its simple stitches and pattern make it perfect for beginners, while the customization possibilities offer a chance for creativity. Whether as a gift or an addition to your table, it’s a delightful handmade piece that’s sure to brighten any space.
Bonus Tip
When crocheting the crust border, avoid pulling the yarn too tightly to maintain even edges and ensure the coaster remains flat.
Leave a Reply