
Celebrate Easter by making a beautiful crochet easter placemat that adds color to your table, is easy to make, and perfect for beginners using simple steps and soft yarn.
Brighten up your Easter table with a charming and easy-to-make crochet placemat that adds a touch of handmade warmth to your celebrations. This beautiful placemat is designed to bring festive cheer with its soft textures and delightful patterns, making it a perfect decoration for family meals or gatherings. Its colorful design catches the eye and creates a cozy, welcoming atmosphere for everyone. This placemat is not only decorative but also practical, protecting your table from spills and messes while making the occasion feel extra special.
Free Crochet Easter Placemat Pattern with Simple Instructions
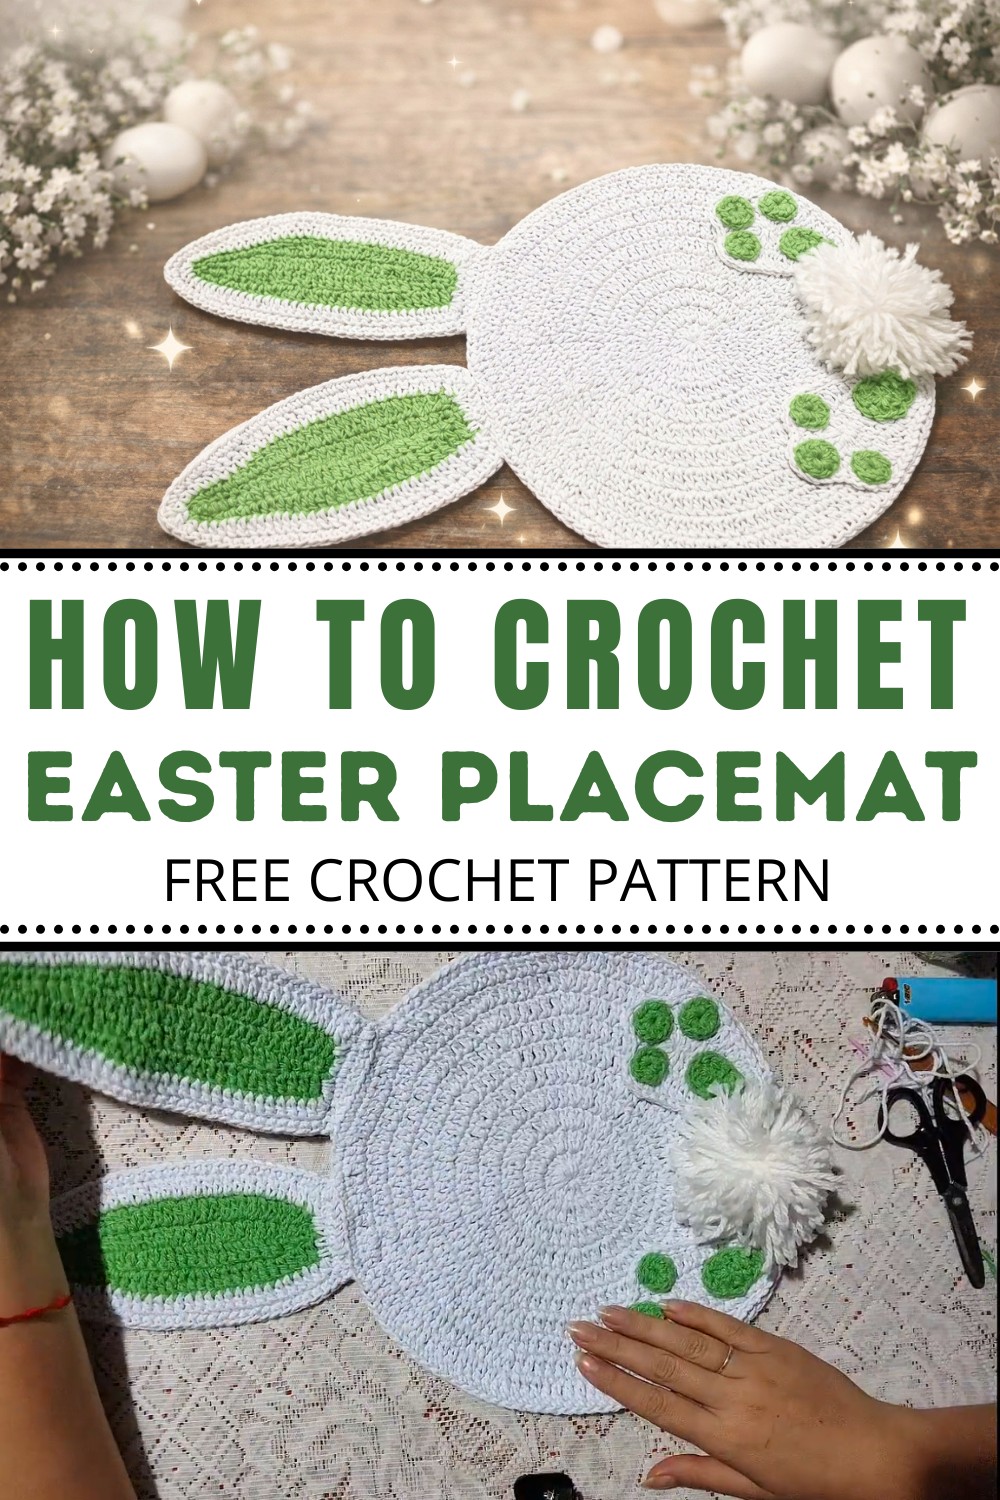
Made using simple crochet techniques, the process of creating this placemat is both fun and relaxing, making it a perfect project for all skill levels, especially for beginners eager to try something creative. You can easily match the colors to your theme, using soft pastels to reflect the springtime spirit. The lightweight yet sturdy design ensures it lasts long, becoming a cherished item in your collection. Whether you’re setting up for Easter brunch or simply adding a festive touch, this crochet placemat is a wonderful way to bring beauty and joy to your table.

Easter Bunny Placemat Assembly & Wreath
Welcome to the final assembly phase of the Easter Bunny Placemat (and Wreath) from Atelier Flor do Campo! This guide provides a clear, step-by-step process, suitable for intermediate to advanced crocheters.
Materials
- Worsted Weight Yarn (or similar): Pastel or festive colors for placemat, ears, feet, flowers, and accessories
- Crochet Hook: 3.5 mm to 4.0 mm (E/4 to G/6), or size required for gauge and yarn
- Upholstery needle (for secure seaming and attaching appliqués)
- Polypropylene Thread (for sturdy sewing or gluing of accessories; strong and durable)
- Scissors
- Hot Glue Gun (optional, for pompom and non-crochet embellishments, though not preferred for durability)
- Decorations: Pompoms, small balls (for feet/paw pads), felt, or ribbon bows as desired
Skill Level
Intermediate to Advanced
(Requires dexterity in joining, proper finishing, neat seaming, and secure embellishment attachments.)
Key Abbreviations (US Terms)
- ch = chain
- sc = single crochet
- sl st = slip stitch
- st(s) = stitch(es)
- FO = fasten off
Special Notes
- Use sturdy, colorfast yarn/thread for decorative and functional pieces; durable joining is essential, especially for items laundered or used often.
- Details and placement are crucial: Check RS/WS before finalizing attachments.
- Polypropylene thread is stronger and longer-lasting than glue for attachment of 3D elements.
- Customize design (bows/flowers) as desired for gender or theme.
Step-by-Step Assembly
1. Attach Bunny Ears
Positioning:
- Mark your desired ear positions at the top (“head” side) of your placemat or wreath.
- Hide any color/join amendments in your margin.
Sewing Ears:
- Thread a long piece of matching or invisible (clear) thread.
- From RS:
- Insert the needle at the back loops on the back of the chain, secure tightly but neatly, so stitches are not visible from the front.
- Pull taut, adjust, and ensure symmetry for both ears. Space ears evenly (about two stitches apart).
- Continue sewing, using small, even stitches for durability and neatness.
- Secure and FO; hide thread ends.
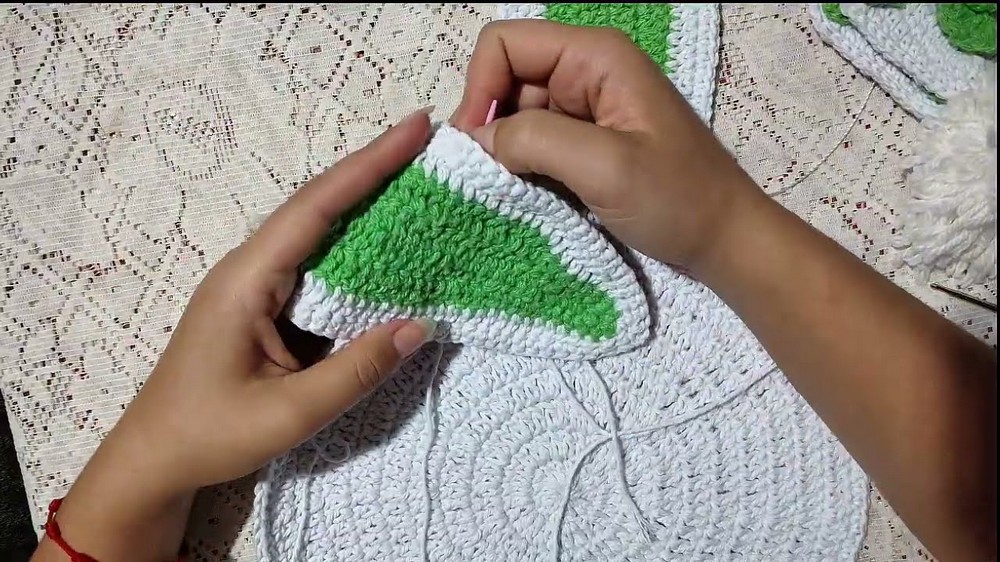

TIP: Always triple-check the placement (RS/WS) before sewing the second ear.
2. Prepare & Attach Feet (“Paws”)
Positioning:
- Find the center point at the bottom (“feet” side) using the center of the “head” as a reference. Drop a line visually (or with a pin) for symmetry.
Attaching:
- You have two main options:
- Feet facing inward (toward the center—friendlier pose).
- Feet facing outward.
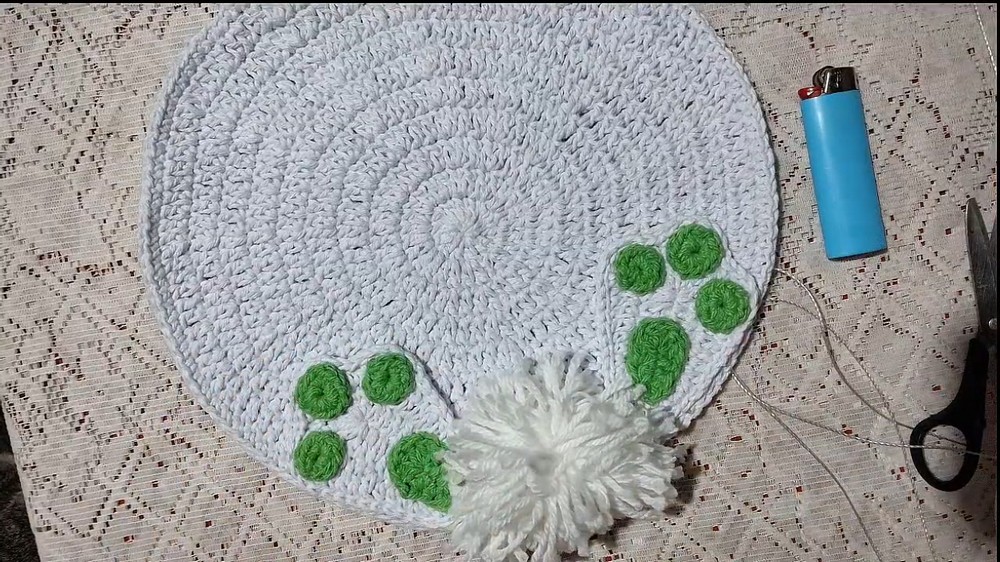
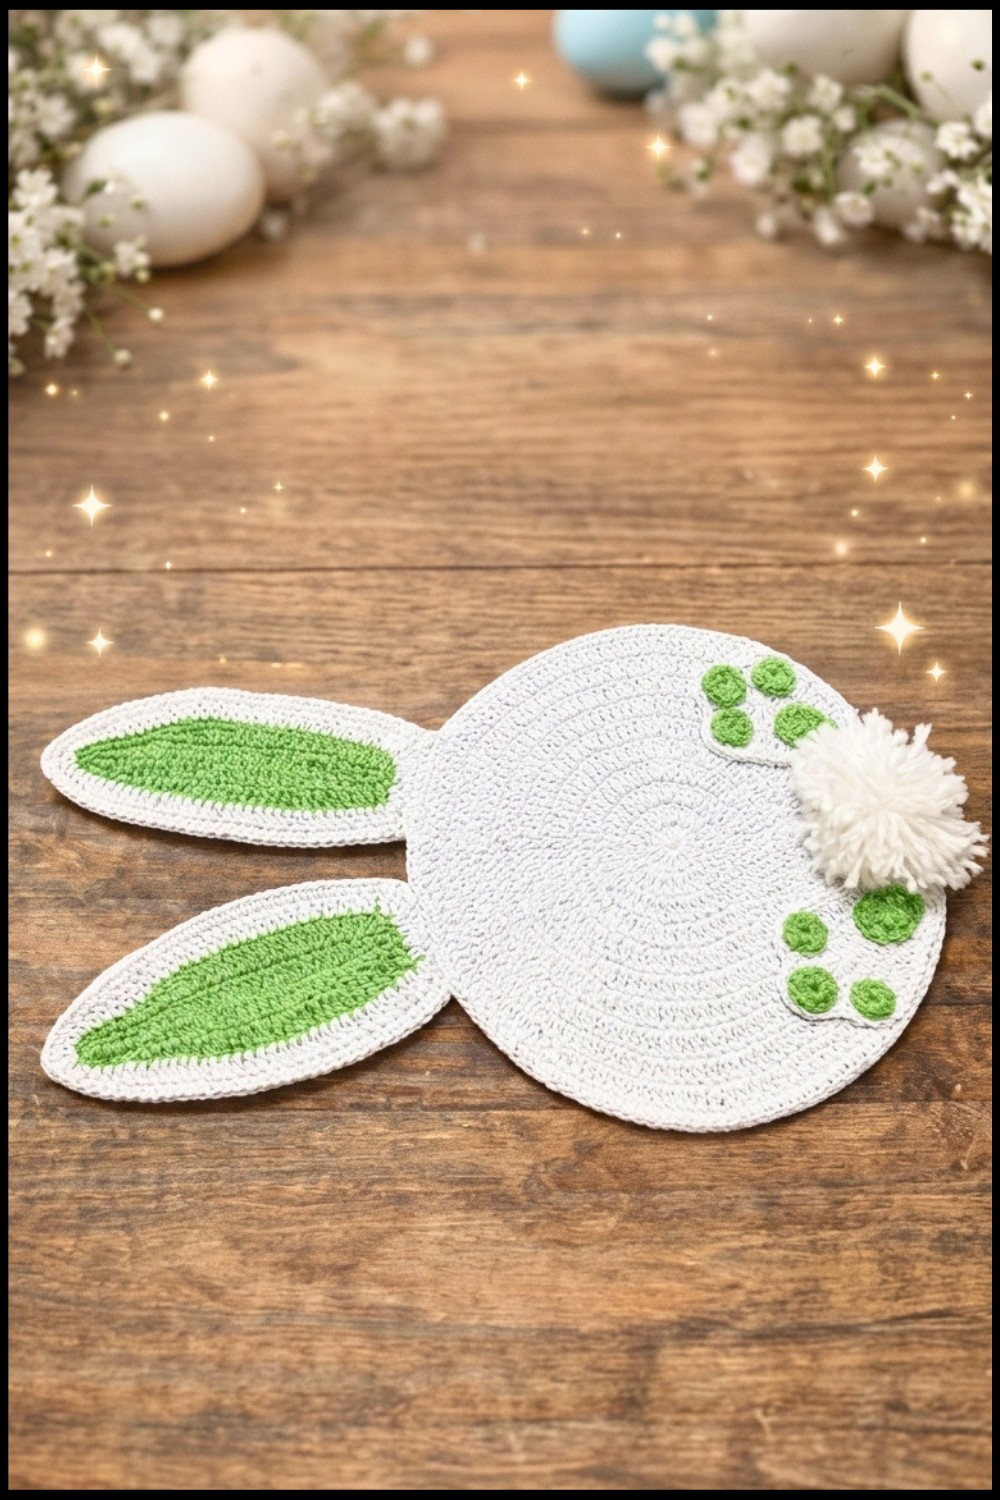
- Place a pompom between the feet for the bunny “tail,” adhering securely at the center line, using hot glue or sewing (preferred: polypropylene thread for durability).
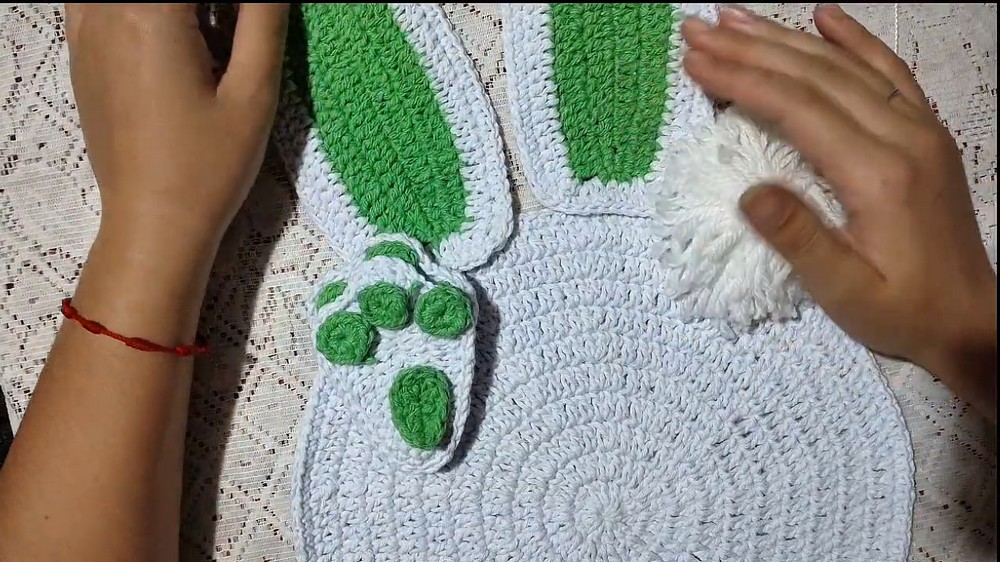
Adding Paw Pads:
- Using small felt balls or crocheted circles, place one at the top (central “toe” area), two below symmetrically.
- Attach using polypropylene thread for permanence, or glue as a quick solution (but less durable for washing).
3. Accessory Attachment (Optional)
- For girls, add bows or small crochet/fabric flowers in the center or near the ear base.
- For boys, omit or use a bow in a neutral/“boyish” color.
- Attach using thread or glue as preferred.
- Optional: Add greenery using thinner thread for a more delicate accent.

4. Finishing Touches
- Tidy up all loose ends: Weave them invisibly on WS.
- Re-examine the piece from all angles for symmetry and even joins.
- If the ears or paws feel loose, add a hidden (underneath) securing stitch.
- Avoid excessive hot glue, especially for placemats intended for washing—thread attachments are preferred for a professional, lasting finish.
Conclusion
This tutorial focuses on achieving a PROFESSIONAL and DURABLE finish for your Easter Bunny Placemat/Wreath through neat stitching, symmetrical placement, and secure attachment of decorative elements. These thoughtful details elevate your work, ensuring customer satisfaction and delightful presentation.
Pattern Correction & Tips
- Correction: Double-check RS/WS during ear and foot attachment (as highlighted in creator remarks).
- Tip: For washable items or frequent use, ALWAYS prefer sewing attachments over glue. Polypropylene thread gives a strong, washable bond versus most adhesives.
- Tip: Add extra rounds/flowers or embellishments to suit gender (bows for girls, skip for boys), color theme, or home decor.
- Tip: When positioning, step back and visually compare both sides under good light for symmetry.
Final Look
A whimsical, neatly finished bunny placemat or wreath, ideal for Easter and spring decor. Proper finishing, sturdy assembly, and thoughtful details guarantee a polished, gift-ready or market-ready piece.
Leave a Reply