
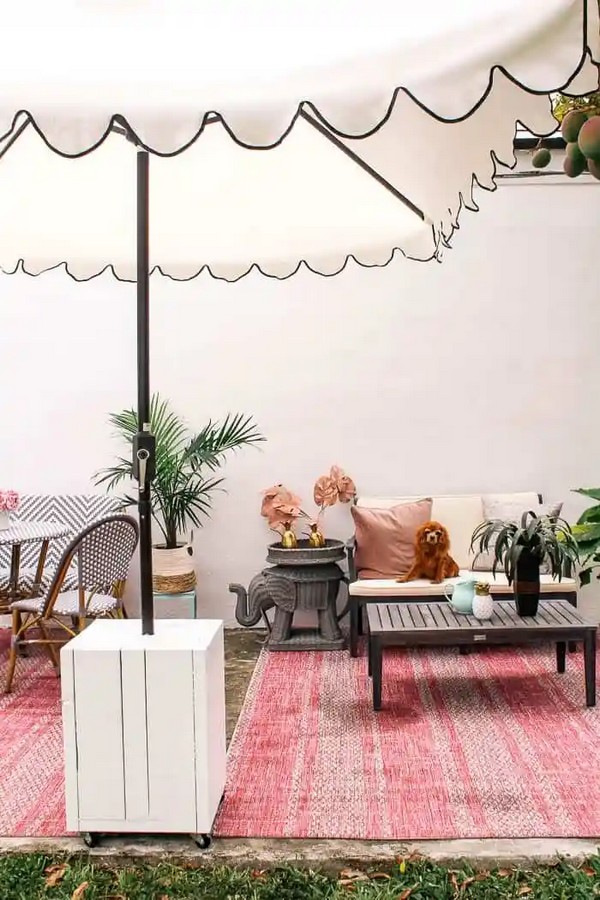
Picture your handmade umbrella stand sitting proudly at your doorstep or in your garden, serving the practical purpose of holding your umbrella and adding a dash of charm to your outdoor decor. Whether sleek and modern or rustic and charming, your DIY Umbrella Stand’s appearance can best match your style. Beyond just looking great, it will be your go-to spot to keep umbrellas handy, avoiding wet messes on rainy days. Our easy-to-follow guide is designed to help anyone make their umbrella stand regardless of their DIY experience. You’ll be amazed how a few straightforward steps can lead to something delightful and practical.
Easy DIY Umbrella Stand
Materials Required:
- 3x 2x6x12 Pressure Treated Lumber
- 1x Box of Screws
- 4x Casters
- 1x Steel Pipe
- 2x Bags of Concrete
- Wood Filler
- Ultra Pure White Exterior Paint
Tools Needed:
- Miter saw
- Drill with pre-drill bit
- A concrete mixer (or a large bucket)
- Paintbrush
- Sandpaper
Step-by-Step Instructions:
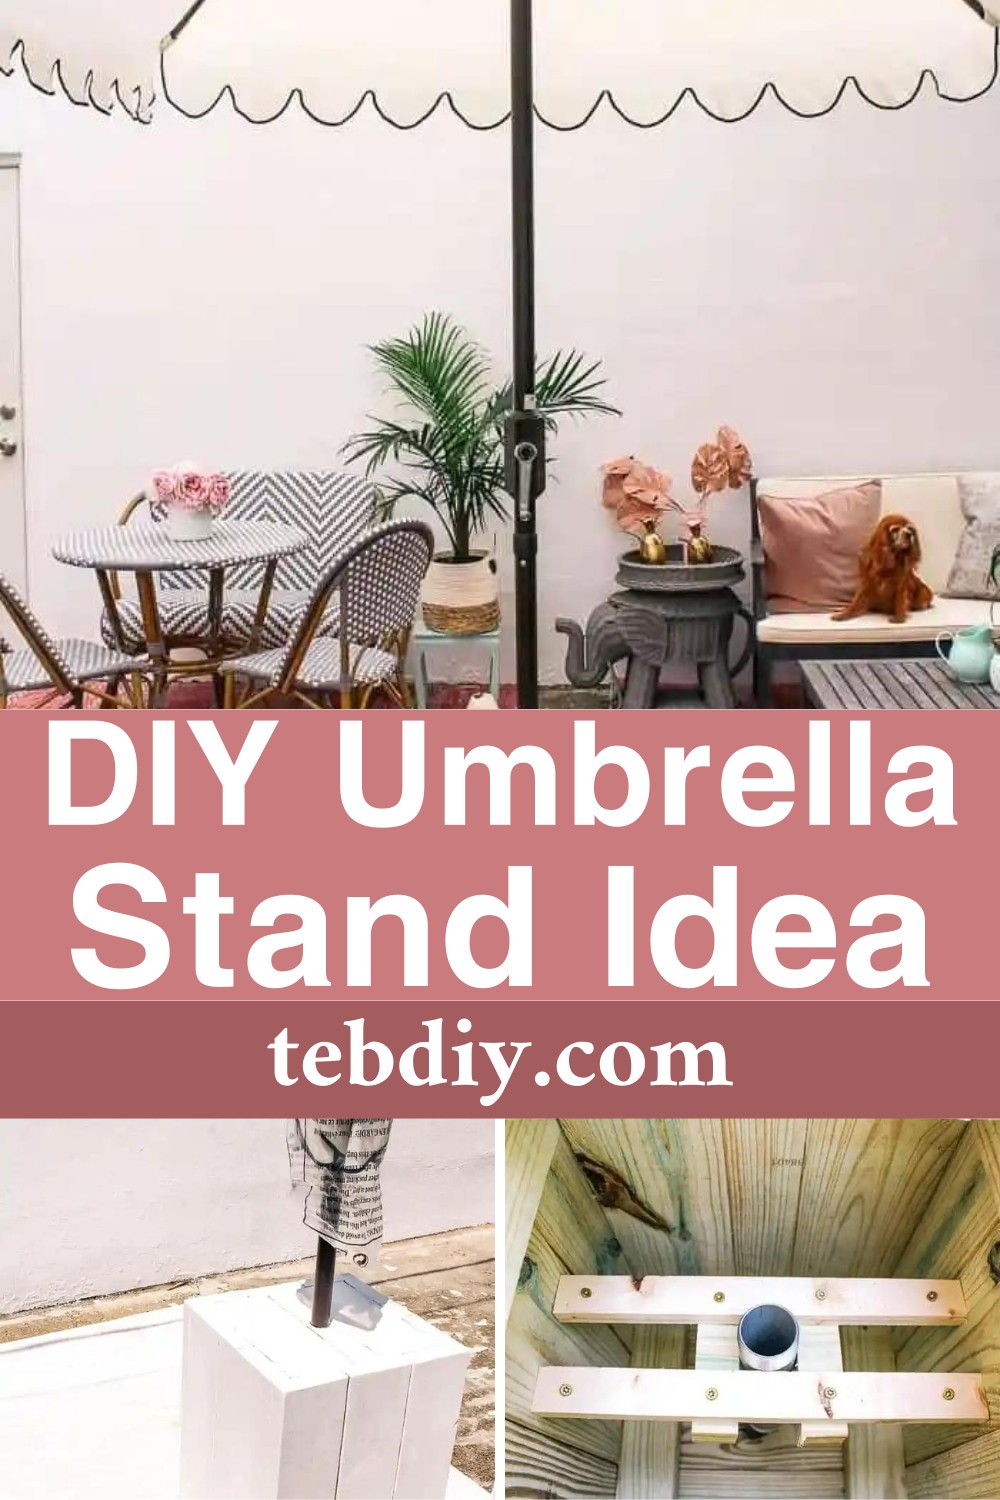
Preparing the Wooden Base: Cut the pre-treated lumber according to the specifications in the original post. Attach three of the 14x2x6″ to two of the 14x2x2 3/8″ with three screws on each side. This will create the base of the umbrella stand. Secure three of the 22″ 2×6″ boards with two screws each on the ends of the 14″ base.
Constructing the Upper Structure: Attach the 20 1/2 x 2 x 6 and 20 1/2 x 2 x 2 3/8 pieces to form the third wall. Follow this by attaching 22x2x6 and 22x2x2 3/8 pieces to create the fourth wall. Secure four casters to the bottom of the umbrella stand, enabling easy movement.
Centering the Pipe: Mark the center of the inside of the umbrella stand base. Predrill and attach the 14×2 3/8″ pieces of lumber at an angle. This effectively holds the galvanized pipe in place while pouring the concrete. Mix and pour concrete into the base of the umbrella stand.
Adding a Top Cover: Screw two 14x2x2 3/4″ to the sides to keep the top pieces of wood from falling in. Place two 14x2x6″ pieces on the sides and a 14x2x2 3/8″ in the middle. Use screws to attach them to the ends. Cut a 1 1/2″ hole for the umbrella to go through.
Polishing the Final Product:
Sand off rough edges for a smooth finish. Fill the screw holes with wood filler and let dry. Afterward, sand down all the filled screw holes and coat your stunning umbrella stand with two coats of white exterior paint.
That’s it! You’ve now created a perfect haven of shade! A successful convergence of functionality, style, and savings that safeguards your shade umbrella amplifies your décor aesthetics and provides an extra spot for your cup of coffee or your favorite book.
Leave a Reply