Trophies are often given out as a sign of accomplishment, success, or recognition. You might see them in sports events, academic competitions, or workplaces when someone has done a great job. They’re a tangible sign that someone has done something worth celebrating. But have you ever thought about making one by hand? This is where our series of DIY Trophy Projects come in! By creating your handmade trophies, you can add a personal touch, reflecting the unique achievement it’s recognizing. Plus, it’s a fun activity that lets you unleash your creativity.
DIY Trophy Projects
Our given Trophy Projects allow you to design and make trophies that perfectly suit the occasion and honor the person receiving them. Each of these projects has its charm and unique aspect, allowing you to customize the trophy specifically for the recipient or the event. So, gather your craft supplies, warm up your creativity, and make something special together!
How To Make A Trophy
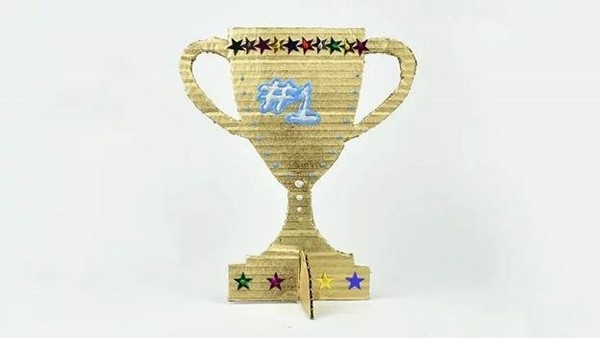
Uses: A trophy adds a personal touch to any event or competition! It serves not just as a symbol of success but also as a unique memento that encapsulates the spirit and memory of the event.
Materials:
A clean, empty plastic bottle
Dish soap
A cutting tool
Super glue
Acrylic paint
Making:
Creating your own trophy involves a simple process where the essential steps include preparing a plastic bottle. Start by separating an empty plastic bottle into three segments- top, middle, and bottom. The middle segment becomes the stem, sculpted by simple scissors into a smaller tube. Join the bottom half to the tube for the trophy base, and the top—flipped upside down—is affixed as the crowning glory.
DIY Making A Paper Cup Trophy
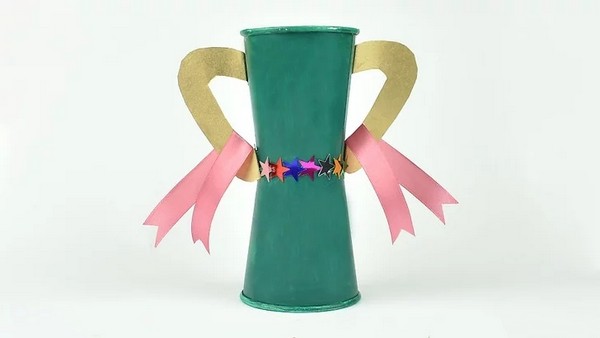
Uses: With just a handful of materials and your creativity, you can tailor-make a trophy to make anyone’s day special. A paper cup trophy is a remarkable and simple way to add excitement and joy to many events.
Materials:
Two identical paper cups.
Thick paper or cardstock for handles.
Paint (preferably gold or silver).
Adhesive.
Making:
Initiate by taking two identical paper cups and painting them in your chosen color, gold or silver, for that traditional charm. Let the painted cups dry completely. Meanwhile, create handles using thick paper or cardstock, painting them in the same color to match the cups. After everything dries, stick the handles to the sides of one cup using adhesive, then fit the second cup upside down on top. For an extra touch, consider attaching a small fitting figure or token on the apex of your trophy.
DIY Making A Plastic Bottle Trophy
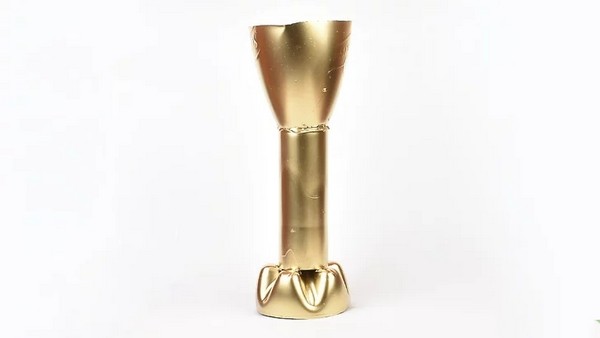
Uses: It’s a fantastic way to award victors in friendly contests, whether a sporty neighborhood challenge, a fun-filled office event, or even a vibrant children’s party. Embodying appreciation and gratitude, the DIY trophy becomes more than just a memento
Materials:
A clean, empty plastic bottle (1.5 to 2-liter size recommended)
Pair of scissors
Strong adhesive
Paint (Silver or Gold)
Making:
Creating a homemade plastic bottle trophy is a joyful process that shines a light on recycling. Start by taking a 1.5 to 2-liter plastic bottle, then chop it neatly into three sections: the top, middle, and bottom. Now, reshape the middle section into a slimmer tube by slicing down its side and folding it inward. Affix this freshly made tube to the bottom of your bottle, forming a sturdy base for the trophy. The top section of the bottle, turned over to form a domed crown, fits snugly on top of your tube. For the icing on the cake, splash out some silver or gold paint and give your trophy a majestic makeover.
DIY Dollar Store Trophy
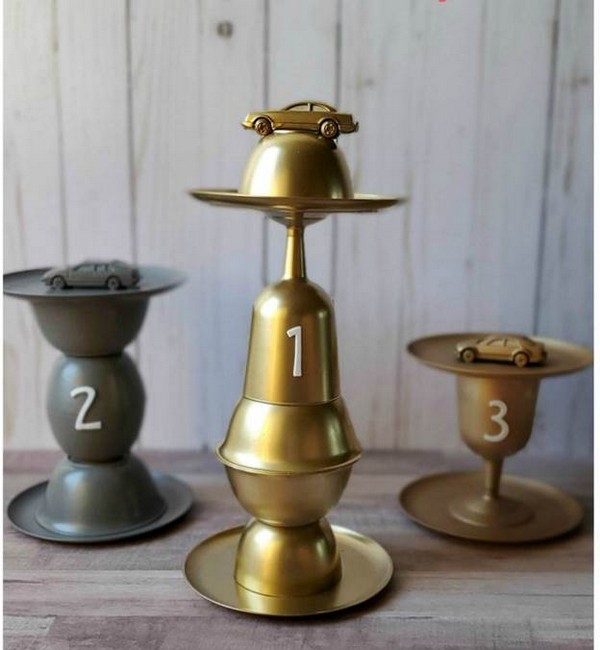
Uses: Ideal for events such as children’s birthday parties, Pinewood Derbies, and Halloween costume parties, these inventive accolades bring out the true spirit of friendly rivalry and amusement.
Materials:
Clear plastic plates
Clear plastic glasses with stems
Adhesive
Small relevant item
Spray paint (gold, silver, bronze)
Foam stickers for numbers and/or letters
Making:
First, gather clear plastic plates, bowls, and stemmed glasses to form the trophy structure. Experiment with stacking them to decide the ideal appearance for first–, second-, and third-place awards. Using adhesive, firmly bind the components and allow them to dry overnight. Attach a small fitting item, such as a toy car, on top to match the event theme. Once the adhesive has cured, spray paint each trophy in gold, silver, or bronze, corresponding to first, second, and third place. After the paint dries, complete your trophy by placing foam stickers for numbers or letters to denote the places.
DIY LED Trophy
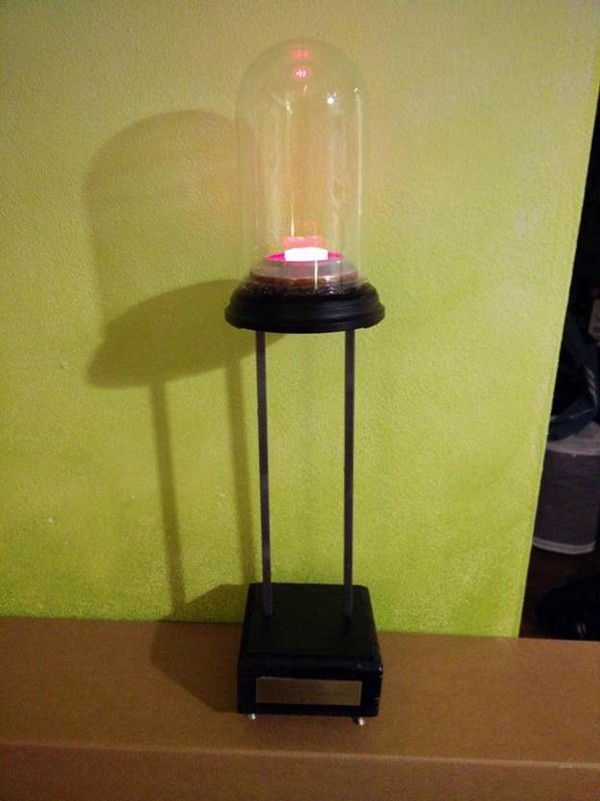
Uses: Showcase the bond between sportsmanship and technology by making your own LED Trophy, a hands-on project that is as rewarding as it is illuminating. A DIY LED Trophy is a brilliant addition to any event, whether a tech fest, a gaming tournament, or an innovative school competition.
Materials:
6 LEDs (5mm)
1 Acrylic glass plate
2 Resistors (150-180 Ohm)
Old clock (for the bell)
Beer can (only the bottom part)
Tools: Soldering iron, Stripping pliers, Saw, Power drill, Grinding wheel
Making:
Creating your LED trophy begins with assembling multiple LEDs on an acrylic glass plate. Once set in position, they are soldered together. Next, you assemble the base using a wooden beam, carving holes to fit the LED assembly’s legs and a space for the battery. Metal rods serve as the trophy’s legs: cut, threaded, and polished to shine, with a hole drilled near one end to serve as the connection for the battery. Other materials like a glass bell from an old clock, the bottom part of a beer can, and a 9V battery are used to complete the assembly. Carefully attach all the parts, adding final touches like a tiny switch for turning the LEDs on or off, and behold the sparkle of success – your DIY LED Trophy.
How To Make Homemade Trophies
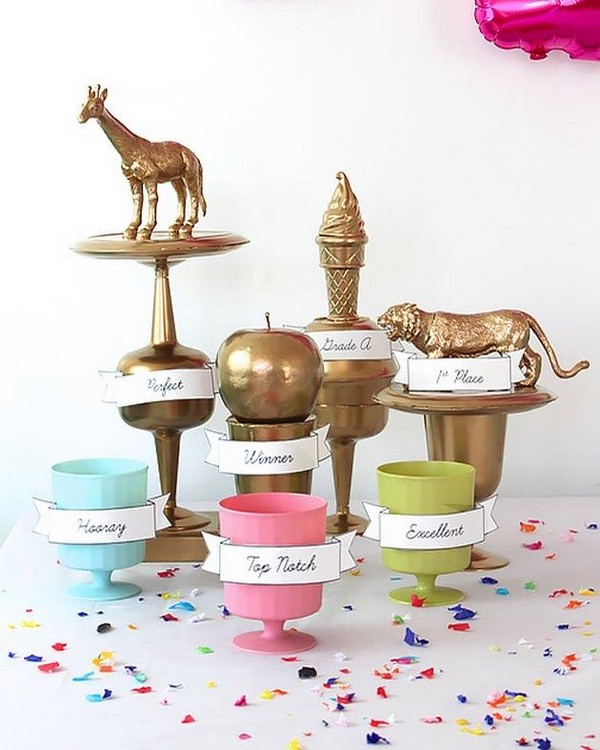
Uses: Homemade trophies make splendid additions to informal festivities! Not only are these money-saving, but these personalized mementos also become keepsakes for the winners, adding charm to their victory.
Materials:
Plastic plates
Small objects for decoration (Animals, figurines)
Hot glue gun along with glue sticks
Spray paint
Tarp or Scrap cardboard
White Cardstock
Tape
Making:
Making homemade trophies is a fun and engaging process! Begin by stacking plastic plates, bowls, and footed cups, creating pedestals for various trophies. Use a hot glue gun to ensure they hold together securely. Next, adorn your pedestals with small objects like figurines or animals, providing a unique appeal. Spray paint the complete ensemble in a choice of color, be it gold for that traditional touch or a vibrant hue for a modern twist. Finish up by wrapping a printed ribbon around, cementing the glory of the achievement. The homemade trophies are now ready to incite delight and inspire commitment.
DIY Trophy Using A Toilet Paper Roll

Uses: A DIY Trophy using a Toilet Paper Roll is a versatile, eco-friendly award that can be used in various events. These Trophies can be themed for any sporting event, from football to mini-golf, making every achievement a cherished moment.
Materials:
Toilet Paper Roll
Colored Construction Papers
Craft Glue
Pencil
Scissors
Making:
Creating a DIY Trophy involves cutting two pieces from a toilet paper roll, which will serve as the base and cup of the trophy. The larger piece is covered with a colored construction paper of your choice, followed by attaching a cone on top of a large round-shaped paper. Handles are added to both sides of the cup, and a curved highlight pattern on one side. The shorter piece from the toilet paper roll is covered with a different colored paper. The trophy is assembled and finished by affixing a star, completing the charming design. The final touch includes customizing the trophy base with a title of achievement written on it.
How To Make A Trophy By Upcycling A Plastic Bottle

Uses: Perfect for classrooms, local community events, or summer camps, this trophy turns heads with its touch of sparkle. These unique symbols of accomplishment instill a sense of achievement and excitement, making any event more jubilant.
Materials:
Plastic bottle
Low-temp glue gun
Spray paint
Scissors
Spray glue
Glitter
Making:
Begin the transformation of a plastic bottle into a trophy by snipping off its bottom. Use a nail to produce two holes on each side, destined to be the handles of the trophy. Connect the handles by intertwining two pipe cleaners and securing their ends within these holes. Bend and shape them to your liking. Affix the mouth of the plastic bottle to its bottom to form a solid base for the trophy. Embellish it with spray paint, and once dry, enhance its shine by spraying a thin layer of glue and showering glitter on it. Presto, your DIY Trophy from an upcycled plastic bottle is ready to dazzle its winners while teaching a solid lesson in sustainability.

Leave a Reply