Are you ready to make your backyard parties super cool? Let’s create some amazing Tiki Torches together! It’s easier than you think. I have many fun and simple ideas that will let you make your own Tiki Torches. We’re going to help you step by step. So, get ready to light up your outdoor space and turn it into a tropical paradise. Your family and friends will love it, and you’ll be amazed at what you can create with just a few simple things! So, let’s get started and make those evenings glow!
DIY Tiki Torch Plans
How to Make a DIY Tiki Torch
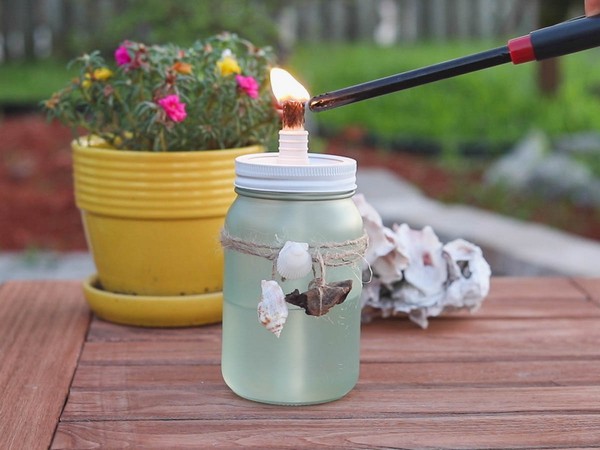
Uses: Tiki torches illuminate any outdoor space with warm, ambient light and enchanting flickering flames. These practical, homemade devices keep bothersome insects away, thus making your backyard gatherings or relaxation hours enjoyable. A DIY tiki torch, adorned in a coastal sea glass look, pleases the eye as much as it serves a functional role.
Materials:
A glass jar with a lid
Sea Glass Paint in Sea Foam
High Heat Enamel Spray Paint, white
1/2″ metal coupling
Wick
Jute twine
Sea shells for decoration
Making:
Creating your DIY tiki torch begins with drilling a hole in the lid of the glass jar for the coupling. Next, assemble the lid and paint the jar and lid in your chosen aesthetic colors, taking care to allow each coat of paint dry. Complement the sea foam painted torch with decorative trim – a sequence of vibrant seashells. Add the tiki torch wick by sliding it into the coupling, trim it, and allow it to absorb the bug-repellent torch fuel for a time. The torches are then ready for use, and their fuel lasts long, giving you peaceful, mosquito-free outdoor settings.
DIY Wine Bottle Tiki Torch
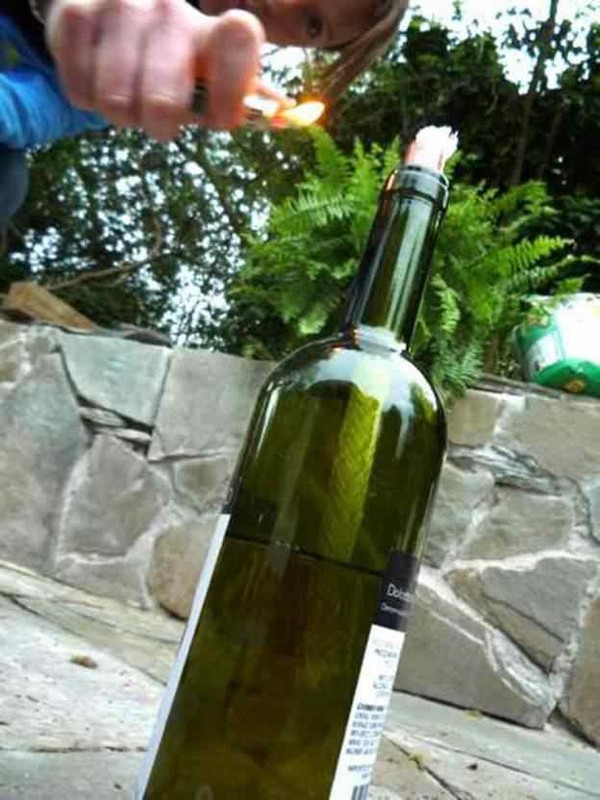
Uses: Recycling wine bottles to create this torch is an excellent way to repurpose things otherwise destined for the dustbin, adding an eco-friendly touch to your outdoor spaces. It is an efficient insect repellent, utilizing citronella to ward off pesky mosquitoes.
Materials:
Wine Bottle (free, recycled)
Copper Coupling (1/2″ x 3/8″)
Tiki Replacement Wick
Nylon Thread Seal Tape
Citronella Torch Fuel
Making:
Building your Wine Bottle, Tiki Torch starts by wrapping the copper coupling with the nylon thread seal tape multiple times, ensuring it fits snugly into the opening of your wine bottle. The next step is to introduce the wick into the coupling. Once done, all that’s left is to fill your bottle with citronella torch fuel and insert the wick. Let the wick soak up the fuel before lighting it. Now, sit back, relax and enjoy the warm glow of your homemade tiki torch.
DIY Mason Jar Tiki Torch
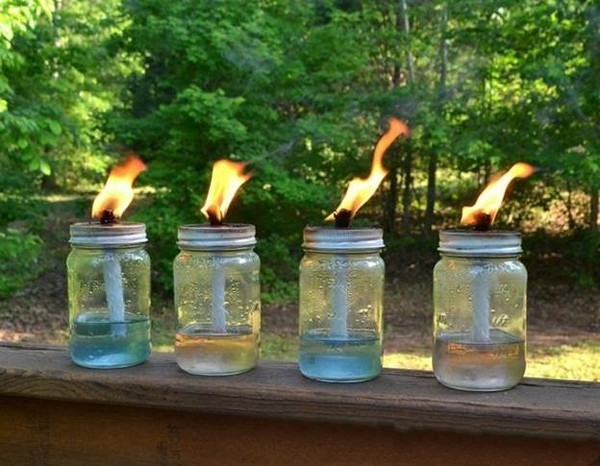
Uses: These torches, made with the ever-popular Mason jars, are an attractive addition to decks, porches, and backyard spaces, ensuring a comfortable environment for your friends and family to enjoy.
Materials:
Mason Jars (or any glass jar of your choice)
Torch Wicks
Canning Lids
Torch Oil (Citronella or similar bug repellant)
Hammer and Nail (or Drill with a large drill bit)
Making:
To create your DIY Mason Jar Tiki Torch, first, punch a hole in a canning lid using a hammer and a nail. Widen the hole to fit the wick. Insert the wick through the hole, ensuring a tight fit so it doesn’t slide back into the jar. Then, fill the jar with torch oil about halfway to three-quarters full. Allow a few minutes for the wick to absorb the oil before screwing the lid back on and lighting the torch. Place the torches strategically in your outdoor space where they won’t be easily knocked over or accessible to children.
DIY Tabletop Tiki Torch
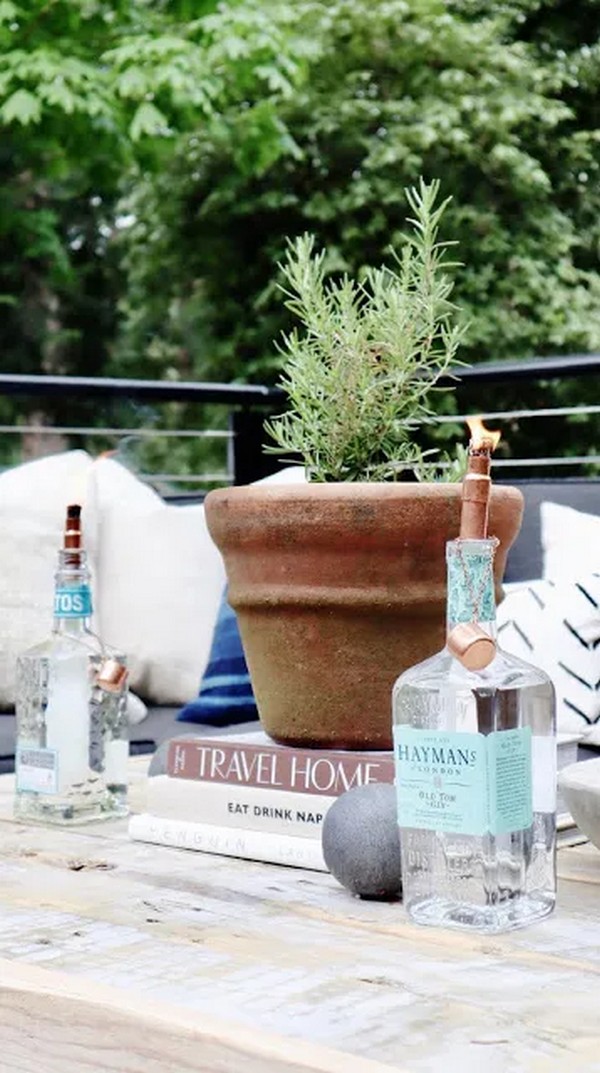
Uses: Besides infusing elegance into the ambiance, this straightforward and handy project helps deter insects, making your outdoor relaxation and entertainment a pleasure.
Materials:
Empty Liquor Bottles
3/4″ Copper Cap
1/2″ x 3/8″ Copper Coupling
1/2″ Copper Pipe of 15″ length
Copper Chain of 6″ length
Wicks
Funnel
Making:
Making your DIY Tabletop Tiki Torch involves simple steps! Initiate the process by drilling a small hole in a copper cap, as the cap will serve as your torch’s extinguisher. Then, attach a copper chain to the cap using a split ring. Cut the copper pipes to the right length and assemble them with a copper coupling on top and a steel washer at the bottom. Slide the torch wick through the assemblies you’ve made and place it inside your chosen bottle filled with tiki torch fuel. Light them up when you wish, and place the cap when not used.
Easy DIY Tiki Torch
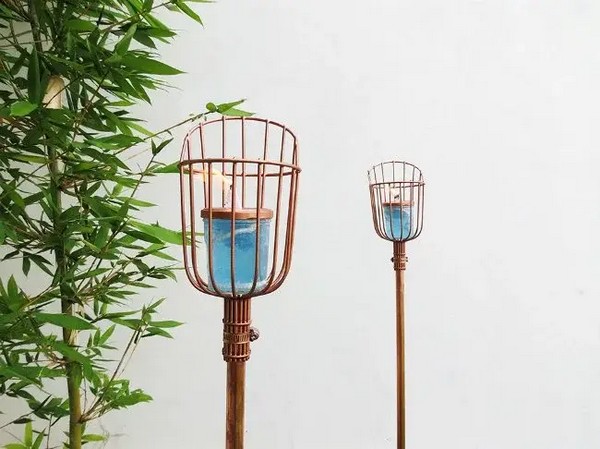
Uses: Bask in the warmth of summer nights without the buzz of mosquitoes hovering around your tiki bar. This torch brightens and protects your backyard soirees by spreading a glow and keeping the critters at bay with its citronella scent.
Materials:
Mason jar
Metal hammer
Sharp nail
Basket from a fruit picker
Sturdy cutting pliers
Metallic copper spray paint
Special tiki torch wick or cotton rope
Citronella oil or Tiki torch fuel
Making:
Creating your own outdoor Tiki Torch is a fun and simple process. Begin by making a snug home for the light in a glass jar with a fitted lid. Next, Painted a unique fruit picker basket and the lid with a metallic luster. Assemble it atop a sturdy copper pole with a clamp to keep it secure. Finish with the key touch—a fuel-soaked wick—to cast a serene light over your evening festivities.
DIY Tiki Torch Bottle
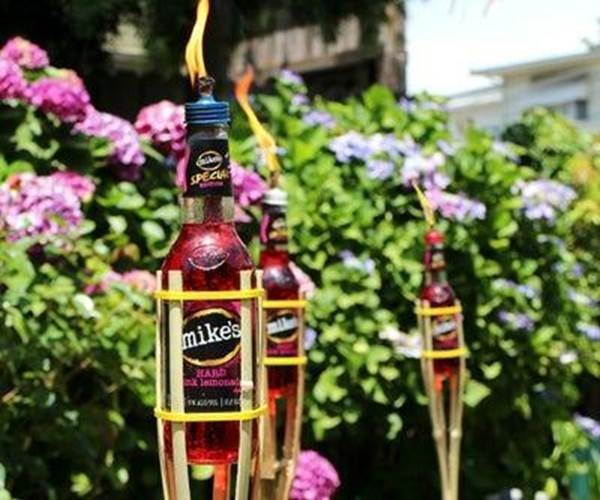
Uses: Imagine a cozy backyard where soft firelight flickers, adding a warm, welcoming glow. A DIY Tiki Torch Bottle is the perfect buddy for those long summer evenings. It keeps the shadows at bay and scares those unwelcome mosquitoes with its gentle, colorful light.
Materials:
A pack of six tiki torches
Two bottles of red lamp oil
Twelve colorful 12″ zip ties
Six empty bottles (Mike’s Hard Lemonade used)
Scissors
Small funnel
Making:
Begin by cutting the ties from the original torch containers. From there, you unscrew all the caps with their wicks from these containers, placing them aside for later. Then, with a funnel, fill empty bottles with your chosen lamp oil, ensuring they do not overfill. Attach a cap with its wick to each filled bottle, lowering the wick inside before screwing the lid tightly. Finally, secure each bottle onto a bamboo torch, using colorful zip ties for a fun, visually pleasing touch. The process concludes with placing these handmade torches wherever you desire some additional light and warmth.
DIY Glass Bottle Tiki Torch
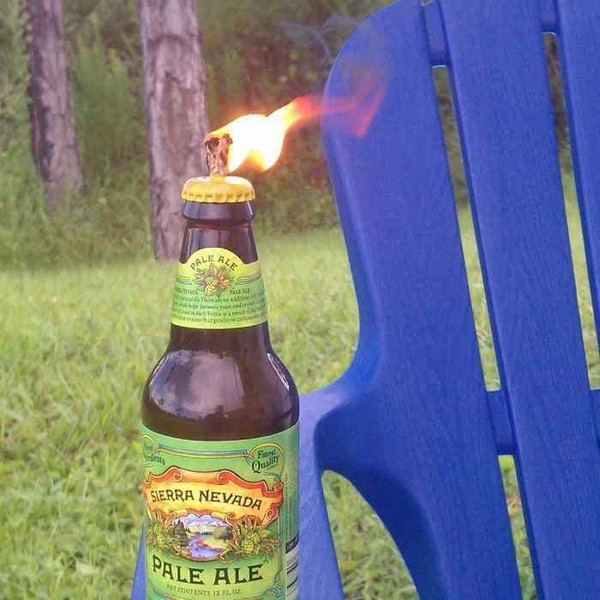
Uses: As the sun sets, light up your open-air social gatherings or solitary evenings with the delicate, soothing glow of this charming torch. Its unmatched appeal does not merely stop at its warm light—it additionally gives off a whiff of a woodsy, fresh, and great outdoors scent of citronella.
Materials:
Non-twist-off beer bottles
Bottle caps, removed carefully without damage
Cotton strings, thicker the better
Philips screwdriver
Hammer
Oil (citronella or used cooking oil will work)
Making:
Bringing a DIY Glass Bottle Tiki Torch to life involves a few easy-to-follow steps. Start by carefully removing the caps from your chosen beer bottles. Use a Philips screwdriver and a hammer to punch a hole in the center of each bottle cap. This hole will later accommodate a cotton string, serving as the wick. Be sure to soak the cotton strings in clean water beforehand to remove any residues. Once dry, feed the cotton string through the hole made in the cap, ensuring a snug fit. Fill up the beer bottle with oil, but refrain from filling it up to the top. Secure the cap back onto the bottle with the cotton string peeping out. Prepare a batch of these stunningly simple torches and switch them out as needed for a warm, glowing ambiance on demand.
DIY Industrial Style Tiki Torch
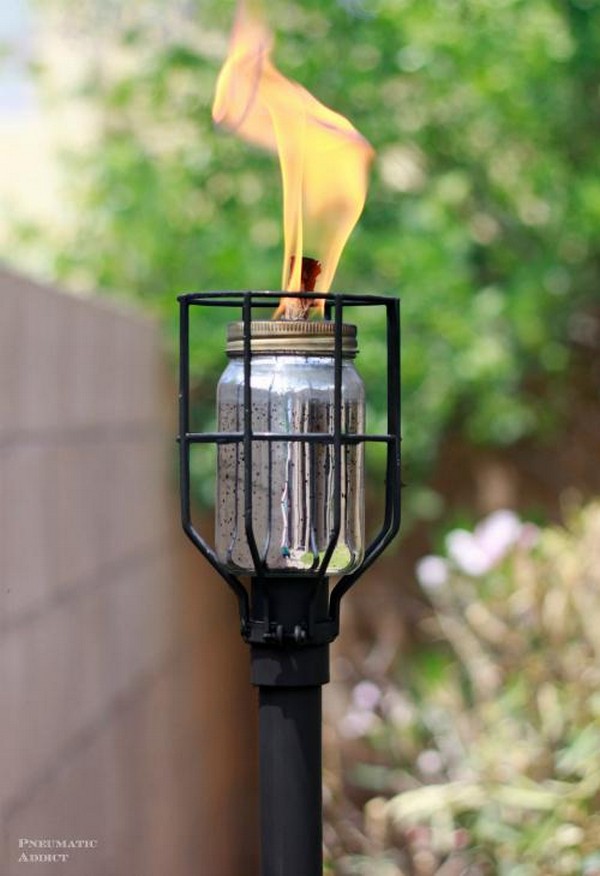
Uses: Sturdy and chic, this torch lights up gardens and paths, transforming outdoor space into a cozy area for evening chats or peaceful solitude.
Materials:
1-3/8″ x 10′ diameter fence pole (you only need 5′ per torch)
Steel light bulb cages
1″ PVC coupler
Mason jars with lids
Tiki torch wicks (preferably fiberglass)
High-temperature spray paint
Making:
The process begins with assembling a pipe into a sturdy coupler and affixing a light bulb guard for that industrial look. A few sprays of heat-resistant paint bring it together in a sleek, cohesive unit. Meanwhile, preparing a mason jar involves puncturing a lid flat to fit a wick, which will be neatly trimmed to fit snugly inside the jar. Once filled with fuel, these lids cap the jars, now ready to cast a warm, inviting light in your backyard haven.


Leave a Reply