Hey, awesome folks, now you can easily turn your ride into a superhero of storage with your DIY roof rack. Your car will look way cooler and more handy with all that extra room on top; you can also bring along your bicycles, camping gear, or even a kayak for adventure times. We’re here to guide you with super simple ideas on how to build a roof rack that’s just perfect for your vehicle. It’s like giving your car a cool hat that holds all your fun stuff! So be ready to high-five yourself because, with our easy-to-follow tips, you’ll hit the road with your homemade roof rack before you know it.
DIY Roof Rack Ideas
DIY Homemade Roof Rack With Accessories
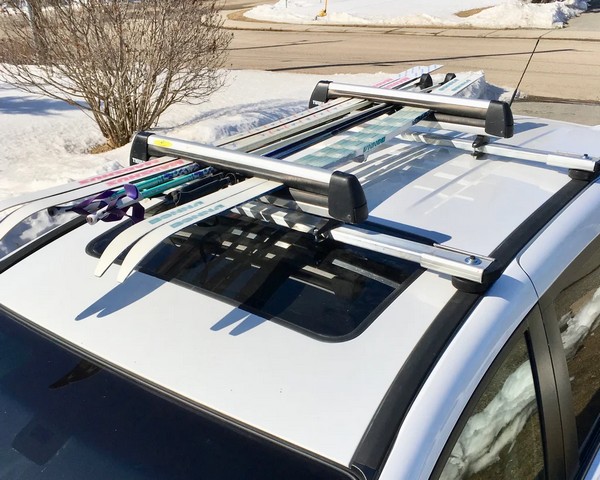
Uses: A homemade roof rack with accessories is an ideal addition to your car if you love outdoor activities and have various equipment to carry along. This DIY project results in a durable and affordable roof rack for hauling items such as skis, luggage, and even kayaks.
Materials:
Aluminum channel and square tubing
Hockey pucks
Various-sized bolts and U-bolts
Drill and various-sized drill bits
Metal cutting saw
Sander
Making:
Start making your roof rack with aluminum channel blocks, which will serve as the base. These blocks can be easily attached to the bolt holes present on the roofs of most vehicles. To raise the rack above the car roof, use material like hockey pucks. Attach aluminum rails to these mounting bases using bolts, creating a sturdy roof rack system. To give your roof rack a finished look and reduce wind noise, make and add end caps using materials like cut hockey pucks. Finally, you can attach various accessories to the rack, such as a ski rack or a luggage rack, using U-bolts.
Functional DIY Roof Rack
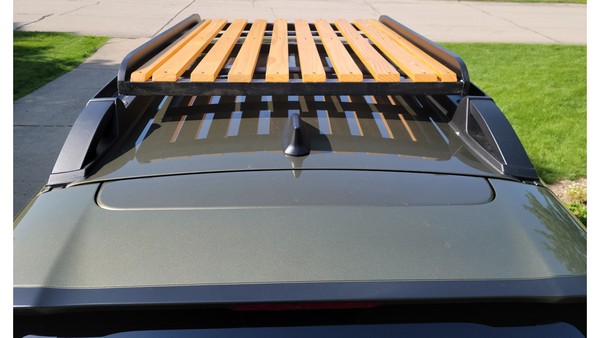
Uses: A functional DIY roof rack is an exciting way to increase your vehicle’s carrying capacity. This handy DIY accessory can effortlessly hold luggage carriers, bikes, and other bulky items that won’t easily fit inside your vehicle. The DIY roof rack offers a stylish yet functional addition to any wagon or SUV, making outdoor adventures and family trips a breeze.
Materials:
Premium Pine boards
Wood glue
Wood stain and polyurethane
Black paint
Carriage bolts, wing nuts, and flat brackets
Making:
The making process starts by deciding the size of the roof rack, which should typically fit most factory roof rails for universal use. Cut the premium pine boards to length and assemble them into a simple, strong frame using wood glue and screws. After the frame settled, position the deck slats on it, ensuring even spacing for a sturdy surface. Each deck slat should then be stained and coated with polyurethane. The assembled frame should be painted black. When all parts are dry, the deck slats can be screwed to the frame. To attach the rack to the car, use carriage bolts, wing nuts, and flat brackets at each rack corner.
DIY Van Roof Rack
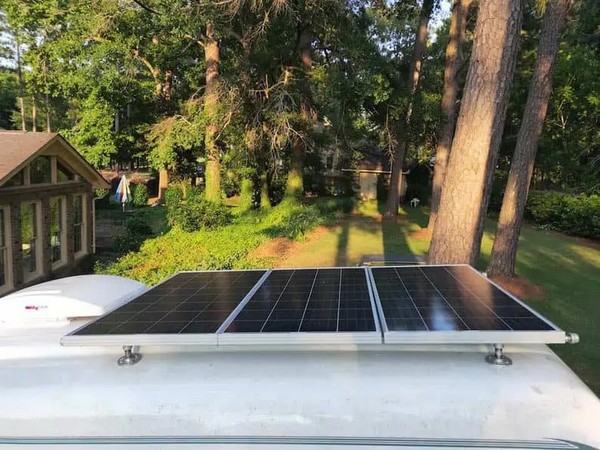
Uses: Having a DIY Van Roof Rack is a convenient and cost-effective solution for van owners, enabling them to carry extra equipment like solar panels, surfboards, or luggage on the roof. This custom roof rack enhances the versatility and functionality of a van while providing a stylish solution to storage concerns.
Materials:
1/2 inch galvanized steel pipes
Galvanized steel nipples
T or right-angle connectors (based on the design)
Philips round head bolts with nuts
Silicon for sealing
U-bolts to secure additional equipment
Making:
Begin with a design that considers the van’s roof curvature and your specific needs. Use half-inch galvanized steel pipes to create the primary structure and check whether T or right-angle connectors are needed based on your design. Attach the pipes to the roof using tee junctions, nipples, and flanges. Secure flanges to the roof with bolts, nuts, and silicon for waterproof sealing. With your roof rack in place, attach your desired accessories, such as solar panels or a cargo box.
DIY Small Car Roof Rack
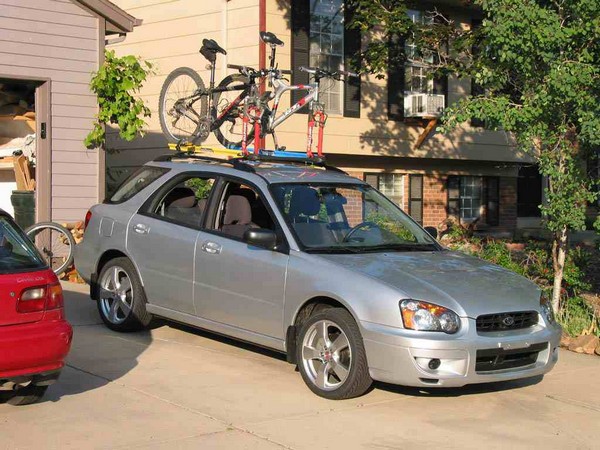
Uses: A Small Car Roof Rack is an ingenious way to expand cargo space for your hatchback or wagon-style vehicle, enabling it to carry large pieces of lumber, plywood, and even outdoor equipment safely.
Materials:
1″x5″ boards or 2x4s
Cross-pieces for frame stabilization
Straps or bungees for attachment
Ratcheting straps for secure cargo transportation
Making:
Begin constructing your DIY Small Car Roof Rack by measuring your car’s roof rails and determining the size of the wooden frame required. Create a simple yet sturdy rectangular structure using 1″x5″ boards or 2x4s to fit snuggly inside the existing roof rails. Attach cross-pieces to both ends of the rails to maintain rigidity. To secure the wooden frame to the car, use straps or bungees, attaching them tightly around the roof rails. To distribute the load evenly, ensure that the entire frame contacts the vehicle’s interior. You can use cardboard, carpet or pads glued to the wood to protect your car’s paint job if desired.
How to Build a Roof Rack to Carry Anything
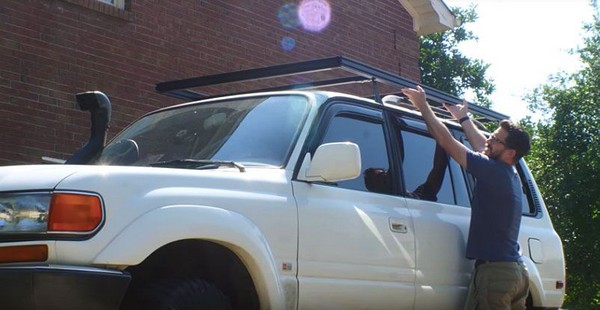
Uses: It is a robust addition to your vehicle that increases storage potential, proving invaluable for carrying anything from full-sized plywood sheets to outdoor gear like kayaks or Christmas trees! Such a rack not only adds practicality but can also enhance the aesthetic appeal of your vehicle.
Materials:
Steel or Aluminum Tubing
Carriage bolts and a fork latch
80/20 aluminum system parts
Welding equipment
Making:
First, decide on the dimensions of the rack that best suits your needs. One option is to create a one-inch square tubing framework to fit on top of factory roof racks, using carriage bolts and a fork latch for a secure fit. If you are comfortable with metal cutting and welding, consider creating a personalized design. You could use round metal tubing to forge a rack that neatly holds all your gear. Alternatively, the 80/20 aluminum system is great for those who might find welding challenging, as it simply bolts together into your desired configuration. No matter the approach, measuring accurately and ensuring perfect alignment is key.
DIY 4Runner Roof Rack
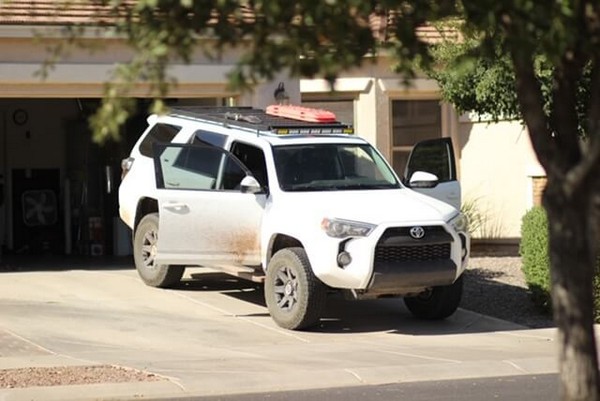
Uses: This robust addition to your 4Runner will prepare your vehicle for any adventure. It paves the way for additional practical and stylish storage on your roof. It’s a great gear holder, including large items such as paddleboards, small luggage, or camping supplies.
Materials:
1in x 2in, 16 gauge rectangular steel tubing
1-5/8-in x 13/16-in Half Slot Channel Strut
2in x 2in L channel
OEM bolts
Making:
You’ll need to create a sturdy framework using rectangular steel tubing and channel strut, which can be welded together. The slots in the strut channel make it easy to secure equipment. After assembling the frame, place it on the 4Runner’s roof to determine the perfect height and ensure the rack is parallel to the running boards. Once satisfied, secure it using spacers and OEM bolts. For the finishing touch, you could consider a bed liner finish that is robust and texture-friendly for your hands and the gear.
How To Build A Roof Rack
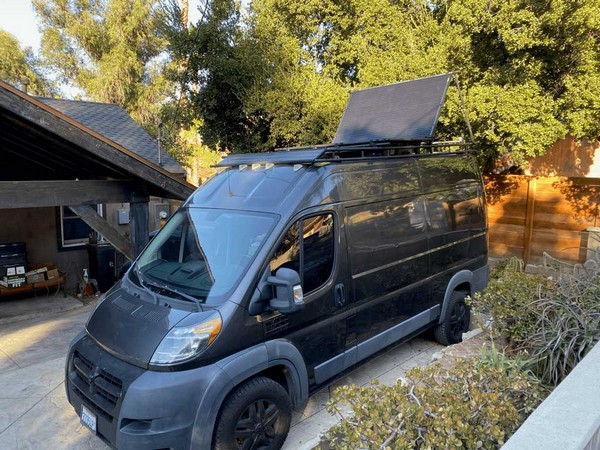
Uses: Building your own roof rack is a brilliant idea that increases the functionality of your vehicle, making way for carrying larger items that would not normally fit inside.
Materials:
Conduit or Structural Pipe
Maker Pipe Structural Pipe Fittings
Conduit Cutting Tool
5mm Allen Key
Making:
Sketching a roof rack blueprint could aid in visualizing the final product and understanding the materials needed better. The skeleton of the rack is mostly made from conduit or structural pipe, which is preferred due to its durability, strength, and cost-effectiveness. Structural pipe fittings are used to interconnect these pipes, which don’t require any fancy tools or advanced skills. After cutting and assembling the conduit pieces to form the base and rails of the rack, you can tighten the fittings while ensuring everything is aligned properly.
DIY Easy Roof Rack
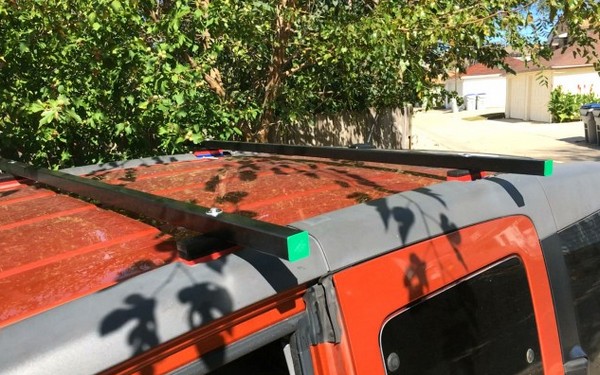
Uses: Perfect for carrying items too large to fit inside your car, it’s the ultimate accessory for those who love adventures, weekend trips, and occasional big hauls. Whether it be camping equipment, construction materials, or any other bulky items, a homemade roof rack can handle them all.
Materials:
Square steel tube (cut to the right length)
3D printed template
Scrap pieces of HDPE plastic
Bolts (preferably rust-resistant)
Grill or marine paint
Making:
Making your DIY Easy Roof Rack begins with exact measurements of your car’s roof and creating a suitable blueprint. Then, get some square steel tube cut to your desired length. Next, drill holes into scrap HDPE plastic pieces using a 3D-printed template. These pieces will serve as the supports for the rack. A single bolt secures all parts of each piece to the car, though you might want to use rust-resistant bolts to increase the lifespan of your rack. A touch of paint enhances the appeal of your DIY project, though a grill or marine paint is recommended for weather resistance.


Leave a Reply