
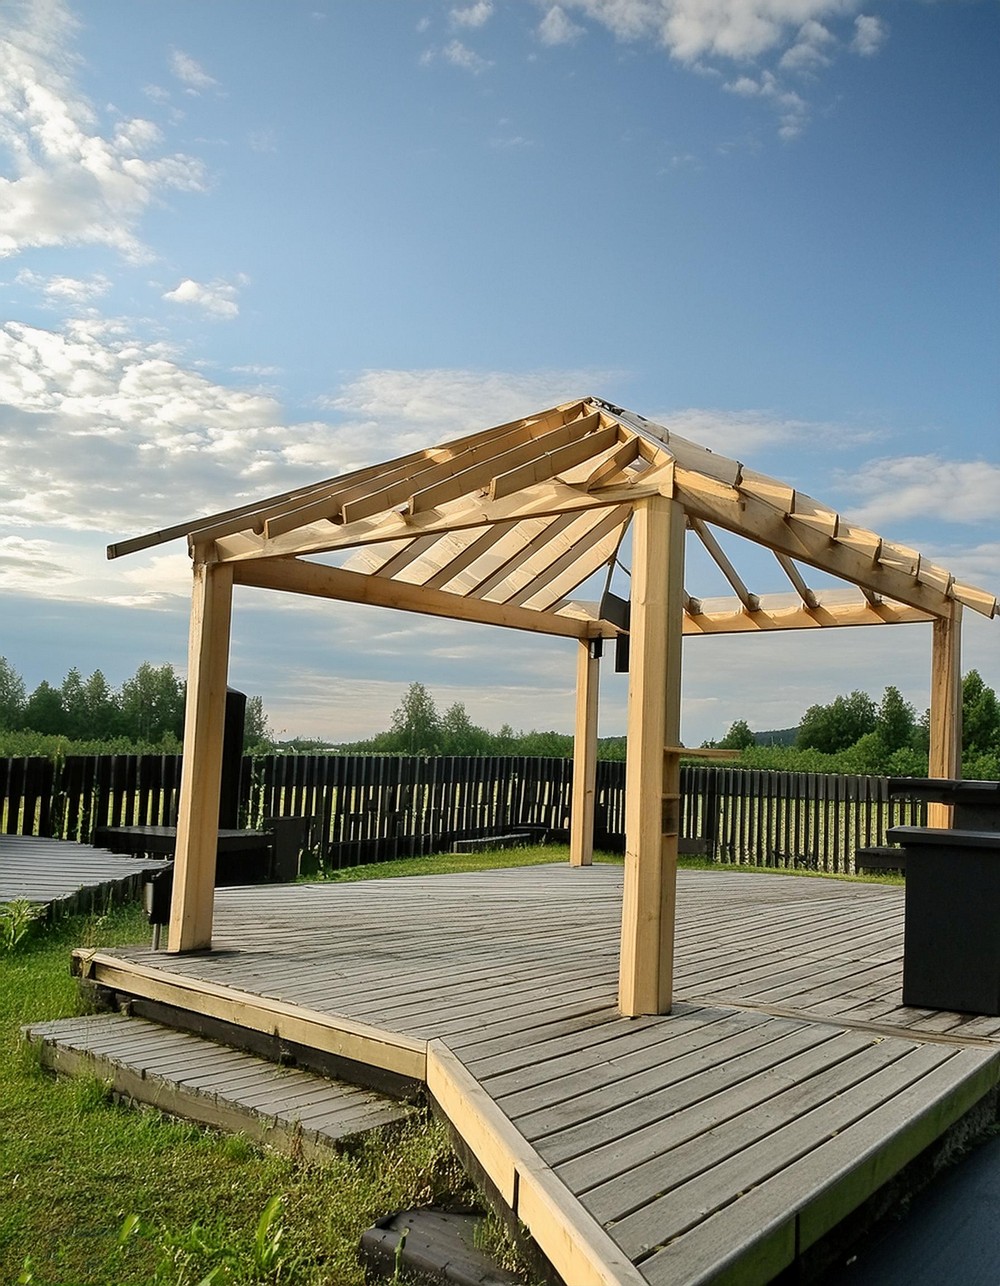
Are you ready to transform your backyard into a stunning and functional retreat? Imagine a beautifully crafted log gazebo, serving as the focal point for gatherings, or simply a peaceful spot to enjoy nature. Building your own gaze-account for cost from start to finish, using basic tools and materials.
DIY Log Gazebo Project

Materials Needed
- Logs: 160×160 mm, approximately 30 meters in total.
- Lumber:
- 5×10 cm (2×4) for roof framing, around 60-80 meters.
- 5×5 cm (2×2) for purlins, about 50-60 meters.
- Screws and wood bolts for joining and securing.
- Roofing sheets and associated hardware.
- Wood finish: Weather-resistant for protection.
- Concrete: Seven 25kg bags for the footings.
- Angle brackets: 8 pieces for stability.
- Buckets: 4 large ones, used for concrete footings.
Tools Used
- Cordless drill with various wood bits.
- Impact driver, to drive screws and bolts effectively.
- Measuring and marking tools to ensure accuracy.
- Chisels and planer to refine wood joints.
- Saws: Hand saw, chain saw, circular saw, miter saw, jig saw.
- Angle grinder for smoothing rough edges.
- Electric planer and drawknife for wood shaping.
- Logging tongs, for handling large logs.
- Protective gear: Essential for safety during construction.
- Crane with operator: For lifting heavy framework.
- Concrete mixer: To prepare concrete for footings.
Step-by-Step Construction Process
Preparing the Logs
- Cleaning: Strip bark with a drawknife and smooth the logs with an angle grinder.
- Cutting: Square off each log’s ends using a speed square and cuts made with a circular saw, finished with a hand saw.
Framing the Structure
- Joinery: Employ half-lap joinery to connect the logs at the corners, add wood glue for extra bonding, and secure with wood bolts.
Constructing the Roof
- Foundation: Begin construction on the ground for ease; ensure level and support with temporary frames.
- Ridge Beam: Fabricate a ridge beam by gluing and screwing two 2x4s together.
- Rafters: Install rafters, ensuring an appropriate pitch as agreed with the owner.
Additional Roof Details
- Hip and Jack Rafters: Measure and cut rafters to fit; assemble using screws and bolts.
- Collar Ties: Add ties for additional stability.
Establishing the Base
- Layout: Confirm squareness with string and measure diagonals.
- Footings: Place buckets, mix and pour concrete to form solid bases.
Erecting the Posts
- Treatment: Apply a wood finish to log ends to prevent moisture damage.
- Installation: Ensure posts are plumb, then secure to the concrete footings and frame using angle brackets and bolts.
Trimming and Perfecting
- Trimming Posts: Measure and cut posts to the required height for a uniform look.
- Accuracy: Check alignment with spirit levels and adjust as needed.
Final Assembly
- Crane Work: Position the roof framework using a crane; secure with large wood bolts.
- Diagonal Bracing: Add diagonals for enhanced stability; attach securely.
Roof Installation
- Purlins: Install horizontally across rafters, maintaining proper spacing.
- Covering: Apply roof sheets, taking care to nail through the high seam to prevent leaks.
Reflection and Review
- Inspection: Review the entire structure for any adjustments or reinforcements needed.
- Celebration: Take a moment to admire the craftsmanship and envision the enjoyment it will bring.
By following these steps and using the listed materials and tools, you can create a durable and attractive log gaze considering your landscape.

Leave a Reply