
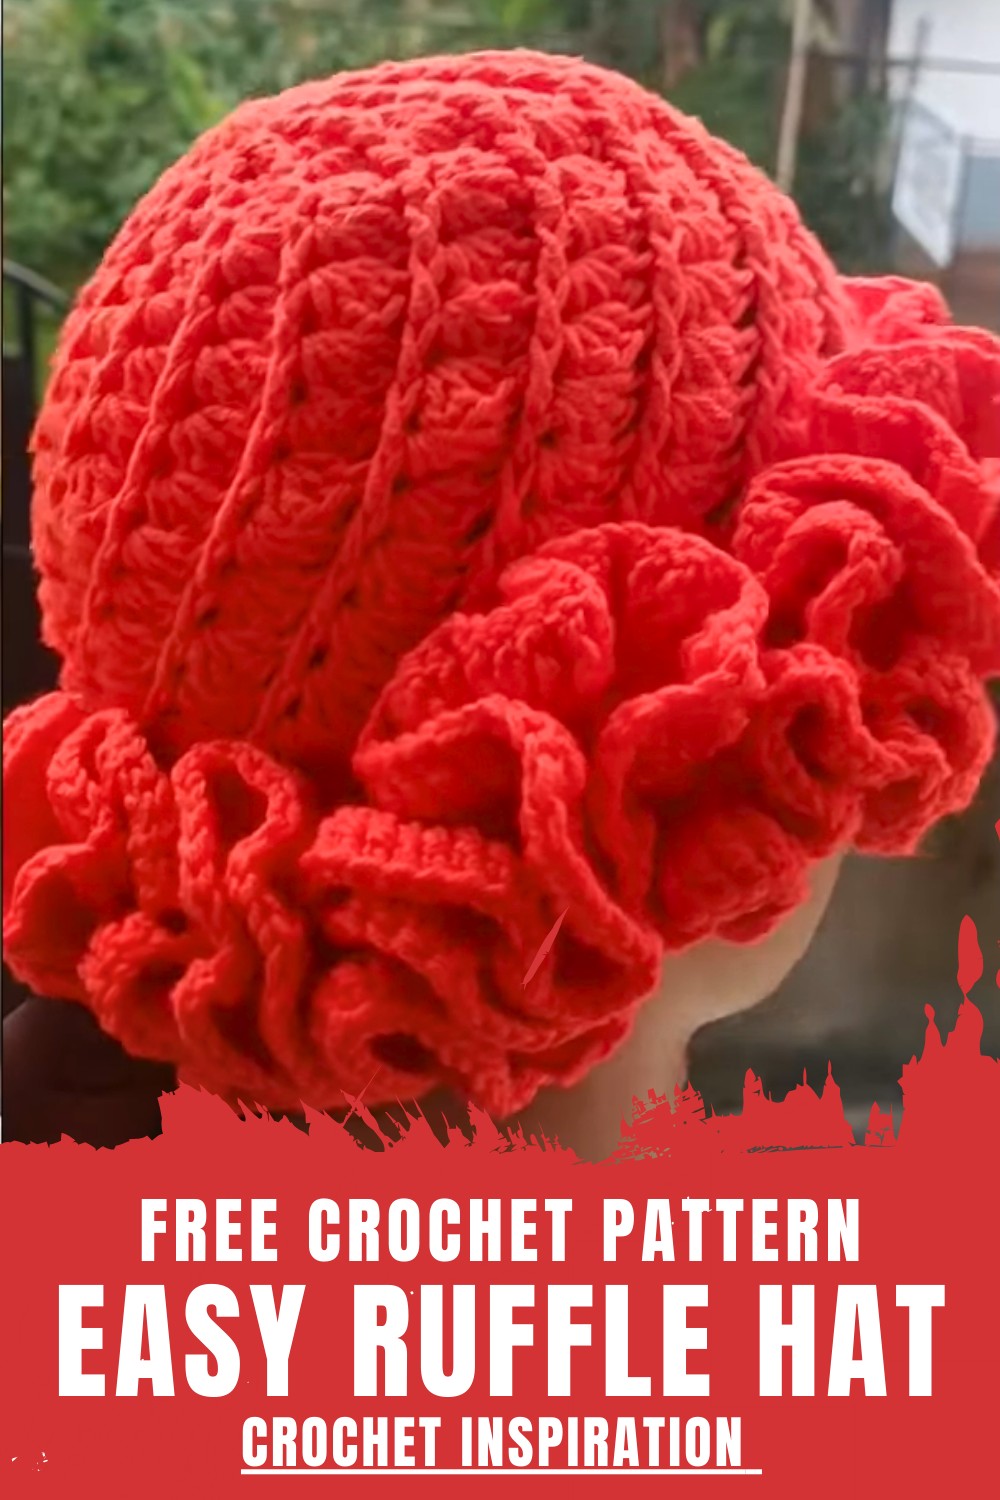
Slip on a pop of style with free crochet ruffle hat pattern, and see how you can whip up cozy headwear full of playful charm for everyone.
Soft loops joining together form an open pattern that lets light dance through, giving a lovely touch to your everyday bag. With a crochet mesh bag pattern, even the simplest outfit starts to look special because of the fresh, airy look it offers. Take one along when shopping for groceries, gathering toys at home, or even packing for a picnic—they’re spacious, strong, and light enough not to weigh you down.
Stunning Free Crochet Ruffle Hat Pattern You’ll Love
Gentle to your hands and easy to fold away, this bag don’t just sit on shelves but join your daily life, repeating their usefulness over and over. The see-through style isn’t only nice to look at; it lets you easily spot what you have inside. Such a pattern turns ordinary threads into a handy friend, blending beauty with function so well that every trip outside feels a little brighter and easier.
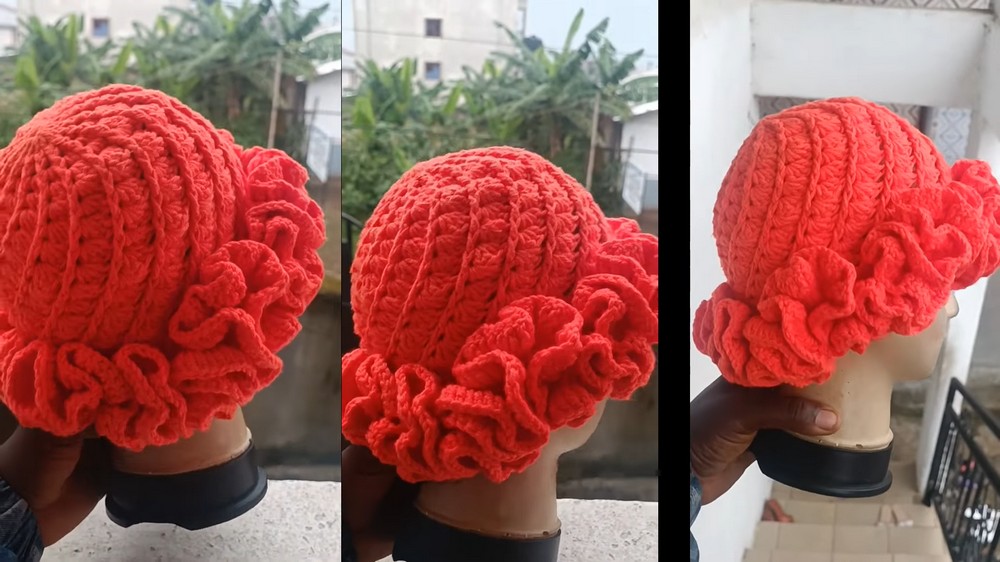
Spiral Ruffle Hat Crochet Pattern (Updated Version)
Materials
- Yarn: 5 skeins 50g each (acrylic, 5-ply recommended; adjust quantity as needed for your head size)
- Crochet hook: 4.5 mm (US 7)
- Scissors
- Measuring tape
- Yarn needle (for weaving in ends, optional)
Key Abbreviations (US Crochet Terms)
- ch – chain
- sl st – slip stitch
- sc – single crochet
- dc – double crochet
- tr – treble (triple) crochet
- fpdc – front post double crochet
- fpsc – front post single crochet
- st(s) – stitch(es)
- rnd – round
Special Notes
- All increases are made in the spaces between groupings, not into the actual stitch tops, unless specified.
- Use front post stitches to create texture and separation for the ruffle rounds.
- The hat will curl as you reach the ruffle section—this is intentional for the “spiral ruffle” look.
- Hat is easily adjustable. Stretch your work slightly when measuring. Try on for fit before starting ruffles.
Pattern
Crown of Hat
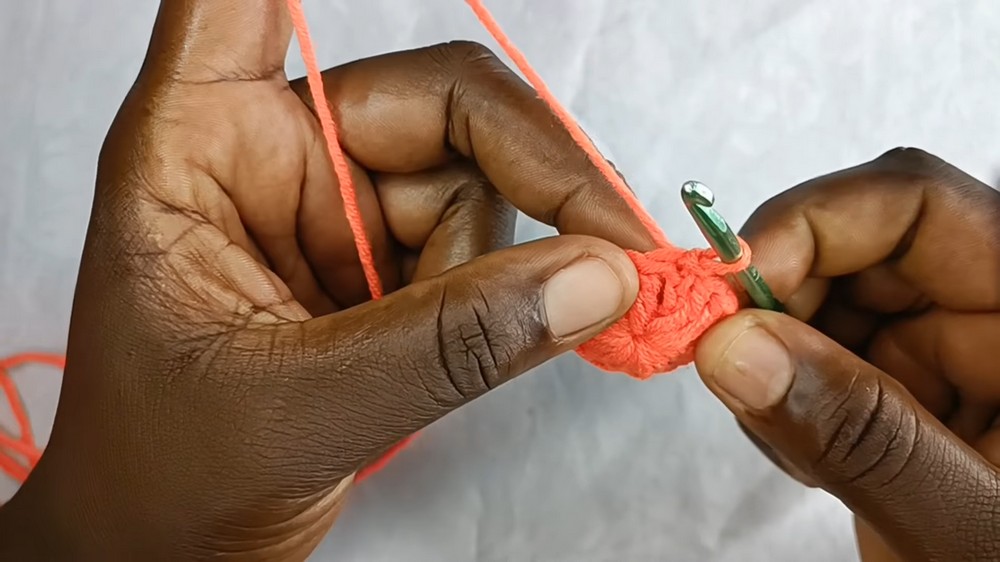
Rnd 1:
Make a slip knot, then ch 4.
Sl st to the first chain to form a ring.
Ch 3 (counts as dc), work 14 dc into the ring (15 dc total including initial ch-3).
Sl st to top of starting ch-3 to join.
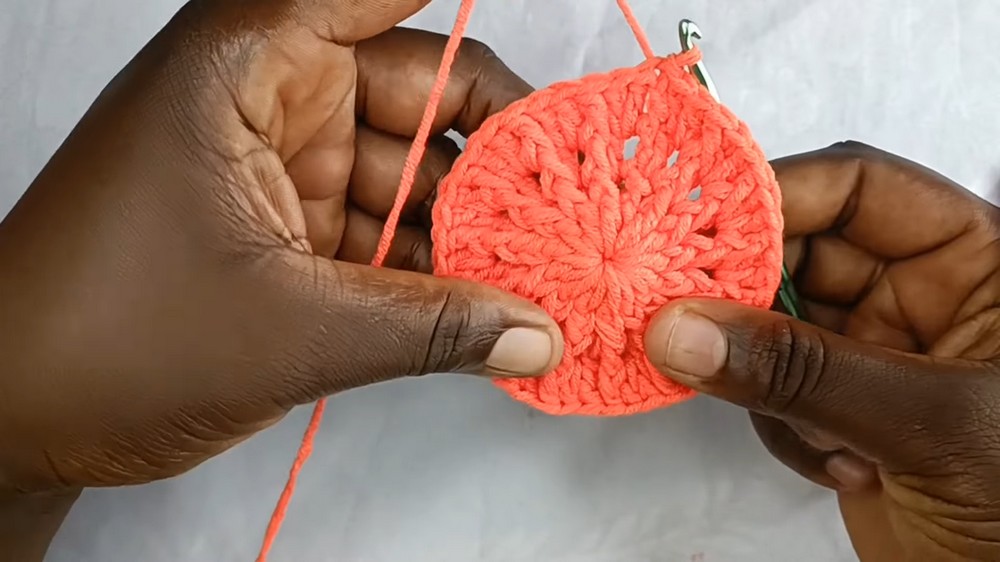
Rnd 2:
Optional: Work over your yarn tail to secure it.
Ch 2 (does not count as a stitch, just for height).
Fpdc (front post double crochet) around each dc of previous rnd (insert hook from back to front around post of dc and work dc as normal).
After the last fpdc, sl st to the top of ch-2 to join.
Rnd 3:
Fpsc (front post single crochet) in same st as join.
Ch 2.
Dc in the first space between posts (place dc between posts, not in the stitch top).
Alternate:
- Fpdc around next post,
- Dc in next space between posts.
Repeat from * to end. Sl st to top of ch-2 to join.
Rnd 4:
Fpsc in same st as join.
Ch 2.
2 dc in first space between posts (between previous rnd’s fpsc and dc).
Fpdc around next post.
2 dc in next space between posts (between fpdc and dc from previous rnd).
Continue – 2 dc in each space, fpdc in next post all around.
Sl st to top of ch-2 to join.
Rnd 5:
Fpdc in same st as join.
Ch 2.
3 dc in first space between posts.
Fpdc around next post.
3 dc in next space between posts.
Continue – 3 dc in each space, fpdc in each post all around.
Sl st to top of ch-2 to join.
Rnd 6:
Fpsc in same st as join.
Ch 2.
4 dc in first space between posts.
Fpdc around next post.
4 dc in next space between posts.
Repeat – 4 dc in each space, fpdc in each post all around.
Sl st to top of ch-2 to join.
Rnd 7 (Repeat Rnd 6):
Continue as above:
Begin with fpsc, ch 2.
4 dc in each space, fpdc in each post around.
Sl st to join.
Keep working in pattern (no increases) until your hat measures about 6.5-7 inches from center (slightly stretched). Try on the hat for fit.
Body of Hat
- Continue working repeats of previous row with 4 dc in each space, fpdc in each post, no increases, until the hat reaches desired length (approx. 7 inches or more if you want a deeper hat). The fabric will start to curve/curl as you work further repeats.
- Tip: At this point, you will have used about 2 skeins (100 g) of yarn.
Transition Round Before Ruffles
Next Rnd:
Work 1 sc into every stitch around, including both the tops of dc and fpdc.
Sl st to join.
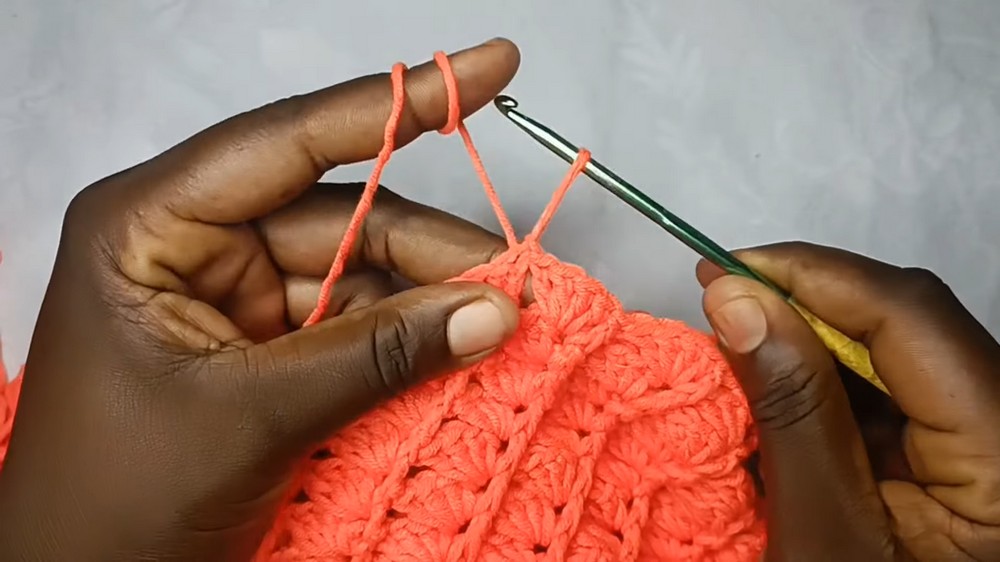
First Ruffle Round
Ch 4 (counts as tr),
Work 4 tr into the same stitch (5 tr total in one st).
In next st, 5 tr in same st.
Repeat 5 tr in each stitch around.
Sl st to join.
Note: Hat will look very ruffled/thick.
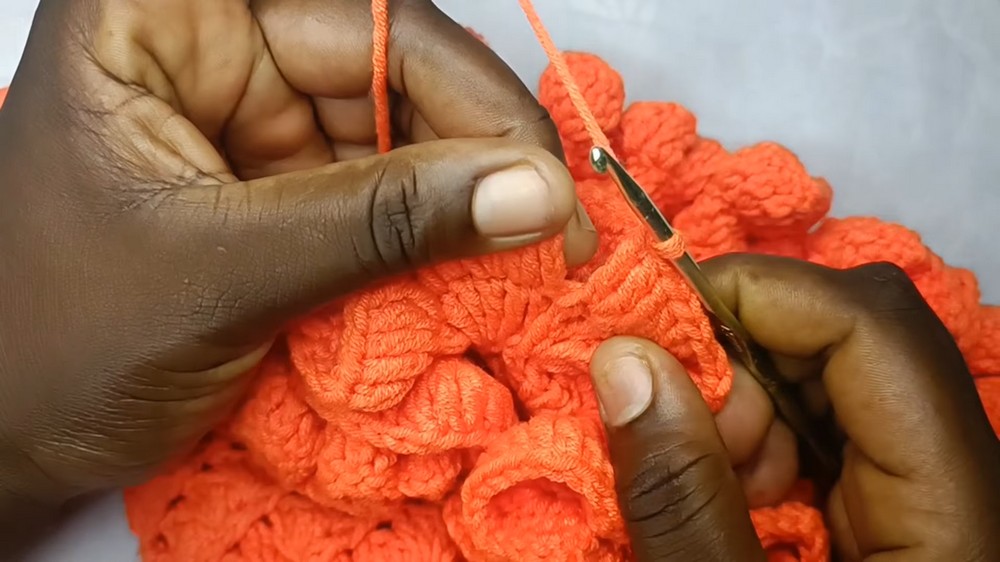
Second Ruffle Round
Ch 4,
2 tr in same st (total 3 tr in first st),
In the next st, 3 tr in same st.
Repeat 3 tr in each stitch around for a moderately thick ruffle.
Sl st to join.
If you want even thicker ruffles, make 4 tr in each st.
Finishing
- Fasten off, leaving a tail.
- Weave in all ends using a yarn needle.
- Block lightly if required for the ruffles to lay as desired.
Conclusion
This beautiful spiral ruffle hat features dramatic, thick ruffles and is constructed with textured front post stitch techniques. The hat is very stretchy and can be easily customized by increasing or decreasing rounds before the ruffle. Perfect for statement winter wear or gifts.
Pattern Corrections
- If your hat is puckering or too tight, check the stitch count or try a larger hook.
- If using lighter weight yarn, increase starting ring to 19 dc for a fuller crown.
- Always work dc/tr into the spaces between stitch groups—not in the top of stitches except as noted.
Tips
- For best results, check fit after reaching body height (pre-ruffle).
- Try on as you go to adjust size or depth.
- Use a stitch marker to identify the beginning of your rounds.
- The ruffles look best with high stitch density. Stick to 5 tr for fullness, adjust for lighter or less fullness if desired.
Leave a Reply