
Showcase a stylish look with this crochet halter neck top pattern that’s perfect for casual outings while pairing with jeans skirt or shorts.

Feel elegant and stylish with a unique top that’s perfect for sunny days and relaxed outings. This piece stands out with its lightweight design and delicate patterns, making it comfortable and breathable for warm weather. Pair it effortlessly with skirts, shorts, or jeans to create a fresh and versatile look for any occasion. The halter-style neck adds a modern and flattering touch that enhances your overall charm.
Timeless Crochet Halter Neck Top Pattern That Stands Out
Whether you’re enjoying a day at the beach, a casual picnic, or an evening with friends, this crochet halter neck top pattern offers a timeless fashion statement that blends simplicity with style. Choosing your favorite colors or textures makes it even more personal and special, ensuring you’ll have a piece that reflects your taste. It’s a great choice for anyone looking to add beauty and flair to their wardrobe.

Materials Needed
- Yarn:
- 100% Cotton Yarn, Size 6 (recommended for durable and comfortable wear).
- Color: White (or any color of your choice).
- Hook: 3.5mm crochet hook.
- Optional Supplies:
- Scissors for cutting threads.
- Tapestry/Upolstery Needle for sewing and weaving ends.
- Polypropylene Yarn (optional for finishing).
- Lighter or silicone glue for additional thread security.
Key Abbreviations
(US Crochet Terminology)
- MR: Magic Ring.
- ch: Chain.
- sc: Single Crochet.
- dc: Double Crochet.
- sl st: Slip Stitch.
- sp: Space.
Special Notes
- Adjust your tension carefully. If your work appears too loose, switch to a smaller hook size. If it appears too tight, increase your hook size.
- The pattern is written for size M with directions to customize for other sizes.
- Each row is mirrored symmetrically for a balanced look.
Pattern Instructions
Step 1: Create the Base with Magic Ring
- Start with a Magic Ring:
- Create an “X” shape with the thread over your fingers.
- Pull the thread and secure it to form a loop.
- Insert the hook into the loop, yarn over, and pull up to form a chain stitch.
- Foundation:
- Work 6 dc into the Magic Ring.
- Ch 2, work 6 more dc into the same ring. (You will have a mirror effect: 6 + ch-2 + 6).
- Pull the Magic Ring’s tail to close the circle tightly.
- Join the Round:
- Sl st in the top of the first dc to join.

Step 2: Establish the Initial Shape
- Row 1:
- Ch 1, work 1 sc in the first stitch to secure and straighten your work.
- Work 1 dc into each dc of the previous round.
- In the ch-2 sp, make a fan: 2 dc, ch 2, 2 dc.
- Continue working dc in each dc until the next ch-2 sp.
- In the last ch-2 sp, repeat the fan.
- Turn your work and repeat the pattern to keep it symmetrical.
Step 3: Begin Increases
- Row 2 and Onward (Increase Rows):
- Ch 1, work 1 sc in the first stitch, continue with dc in each dc from the previous row.
- In each ch-2 sp (fan space), work: 2 dc, ch 2, 2 dc to create an increase.
- Continue repeating this pattern until the desired number of rows for your size is reached.
- Row Count Guide:
- Size M (Medium): 16 Rows.
- Adjust the number of rows as follows:
- Size S: 28cm width (approx. 12-14 rows).
- Size L: 32cm width (approx. 18-20 rows).


Step 4: Side Edging
- Adding Edges to the Body:
- Begin on the right side of your work. Start by working 2 sc into the side of each dc stitch lying horizontally along the edges of your crop top.
- End the row with a tight sc to maintain a straight edge.
- If the edge pulls or bunches, adjust by adding or reducing stitches as necessary.
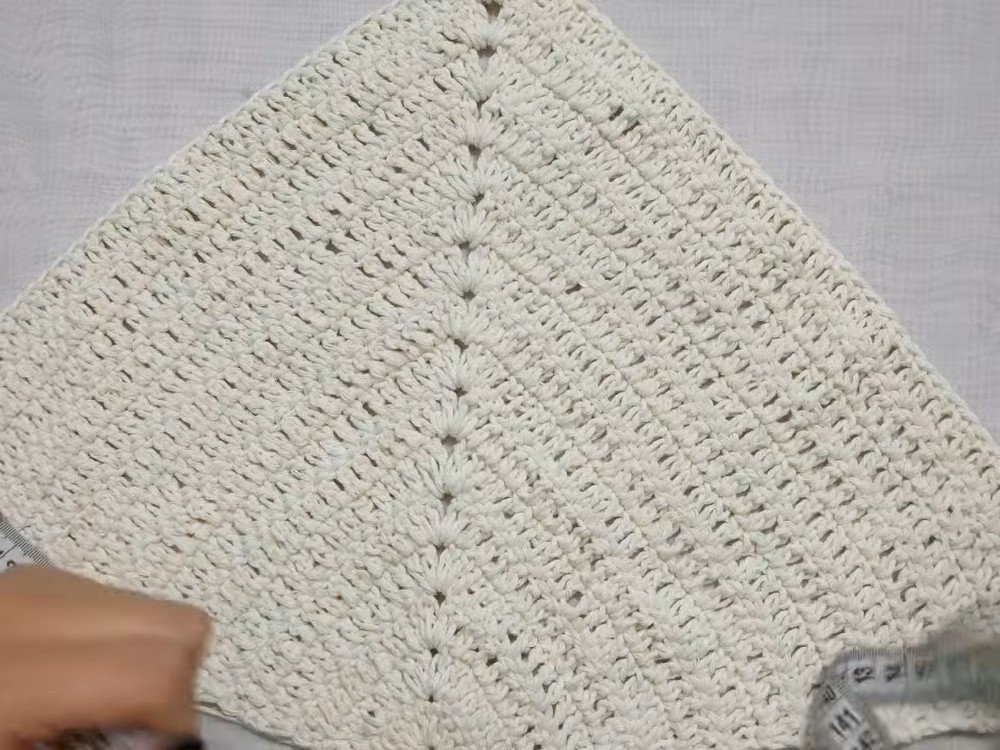
Step 5: Bottom Trim with Tilted Stitch
- Begin Bottom Edging:
- Working on the bottom base, ch 3, yarn over twice (to prepare for a triple stitch).
- Insert the hook into the same sp and work 3 treble crochet stitches.
- Count 3 stitches and work 1 sc in the 4th stitch.
- Repeat across the bottom edge, creating a tilted stitch pattern.
- Middle and End Adjustments:
- When you reach the center, work 2 sc to balance the pattern.
- Continue the tilted stitch sequence along the other side.
- If adjustments are needed to make the pattern align, skip or add stitches as required.
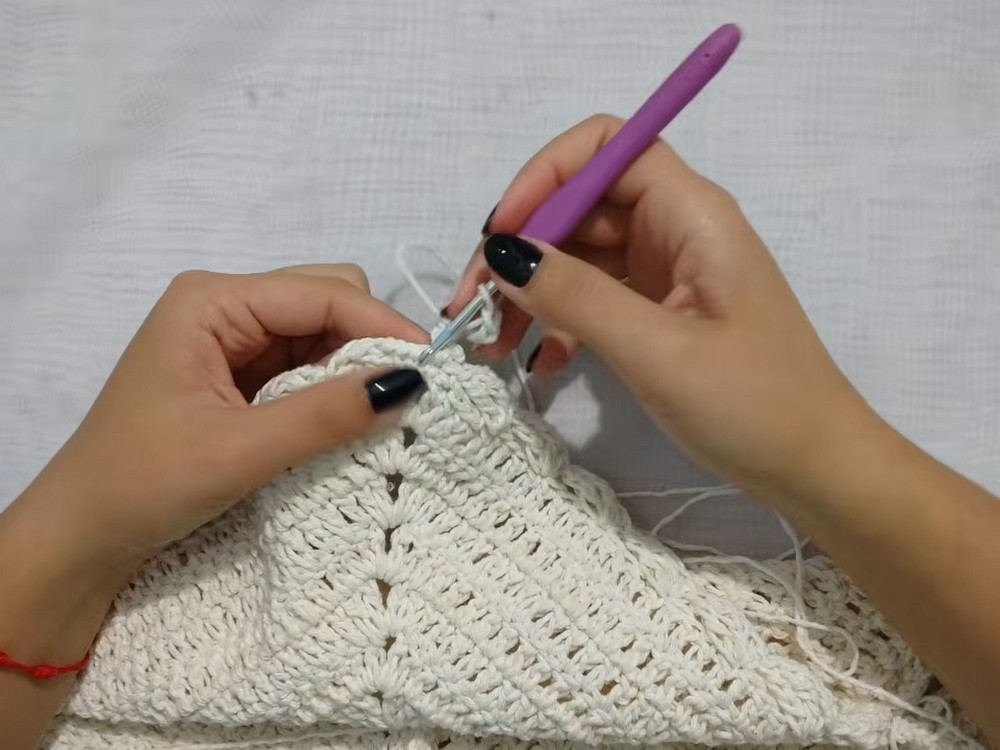
Step 6: Straps – Top Ties
- Straps:
- At the top corners of the crop top, attach the yarn to the first sc of the corner. Ch 60 (for approx. 30cm length).
- Turn your chain and sl st into each chain stitch for a finished look.
- Attach the strap back to the starting sc with a sl st.
- Work Across the Top Edge:
- Work 1 sc into each stitch across the neckline.
- Repeat the strap process on the opposite corner.
Step 7: Neck Tie
- Neckline Tie:
- At the top of the back neckline, attach the yarn to the middle sc.
- Ch 60 for one tie, then return with sl sts along the chain.
- Attach with a sl st to the sc, and cut yarn.
- Repeat for the second tie on the opposite side of the neckline.

Step 8: Final Finishes
- Secure End Threads:
- Use a tapestry needle to weave in all loose ends cleanly.
- For extra durability, use silicone glue or melt thread ends with a lighter.
- Block the Piece:
- Lightly block to shape the garment and even out stitches.
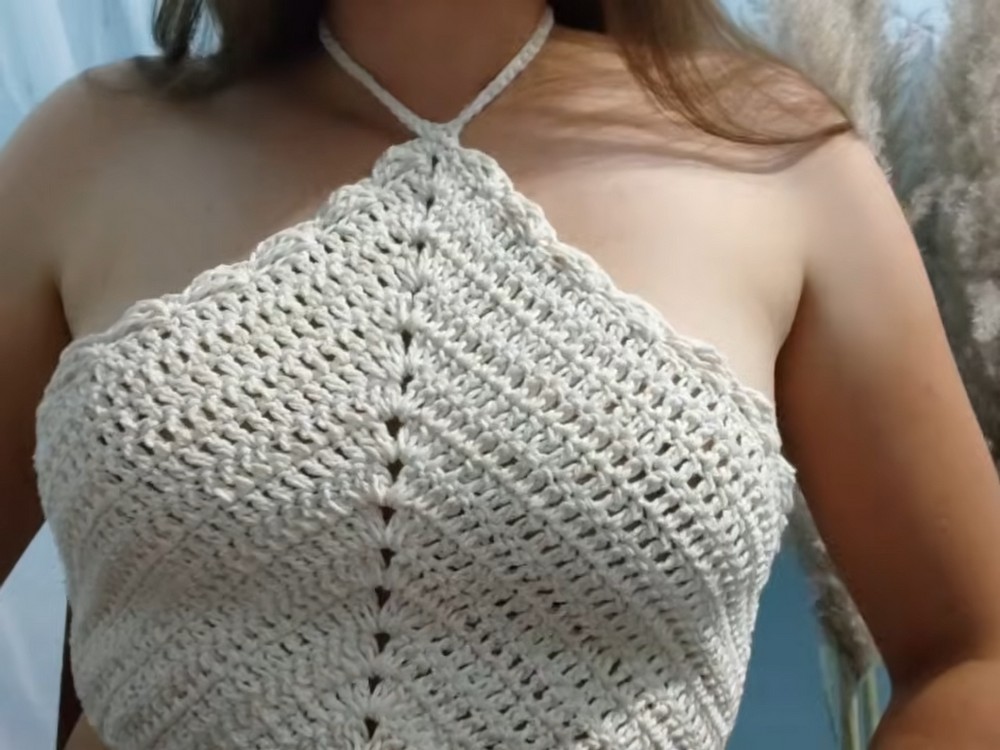
Conclusion
Congratulations on completing your gorgeous tie-front crop top! This lightweight, customized top is ideal for warm weather, styled casually with skirts or shorts.
Pattern Corrections
- Ensure proper practice with the Magic Ring to avoid loose centers.
- Maintain consistent tension for structural integrity.
Tips
- Blocking:
Light blocking is recommended to correct any pulling at the edges and ensure symmetry of the piece. - Customization:
- Adjust the strap length as needed for a snug or loose tie.
- You can add more rows for additional length or remove rows for a cropped look.
- Secure Ends:
Use silicone glue or a melted thread finish for extra durability, especially for selling or gifting the item.

Leave a Reply