
Spruce up your wardrobe with a cozy crochet ribbon tie cardigan that’s stylish, comfy, and perfect for everyday looks or special occasions.
Tired of ordinary store-bought cardigans that lack personality? This free crochet ribbon tie cardigan pattern brings elegance and individuality to your wardrobe. The soft, flowy design ensures a comfortable fit, while the delicate ribbon tie adds a charming, feminine touch that sets it apart. Its intricate stitchwork showcases the beauty of handmade craftsmanship, giving it a timeless appeal.
Crochet Ribbon Tie Cardigan for Personalized Style
Perfect for cool evenings or adding flair to everyday outfits, this cardigan provides both warmth and style without sacrificing comfort. Its customizable design lets you choose colors and ribbon styles that reflect your unique taste, making it a versatile and eye-catching wardrobe essential. Whether you’re at home or stepping out, this cardigan is a practical yet elegant solution for effortless fashion. Easy to crochet, it’s more than a piece of clothing—it’s a delightful blending of skill, comfort, and creativity that you’ll love wearing.
Crochet Cardigan Pattern
Materials Required
- Yarn: Any four-weight yarn (e.g., 100% acrylic Big Twist yarn)
- Quantity: Refer to your size; Small/Extra Small is demonstrated.
- Color: Magenta (or your choice).
- Crochet Hooks:
- Size 6 mm
- Size 5.5 mm
- Velvet Ribbon (Approximately 40 inches long for tying at the neckline).
- Stitch Markers: To help secure panels and sleeves while sewing.
- Scissors: For cutting yarn.
- Darning Needle: For weaving in ends and sewing panels.
- Measuring Tape: For accuracy while measuring body size and panel lengths.
Gauge
- One Mesh Row and Two Double Crochet Rows (3-row repeat) = Approximately 4″ x 4″.
- Adjust your hook or tension to achieve the same gauge.
Finished Size
The default size in this pattern is Small/Extra Small:
- Back Panel: 20″ high, 21″ wide.
- Front Panels: Adjusts neckline; fully customizable to size.
- Sleeve Width: 7″ (folded).
Finished cardigan sizes can be adjusted by adding/reducing rows or foundation chains.
Tips for Success
- Customization: Add more rows for larger sizes, fewer rows for smaller sizes.
- Odd Foundation Chains: Ensure the foundation chain is an odd number for seamless pattern success.
- Neckline Decreases: Carefully follow instructions during decreases to maintain symmetry.
- Panel Assembly: Use stitch markers to secure edges while sewing panels together.
- Trim Options: Substitute single crochet trim with ribbed or textured trims for customization.
Pattern Instructions
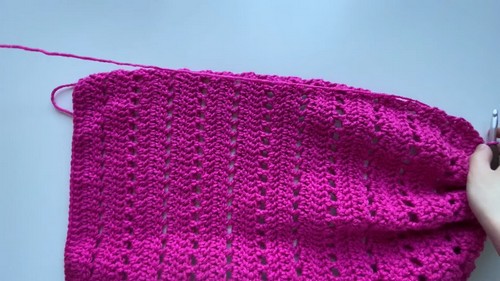
The cardigan involves creating 5 panels: 1 Back Panel, 2 Front Panels, 2 Sleeves, and trim work to finish.
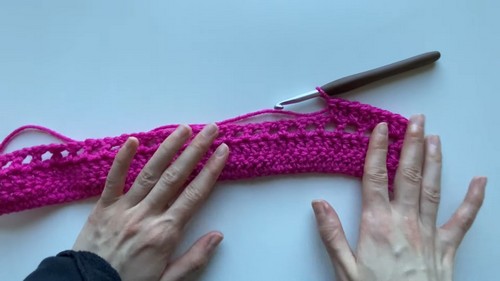
Panel Construction
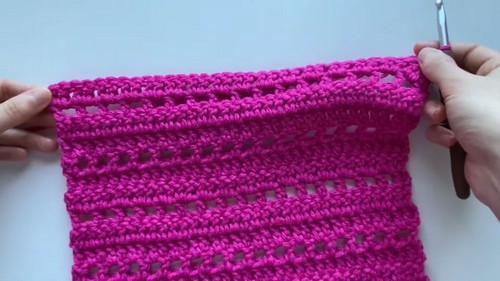
Each panel follows a 3-row repeat:
- Row 1: Double Crochet (DC) across.
- Row 2: Double Crochet (DC) across.
- Row 3: Filet Row (Mesh) — Alternate DC with a chain space (ch 1, skip 1).
Back Panel
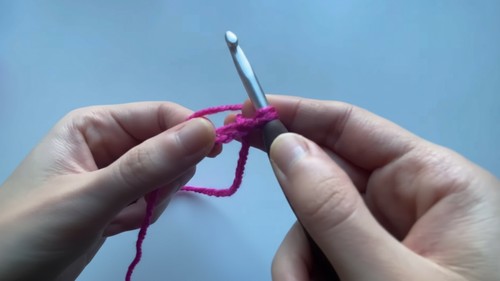
- Foundation Chain: Chain (ch) 73 using a 6 mm hook.
- Row 1: Skip 2 chains from the hook, 1 DC into the 3rd chain. Continue 1 DC in each remaining chain across (71 stitches). Ch 2, turn.
- Rows 2-3: Repeat the pattern. For Row 3 (mesh row): 1 DC, ch 1, skip 1 stitch. Continue alternating DC and chain spaces across the row. End with a DC.
- Repeat Rows 1–3: Continue until you have 38 rows (or desired dimensions).
- Fasten Off: Leave a long tail to sew the panel together later.

Front Panels
Each front panel adjusts to leave space for the neckline. You will create two identical panels.
- Foundation Chain: Chain (ch) 35.
- Follow the Row Pattern from the Back Panel (Rows 1–3). Work a total of 31 rows.
Neckline Decreases
To shape the neckline:
- Start decreasing from Row 32.
- Row 32: Work up to your marked neckline. Perform a double crochet decrease (DC2tog) at the last two stitches in each row.
- Continue the 3-row repeat, reducing four stitches gradually per row until you reach Row 38, which should have 23 stitches.
Repeat the front panel instructions to create the second front panel.
Sleeves
- Foundation Chain: Chain (ch) 53.
- Work the 3-row repeat (Rows 1–3) for 35 rows. Adjust the number of rows for a longer or shorter sleeve.
- Cuff Rows:
- Row 36: Work single crochet (SC) decreases across the row to reduce the stitch count by half (down to 26 stitches).
- Row 37: Do another row of SC decreases to further reduce the cuff to 13 stitches.
- Fasten Off: Leave a long tail for sewing the sleeve.
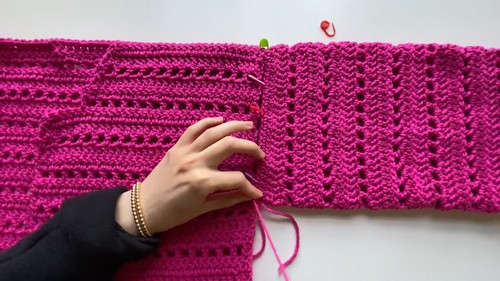
Assembly
- Lay the back panel flat, with the right side facing up. Place the front panels on top, wrong sides out, aligning edges.
- Use stitch markers to secure the edges. Sew the shoulders and sides together using a whip stitch or your preferred seaming method.
- Fold the sleeves in half. Align the edges to the armholes and use stitch markers to secure. Sew in place.
- Weave in all loose yarn ends using a darning needle.
Trim
- Attach the 5.5 mm hook to the bottom corner of the cardigan.
- Work single crochets around the entire cardigan edge (including neckline).
- Add 3 single crochets at each corner for smooth edges.
- Slip stitch into the first stitch to join, then fasten off.
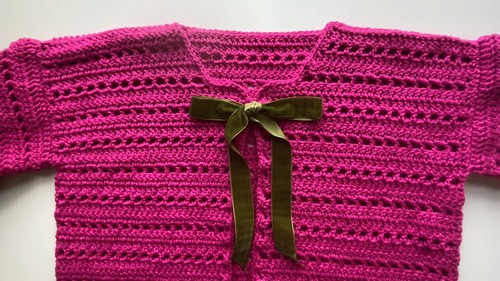
Adding Ribbon
- Thread a 40-inch velvet ribbon through the neckline. Weave it in and out evenly on both front panels’ top edges, close to the trim.
- Tie the ribbon into a secure decorative bow at the front.
Special Techniques
- Decreasing (DC2tog): Yarn over, insert hook into the next stitch, pull up a loop, yarn over, pull through 2 loops (repeat this step into the next stitch), yarn over, pull through all 3 loops on the hook.
- Seaming: Use a whip stitch by aligning two edges, sewing the loops closest together with a darning needle.
Conclusion & Final Look
Your crochet cardigan is now complete! The mesh pattern combined with sturdy double crochet rows ensures a breathable yet warm design, perfect for chilly weather. The velvet ribbon adds a charming touch to the neckline, allowing for easy adjustments and a polished finish.
Leave a Reply