
Sprinkle charm into your daily routine with free Crochet Rose Coin Purse Pattern that features beautiful texture and a lovely floral accent.
Tiny petals wrap around a sturdy pouch giving it a flower-like look that stands out in any bag or pocket. The Crochet Rose Coin Purse pattern helps you build a sweet and useful little purse that’s perfect for holding coins small keepsakes or even keys. Each piece is shaped like a soft rose making every purse one of a kind and easy to spot. The round base and snug closure help keep everything inside safe while the playful design brings a smile with every use.
Free Pattern: Crochet Rose Coin Purse
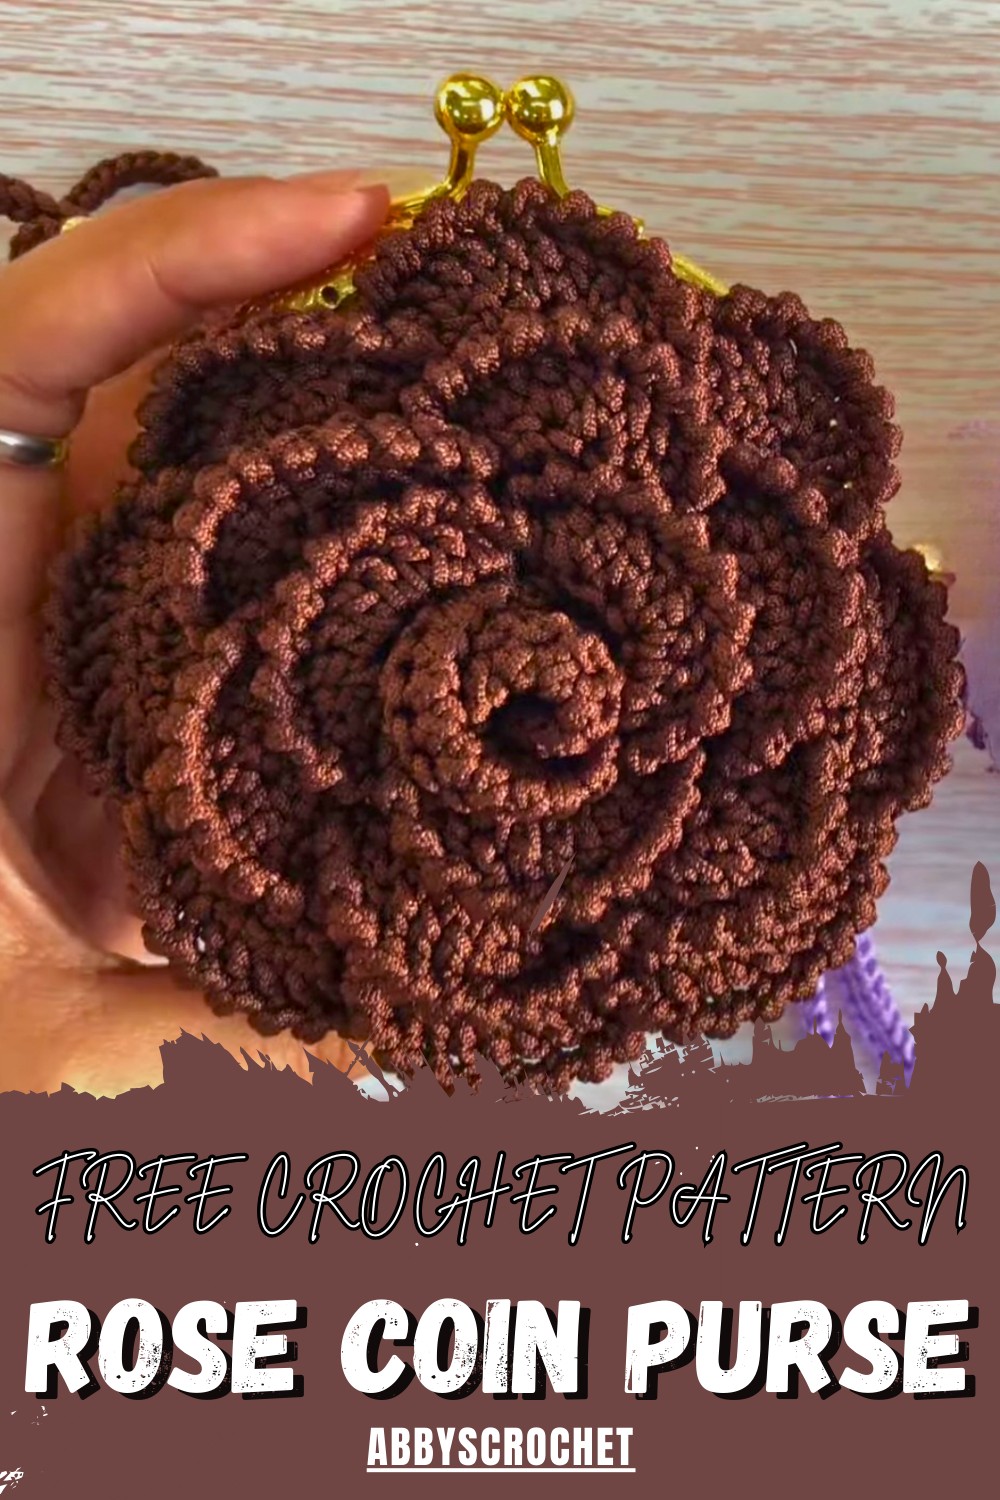
Handy for market trips or as a special holder for little treasures this item makes life simpler and adds a bit of beauty to every day. The strong yarn and pretty rose shape turn a simple purse into something eye-catching and practical at once. Carrying it feels good in your hand and always draws happy attention from others.

Crochet Rose— Step-by-Step Pattern
Materials List
- Yarn: Any lightweight cotton or acrylic yarn for flowers (recommended: mercerized cotton or fine yarn)
- Hook: 2.0 mm crochet hook (adjust for yarn weight)
- Scissors
- Tapestry Needle (for weaving/locking ends)
- Optional: Craft glue (e.g., E7000) if you want the petals to remain open and firm
Key Abbreviations (US Terms)
- ch: chain
- sl st: slip stitch
- sc: single crochet
- dc: double crochet
- tr: treble crochet
- inc: increase (2 sts in same stitch/loop)
- st(s): stitch(es)
- rep: repeat
Special Notes
- The flower is made in four rounds of repeating petal groups, with each round worked into unworked loops of the base.
- The petal rounds are layered and finished with a “crab stitch” (reverse single crochet) border for detail.
- Petal counts and skip/attachment points increase per round for natural shape.
- For a firmer flower, use glue on petals after finishing.
- The petal motif is joined by slip stitching and chained starts; skip counts and petal group count vary by round—see details below.
Pattern Instructions
Base Preparation
- You should already have a round flower base (as described in prior tutorial):
1st round: 12 loops are available around the center (these are your working loops for petals).
If making from scratch: Make 4–5 rounds in the round for a dense center, ending with 12 visible front loops.
First Petal Round (2 Petals)
- Join yarn in any of the 12 outer front loops (insert hook from inside to out for a neat finish).
- Petal 1:
- Ch 2 (counts as first dc).
- In the same loop, work 2 dc (3 dc total).
- In next loop, work 3 dc.
- Turn your work.
- Ch 2, in same space, dc.
- In the next five sts/holes, work 2 dc in each (increase 5×), finishing with 12 dc across the petal.
- Skip next 4 loops, sl st in the 5th loop to anchor the petal.
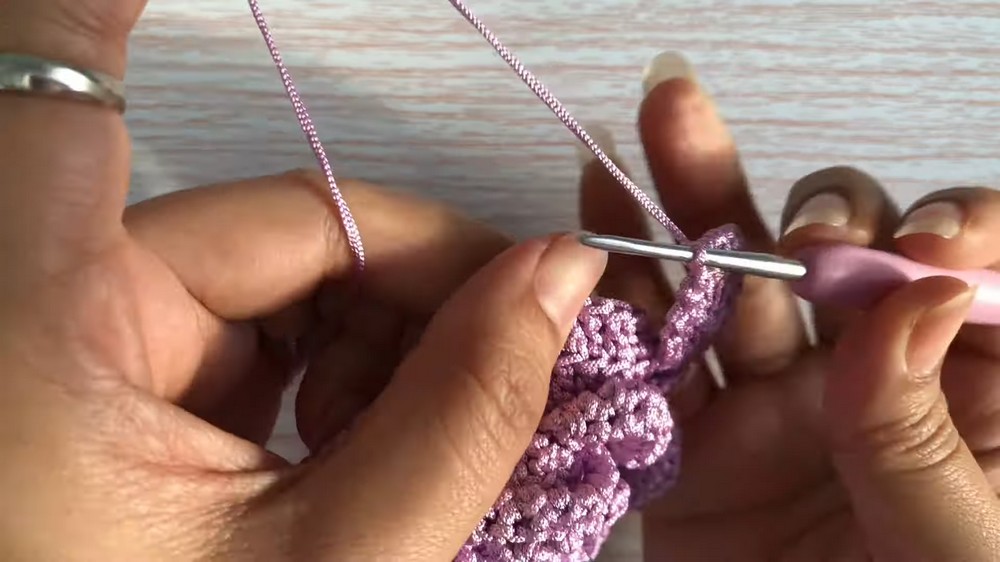
- Crab Stitch Border: Ch 1, work 12 reverse single crochet (crab stitch) across the petal edge, turn, then skip 4 sts, sl st to anchor in base.
- Rep the above steps to make the second petal.
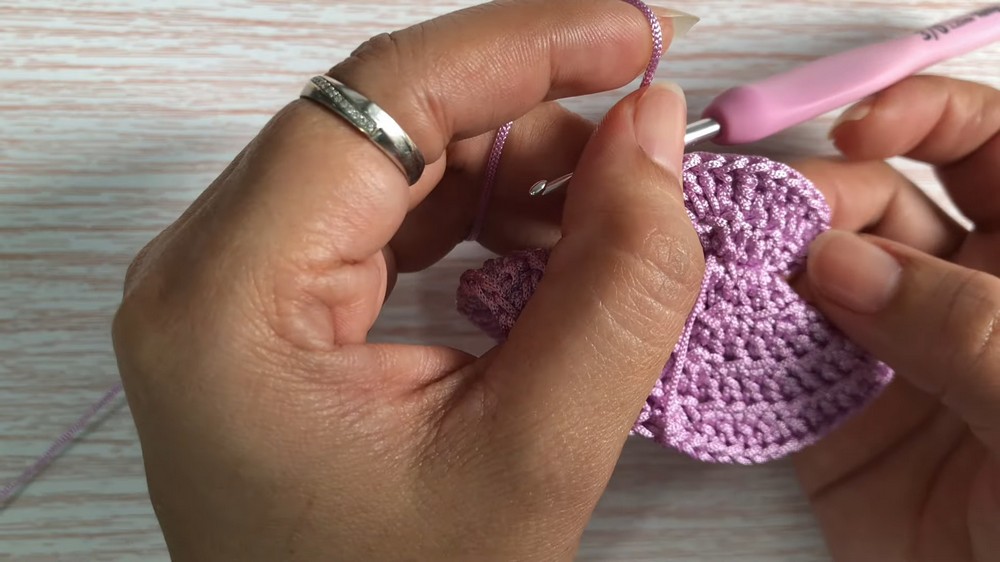
Second Petal Round (3 Petals)
- Join yarn in nearest available loop after first round’s petals.
- For each petal:
- Ch 2, in same loop, 2 dc (3 dc total).
- In next loop, 3 dc (6 dc in row).
- Turn, ch 2, dc in same, then work 2 dc in each of next 5 sts/holes (total 12 dc).
- Skip next 6 loops, sl st to anchor on base (may be between or in front of a petal).
- Crab stitch (reverse sc) 12 sts for the edge, as before. Turn.
- Repeat for all 3 petals.
- For slip stitch anchors in this/next rounds, insert the hook in front of each existing petal (not behind), to keep new petals layered.
Third Petal Round (6 Petals)
- Join yarn in next available loop.
- For each petal:
- Ch 2, in same loop, 2 dc (3 dc total).
- In next loop, 3 dc (6 dc total).
- Turn, ch 2, dc in same, 2 dc in each of next 5 sts (12 dc).
- Skip 4 loops, sl st in the 5th loop in front of a petal.
- Crab stitch (reverse sc) 12 sts along petal edge, turn, skip 4, sl st to anchor in front.
- Repeat for a total of 6 petals.
- For the last petal of this round, sl st anchor at back of the first petal.
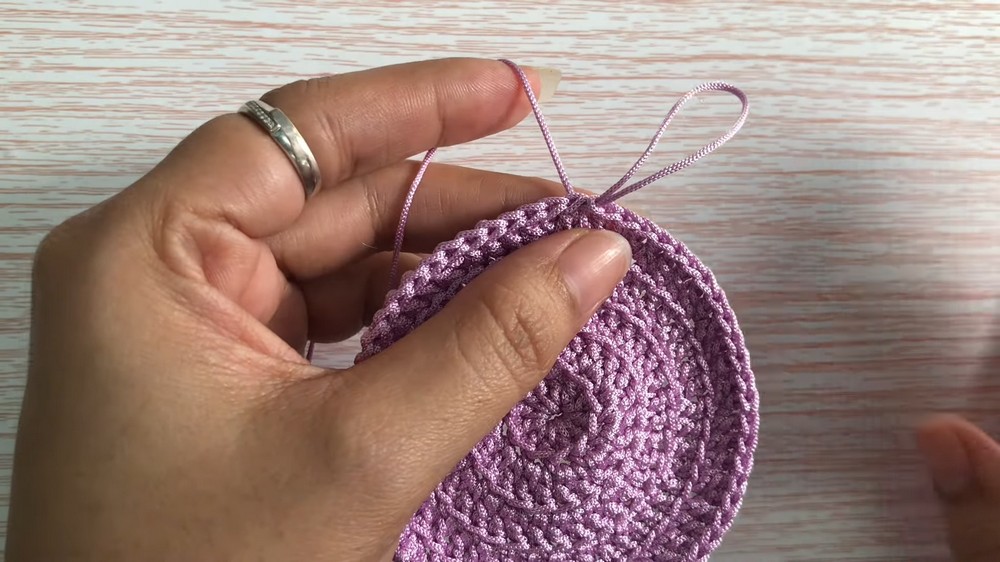
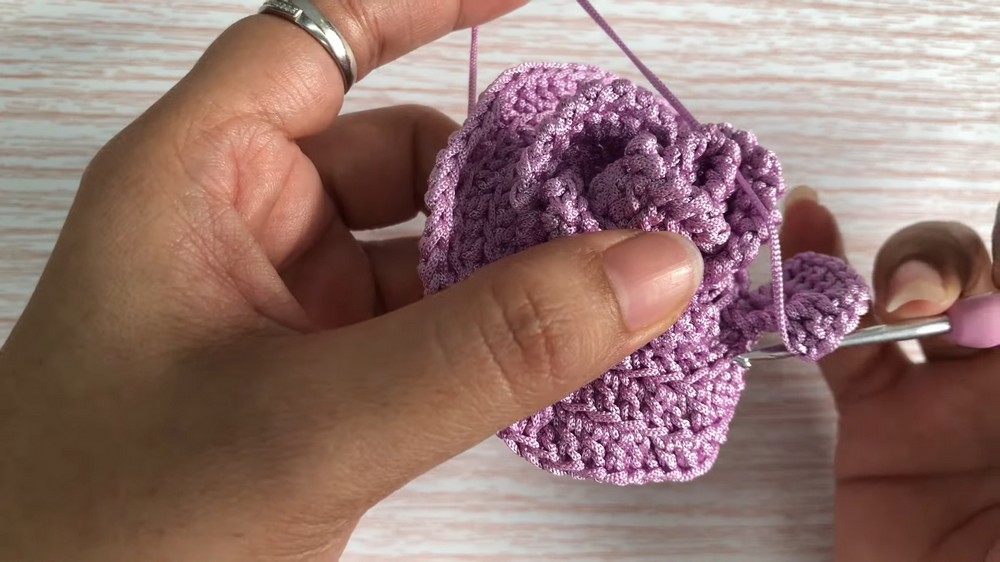
Fourth Petal Round (8 Petals) — Larger Petals with Treble Crochet
- Join yarn at the next available loop.
- For each petal:
- Ch 2, in the same loop, work 2 dc (3 dc total).
- In next loop, 3 dc (6 dc total).
- Second Row: Ch 3, turn. In same, work 2 tr (counts as 3 tr with ch-3).
- In each of next 4 sts, (work 2 tr in one st) — repeat 4× along petal edge.
- In the last st/loop, work 3 tr (increase for width). (Total: 14 tr)
- Skip 4 loops, sl st in 5th loop to anchor petal.
- Crab stitch (reverse sc) for the petal edge as before.
- Repeat for a total of 8 petals.
Finishing
- On the last petal, after crab stitch, sl st to the first base st for a seamless join.
- Fasten off, leaving a tail. Pull the tail through to the back, and tie securely with beginning tail for anchoring, then weave in or tuck away.
- Slightly stretch and adjust each petal for symmetry.
- Optional: For open petals, apply a small amount of craft glue at the petal bases and shape as desired.
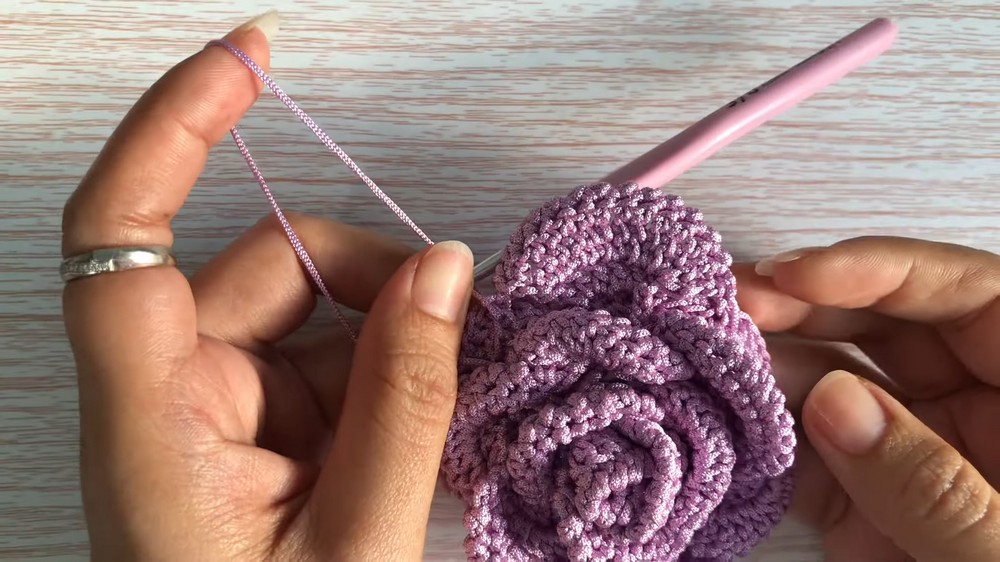
Conclusion
You have completed a multi-layered and realistic crochet rose using increasing petal rounds. This rose works beautifully as a brooch, home décor, or as part of larger floral arrangements.
Pattern Correction & Tips
- Correction: Carefully count skips between petals as they increase per round: 1st round skip 4, 2nd round skip 6, 3rd/4th rounds skip 4.
- Tip: When anchoring petals, always slip stitch in front or inside of the previous petal (not on the back), so that petals overlap naturally.
- Tip: For crisp, open petals, consider using craft glue as demonstrated or stiffen as desired.
- Tip: If you want larger or smaller roses, adjust yarn weight, hook size, or number of starting loops/petals per round.
Leave a Reply