
Take everything you need in a beautiful crochet shoulder bag pattern perfect for any occasion without compromising comfort and versatility.

A handmade bag can be a beautiful everyday accessory that catches everyone’s eye. Using a crochet shoulder bag pattern, it’s possible to create a design that stands out with its unique style and texture. This bag isn’t just pretty; it is functional too, making it a great choice for shopping trips, casual outings, or even a day at the beach. Vibrant colors can be chosen to add energy to a look or soft tones for something more elegant and subtle.
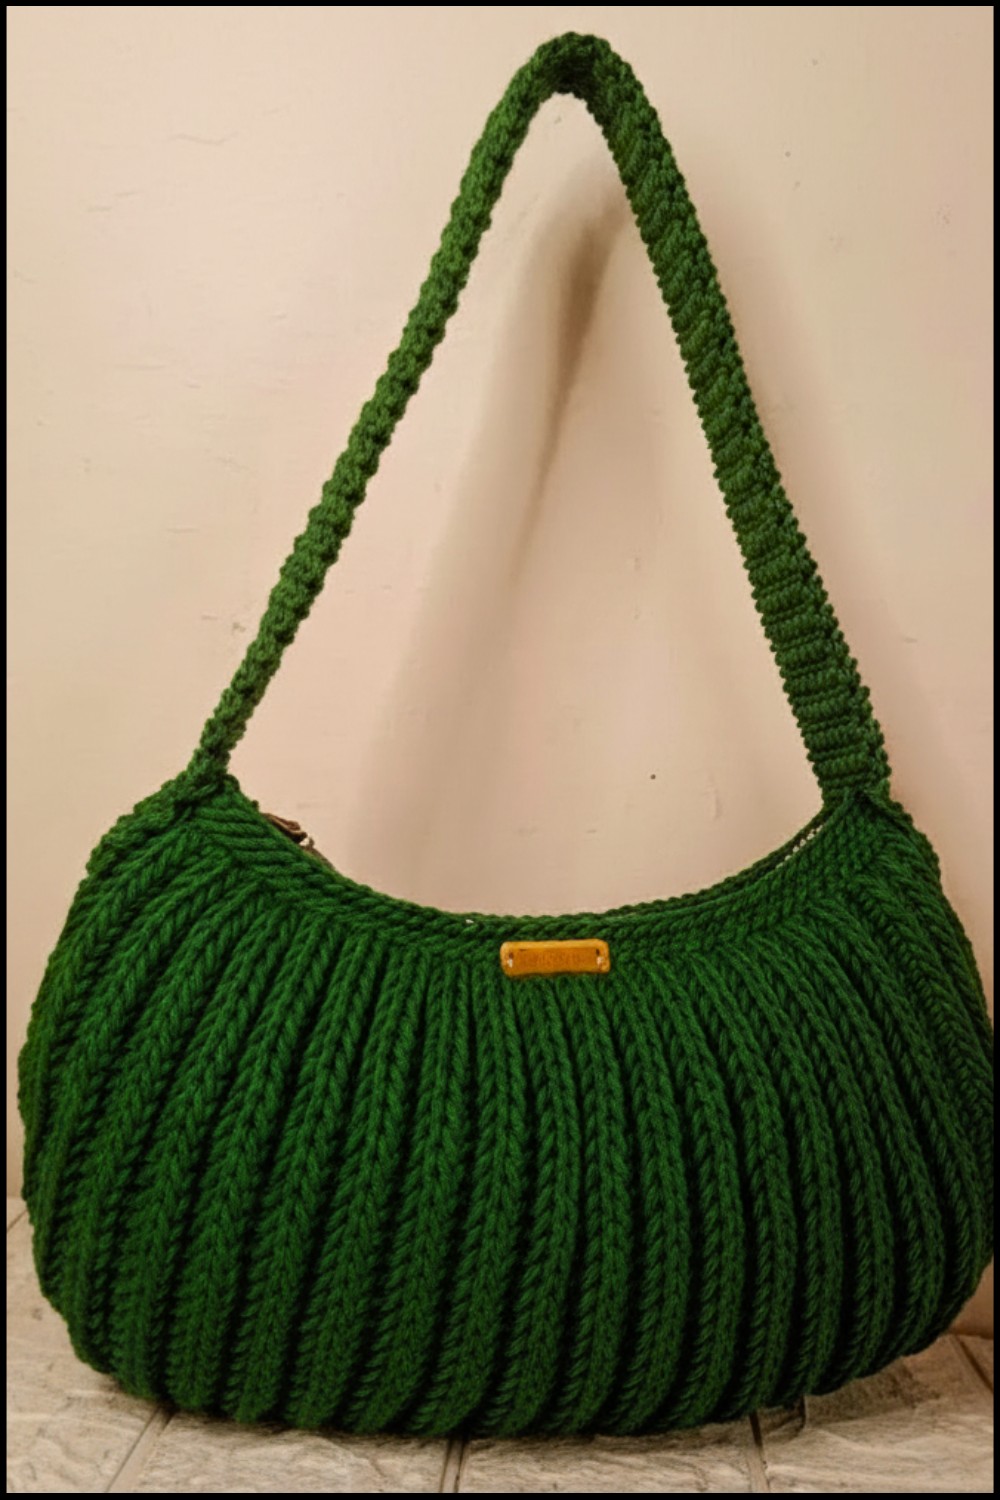
Versatile Crochet Shoulder Bag Pattern to Match Any Outfit
The pattern gives the freedom to make a bag that fits specific needs, whether it’s small for just the essentials or large enough to carry more. This bag also makes a thoughtful and personal gift that anyone will appreciate. Perfect for someone who loves creative and practical designs, it brings beauty, ease, and charm into everyday life while being perfect for a variety of uses.

Materials List
- Yarn Type: Polypropylene thread or similar strong yarn
- Crochet Hook: Size 5mm (US size recommended)
- Additional Tools:
- Scissors
- Tapestry needle
- Stitch markers
- Zipper (optional, for finishing)
Key Abbreviations
- Ch: Chain
- Sl st: Slip Stitch
- Sc: Single Crochet
- Rep: Repeat
- St(s): Stitch(es)
- Back Loop Only (BLO): Work in the back loop of the chain
Special Notes
- This pattern uses US crochet terminology.
- The bag dimensions are approximately 28 cm width and 17 cm height (can be adjusted as needed).
- For intermediate to advanced crocheters; beginner friendly adjustments are optional.
- Keep yarn tension consistent for uniform stitch appearance.
Step-by-Step Pattern
Step 1: Base
- Start with a magic ring or slip knot.
- Ch 61 to form the base of the bag. (Adjust length of base depending on the desired size.)
- Once the chain is complete, add 1 additional Ch. Turn your work.
Step 2: First Row
- Starting from the 2nd Ch from hook, create 1 Sc in each Ch across.
- Continue this pattern of Sc stitches until the end of the row.

Step 3: Create Texture
- Ch 1 and turn your work.
- Begin working each Sc into the BLO.
- Insert hook into the back loop only of the stitch, yarn over, and pull through. Complete as Sc.
- Continue this texture for the entire row.

Step 4: Repeat Rows for Base
- Rep Step 3 until the bag base reaches your desired width.
- Recommended width: 21 cm wide.
Step 5: Begin Side Shaping
- Divide the number of chains into two equal halves using stitch markers.
- For each side, start decreasing stitches in rows.
- At the start of each row, work a single crochet decrease (Sc2tog):
- Insert into first stitch, yarn over, pull through.
- Insert into next stitch, yarn over, pull through.
- Yarn over and pull through all loops on hook.
- Reduce stitches by 2 per row.
- At the start of each row, work a single crochet decrease (Sc2tog):
- Continue repeating decrease rows on both sides evenly until a hill shape forms.
- Final stitch count at the narrow edge should be 16 stitches.

Step 6: Sewing the Edges
- Once the side shaping is completed, fold the base into a bag.
- Use a tapestry needle and yarn to sew the edges together.
- Turn the bag inside out to hide seam lines.

Step 7: Finishing the Rim
- Create a Sl st border around the opening of the bag:
- Attach yarn to the edge nearest to the seam.
- Sl st into each stitch around the rim of the bag.
- Rep Sl st rounds for elevated texture.
- Recommended: 5 rounds of Sl st.


Step 8: Add Handles
- Create custom-sized rope handles using the following method:
- Start with a slip knot, Ch 5, and add 1 turning Ch.
- Work Sc into each Ch, ensuring consistent tension.
- Rep rows of Sc using BLO for texture.
- Continue working rows until handles reach desired length.
- Recommended: 51 cm long handles.
- Once completed, sew handles onto bag edges using a tapestry needle. Ensure sturdy attachment.

Step 9: Attach Zipper (Optional)
- Position zipper at the opening of the bag.
- Use safety pins or stitch markers to secure zipper placement.
- Sew zipper using regular sewing needle and thread:
- Ensure the threading matches the bag’s yarn color.
- Sew tightly to avoid gaps.

Final Dimensions
- Width: 28 cm
- Height: 17 cm
- Handle length: 51 cm

Conclusion
The crochet shoulder or handbag is durable, functional, and beautiful. By following each step carefully, you’ll craft a sturdy bag suitable for everyday use or gifting. This pattern allows for creativity, enabling customization of bag dimensions, colors, and texture designs.
Pattern Correction
Ensure stitch counts remain consistent during the process, particularly while decreasing and shaping the sides. Miscounting rows or stitches will result in uneven edges.
Tips
- Use power-polished or strong yarn for durability.
- Test zipper alignment before sewing to avoid uneven attachments.
- Keep the seams clean by tightening stitches while sewing edges.
- Blocking your finished bag can enhance structure and refine its overall appearance.
Leave a Reply