
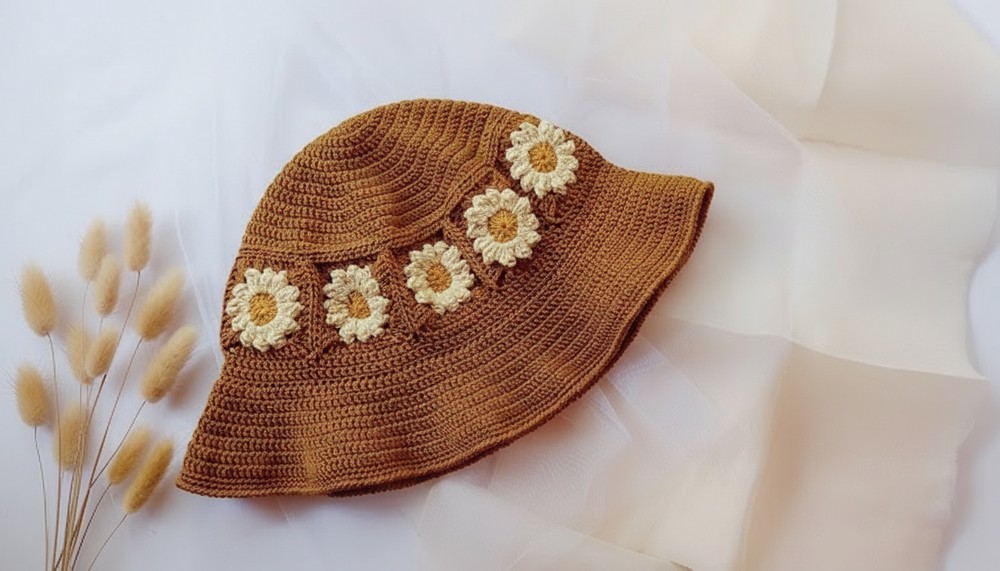
Style your look with this Crochet Daisy Bucket Hat Pattern that blends charm and comfort while keeping you chic and protected under the sun.
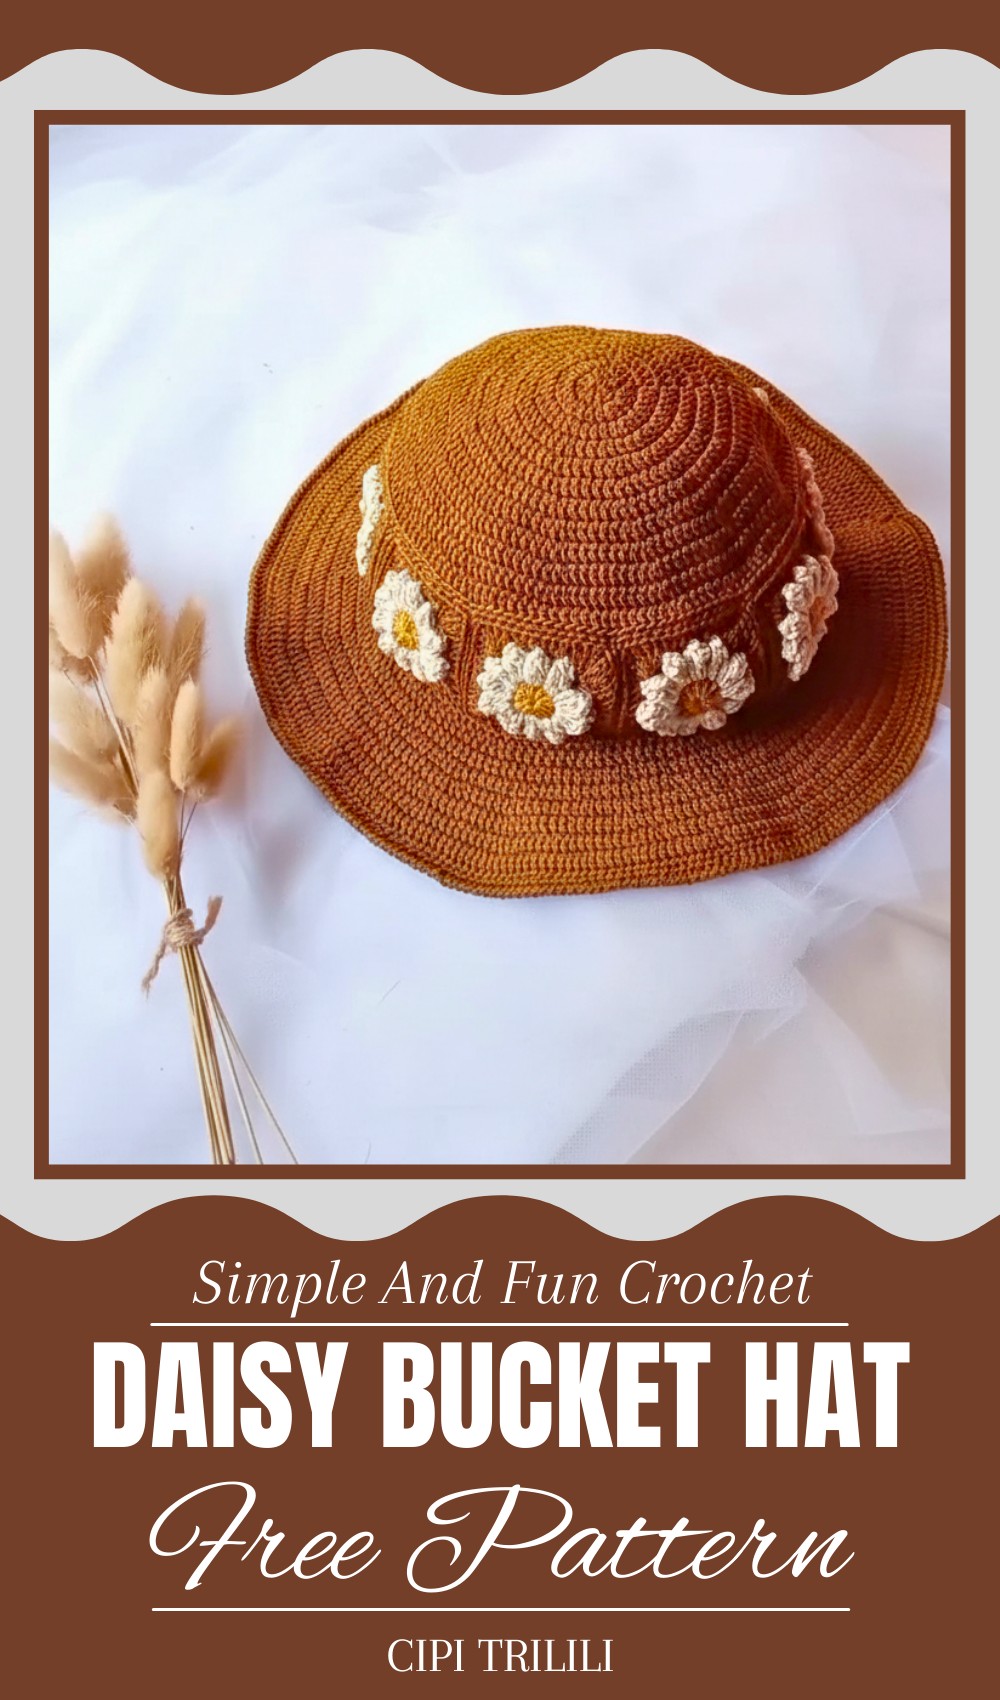
Bring a touch of whimsy and sunshine to your outfit with this cheerful and cozy design! Perfect for all seasons, this Crochet Daisy Bucket Hat Pattern blends style and comfort seamlessly. Its delicate daisy motifs add a playful, charming vibe that can brighten up even the simplest look. Whether you’re heading to a picnic, beach day, or a casual stroll, this hat is the ultimate accessory to keep you looking stylish while protecting you from the sun.
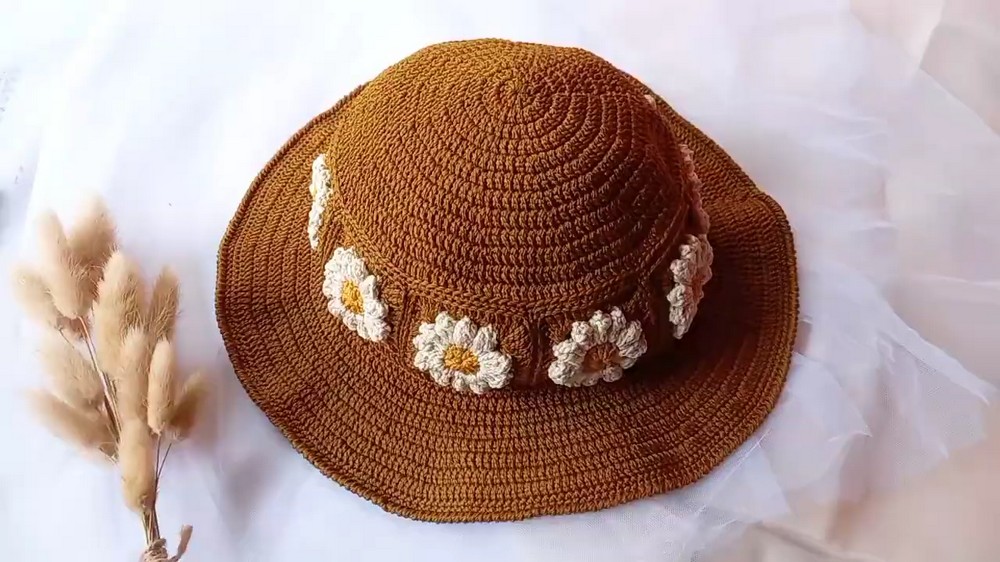
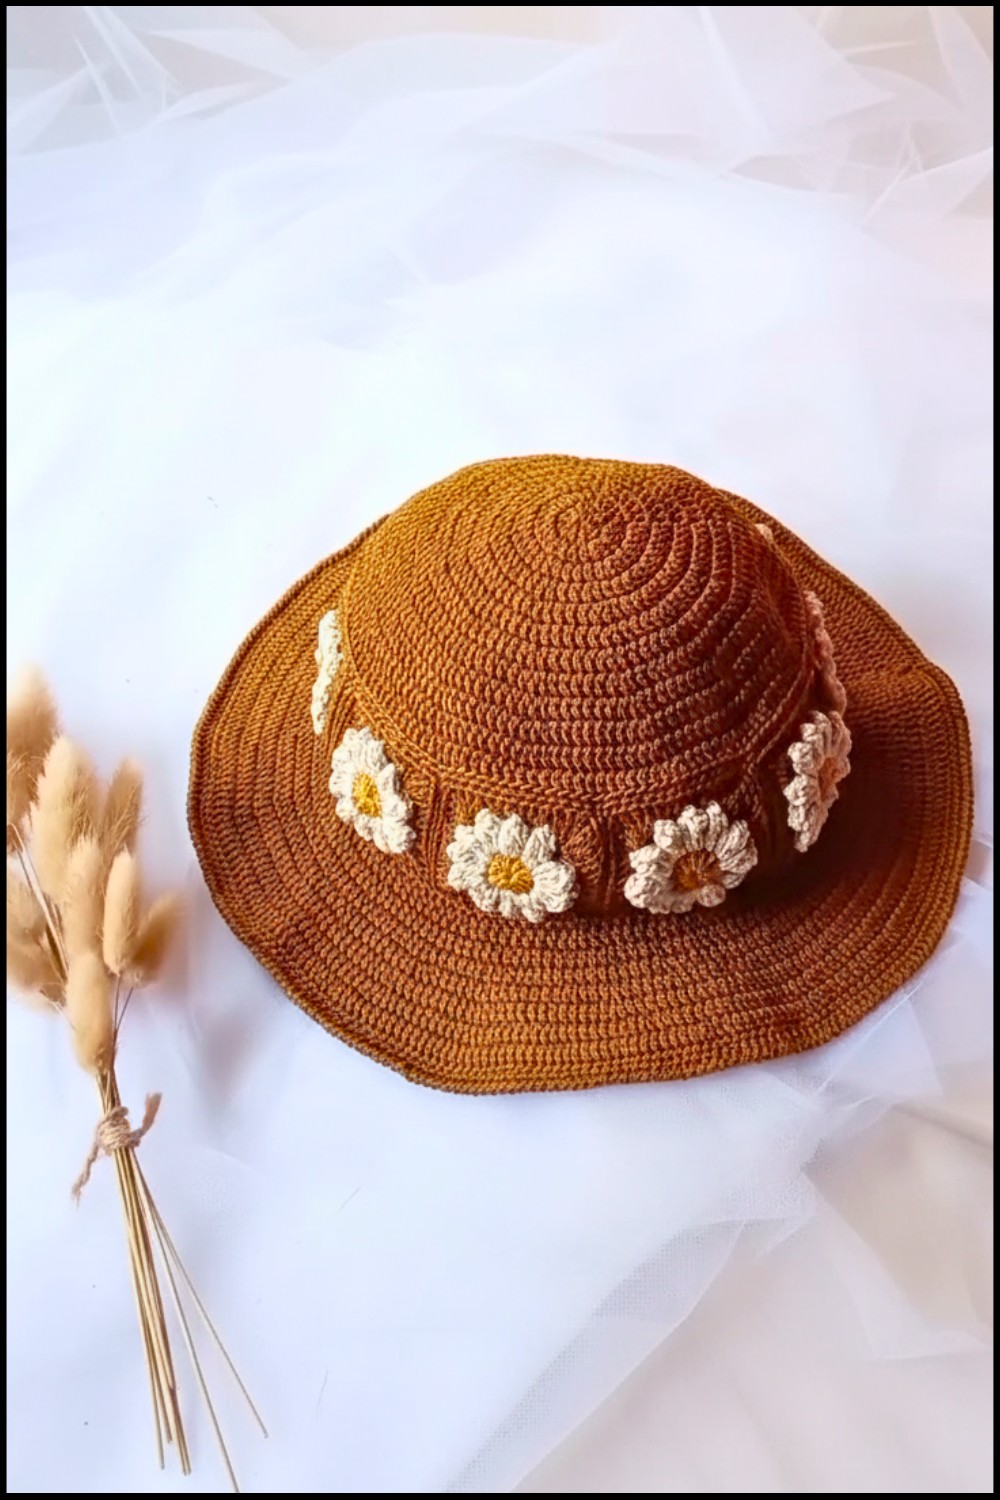
Gorgeous Crochet Daisy Bucket Hat Pattern Perfect for Warm Days
Plus, it makes for a thoughtful handmade gift that anyone would love to receive. Versatile and trendy, this hat pairs easily with summer dresses, casual jeans, or even cozy sweaters. Crocheting it is a joyful experience that allows crocheters to embrace their creativity. With its stunning floral details, it’s a project that’s as fun to make as it is to wear, making it a must-try for crochet enthusiasts of all skill levels.
Materials List
- Yarn: 3 colors of polyester yarn (e.g., Polycherry brand).
- Crochet Hooks:
- 3.0 mm for general crochet work.
- Optional 4.0 mm hook for assembling or joining.
- Tapestry Needle: For sewing and weaving ends.
- Scissors: For cutting yarn neatly.
- Lighter: To tidy up yarn edges, especially for polyester yarn.
- Measuring Tape: For checking size as you crochet.
Skill Level
Intermediate to Advanced
Key Abbreviations (US Terminology)
- ch: Chain
- sc: Single Crochet
- hdc: Half Double Crochet
- dc: Double Crochet
- tr: Treble Crochet
- sl st: Slip Stitch
- MR: Magic Ring
Special Notes: - Each step is intended to produce clean, neat results for assembly and edges.
- Tension adjustments may be needed according to yarn or hook size.
Pattern Instructions
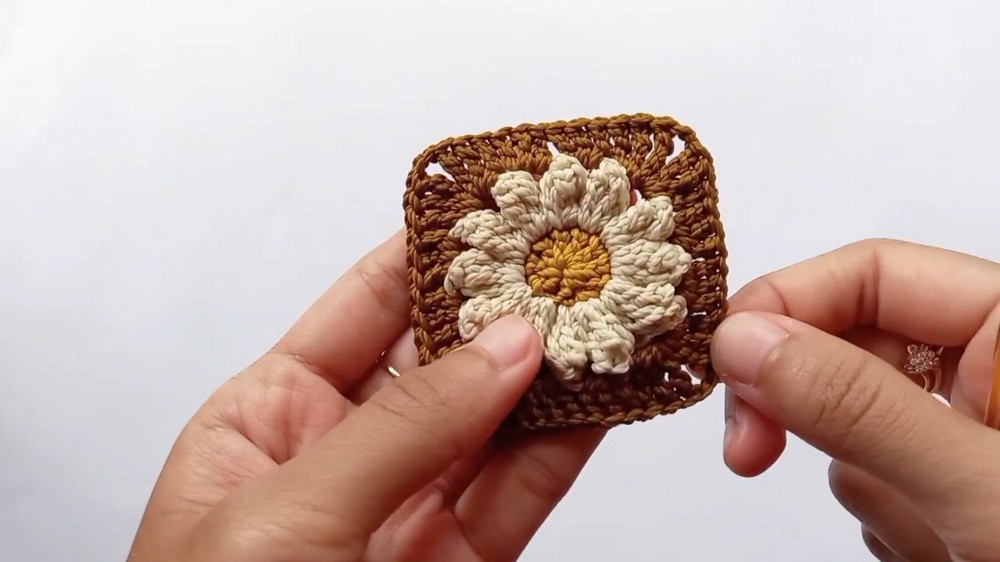
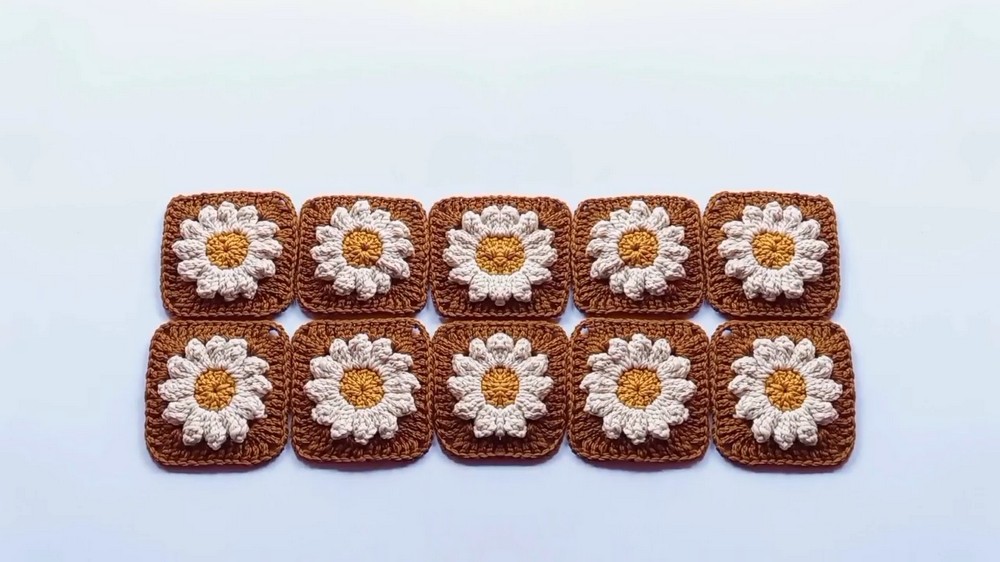
Part 1: Creating 10 Daisy Flower Granny Squares
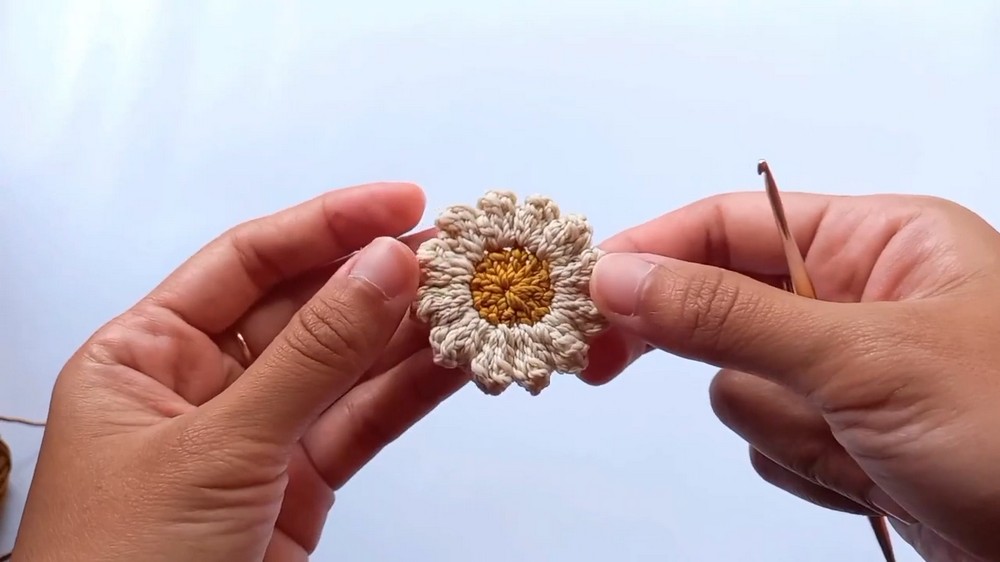
Step 1: Creating the Daisy Flower Center
- Start with a Magic Ring (MR):
- Ch 3 (counts as 1 dc).
- Make 11 dc inside the MR, totaling 12 stitches.
- Pull the ring closed tightly, and sl st into the top of the chain-3 to join.
Step 2: Making Granny Square Rounds
- Round 1: Petals
- Ch 3. Then:
- 2 dc in the same stitch.
- Move to the next st: make 3 tr stitches.
- Repeat the sequence of 3 dc and 3 tr in alternating holes until all st are filled.
- The square corners are formed in the tr sections.
- Sl st to the top of the initial chain-3 to complete the round.
- Ch 3. Then:
- Round 2: Squaring the Shape
- Ch 3. In the same corner, place 2 more dc.
- For the next hole in the square’s edge, work:
- 3 tr, then ch 2, followed by 3 tr (corner).
- Continue forming the square format, “3 dc, corner work repeat” until finished.
- Sl st at the end.
Step 3: Repeat the Above for 10 Squares
- Make 10 Granny Squares using the same steps.
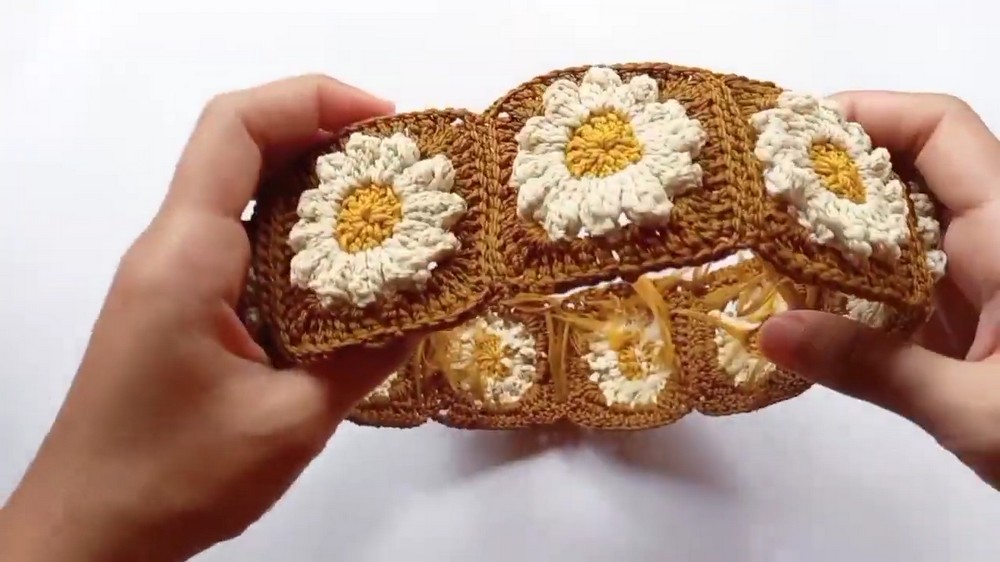
Part 2: Assembling the 10 Granny Squares
Step 1: Sewing Squares
- Align Edges:
- Place two squares back-to-back (wrong sides facing).
- Sew using tapestry needle to stitch the back loops only. This ensures neat seams.
- Tips for Sewing:
- Start on one corner and ensure the stitches are evenly matched.
- Pull gently to ensure a tight, flat seam.
- Repeat the above steps to create a circular band of 10 squares joined end to end.
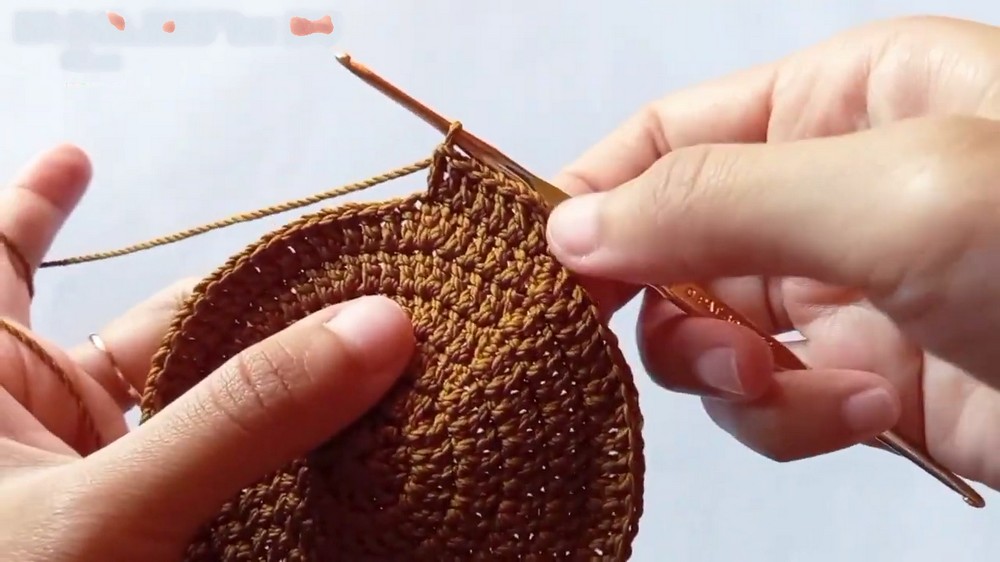
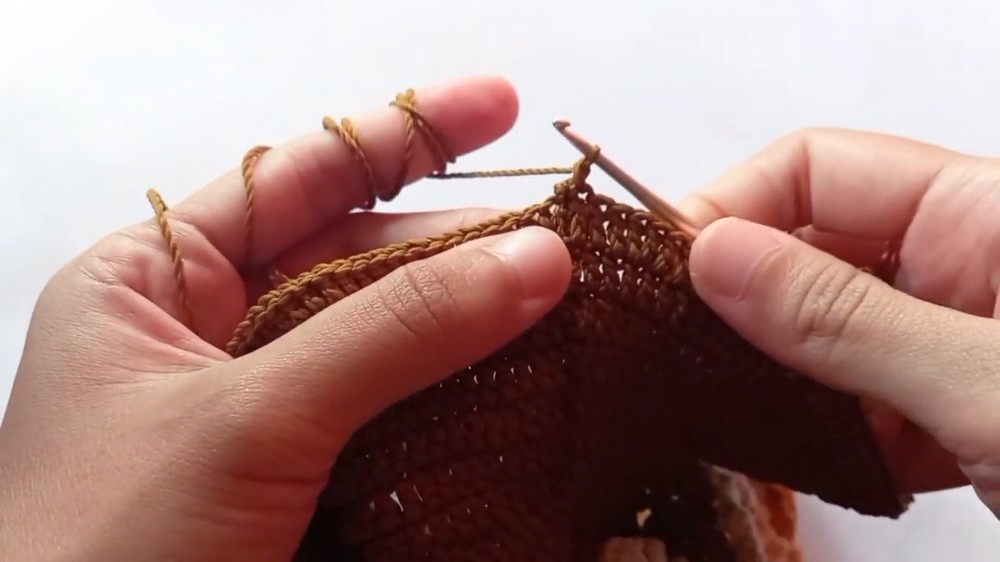
Part 3: Crocheting the Crown Top
Step 1: Begin Crown with the Magic Ring
- Magic Ring and Base:
- Create an MR and make 12 dc.
- Pull tight and sl st to the first dc to close.
Step 2: Crown Rounds with Increases
- Rounds 1-12: Gradual Increases
- Round 1: Ch 3 (counts as dc), 2 dc in each st (24 in total).
- Round 2: 1212 Pattern: [1 dc in next st, 2 dc in next st]. Repeat; total: 36 st.
- Round 3: 2112 Pattern: Repeat [2, 1, 1]. Total: 48 st.
- Continue with similar increases, adjusting to the format:
- Round X Formula: 111112 or 1111112, depending on the total st for flat circle logic.
- Increase at set intervals to maintain a smooth, rounded shape.
- Stop at Round 12: 140 st to align with Granny Square circumference.

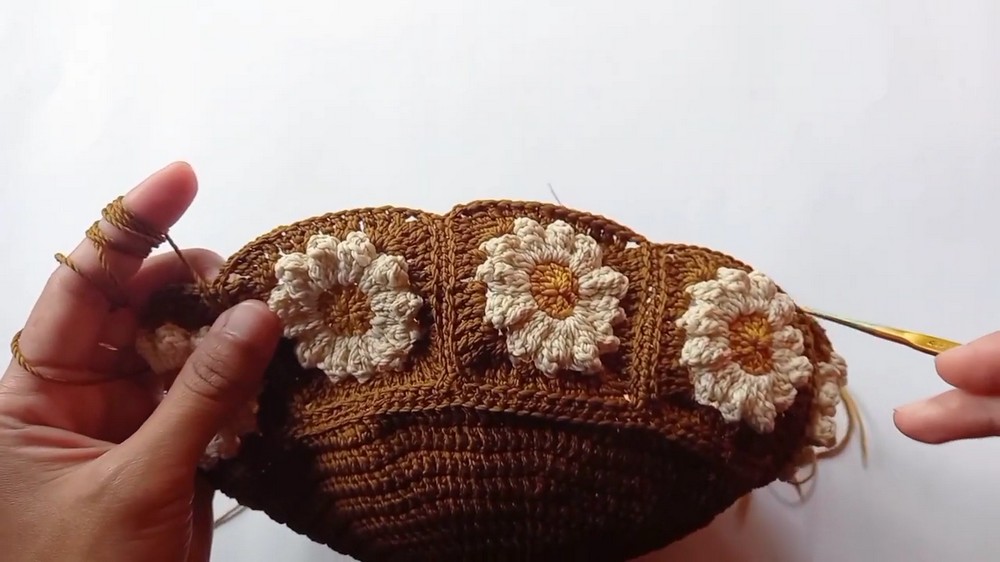
Step 3: Join Crown to Granny Squares
- Use tapestry needle or slip stitches to join the crown to the circular Granny Square band.
- Align stitches precisely, especially at corners.
Part 4: Finishing the Hat with Edging
- Add a single crochet reverse stitch around the border:
- Instead of crocheting forward to the left, stitch to the right (backwards).
- This gives a firm, decorative edge.
- Tidy up loose threads:
- Sew loose ends into the stitches.
- Use a lighter on polyester thread to seal the cut ends cleanly.
Conclusion
You’ve just completed an eye-catching Granny Square Hat! Each square contributes to the unique style, and the crown rounds complement the design seamlessly. Master this pattern, and you can replicate it with various color schemes for personalized styles.
Pattern Corrections
- Ensure the Granny Squares align in the correct direction (corners match when joined).
- Watch stitch counts in the crown’s increases to prevent warping.
Tips for Success
- Use contrasting thread temporarily for joining to ensure proper alignment before permanent sewing.
- Block the Granny Squares before joining to enhance the final hat structure.
Leave a Reply