
Sprinkle your home with cheerful color using Crochet Watermelon Pillow Pattern that adds playful charm and vibrant personality to any space.
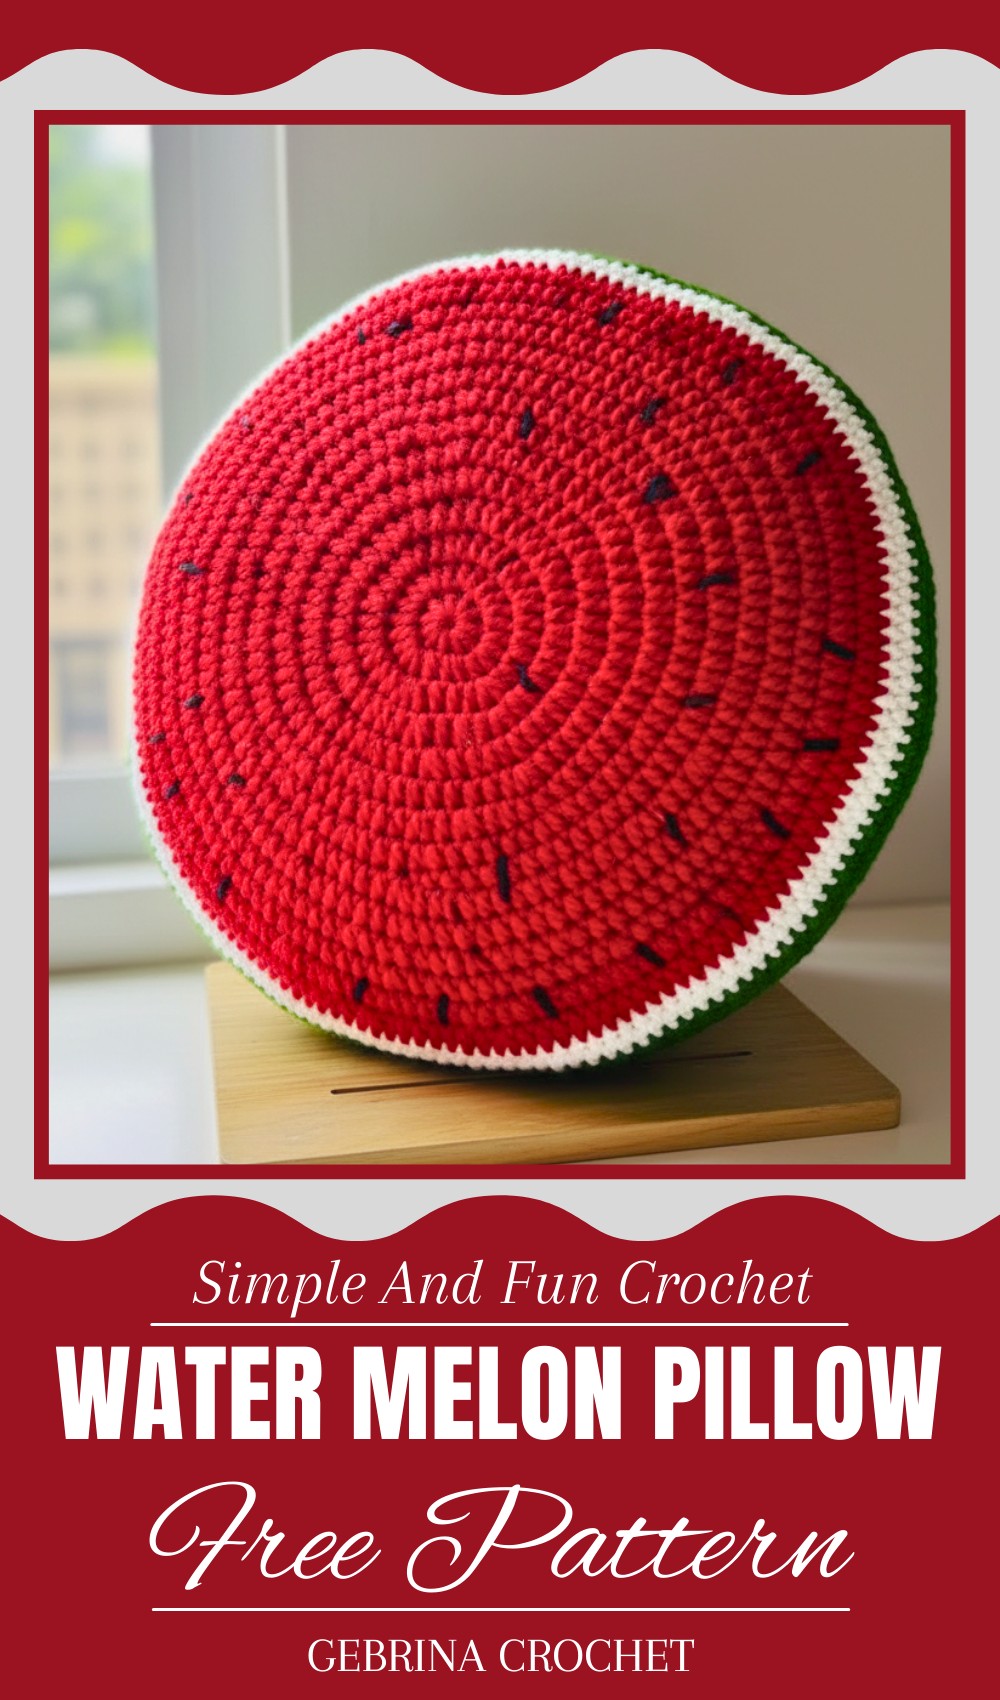
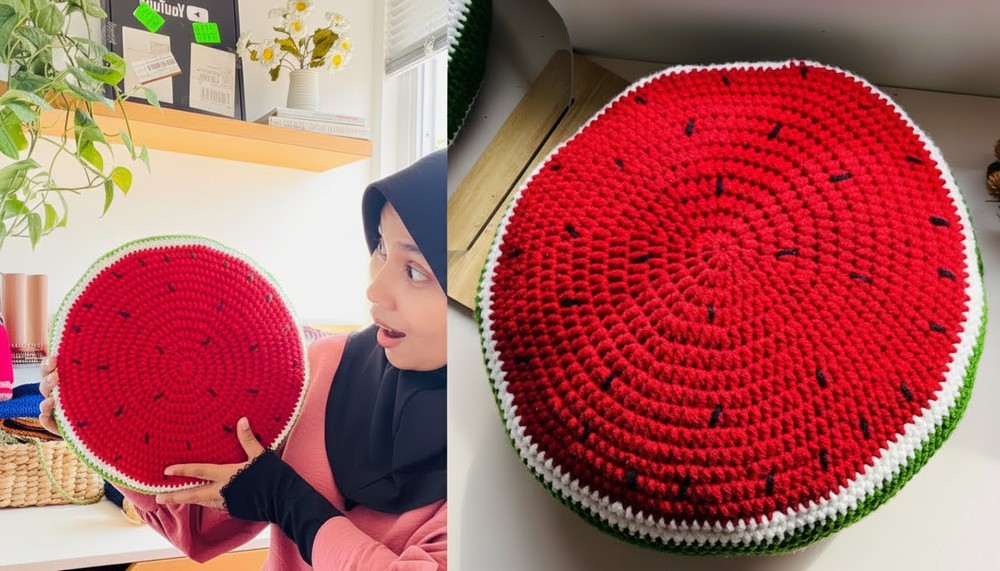
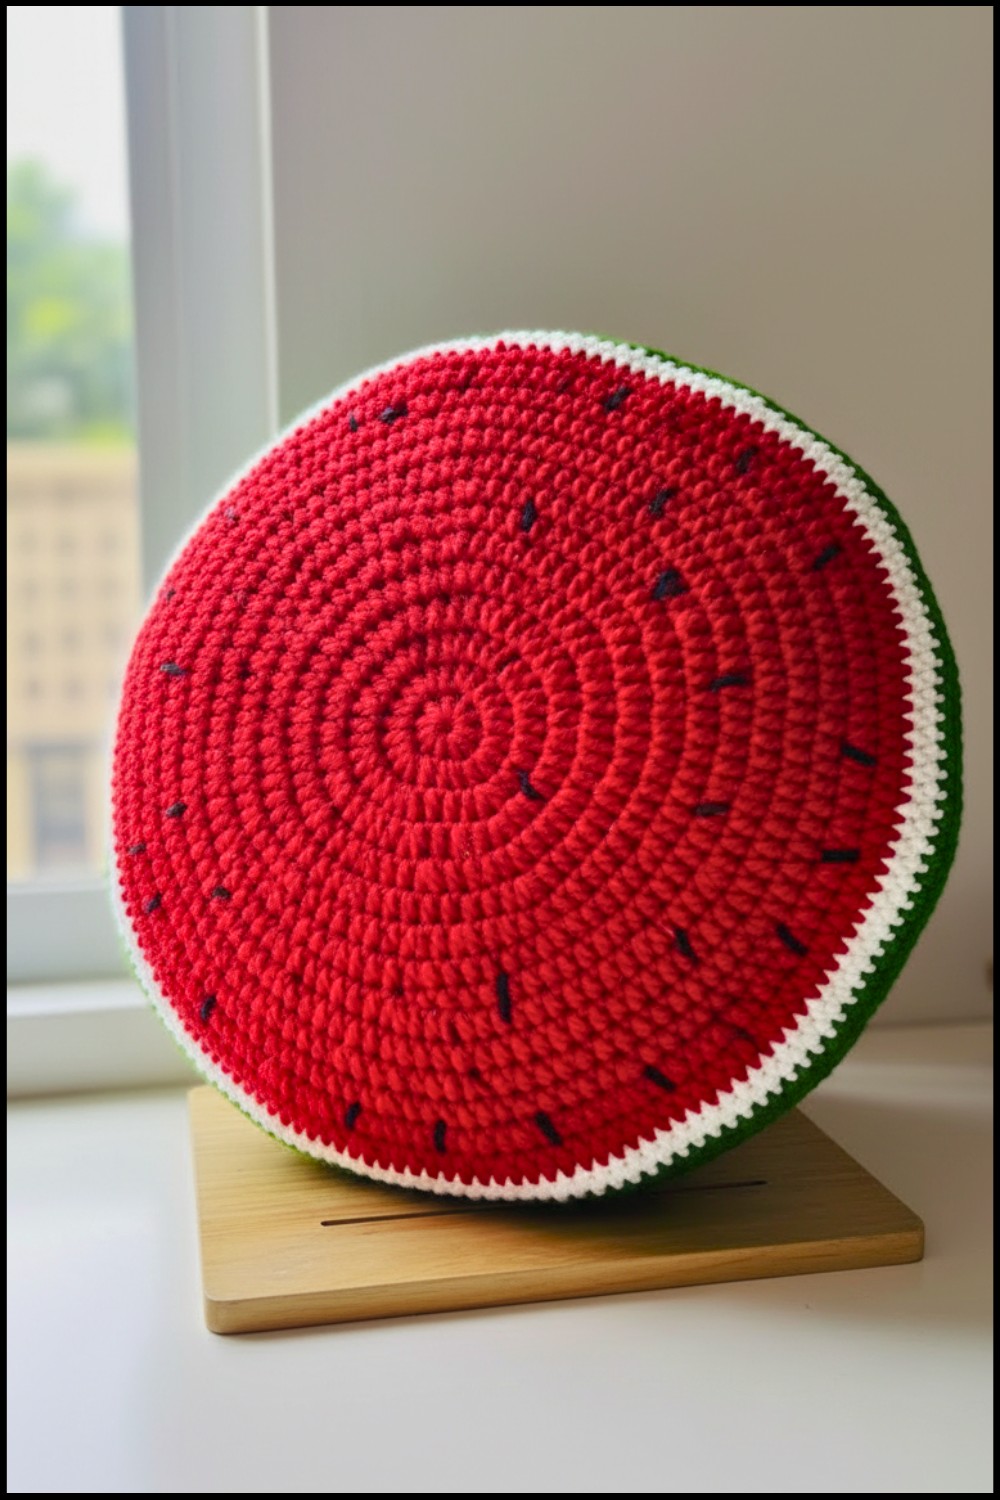
Bring a burst of fresh fruity charm into your home with a big cheerful watermelon design that’s impossible to ignore. This cozy creation uses the Crochet Watermelon Pillow pattern to add a pop of color and fun to any room, making it perfect for bedrooms, living rooms, nurseries, or even outdoor patios during summer gatherings. Its vibrant red, green, and black detailing perfectly captures the beauty of a juicy watermelon slice, turning an ordinary pillow into a delightful decorative piece.
Perfect Crochet Watermelon Pillow Pattern for Splash of Joy
Soft, comfy, and full of personality, this handmade design is not just a treat for your space but also a great conversation starter. Whether placed on a couch, bed, or chair, it instantly brightens the atmosphere and adds a playful touch to your décor. Perfect for gifting or creating as a one-of-a-kind personal project, this pattern makes it easy to showcase your creativity while sprucing up your space.
Materials Needed
- Yarn Type: Cotton yarn, preferably Rose Brand Cotton
- Colors:
- Red (main body)
- White (middle layer)
- Green (outer rind)
- Black (watermelon seeds)
- Colors:
- Hook Size: US Size G-6 (3.5 mm)
- Extras:
- Tapestry needle
- Fiberfill or stuffing for pillow
- Stitch markers
Skill Level
Intermediate to Advanced
Abbreviations Used (US Terminology)
- Ch – Chain
- HDC – Half Double Crochet
- HDC Inc – Half Double Crochet Increase
- Sl St – Slip Stitch
- Magic Ring – Adjustable loop to start
Special Notes
- This pattern uses increases to shape the circular pillow. Use stitch markers to keep track of rounds.
- The pillow consists of two identical crochet pieces joined together and stuffed.
- Ensure you carry unused yarn neatly at the back when switching colors.
Pattern Instructions
Pillow Front and Back – Red Section
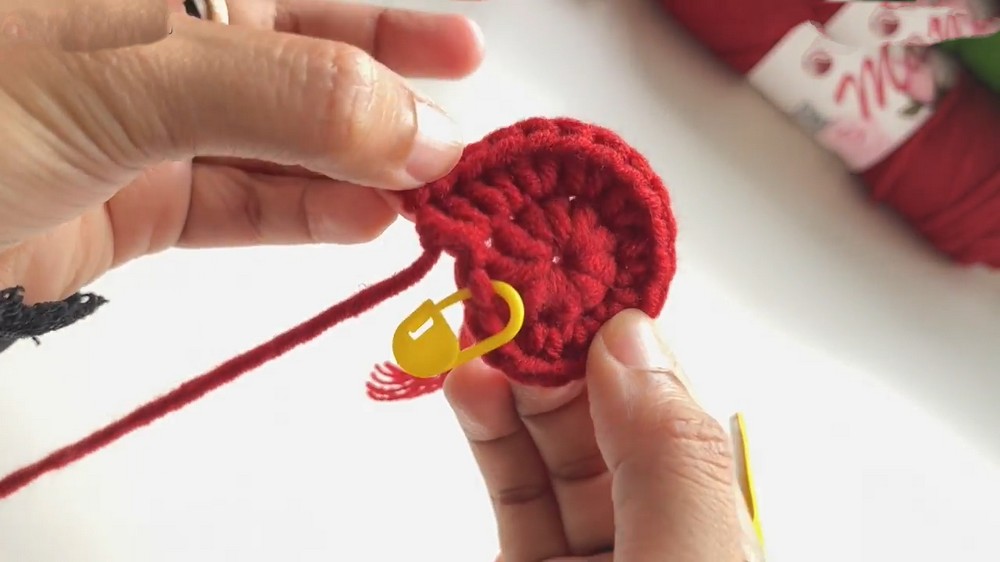
Step 1: Magic Ring Base
- Start with a magic ring.
- Round 1: Make 10 HDC into the magic ring. Pull the loop tight to close. (10 HDC)
Step 2: Increase Rounds
- Round 2: Instead of joining with a Sl St, start working directly into the first HDC of the previous round. Work 2 HDC into each stitch. (20 HDC)
- Round 3: Work 1 HDC in the first stitch. In the next stitch, make 2 HDC (HDC Inc). Repeat this pattern (1 HDC, HDC Inc) around the round. (30 HDC)
- Round 4: Make 1 HDC in each of the two stitches. In the third stitch, make an HDC Inc. Repeat (2 HDC, HDC Inc) around. (40 HDC)
- Round 5: Work 1 HDC in each of the next three stitches and make an HDC Inc in the fourth stitch. Continue the pattern (3 HDC, HDC Inc). (50 HDC)
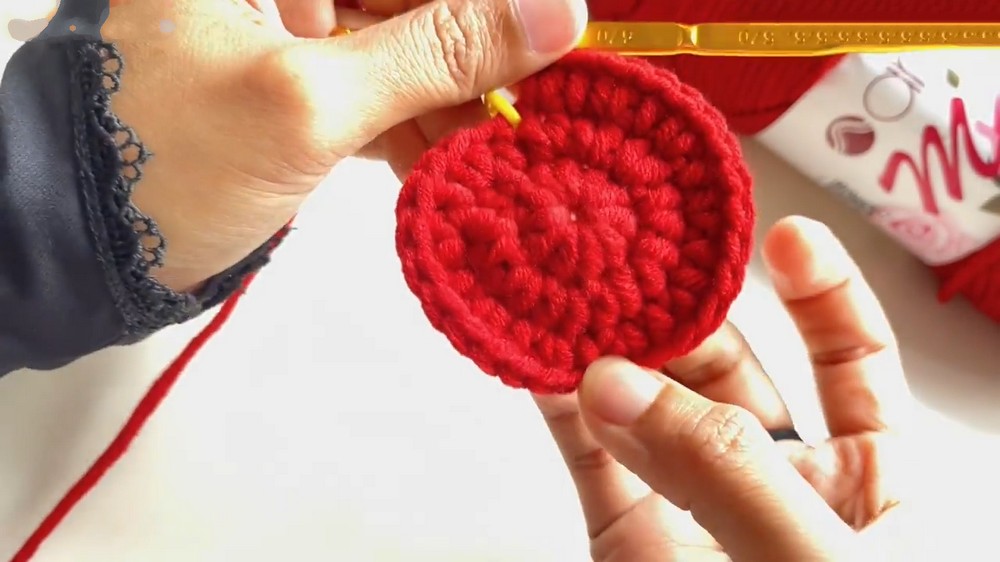
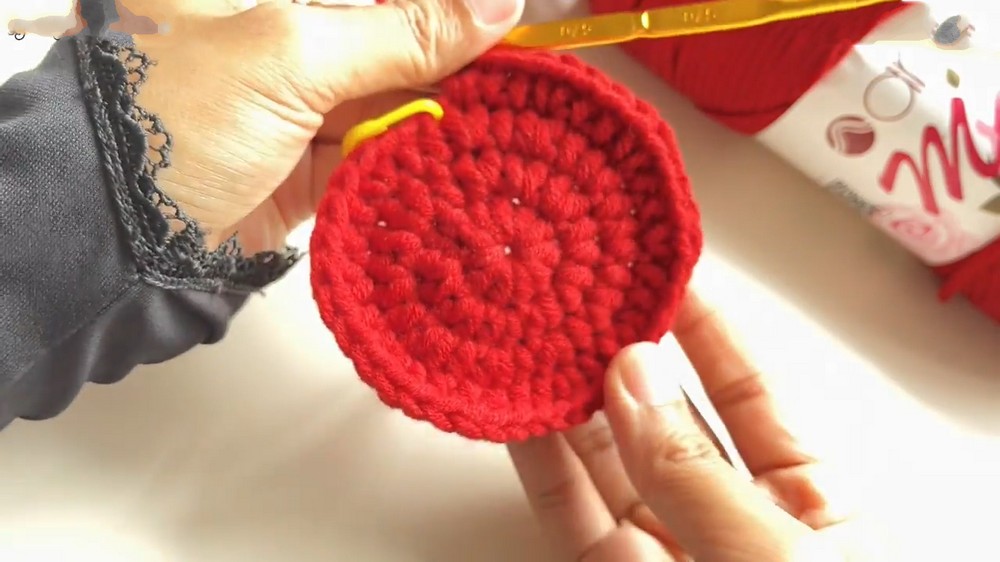
Continue with increases for each round, adding one more stitch to the pattern sequence before each increase. Repeat until Round 14, achieving a total of 150 HDC.
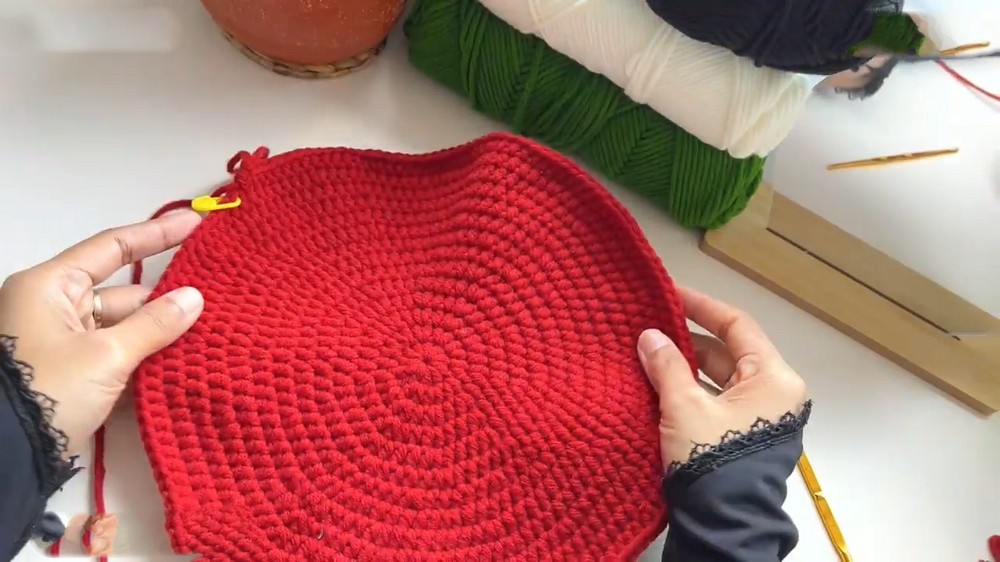
White Section
Step 3: Adding White Yarn
- After completing the red section, do not join with a Sl St. Attach white yarn with a Sl St into the next stitch.
- Round 15: Work 13 HDC in consecutive stitches, then make an HDC Inc in the 14th stitch. Repeat (13 HDC, HDC Inc) around the round. (150 HDC)
- Round 16: Work 1 HDC into each stitch without further increases. (150 HDC)
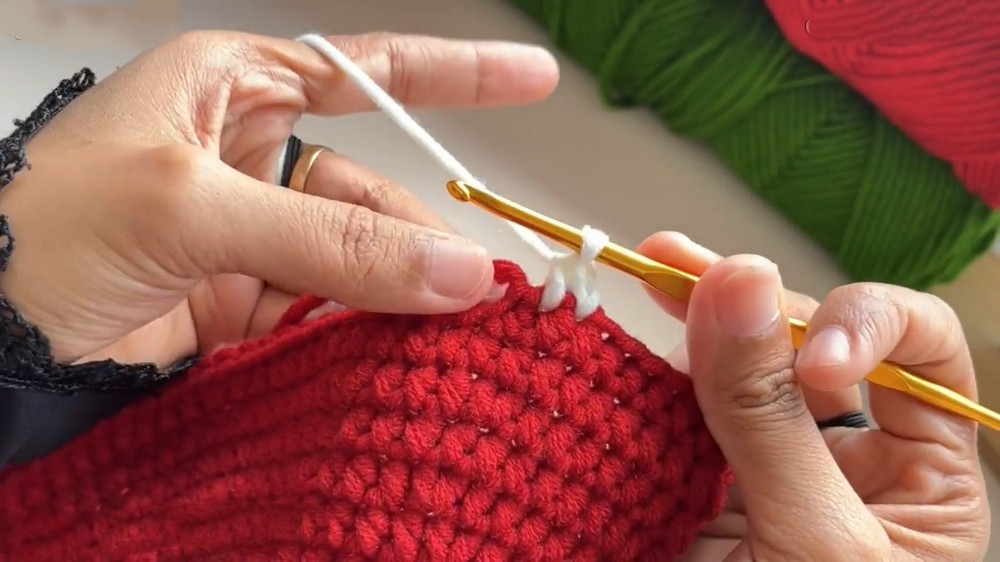
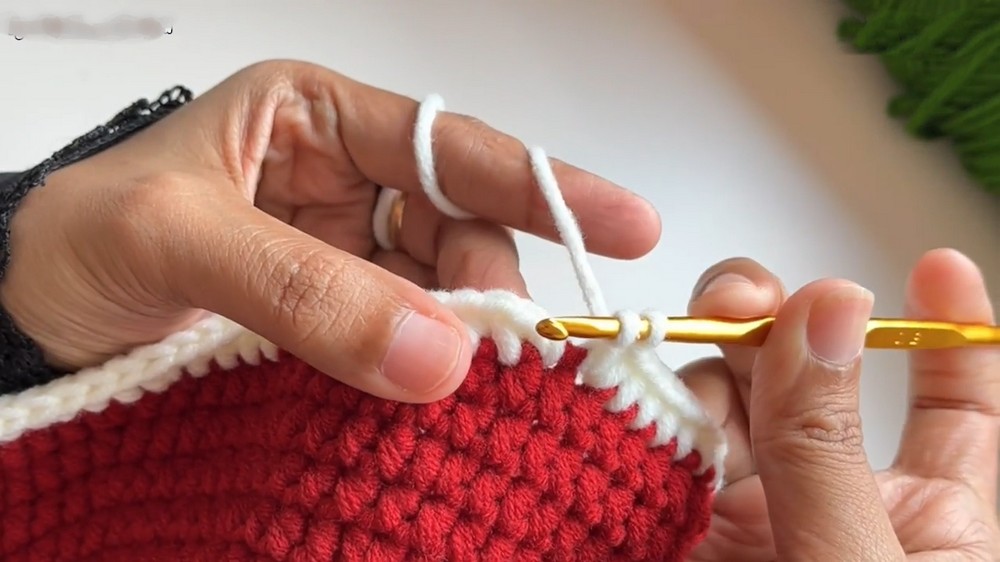
Green Section
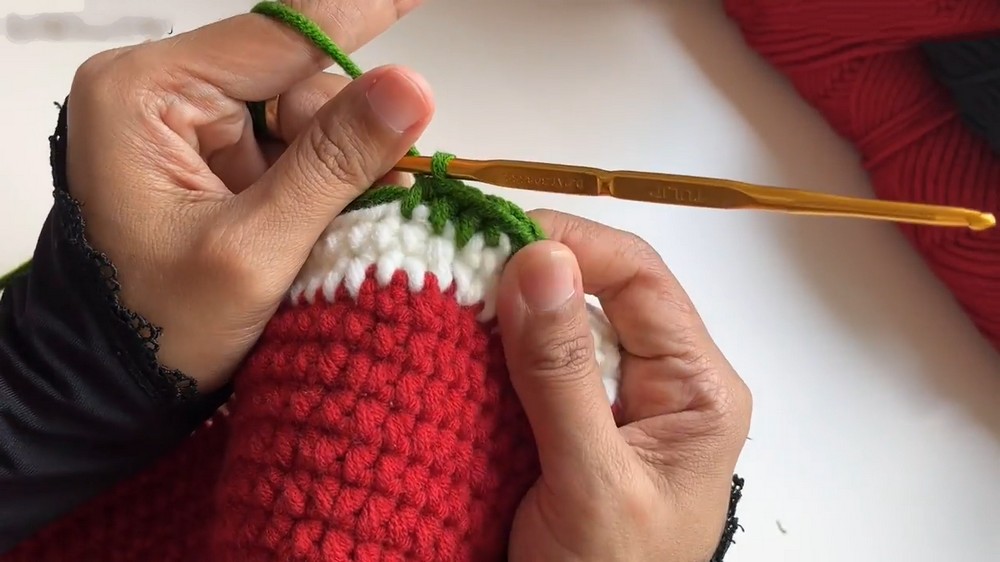
Step 4: Adding Green Yarn
- Cut off the white yarn and attach green yarn with a Sl St into the next stitch.
- Rounds 17 & 18: Work 1 HDC into each stitch (no more increases). (150 HDC per round)
Watermelon Seeds
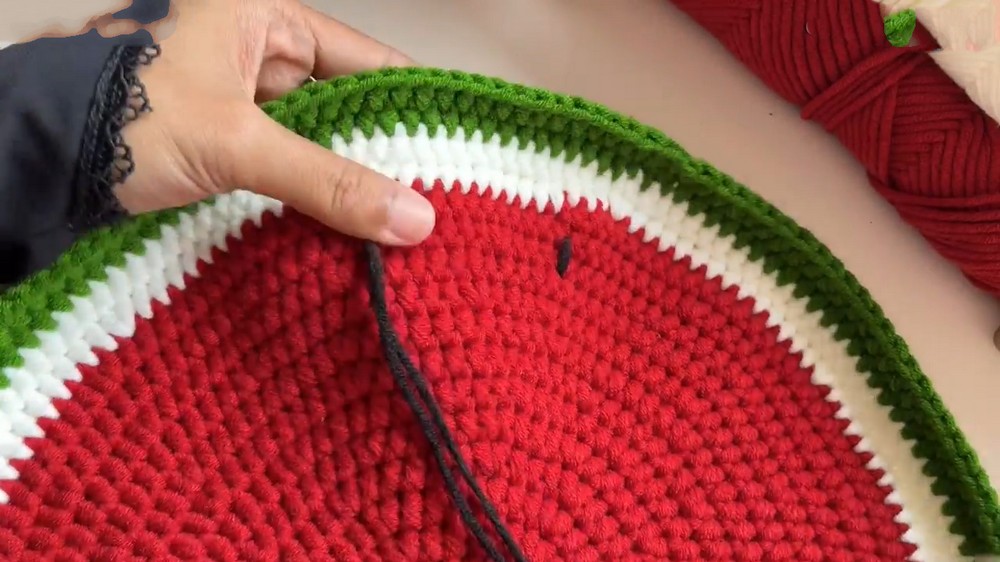
Step 5: Adding Black Seeds
- Using black yarn threaded through a tapestry needle, sew watermelon seed shapes randomly on the red section. Double up the yarn for bold stitches. Secure each seed from the back before moving forward.
Assembly Instructions
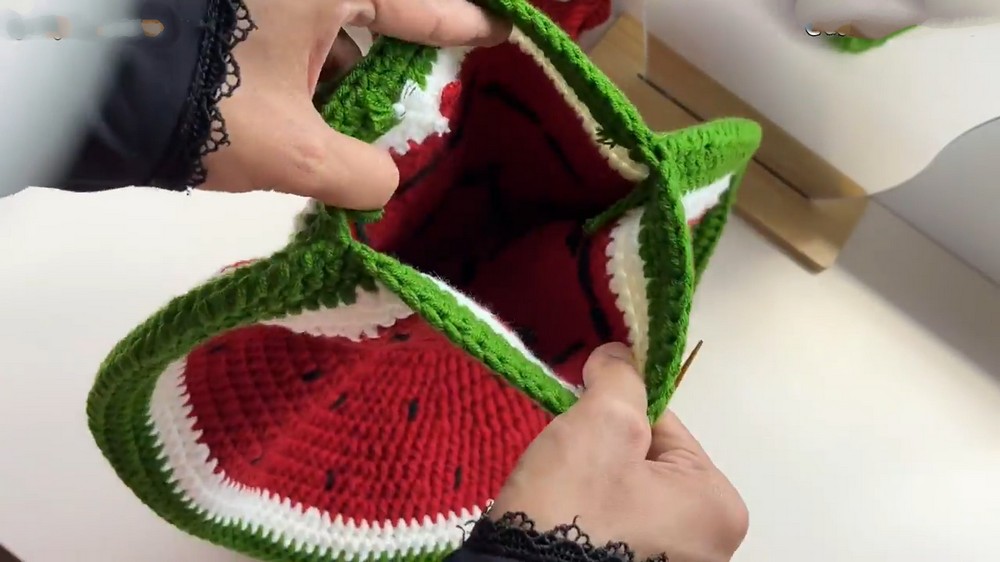
Step 6: Join Pillow Layers
- Create two identical pillow pieces following the above pattern. Leave a long tail for sewing on the second piece.
- Place the two pieces together, ensuring both sides face the correct direction. Use a tapestry needle to sew together the edge stitches, matching up the holes on each layer.
Step 7: Stuffing
- Leave a small gap while sewing to insert fiberfill stuffing as per desired firmness. Once filled, finish sewing the edge completely.
Step 8: Finishing Touches
- Secure all loose ends by sewing them neatly into the inside using the tapestry needle.
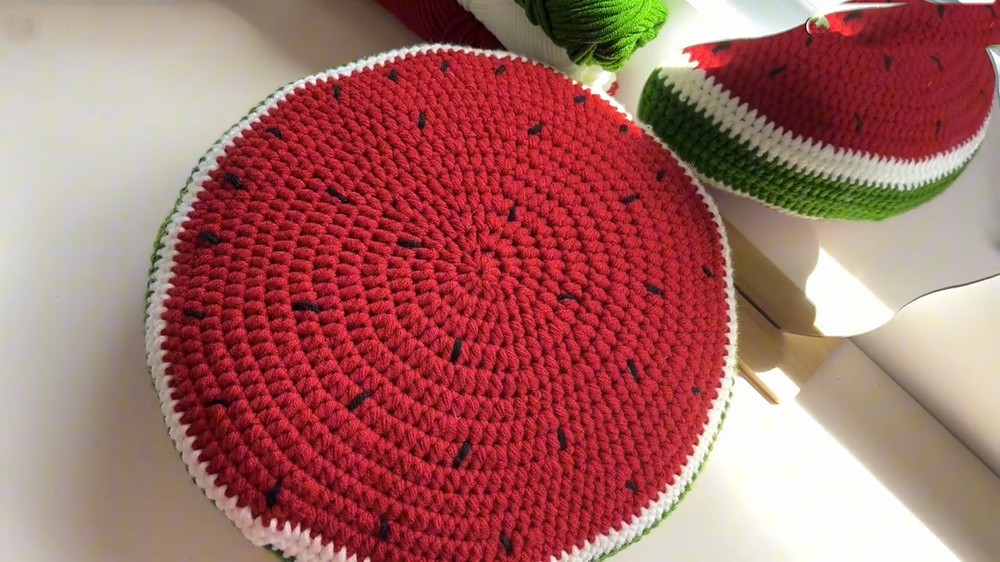
Conclusion
You’ve completed a beautiful crochet watermelon pillow with a sturdy design and cheerful aesthetic! This decorative piece adds a splash of color to any space and makes an amazing handmade gift.
Pattern Corrections/Clarifications
- For consistent sizing, ensure not to overstuff the pillow as it may misshape the circular form.
- Always check stitch count at the end of each round to avoid gaps or uneven edges.
Tips for Success
- Use stitch markers when increasing to avoid missing stitches.
- If the pillow diameter differs significantly, adjust your tension or use a slightly smaller/larger hook size.
- For added texture, experiment with yarn weights or use a mix of cotton and acrylic yarn.
Leave a Reply